
Google announced Google Analytics 4, often known as GA4, on October 14th, 2020. They're calling this their "next-generation analytics." You may have previously known it in your Google Analytics account as App > Web property.

It's crucial to understand how to use Google Analytics to track conversions before integrating this new Google Analytics with WordPress. You can gain insights into a variety of numbers that can be used for marketing, interaction, SEO, social media, and more using analytical data and traffic numbers coming from your website.
Importance of adding GA4 to WordPress?
As was already mentioned, it is impossible to exaggerate the significance of Google Analytics and the information it can give you. It is crucial to upgrade when Google releases significant Analytics upgrades or new versions in order to provide your website access to all of the new features.
For instance, the Google Analytics 4 upgrade introduced four extremely fantastic features that anyone can use. These consist of:
Create Amazing Websites
With the best free page builder Elementor
Start Now- Enhanced Insights
- Enhanced Google Ads or Adwords integration
- Data Measurement Focused on Customers
- Additional Data Controls
You can use these crucial tools to advance your website marketing by making the most of them.
I'll now demonstrate how to configure Google Analytics 4 in WordPress.
Add Google Analytics 4 to WordPress
Google Analytics Account
Go to the Google Analytics home page and log in using your Google account to begin the process. Your dashboard will now be accessible, and we can continue from there.
Create a New Google Analytics 4 Property
You need to create a new GA4 property now that you are on your Analytics dashboard. You may either choose an existing account to set up your new property on or click Admin > Create Account.
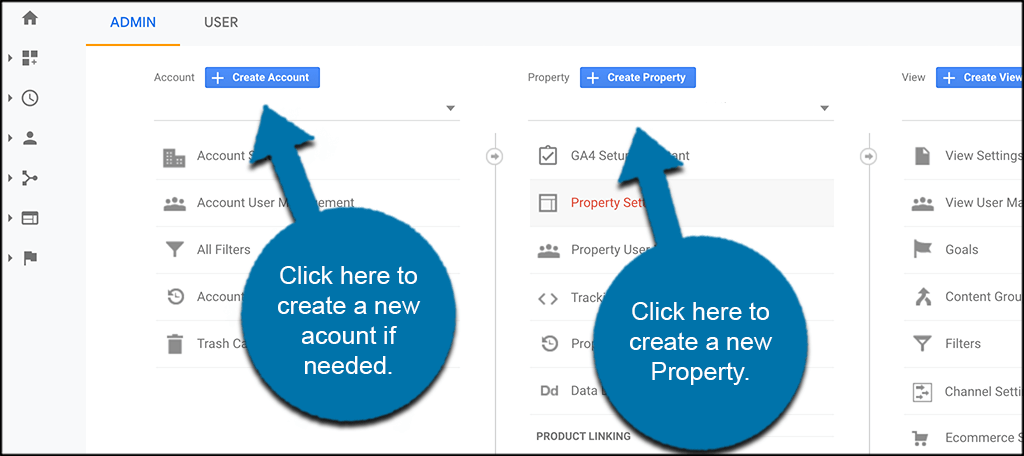
We'll just click "Create Property" on an existing account as this article assumes you already have a Google Analytics account.
Add All Property Details
You can access the Property Details page by selecting the "Create Property" option. You can enter all the necessary property details here.
Add your property's name, the time zone it is in, and any other necessary information. You decide how to set this up.
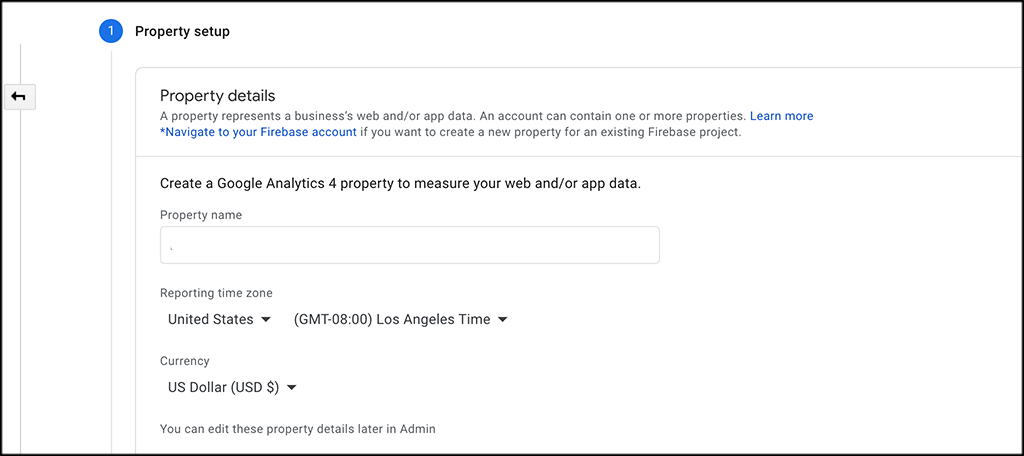
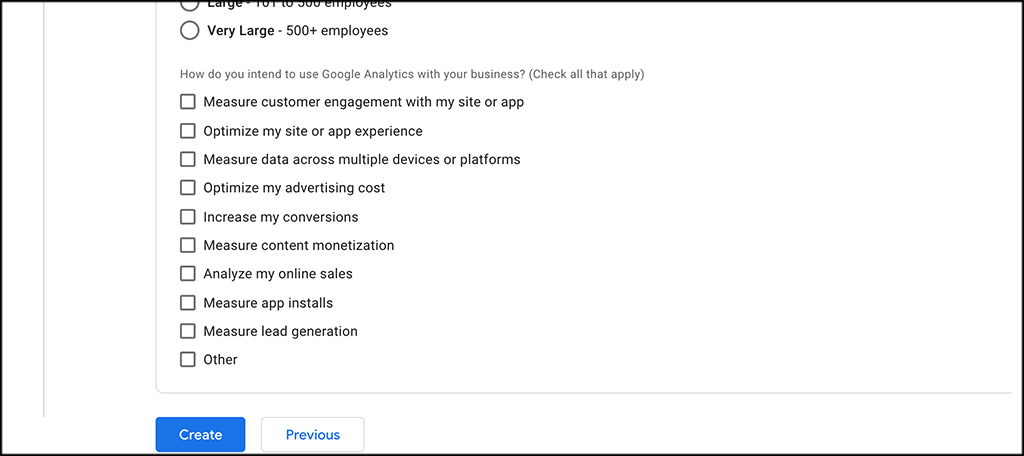
Click the "Next" button when you are done to continue. This brings you to a few other details you might wish to include. This covers the number of questions and the size of the firm. You are free to complete this whatever you like.
Click the "Create" button at the bottom of the page when you are finished.
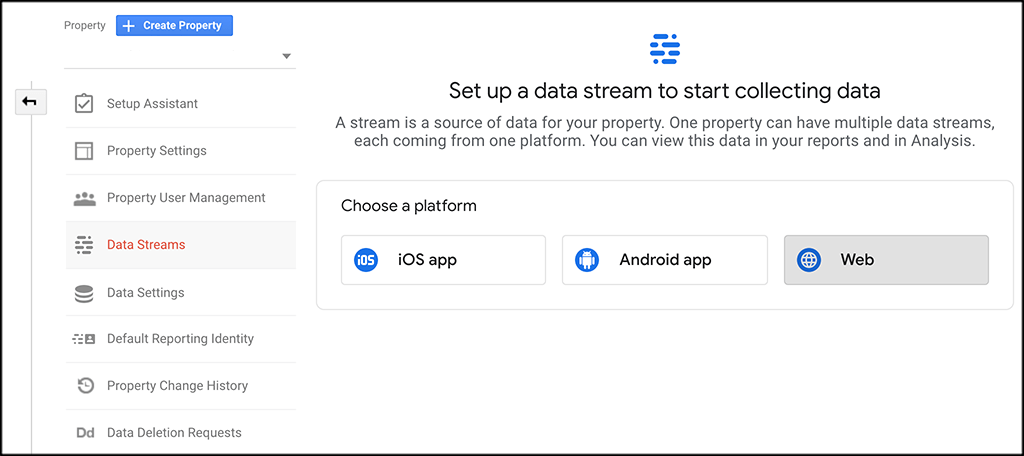
Select “Web” Option
You are now in the "Data Streams" page. As you can see, there are three possibilities available. Web, iOS, and Android applications. Choose "Web."
Set Up Web Stream
A screen that lets you configure your web broadcast appears when you select the Web option. Fill out every piece of necessary information so that the stream can be created. You can do this by including your URL, naming your stream, and adding or removing any additional measurements you like.
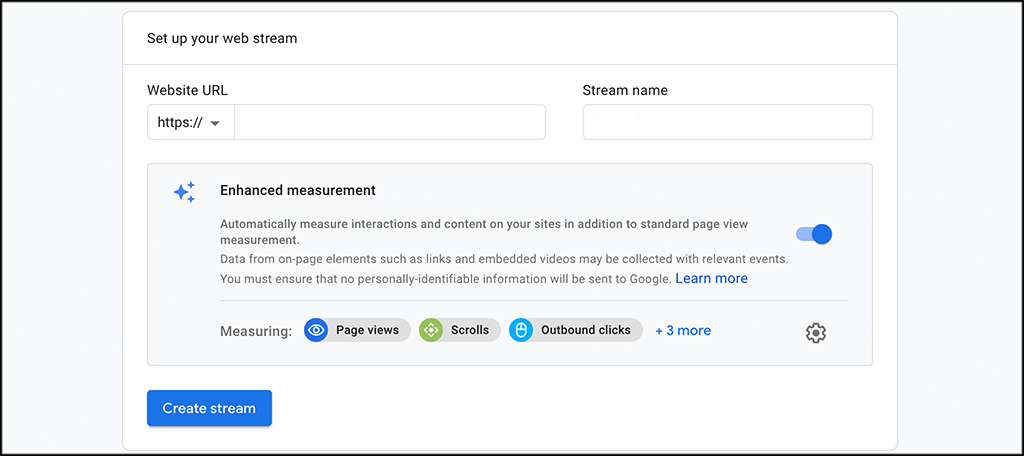
When you're done, press the "Create Stream" button.
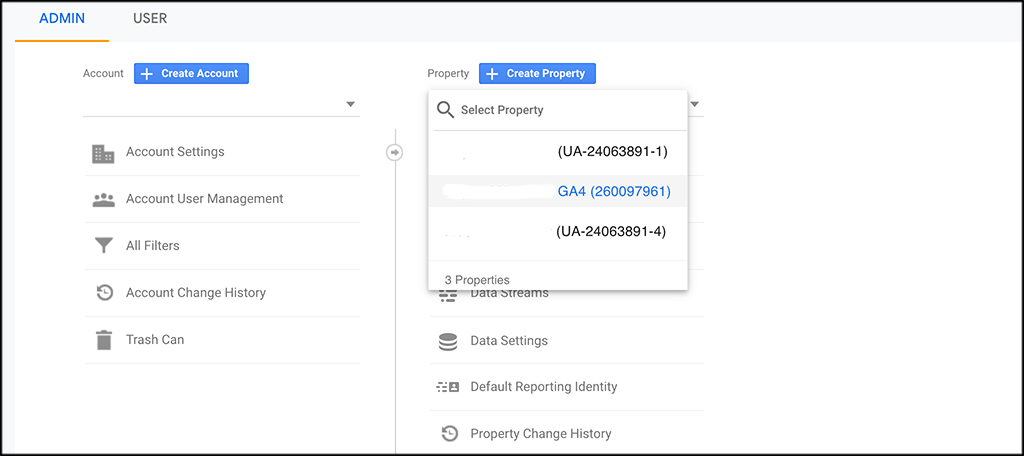
Connect Existing Analytics Property to GA4
By selecting your UA Property from the drop-down menu after pressing the Admin button, return to your previous UA property.
Select "Tracking" code from the dropdown menu after clicking the "Tracking Info" option.
Copy your tracking code from the screen that appears so you have it.
Select the new GA4 Property from the drop-down to return to your new GA4 Property. Next, select the stream you just established and search for "Connected Site Tags." Just click it.

Give it a name, enter or paste the tracking ID you copied earlier, and then select "Connect."

Install Tracking Code on Website
You've reached the final stage of the process. Your next task is to set up the tracking code on your WordPress website, enabling you to begin receiving the comprehensive data and analytics provided by Google Analytics 4.
Within your web stream, locate and click on the "Add new on-page Tag" option, then choose the Global Tag (gtag.js) option.
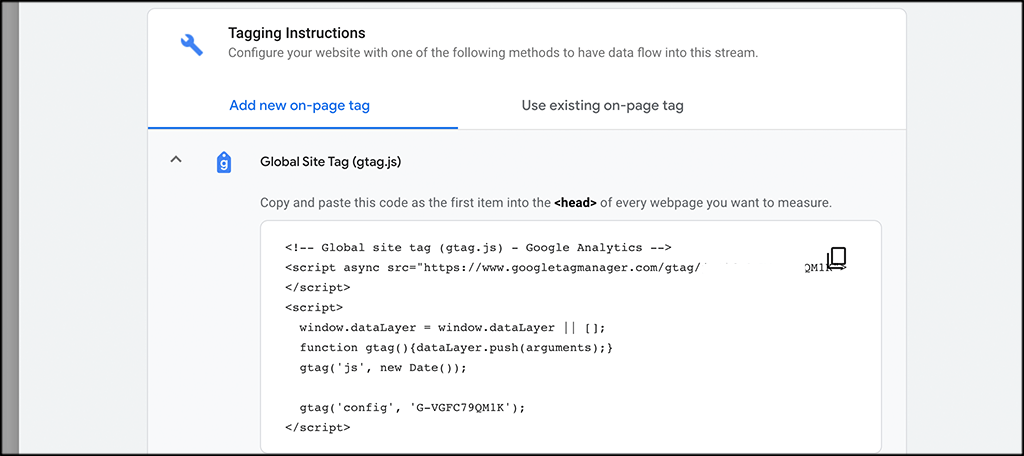
Copy the tracking code provided. Now, navigate to your website and proceed to insert the code.
Access your WordPress admin dashboard, log in, and paste the code into the header section of your website, following the instructions mentioned earlier. To save the code, simply click on the "Save" button.
You can accomplish this either by using a plugin like "Insert Header and Footer," which allows direct placement of code within WordPress sections, or by manually inserting the code into your website files.
And that's it! You've successfully implemented Google Analytics 4 on your website, and soon you'll begin to observe the data reflecting in your Analytics dashboard.
How To Add GA4 Using a Plugin
There are several Google Analytics plugins that are now available, and many of them let you add Google Analytics 4 tracking features. The method you use will depend on the settings for your specific plugin.
Having said that, I suggest using a Google Analytics plugin to accomplish this.

GA Google Analytics is one of the many excellent analytics plugins that make it simple to include Google Analytics into your WordPress website is Google Analytics.
Simply copy your tracking (measurement) ID and put it into the plugin's "GA Tracking ID" setting to enter and enable Google Analytics 4 using the plugin. Then, choose "Global Site Tag" from the plugin's drop-down menu.
Wrapping Up
The Google Analytics 4 release is a significant development that will likely benefit marketers in a variety of ways. You can now decide when and how to use consumer data to improve advertisements. Additionally, you can restrict the use of your data to measurements only.
Additionally, if you website uses Elementor, you can check how to set up Google Analytics On Elementor and on Elementor Cloud version.
Overall, if applied properly, you should be able to satisfy all client needs, enhance items, and optimize your marketing approach. Anything that can be done to make the process simpler is always appreciated by marketers.


