
It's a well-known fact that you'll need to grasp your website's statistics to run a successful business. There is no better tool than Google Analytics for gathering valuable information about your website and its users.

Learn how to integrate Google Analytics with Elementor in this post.
Introduction To Google Analytics
Using Google Analytics, you can monitor your website's visits and customers' behavior.
You can keep track of the following:
Create Amazing Websites
With the best free page builder Elementor
Start Now- Visitors’ location.
- Bounce rate.
- Time spent on website.
- Conversions rate and much more
Your site's conversion will improve and you'll reach more clients if you use the obtained data effectively.
As an example, if you discovered that the majority of your visitors are abandoning your cart page, you should investigate and update the page. Even the tiniest modification can have a huge impact on income.
Knowing information is a power that can lead you to feel that adding Google Analytics to your website is not just a good idea, but a must as well.
Adding Google Analytics to Elementor
The procedure of integrating Google Analytics with Elementor is simple. It's a two-step process at first. To begin, copy & paste the Google Analytics code into Elementor.
Let's collect our tracking number first.
Copy the Google Analytics Code
In order to track your website, you will need to copy and paste the tracking code that you received after signing up and registering your website with Google Analytics. Go to Admin -> Data streams and click on the name of your website.
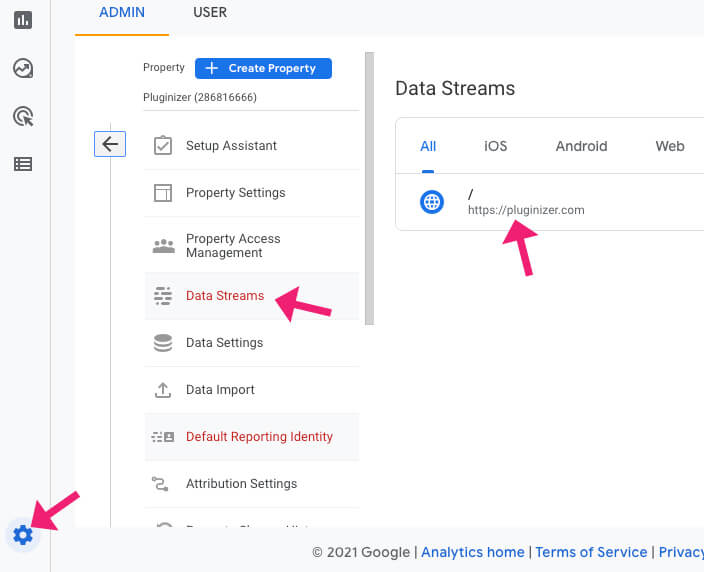
Copy the code that appears when you select the Global site tag option and paste it into your browser window.
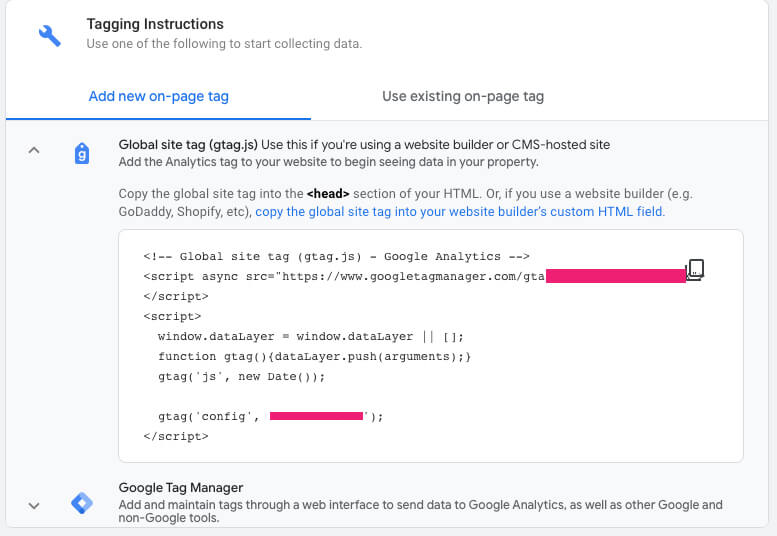
We can proceed to the following step and put the code into Elementor once you've copied it.
Add the Code to Elementor
Once we have the Google Analytics code, we can paste it on any page we want to monitor.
Elementor's pro version comes in handy in this situation. Free users must manually insert the code on each desired page, whereas paid users just need to do it once and it will take effect on all wanted pages.
Using the free version of Elementor, create the page you want and then drag the HTML widget to the very bottom.
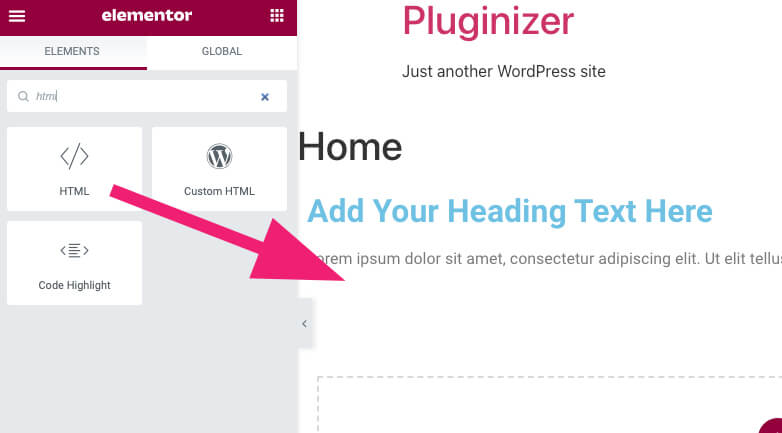
Add Google Analytics tracking code to the left HTML widget box and save your modifications.

When all of the necessary information has been entered, go to the last stage of testing the integration.
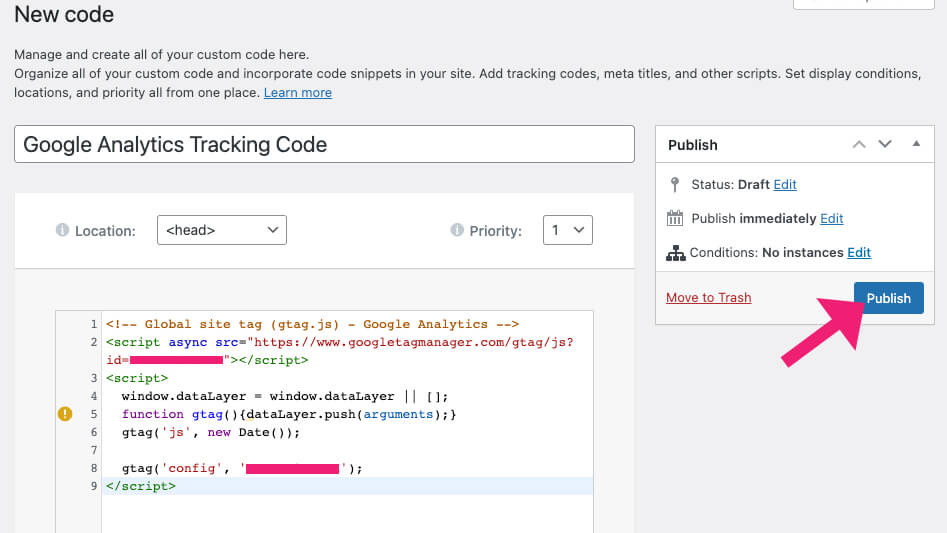
When using Elementor pro, however, go to Elementor -> custom code and click on add new in order to add a new code block.
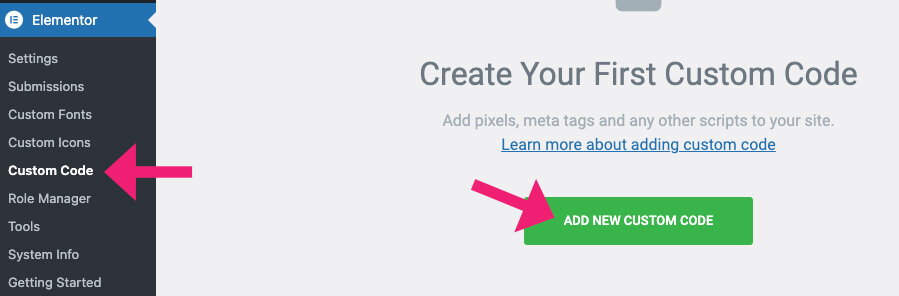
The new code should be given a name. Google Analytics Tracking Code is what we'll call it in this scenario. You can then click Publish when you have entered the code and it has been successfully published.
A question will pop up on the following screen from Elementor asking you which pages you want to use the Google Analytics tag on. Aside from the option to select certain sections, you can leave the entire website as it is.
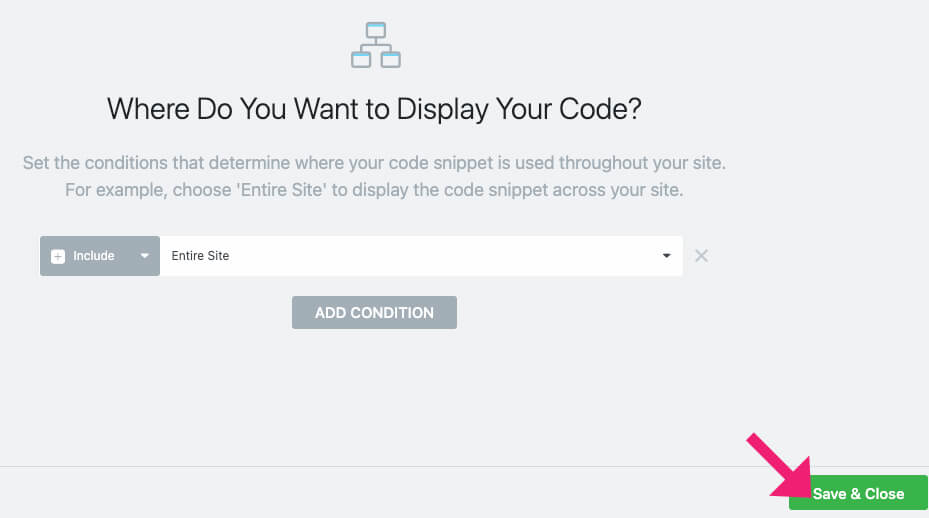
Google Analytics will begin tracking your website's activities as soon as it is released.
Test the Integration
To ensure that the connection between two apps is working properly, it's always a good idea to run some tests. To accomplish this, open an incognito browser and navigate to a page on your website that triggers the tag.
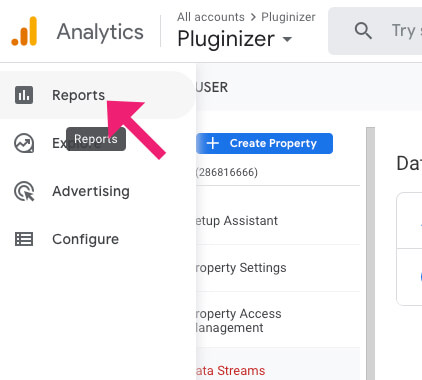
Select "Reports" from within your Google Analytics panel.
It's possible to observe a visitor and its location in the real-time tab if the code was successfully installed.
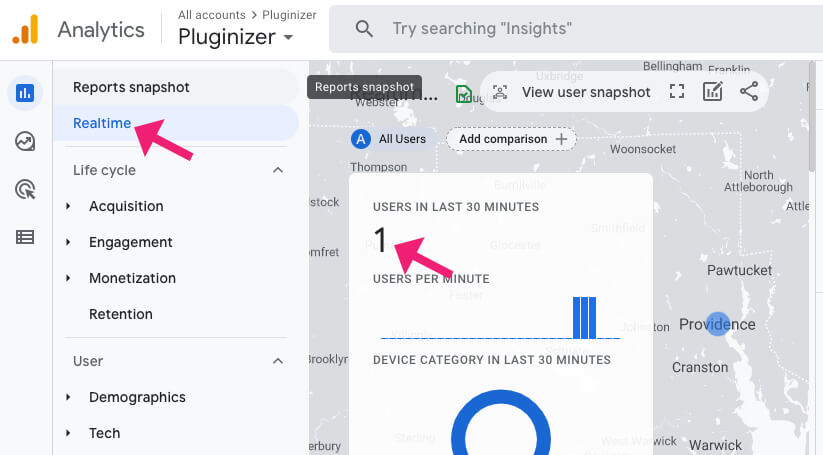
Everything is operating as planned if the visitor can see where the tag was pasted.
Final Words
Data is a business's most valuable asset, therefore it should be a top priority to acquire it. You now know how to integrate Google Analytics with the Elementor page builder after reading this post.
We'd love to hear from you if you have any questions or concerns.


