
Even though visits and pageviews are nice, what really matters are conversions. The problem, of course, is that conversion goals don't come "preloaded" with every new Google Analytics account. You also can't get access to data from the past or that is already stored.
That means that if you let days (or weeks) go by without setting up conversion goals properly, you will lose all of that information forever.
Key pieces of information that could have helped you find new ways to make money or cut costs to save money quickly.
If you know what you're doing, it only takes a few minutes to set up goal tracking.
Create Amazing Websites
With the best free page builder Elementor
Start NowHere's everything you need to know to start tracking conversions in Google Analytics.
How does conversion tracking work?
After you log in to your Google Analytics account, look for "Admin" at the bottom of the menu on the left.
When you click on that, you'll be taken to a page with three columns. These columns are labeled "Account," "Property," and "View." Under "View," look to the far right for the Goals option.
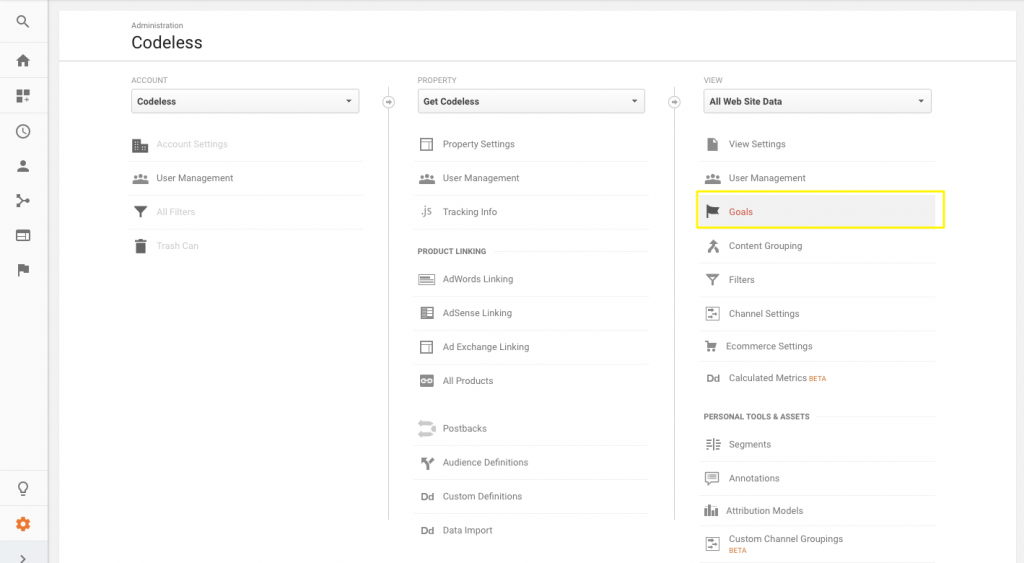
Here is where you choose a new Goal to set up.
You can start with one of their "templates" that are already set up. There are three "hard" ones (Revenue, Acquisition, and Inquiry) and one "soft" one (Support) (Engagement).
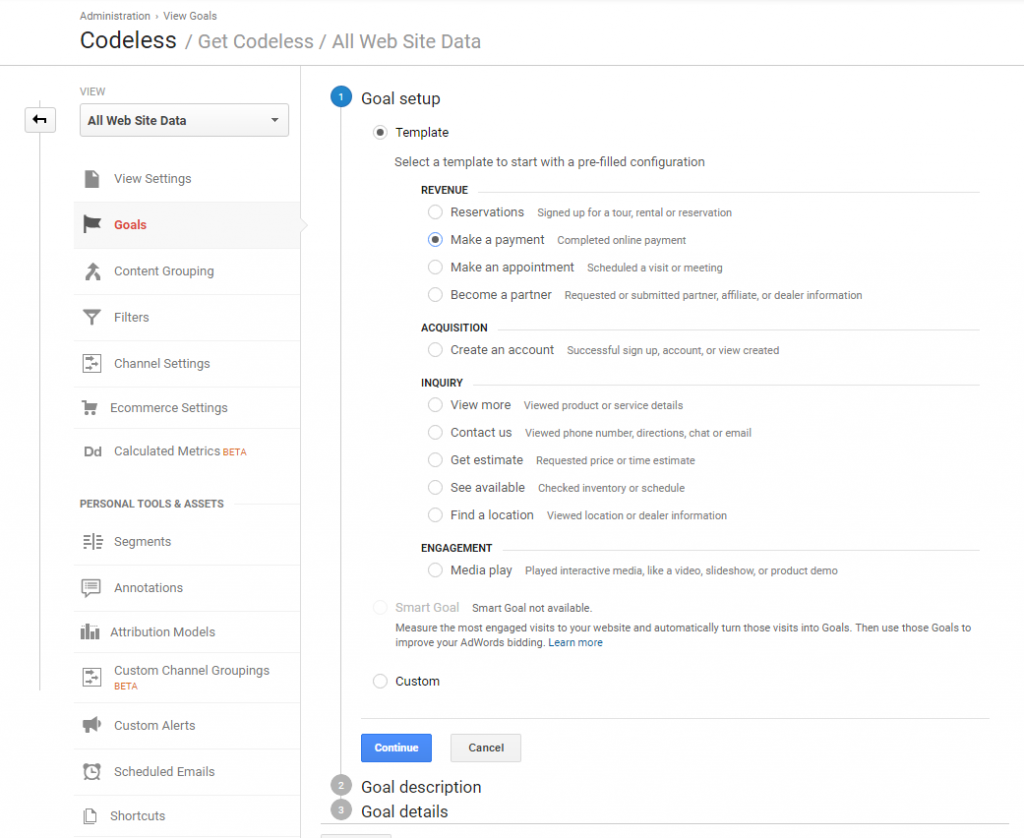
Say you have an online store where you sell meal delivery services. Amanda goes to your website, watches a video, and then signs up for a free trial. That's the order.
We tend to focus on "macro" goals that are hard to reach, like completing that new free trial goal. But in this case, that "micro" conversion, also called a "soft video view," should also count as an assist.
So let's come up with different goals for each of them.
First, let's keep track of that video view by choosing "Engagement Goal." Here's what step two will look like:
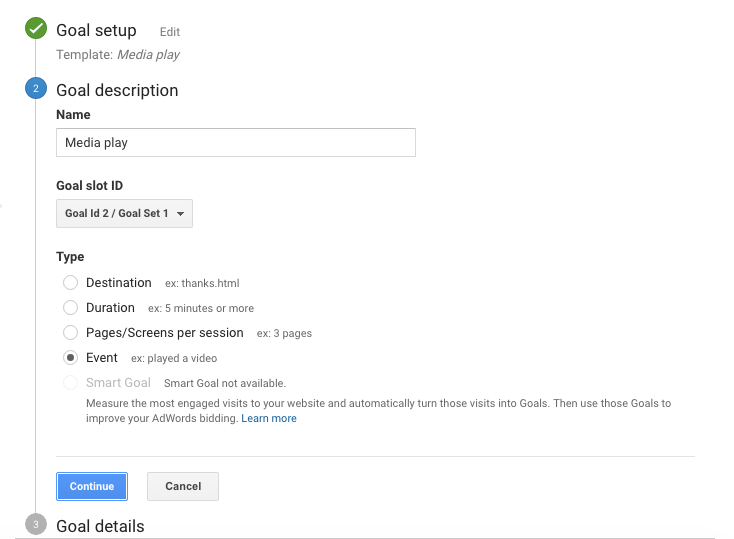
Engagement-based goals, like watching a video, will be tracked as a new Event. Click "Continue," and you'll see your new Event options:
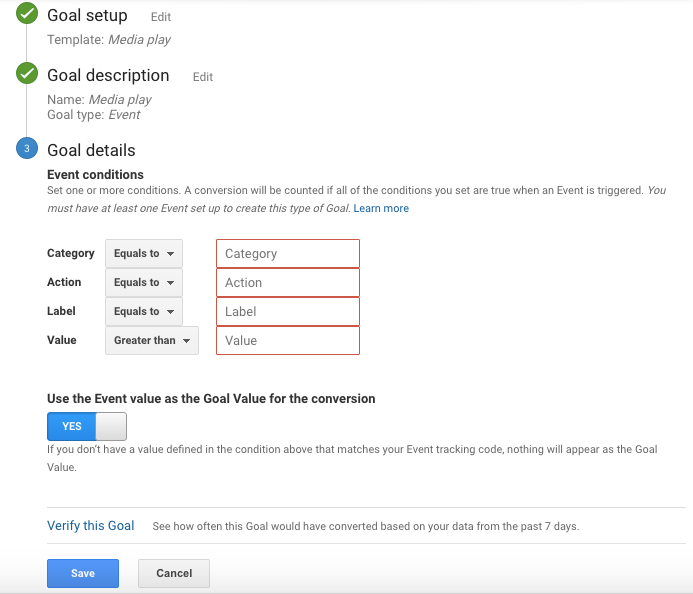
Here, you'll need to add labels that explain what this Event is tracking. There are three big groups that get smaller as you go through them.
Or, if you want to get technical, you can break these down into nouns, verbs, and adjectives:
- The category is the broadest way to describe what you're keeping track of. An outbound link is a noun: Video. File.
- The action is a verb that shows what happens. What do people who come do? Download. Click. Submit. Play, and give.
- The label is the adjective. It describes what you want to show. Maybe it's the answers to certain polls. Or, if you want to keep track of video plays, this is where you write down the title of the video.
Usually, you'll also want to choose "Yes" before you finish so that Event Values are also passed on to Goal Values.
So, if you want to find out where these video views came from (the channel, source/medium, marketing campaign, etc.), you can track this information back.
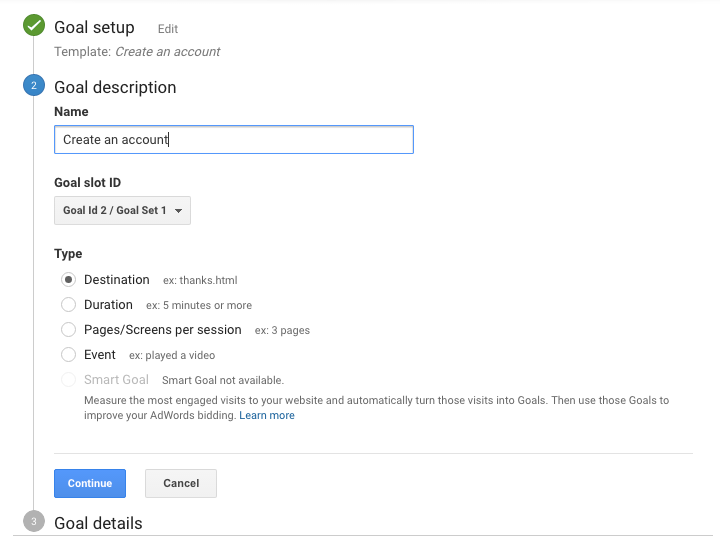
Now that we've set up the video view, we can make a Goal for our "macro" conversion. Go back to the beginning and choose "Acquisition" this time.
This one's goal will be a "Destination" goal, and you'll just need to put in the URL for the "Thank You" or "Confirmation" page that someone goes to after submitting their information.
Here’s how to customize that option in the last step.
First, drop in the URL path for the Thank You page (minus your root domain). So: “https://temporary.com/thanks” should be simply: “/thanks”:
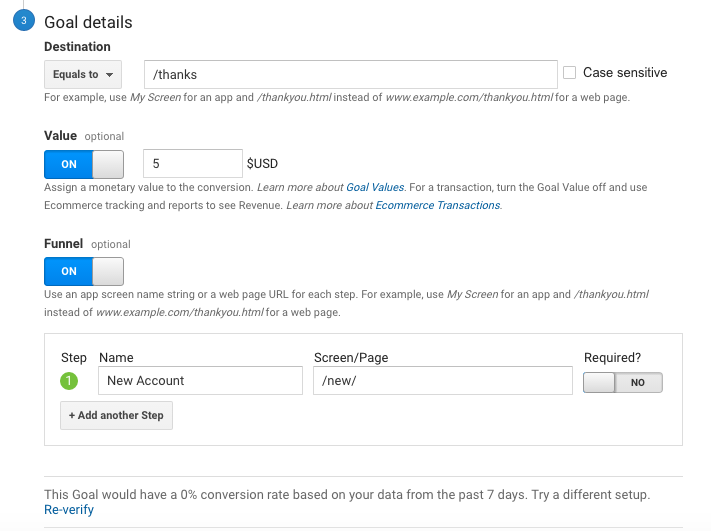
Then you have two values that are optional:
- Value: Just a dollar amount based on how much this new signup is worth. If it's technically free, you can still use a placeholder like a dollar per subscriber or cost per lead (if appropriate).
- Funnel: If you want to make sure that a conversion goal is only counted when every page in the funnel is visited, you can say "in sequence."
Last but not least, before you save the Goal, click the small Verify link at the bottom to make sure you set it up correctly. (For example, if this conversion has already been done, you should see some kind of percentage conversion rate value.)
Once you've set up these two different Goal types, you can go back to the main reporting area of Google Analytics to see your results.
Google Analytics won't give you information about things that happened in the past, unfortunately. From now on, you'll only be able to see these new conversions.
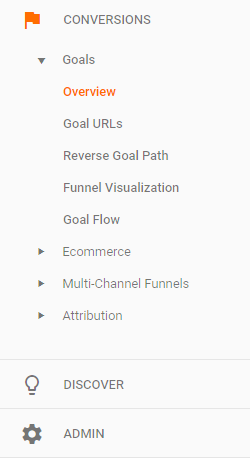
To start, click on Conversions > Goals > Overview in the menu on the left.
You should see a nice little graph in a few days that looks something like this:

And that's about all! Simple, right?
Besides one thing:
Your work is just beginning. Because the only reason to track something is so that you can do something with it.
Now that you have conversion tracking set up, feel free to explore the potential!
Wrapping Up
You can track both "hard" goal conversions and "soft" engagement conversions with Google Analytics. In the end, you need them both. In the end, each one leads to the other. The problem is that you won't know how to improve either one until you start keeping track of them. That means you have to set up Destination Goals and Engagement Events by hand in Google Analytics. A few more lines of code are needed, which will take only a few minutes. But the things you learn from analyzing the data can help you turn a campaign that isn't working into one that is more profitable.


