
WordPress Stress Test is a method that can help you determine the limits of your website and identify its breaking point. To conduct a Stress Test on your WordPress website, you will need to assess various aspects such as loading speed, setup quality, plugin performance, and conduct Load Testing.

There are numerous tools available for analyzing a WordPress website. You can select the tool of your choice from a wide range of options available online. Simply enter your website's URL into one of these tools to start analyzing your website.
Running tests can help you analyze and enhance your website's performance. This will ensure that your website is functioning perfectly and performing optimally.
In this article, we will discuss WordPress stress tests and explore ways to improve your website's speed.
Create Amazing Websites
With the best free page builder Elementor
Start NowWebsite speed is critical for visitors, as we have highlighted in previous articles. Visitors expect websites to load fully in under 2 seconds.
As you can imagine, achieving this can be challenging. However, there are numerous methods available to boost your website's speed. Additionally, you can analyze your WordPress website using various approaches.
How To Stress Test Website
There are several tools that you can use to stress test a website. However, in this tutorial, we will use Loader.io.
This is a freemium tool that enables you to easily test your website for different amounts of traffic. With the free plan, you can check one target host (i.e., your website) and two URLs per test, and you're limited to a maximum of 10,000 clients (or visitors) per test.
If you have a small website, the free version might be sufficient for your needs. However, if your website receives a high amount of traffic and you want to simulate even more, you may want to consider upgrading to a premium plan. To stress-test, your website with Loader.io, follow these steps.
Sign up for Loader.io
You must first register for a free Loader.io account. It's a really simple procedure. After your account has been verified, you can configure your destination host (or domain):

Nevertheless, you'll also need to confirm that the domain you'll be testing belongs to you. Verification is crucial to prevent abuse (because sending this much traffic to another website could be interpreted as a DDoS attempt).
To begin, click + New Host and type your domain into the box provided on the following screen:
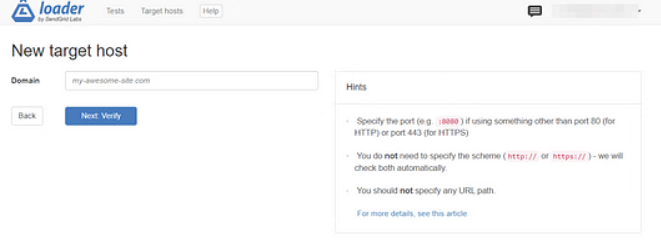
The next step is to confirm your domain. You can only verify over HTTP if you're on the free plan. To do this, open the file on your computer by clicking the download link:

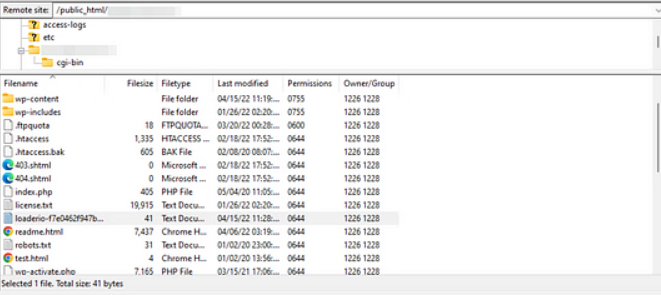
You must then upload this saved file to the root directory of your website. This means that you must use an FTP client, such as FileZilla, to connect to your website.
After connecting, look for the root folder. Typically, it goes under the name public html. After that, upload the Loader.io file you have downloaded to the following main folder:
Return to Loader.io when you're ready, then select Verify. After that, a notification stating that your domain has been confirmed should appear:
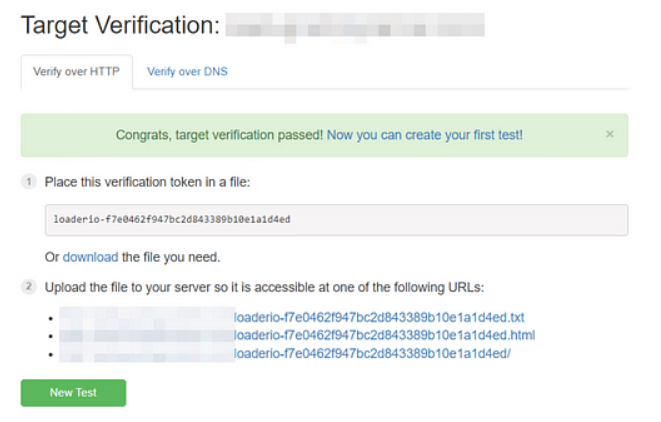
I'm done now! You can now select New Test to begin.
Configure your test settings
For your stress test, Loader.io has a number of parameters. You can decide what kind of test you wish to perform, for instance:
There are three options available for you to choose from to test your site's performance:
- Clients per test - You can choose to distribute a specific number of clients evenly throughout the test, such as testing how your site performs when 600 users access it for one minute.
- Clients per second - Alternatively, you can choose to test your site for a specific number of client requests per second.
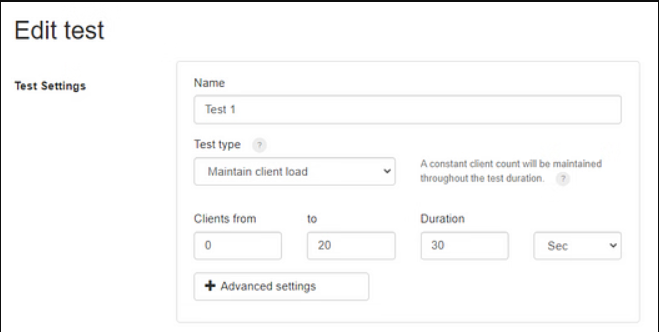
- Maintain client load - This option will stress test your site for a constant load of users over a specified timeframe.
Remember that running multiple tests is recommended to gain a comprehensive view of your site's performance under different conditions.
In this tutorial, we will be using the "Maintain client load" option, which simulates a specific number of users accessing your site concurrently over a set amount of time, and remaining active during that period. This test will provide you with the average loading time for these users.
After selecting this test type, you can specify the number of clients (or users) and the duration of the test. For example, you may want to test how your site performs when it receives 500 visits in one minute.
If you click on "Advanced Settings," you can also set an error threshold.
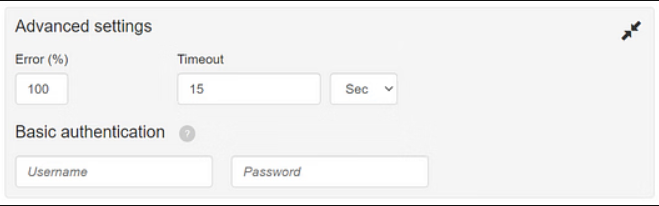
This means that any request that takes longer than the time limit you've set (for example, 15 seconds) will fail.
You can also find other settings for client requests if you scroll down:
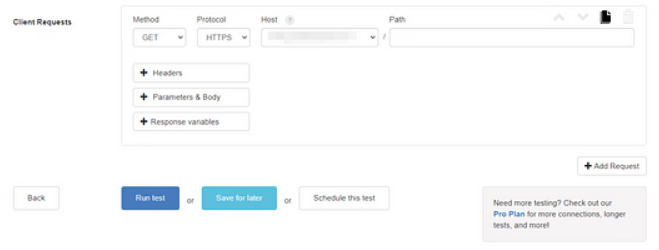
Unless you have some special requirements, there are no alterations that need to be made here. The current parameters will work for a general stress test. When you are prepared, select Run test.
Analyze the results.
Once the test is completed, a detailed breakdown of the results will be provided from your perspective. Let's examine the most crucial metrics, beginning with the graph:

In the graph, there are two sets of data - the green line represents the number of clients, and the blue line represents the average response time. As per the graph, 20 clients were added within a 30-second time frame.
As indicated by the graph, the average response time increases with the number of users. However, when the 20th client was added, there was a significant drop, indicating that the response time for this user was going to exceed the error threshold of 15 seconds. Consequently, a timeout occurred.
By examining the information in the Response Counts section, we can see that there were 19 successful responses and one failure.
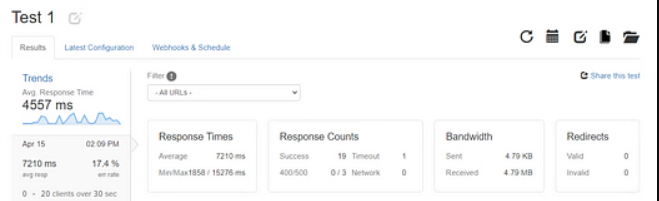
From your perspective, you may have noticed that the average response time for this test was 7210ms, equivalent to 7.21 seconds. This suggests that when the site is accessed by 20 users concurrently, there is a slow loading time.
It's worth noting that the site's fastest response time was 1.8 seconds, while the slowest was 15.2 seconds (our failed request). These findings indicate that the site loads the quickest when it has the minimum number of users.
After analyzing the results, you can adjust the test settings to include more clients and re-run the test to determine if your site can handle the extra load. Gradually adding more clients can help you determine the maximum number of users your site can accommodate at once. This approach can be helpful in identifying any potential issues with your site's performance under heavy traffic.
Solution To The Problems
Don't worry if the results of your stress test reveal that your site loads slowly during periods of high traffic; there are several strategies to enhance performance. Let's examine some potent tactics.
- Establish a content delivery network (CDN)
- Use a caching program.
- Image compression
- Delete any hefty plugins
Establish a content delivery network (CDN)
A system of servers dispersed across numerous sites is known as a content delivery network (CDN). When you use a CDN, the server that is closest to your visitors' locations serves cached versions of your website to them. In this manner, your material travels a shorter distance and loads quickly for the user.
A CDN can also lessen the burden on your hosting server. Your loading times may be further enhanced as a result, perhaps raising your Core Web Vitals rating.
Use a caching program
The act of storing static versions of your website and serving them to users is known as page caching. The browser won't have to load large scripts when users access your site if you use caching.
Caching can consequently enhance the speed and functionality of your website. You can provide static pages to your visitors using a technology like WP Total Cache. Read more about How to use it to delete WordPress Cache.
Image compression
Unoptimized files are another culprit in bad performance. Your pages may probably take longer to load if your site has a lot of huge items on it (such as photographs and videos). This also implies that if several users access your website at once, it can load slowly.
With an image optimization tool like Optimole, you can solve this issue:
Your photos are compressed with this program without losing quality. Also, it uses a CDN to serve your photos, which can speed up page loads even more.
Delete any hefty plugins
And think about deleting any resource-intensive plugins from your website. These bloat your WordPress website by loading unnecessary scripts, which can make it load more slowly.
As an alternative, you may minify your HTML, CSS, and JavaScript code using a program called Autoptimize. For a better User Experience, this plugin can also lazy-load your graphics and inline crucial CSS (UX).

Final Words
In conclusion, stress testing your WordPress website is an essential task to ensure its reliability and stability in 2023. With the increasing demands of online users, it is crucial to ensure that your website can handle high traffic and maintain optimal performance even during peak periods.
To effectively stress test your WordPress website, you can use a variety of tools and techniques such as load testing, code optimization, and server monitoring. By implementing these methods, you can identify any bottlenecks or weak points in your website's infrastructure and take the necessary steps to improve its performance.
Remember that regular stress testing and maintenance of your website can help prevent downtime, improve user experience, and ultimately increase your website's success. So, make sure to prioritize stress testing in your website's maintenance plan to ensure it is ready for the demands of 2023 and beyond.


