
All In One SEO is the most SEO plugin out there that offers a lot of exceptional features for you to optimize your website and its content to improve its ranking on the search engines and reach further on the social media forums.

For the beginners out there, it can be tricky at times to efficiently use the plugin and set it up to work perfectly with the website. In this tutorial, we are going to help you set up an All In One SEO plugin for your website.
Why Should You Use All In One SEO
All In One SEO is the best SEO plugin package out there in the market and it has already won the trust of over two million websites.
Additionally, the plugin is simple and easy to use which allows beginners as well masters to appreciate the plugin the same way. Its extremely powerful and beneficial features not only help you improve your website's ranking on the search engines but also gather traffic from social media platforms such as Facebook and Twitter.
Create Amazing Websites
With the best free page builder Elementor
Start NowFrom the very basic SEO tools to the more advanced ones such as meta tags, XML sitemaps, optimizing social sharing and schema markups, it has all for one who desires quick and better results.
Setting Up The All In One SEO plugin
Now that you have already gone through the introduction part, let's move ahead to set up the plugin for your website.
First of all, you need to install the All In One SEO plugin on your WordPress. For this tutorial, we will be using the premium plugin to go over all the features while you can use the free version to get started.
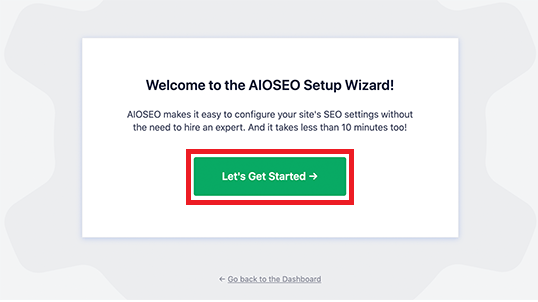
Once you have activated the plugin, it will take the opening page of the setup wizard with the button saying Let's Get Started.
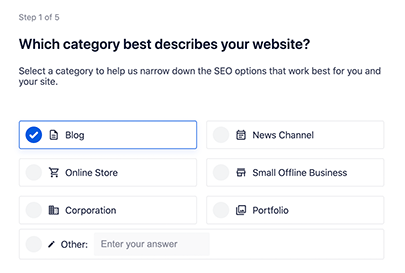
The next page will demand you to opt for the category of your website. Such as a blog, an online store, a news channel or more.
Next up, you will be asked to type in the Homepage SEO Title and Description. This title and description will be served for the usage of search engines, so it is important to use your main keywords here.
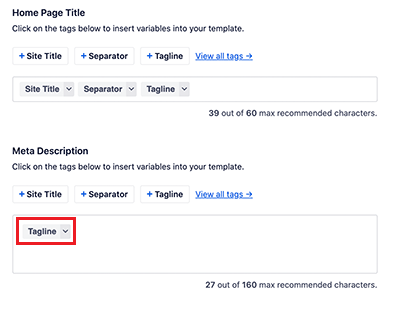
The Smart Tag option below lets you generate tags for your Title and Meta-Description although you can add the Title and Description manually as well.
Once you are done with all the settings, save them and move ahead.
Moving ahead it will ask you that whether you want to set up as an individual or as an organization. Such as if you own a personal blog, you can go ahead and leave the spaces blank.
On the other hand, if you are signing up as an organization, you need to add the name of the organization and the business phone number while if you don't have one, you can add it later.
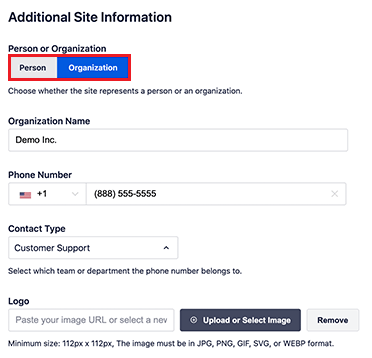
There is also an option to upload the logo of your business in case you sign up as an organization.
Scrolling down you will find a number of social media forum fields where you should add the URLs of your social profiles.
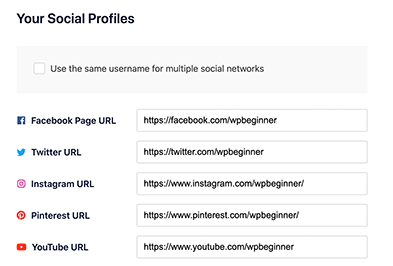
Business Logo and Social Media Profiles also play their part in Search Engine Optimization.
Once you are done with the fields, save your changes and move ahead.
Now you will be asked to choose which SEO features you want to turn on. The basic and most important SEO features such as Optimized Search Appearance and XML Sitemaps are turned on by default. While you can choose which other features you want to turn on.
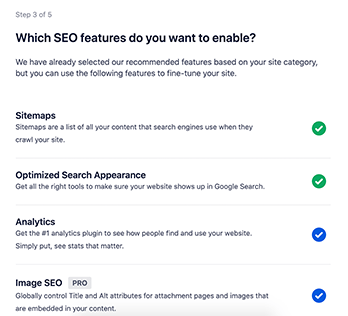
If you feel unsure about them. You can go with the default settings as they work for most of the websites.
Next, you will be taken to the Search Appearances page which will show you a preview of how your website will look on the search engine. Using that display you can change the Title or the Meta-description according to your choice.
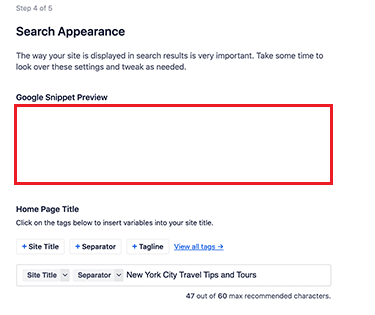
The same Smart Tags will be used by default for the site tagline, separator and site title.
Make sure to use your main keywords for the site title and description. Scroll down to access more advanced features.
This page will offer questions as if your website uses multiple authors or is it under construction and so on. You can configure these settings as you desire.
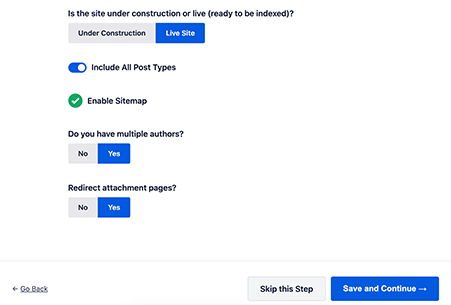
By default, the redirect attachment pages option will be turned on. These are the pages with low text and it is important to redirect them in order to improve the overall SEO of the website.
Save the changes as you go ahead in the process.
Now if you are using the premium version, you will be asked to type in the license key and integrate your All In One SEO account with your website.
Click on the Finish Setup button after you have entered the license key.
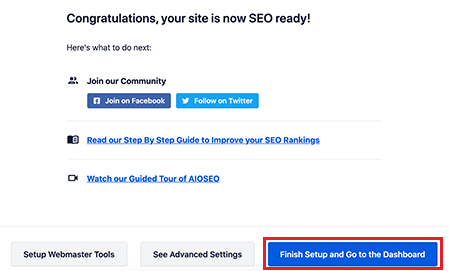
Congratulations, now you have completed setting up the All In One SEO plugin on your WordPress website.
Next, you should go ahead and check out our plugin on Keywords and MetaData to Improve your Website's Ranking in order to efficiently use the All In One plugin and increase its benefits.
The tutorial will take you over all the necessary details and steps that will help you make your website rank faster. We hope this article helped you run the All In One SEO plugin on your website and it will be beneficial for your growth. Join us on Facebook and Twitter to never miss a post.


