
We all know how important images are to attract users and enhance their experience while it is also a fact that high-quality images take up a large space and can be a disadvantage for your WordPress site.
In such circumstances, we usually use resized images on WordPress to save up space. However, resizing these images one by one can take a lot of time and effort as compared to bulk resizing.
Luckily Photoshop allows us bulk image resizing and in this tutorial, we are going to understand how to resize multiple images with Photoshop.
Recognize The Best Dimensions To Resize
Before moving on to Photoshop, make sure you have your preferred dimensions in your mind. Once you have done your research, I would suggest you make a New Folder and move all to-be resized in that folder.
Create Amazing Websites
With the best free page builder Elementor
Start Now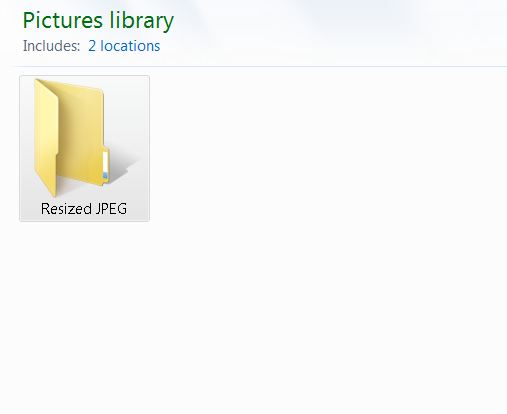
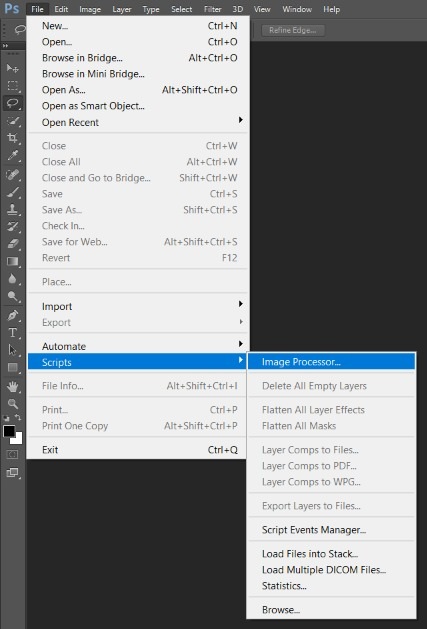
Now, go ahead and open Adobe Photoshop. Soon after it opens, navigate to File on the right-bottom of your screen and then navigate to Scripts right below automate and then click on Image Processor.
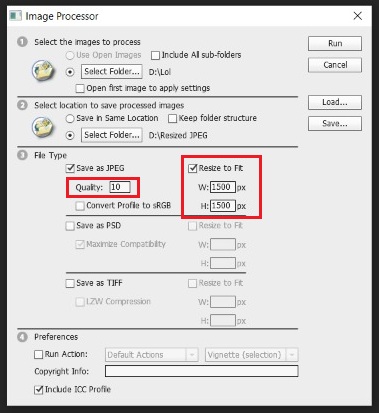
After the Image Processor opens, you can either select Select Folder or Use Open Images but according to this tutorial we have created a folder, we will select Select Folder.
Now you can go ahead and select the folder that you created earlier.
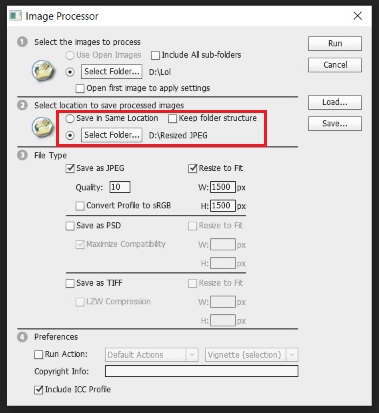
Now, you need to decide where you want to save your resized images. You might want to save it to somewhere else but if not, you can select Save in Same Location and Photoshop will create a subfolder of your resized images.
The next section requires you to choose the parameters and dimensions for your images. First, you will need to select the image type such as JPG, PSD and TIFF.
Next, you will need to select the quality of your resized image. You can set the quality parameter between Zero to Twelve where Zero refers to the lowest quality and size and Twelve refers to the highest quality and size.
Typically for websites, quality parameter works best between 8-10 where you do not compromise on the quality much and reduce the size as well.
For colour, you should choose Convert Profile to sRGB for the best results on your WordPress site and then check the Include ICC Profile at the bottom.
Now, select the size of your image and click the box saying Resize to Fit to resize all your images.
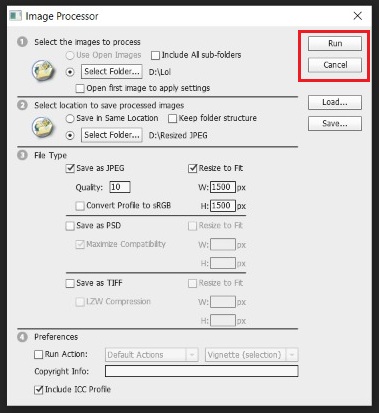
You are done with all the settings and now you can go ahead to run the script.
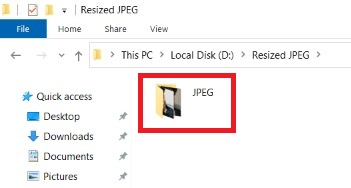
Go ahead and check the recently created subfolder consisting of all the resized images to make sure that everything is done right.
That's all for this tutorial. We wish you luck in making your site more accessible and wonderful. If you want to resize your images directly in WordPress using a plugin try checking out our tutorial on that too.
For further updates about our publishments, stay connected with us on our Facebook and Twitter.


