
We all know how using full-sized images can slow down a website and takes a lot of storage capacity. It's also true that compressing those images one by one can be a real hustle. The solution we're about to detail here is a WordPress plugin known as Smush.
Smush is a well-known WordPress plugin that is used for image optimization. It compresses and resizes the images to save up the storage and lessen the load on the server, which results in speeding up the WordPress site.
This plugin gives you automated tools that ease a lot the entire compression process. Most of the time, it will work on the background without having you to something special.
As we cannot list all the features available in one sentence, let's try to summarize what are the feature available.
Key Features
- Lossless Compression
- Bulk Smush
- Image Resizing
- Automated Optimization
- Multi-site Compatible
- Lazy Load
- Incorrect Size Image Detection
- Without Monthly Limits
Steps To Compress Images Using Smush
Let's go over these ways, one by one and how you can use them.
1. Bulk Smush
Once you install and activate the Smush to your WordPress site, it starts to look for images that need some compression.
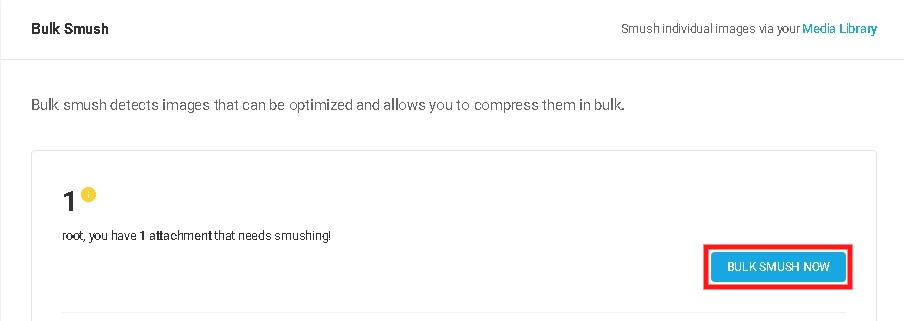
Bulk Smush will run automatically and show the number of detected images that can be compressed. With one click you can compress all the images on your WordPress site.
Create Amazing Websites
With the best free page builder Elementor
Start NowAlso, Whenever you add more images, Bulk Smush will run through them to find to if they need to be compressed more.
It will show you the number of images that need compression, and with one click, you can compress all these images at once.
2. Automatic Compression
You can also choose to compress these images automatically if you are satisfied with the function of Bulk Smush.

Once you enable the Automatic Compression, you will never need to go for Bulk Smush again. It will quickly compress all the images right after you upload them.
3. Select images to exclude
There is an Image Sizes panel that will allow you to select multiple image thumbnails to dismiss the images you do not want to compress.

This option allows you to compress only the small images as some people do not want to compress large images for them to be in the same sound quality.
4. Image Resizing
Some images are too large to be uploaded on WordPress, as WordPress 5.3 automatically resizes the images to 2560px in width and height. This resized image is called a "new original."
While sometimes, there can be a need to upload images larger than 2560px. Smush can quickly help you with that in the image resize panel.
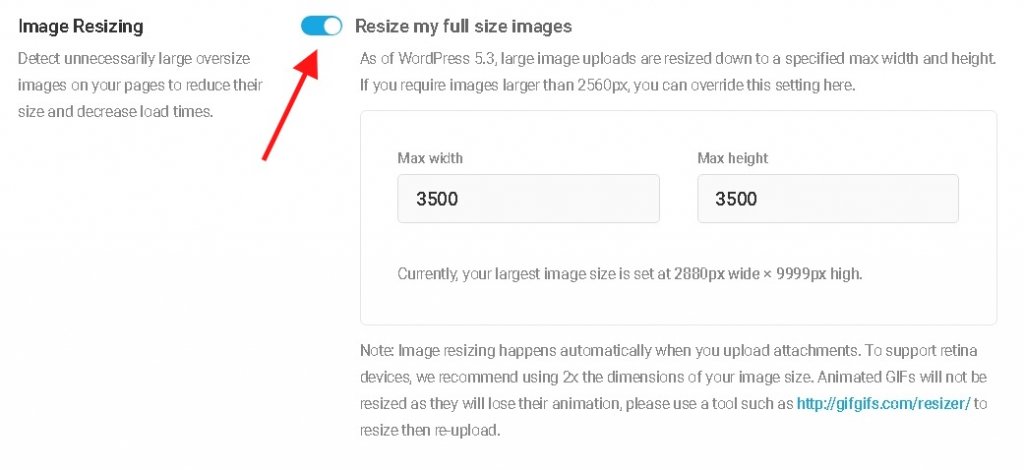
Switching this setting on will enable you to save images larger than 2560px while you will able to make your custom large size.
The images that have been resized before being uploaded may not be needing this setting while it does waste a lot of time resizing the photos manually.
Once you have decided what size your large images would be, you can now ensure that you want them Smushed.
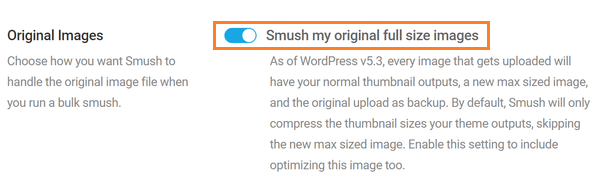
For this, you will have to go to Original Images as Smush does not automatically compress original images, unlike thumbnails while this setting is only available on Smush Pro.
Smush guarantees lossless compression while there might be people who want to have backups so they could revert to the originally uploaded image.
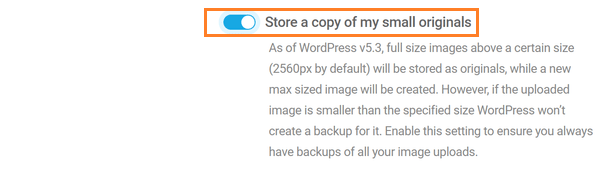
For this, Smush allows the user with an option store a copy of my small originals, which will enable you to have a backup of your original image.
5. Metadata
Some of the data that comes with the images we upload is unimportant to random users, unlike photographers.
This data is safe to remove using Smush's metadata feature you can easily do that.
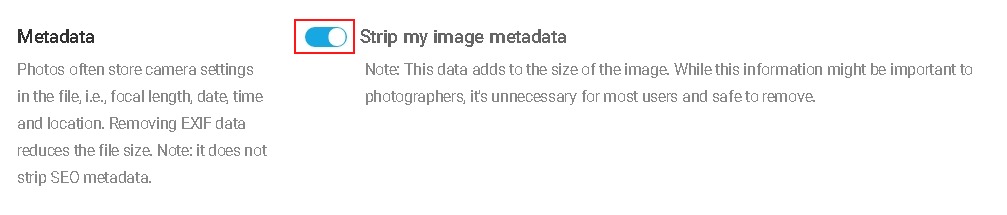
This feature will help you remove all the redundant and unimportant data such as the location of the photo, which might lead the user to your loction or the camera serial, which can trace to the images captured from the same camera.
However, most of this is very unlikely to happen, but now that it makes much more sense to remove the unimportant data.
6. Super Smush
It is normal to be keen and focused about the storage and speed of the site. And if you are one of those people, with Super-Smush, you can compress these images two times more.
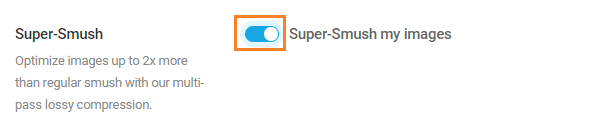
It is also one of those features that come with the premium version of Smush, i.e. Smush Pro.
It will eliminate excessive data as much as it can without sacrificing the quality of the image. And can reduce the size of the file up to two times.
Convert PNGs to JPEGs:
A simpler and effective way to compress your images is to use JPEG format instead of PNG. It will automatically decrease the size of your image.
Smush Pro will allow you to do that with a single click in PNG to JPEG Conversion panel.
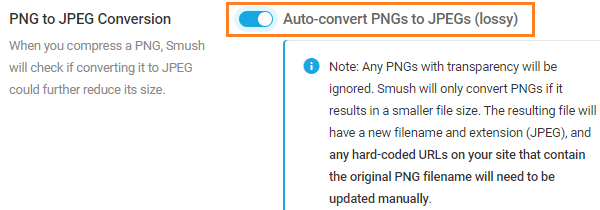
While it might be hard to decide as of which images you should keep as PNGs and which ones can be converted to JPEGs.
For the images that contain graphics and texts such as screenshots might lose some quality and appear grainy on your WordPress site. To ensure consistent quality, you might not want to convert these types of images into JPEGs.
Similarly, For the photographs where 10% of the quality drop will not be notable, can be converted to JPEGs to save up some storage.
Conclusion:
We all know how important it is to lessen the load from the server to keep the site fast so that the users do not leave the site while it is loading.
Optimizing the image sizes can be a great way to do that and Smush is there to help you not only with ease but is quick too and can save a bunch of time.
This way, you can increase your Google PageSpeed score. Alongside this, there are tons of other features offered by Smush to strengthen the experience of your website.
How do you compress your images to speed up your site? Which plugins do you use and how is your experience with them?
Tell us about your way of compressing and resizing images in the comments below.


