
Among the best news we had this year (2023), we have Elementor AI. The team behind Elementor is surfing on the AI wave and announced what is a major turn in web design. Elementor AI is a game changer as that makes creating a website more easier and convenient than ever. One of the greatest features we liked about that, is the fact you can now have a multilingual website.
Using new tools comes with new challenges and we know using this tool might make you wonder how you'll deal with your current content. This post more than explaining how multilingual websites work with Elementor AI, goes further on explaining how you can possibly organize your content.
Let's get started.
Elementor AI Write
Since Elementor now includes AI capabilities, new features are made available to everyone. You can for example :
Create Amazing Websites
With the best free page builder Elementor
Start Now- Generate content and heading
- Generate HTML, CSS & JS snippets
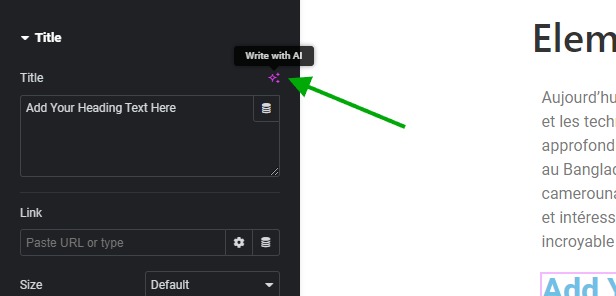
The controls for accessing AI are added pretty much on every widget that receives content (text widget, heading widget, code widget). Above each supported widget, you'll see a button that has multiple star icons and looks like below.
The best part here is that you can now translate content into a language you desire. This is not just a simple Google translation feature. Since it's based on AI, it will try to understand the content and provide an appropriate translation.
Requirements
We have wished the feature is available for everyone. But good things usually as has a price. Fortunately, Elementor has considered the fact some users might want to test the feature that's why from Elementor 3.13, you can try the Elementor AI Write. However, you're limited in prompts.

For those willing to use the full version (with no limitations), you'll either need to use Elementor Hosting (starting at 9.99/month) or get the premium plugin (Elementor Pro $59/year). Those are the requirements for using Elementor AI Write with no limitations.
URL & Content Structure
Based on the test we had, we've found that a certain URL structure and content are applicable to a multilingual website using Elementor AI Write. Here, we'll use the page and sub-pages to structure our content. We'll also make use of that to create a blog post list (only those belonging to a specific category).
URL Structure
We'll start by checking that our permalink configuration is set to custom with the following tags used.
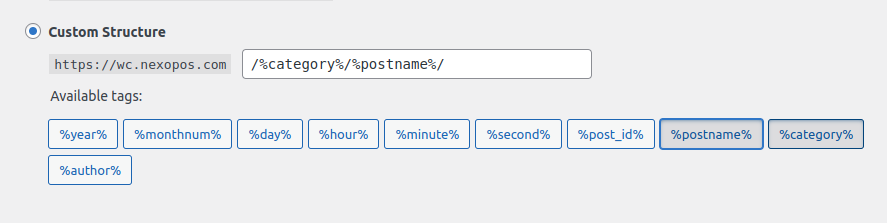
The URL structure we can use will look like this:
- en/about-us
- fr/a-propos-de-nous
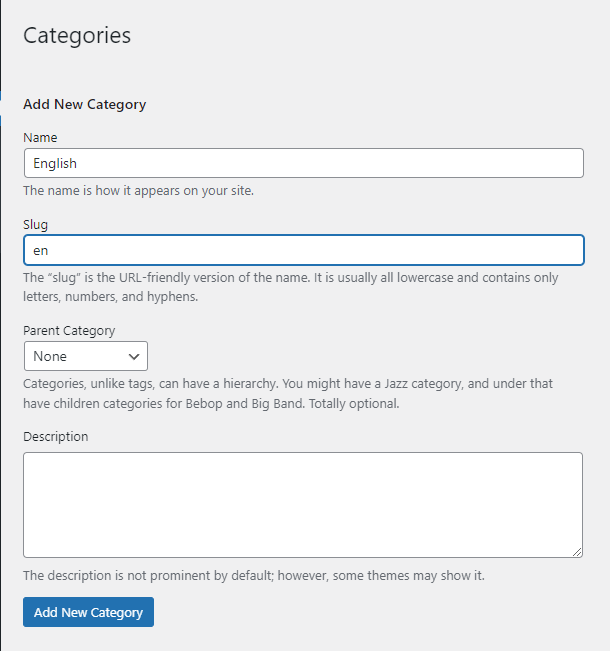
This implies that we'll have to create a categories that will have as slug "en" and another one that has "fr".
Now, we'll create two posts: "about-us" in which the parent will be "en" and "a-propos-de-nous" in which the parent will be "fr".
Post Editing
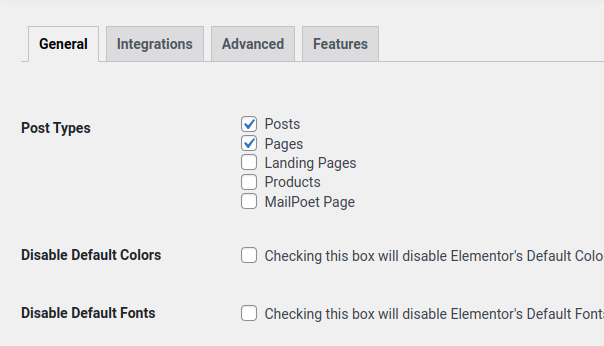
Now we need to enable Elementor for Posts. This might not be convenient if you're already familiar with Gutenberg. So you're not forced to enable this and keep that on the page. However, doing that will force you to go back and forth between the page and the blog post for copying and pasting the generated content.
Let's assume you want to enable Elementor to work on posts. We'll go to the settings and make sure it's enabled.
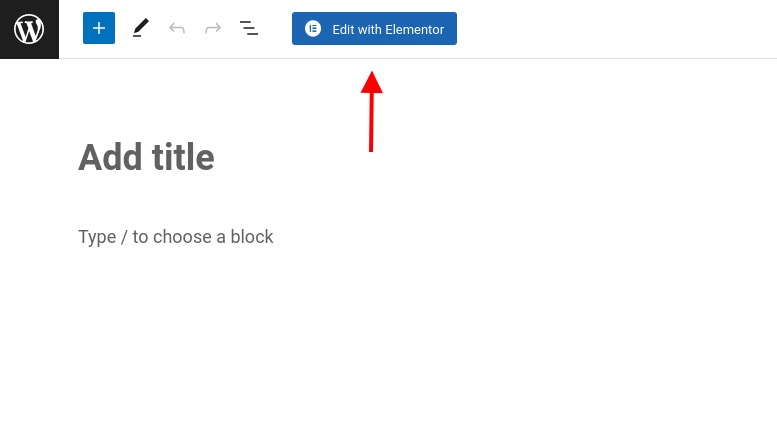
Now we'll go creating a post. We'll have to select above the Gutenberg editor "Edit with Elementor".
Now we'll add a text widget. Note that in order to use Elementor AI, you need to be signed to Elementor.com. So don't worry if you see that you're asked to log in. Now while using a Text widget, we can ask Elementor AI Write to write a small description about us.
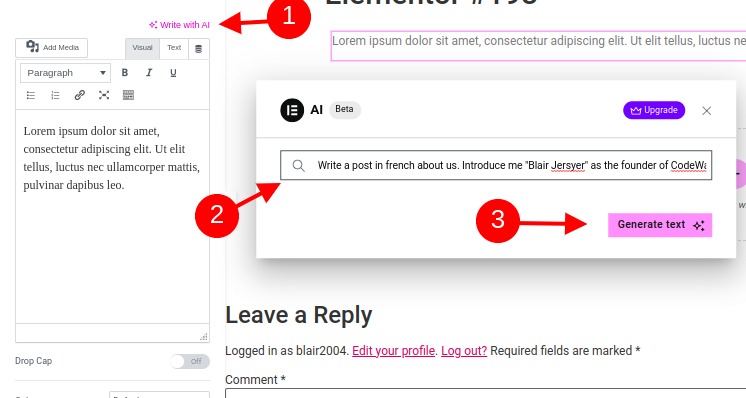
We'll have an output of the content that we can use directly.
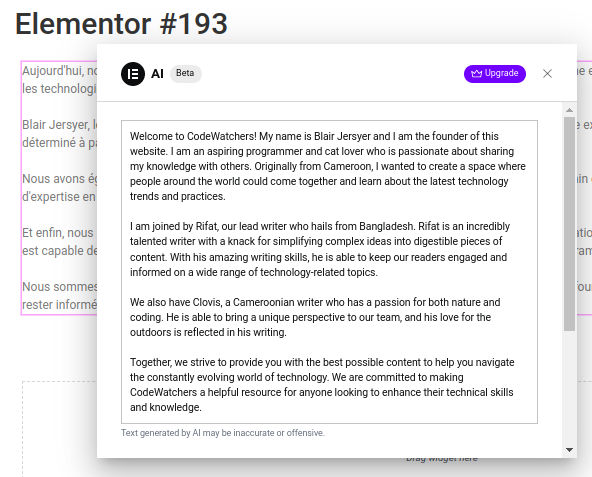
Note that the content Elementor AI Write will share with us will not contain any formatting. We'll therefore make the necessary adjustments ourselves.
Now that we've created our posts, we need to assign them to the right category. Since the first post is in English, we'll assign that post to the category "en".
Translation
Now, for every category we created as a root language, we'll need to create a translated version of the page for which we have an English version. Proceeding here is quite simple as Elementor makes it easy thanks to the visible buttons available.
So, what we'll do here is to duplicate the post we created earlier (about-us). We'll make sure from the post list to edit the "slug" by editing the copied post title. Now we'll start by translating each widget available from Elementor editor.
Then we just have to click on "Use Text" and we've translated a new section. Now we'll have to do this for every widget that is available on our page. We know this process might be long, but we believe Elementor will improve this in a near future.
Language Switcher
Now to complete our website, we need to create a menu that will ease language switching. If you haven't yet, you'll land on the customizer and create a new menu.
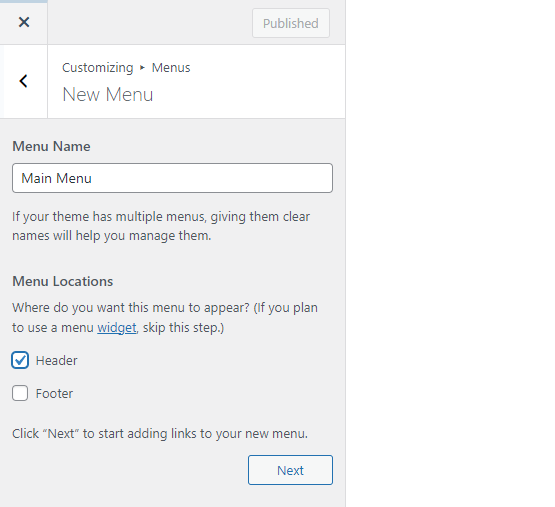
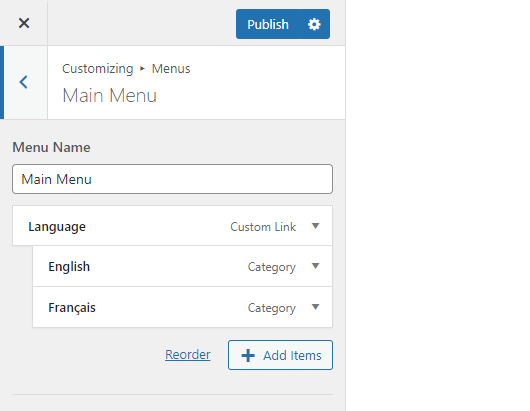
Now, we'll just add a simple menu (custom menu) that has a URL # and text "Language" (you can change it with whatever you want). Now, we'll add as a submenu the categories we created earlier. You should have a result like this:
In action, your language switcher should look like this:

Final Words
As you've noticed, we've created a very easy and free multilingual WordPress website. You should note here that this solution might be suitable for small and medium websites. If you're having a blog that publishes frequently, it might be hard repeating those tasks, but it remains feasible.
With the translation capability, you're able to translate your website into 29 languages (English, French, Italian, Spanish, Russian, Japanese, Chinese, Korean, Arabic, German, Hindi, Indonesian, Portuguese, Malay, Hungarian, Vietnamese, Turkish, Greek, Hebrew, Polish, Swedish, Slovak, Norwegian, Dutch, Czech, Finnish, Romanian, and more).
Note that, you might be limited if you don't opt for Elementor Pro or Elementor Hosting because Elementor AI Write is only available on the base version freely for testing purposes.


