
Are you considering the installation of Google Tag Manager on your WordPress platform?
If you aim to link diverse analytics and marketing services to your WordPress site, along with configuring various tracking features provided by Google Analytics, then Google Tag Manager emerges as an excellent tool at your disposal. It facilitates the seamless addition and modification of tracking codes and code snippets on your website.
It's essential to note that becoming proficient with Google Tag Manager may require a significant learning investment. Acquiring the necessary skills to use the tool effectively becomes imperative once it is successfully integrated into your WordPress environment.
Introduction To Google Tag Manager - GTM
Google Tag Manager, a free tool from Google, serves as a tag management solution enabling you to implement and revise various code snippets, known as 'tags,' on your website.
Create Amazing Websites
With the best free page builder Elementor
Start NowVarious tracking services, such as Google Analytics, Adobe Analytics, Facebook Pixel, and advertising tools like Google Ads, necessitate the inclusion of specific lines of JavaScript or HTML code on your website for seamless integration of their services.
With the assistance of Google Tag Manager, you can effortlessly incorporate and oversee all these code snippets through a unified interface, eliminating the need to directly edit your website's code.
Beyond the addition of tracking snippets, Google Tag Manager plays a crucial role in incorporating code snippets instructing Google Analytics to monitor aspects of your website that aren't inherently tracked. This includes activities like eCommerce transactions, button clicks, form submissions, and more.
While this may seem straightforward, configuring the various tags and triggers required for such setups can become intricate, and the associated tutorials tend to be quite extensive.
Set Up WordPress Google Tag Manager
To integrate Google Tag Manager into your WordPress site without relying on MonsterInsights, simply proceed with the following instructions.
Step 1: Establish Your Google Tag Manager Account
To initiate the process, visit the homepage of Google Tag Manager and click on the Sign-Up button.

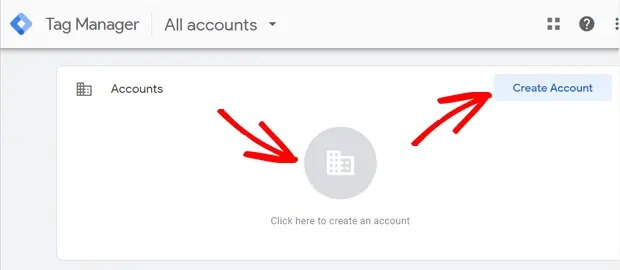
To begin, please log in using your Google account. After successfully logging in, you will be directed to the Google Tag Manager's account creation page. Simply click on the "Create Account" button to initiate the process.
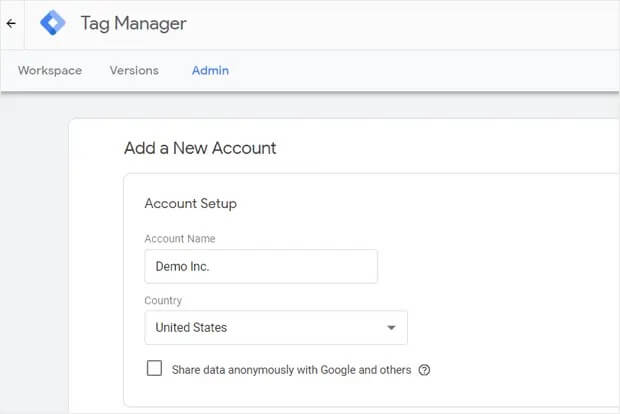
On the subsequent screen, introduce a new account by providing a name and selecting your country within the Account Setup box. Feel free to designate your company name as the account name.
Moving forward, it's time to establish your container. In essence, a container encompasses tags, triggers, and all configurations implemented on a website.
Opt for your website name as the container identifier. Select "Web" under the Target Platform Container option, and then proceed by clicking on the "Create" button.

Subsequently, you'll be prompted to acknowledge the Google Tag Manager Terms of Service Agreement to proceed further. Ensure to tick the box adjacent to "I accept the Data Processing Terms as required by GDPR" at the bottom, and then confirm by clicking the "Yes" button located in the top right corner.
After agreeing to the terms of service, a new popup window will emerge on your screen containing the GTM code snippets essential for installation on your website.
The JavaScript tag requiring installation in your header will have the following appearance:
<!– Google Tag Manager –>
<script>(function(w,d,s,l,i){w[l]=w[l]||[];w[l].push({‘gtm.start’:
new Date().getTime(),event:’gtm.js’});var f=d.getElementsByTagName(s)[0],
j=d.createElement(s),dl=l!=’dataLayer’?’&l=’+l:”;j.async=true;j.src=
‘https://www.googletagmanager.com/gtm.js?id=’+i+dl;f.parentNode.insertBefore(j,f);
})(window,document,’script’,’dataLayer’,’GTM-XXXXXX’);</script>
<!– End Google Tag Manager –>
On the other hand, the tag that should appear in the body section right after your opening body tag is as follows:
<!– Google Tag Manager (noscript) –>
<noscript><iframe src=”https://www.googletagmanager.com/ns.html?id=GTM-XXXXXX”
height=”0″ width=”0″ style=”display:none;visibility:hidden”></iframe></noscript>
<!– End Google Tag Manager (noscript) –>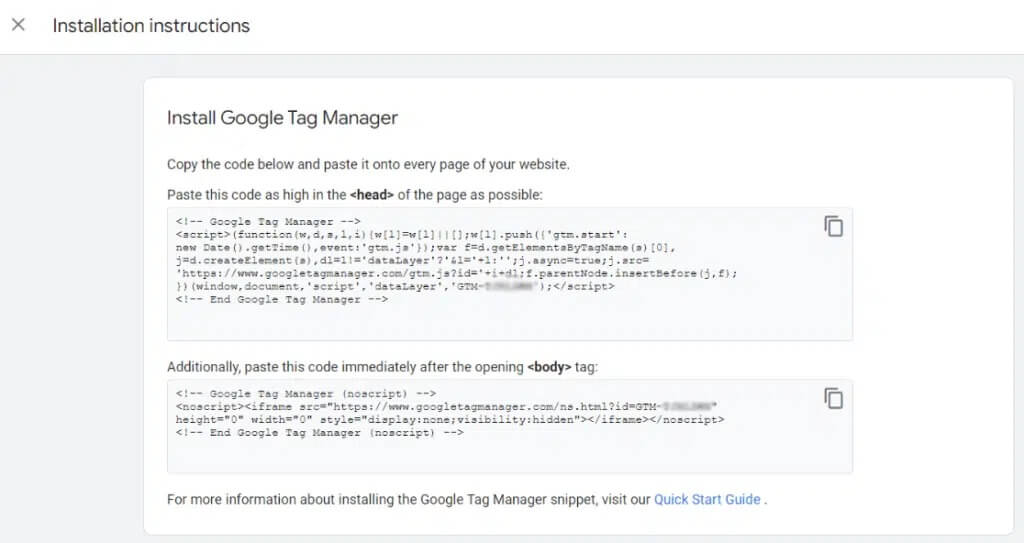
Step 2: Integrating Google Tag Manager Code into WordPress
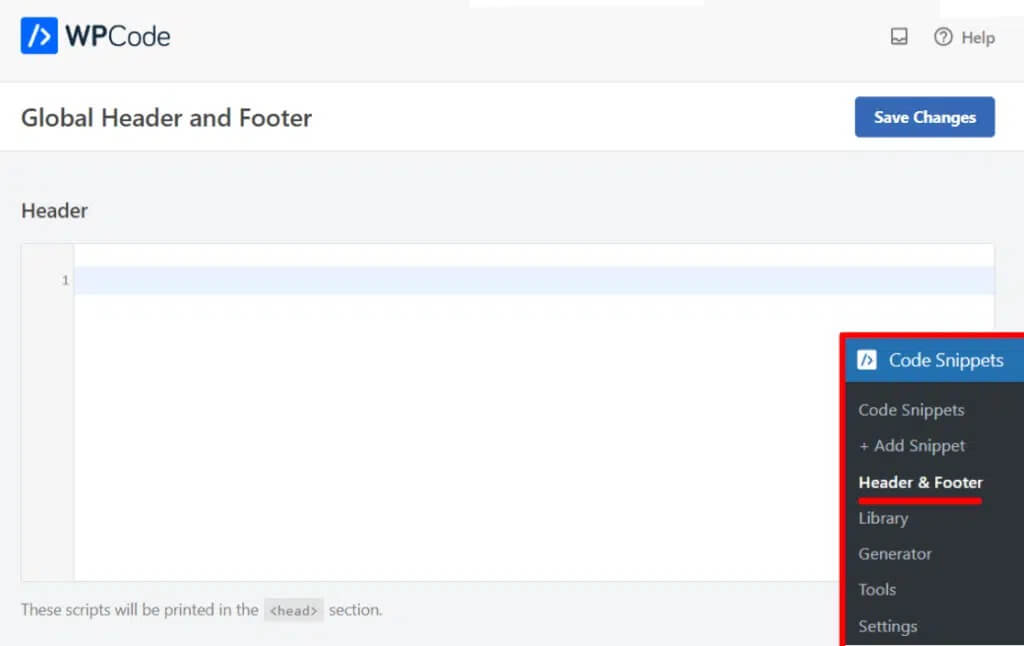
Begin by accessing your WordPress admin dashboard and proceed to install the complimentary edition of the WPCode plugin. Once activated, navigate to the Code Snippets section on the Header & Footer page.
WPCode stands out as the top-tier WordPress plugin designed to effortlessly incorporate code snippets and GTM container code into your website, eliminating the need to manually modify any site files.
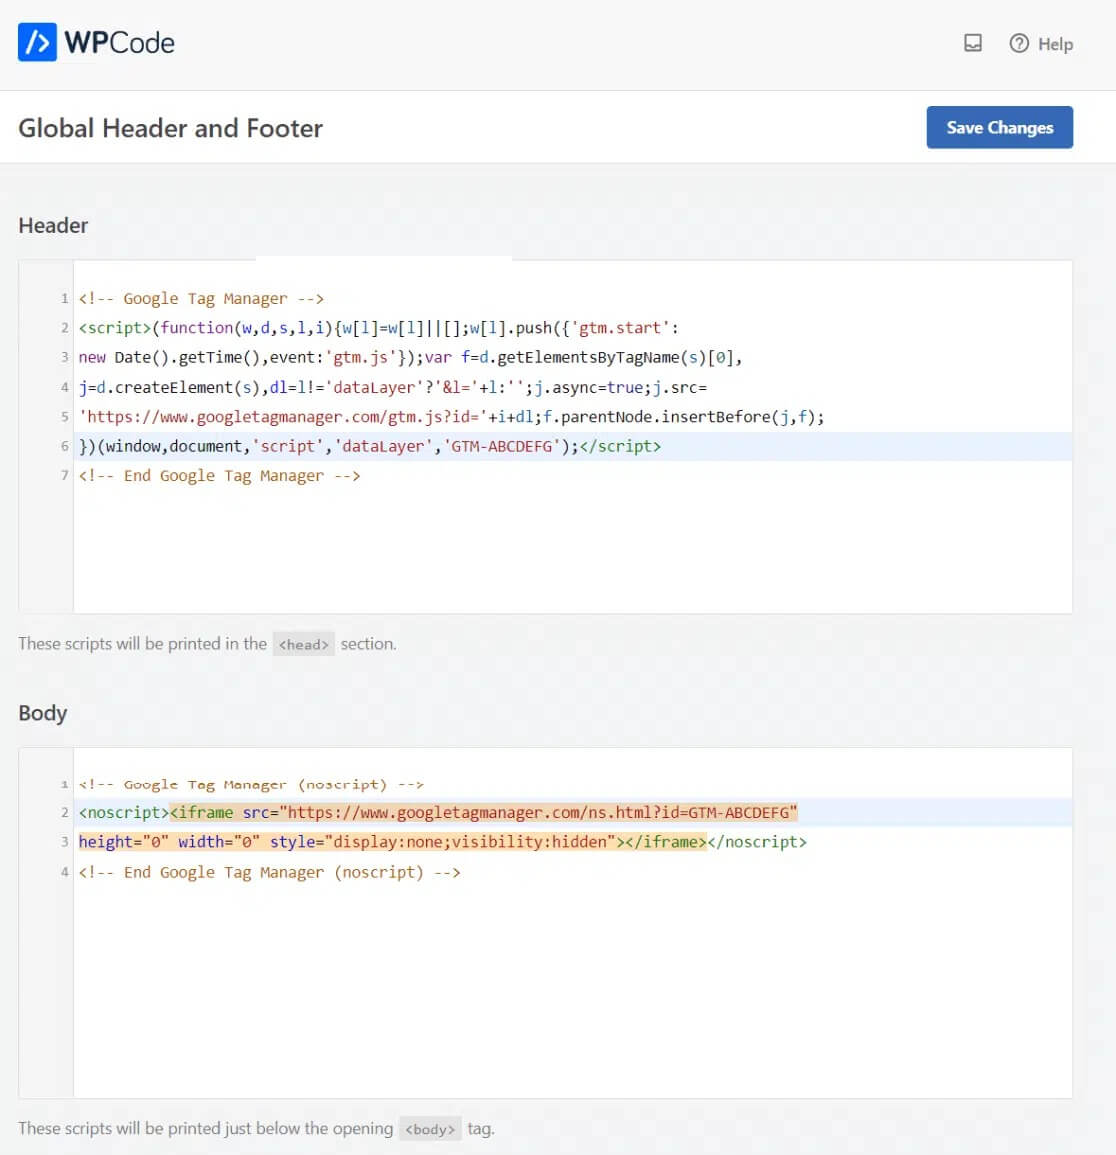
You can now add code to your header without editing the header.php file by using the box that appears. Return to your Google Tag Manager account, then choose the first box to copy the code. In the Header box, paste the code.
Next, copy the other code, and paste it into the Body box from your Tag Manager account.
Using the box that appears, you can now add code to your header without having to alter the header.php file. To copy the code, go back to your Google Tag Manager account and choose the first box. Paste the code into the Header area.
Next, make a copy of the other code and paste it from your Tag Manager account into the Body box.
Step 3: Incorporating and Publishing Tags in Your Tag Manager
Once Google Tag Manager is successfully integrated into your website, you're set to include code snippets (tags) from various tracking tools onto your site.
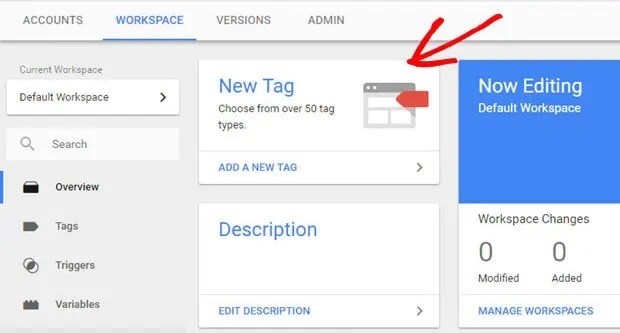
Google Tag Manager boasts compatibility with over 50 tag varieties, encompassing Google marketing products and assorted third-party services. Moreover, you have the flexibility to introduce custom HTML or JavaScript tags to your site through its user-friendly interface.
To initiate the process of creating and adding a tag, simply click on the New Tag tile and follow the provided steps to craft your inaugural tag.
Now that you've followed the same procedure, you may integrate your WordPress website with alternative marketing and tracking platforms and add additional tags to your Google Tag Manager container.
That's it, guys!
MonsterInsights: A Seamless Alternative to Google Tag Manager
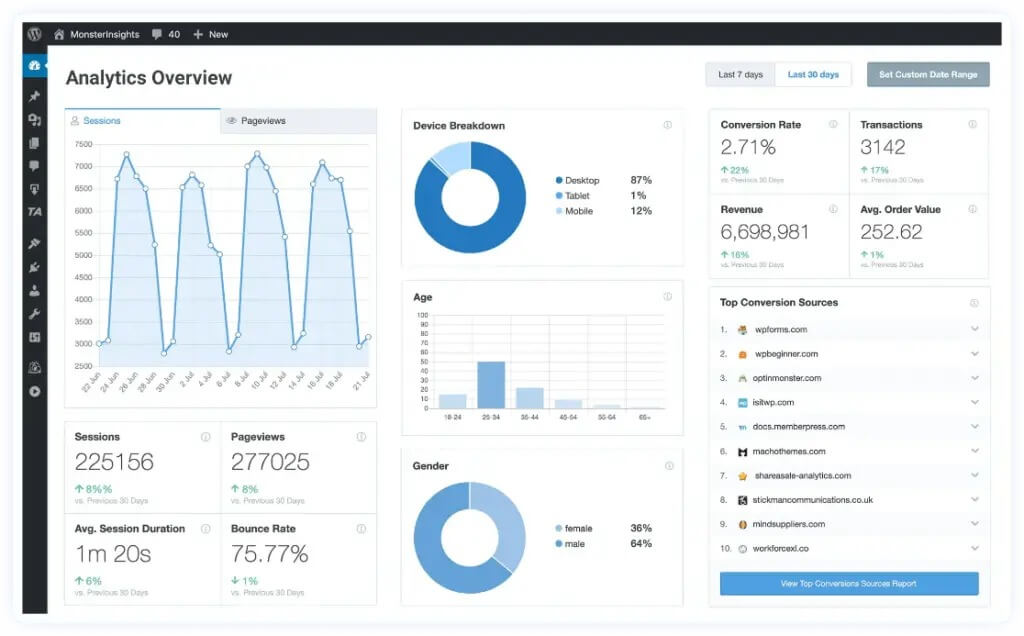
MonsterInsights proves to be a superior alternative to Google Tag Manager, offering simplicity without the need for extensive learning curves.
With MonsterInsights, there's no tedious process of individually configuring tags on your WordPress website. Moreover, it eliminates the risk of errors that can disrupt tracking efforts.
The plugin comes with advanced features out of the box, allowing you to set up Google Analytics on your WordPress site effortlessly, without any code modifications.
Why Choose MonsterInsights?
Effortless Tracking of Link and Button Clicks
Unlike Google Analytics, MonsterInsights automatically tracks link clicks and button interactions without additional setup. No need for extra tracking tags or code edits. You can effortlessly track:
- Affiliate link performance for revenue growth
- Outbound links with the highest click rates
- Video plays, including a detailed Media report
- Clicks on mailto: or telephone links
- File downloads on your website
- Call-to-action (CTA) button engagement for improved conversions
- Product popularity through add-to-cart button tracking
Simplified Form Conversion Tracking
MonsterInsights streamlines the process of tracking form performance. By installing its Forms addon, all types of WordPress forms are automatically tracked. Access performance insights directly within the WordPress dashboard under Insights » Reports » Forms.
- View impressions, conversions, and conversion rates for all forms
- Identify the sources of form conversions
- Analyze channels that contribute the most leads
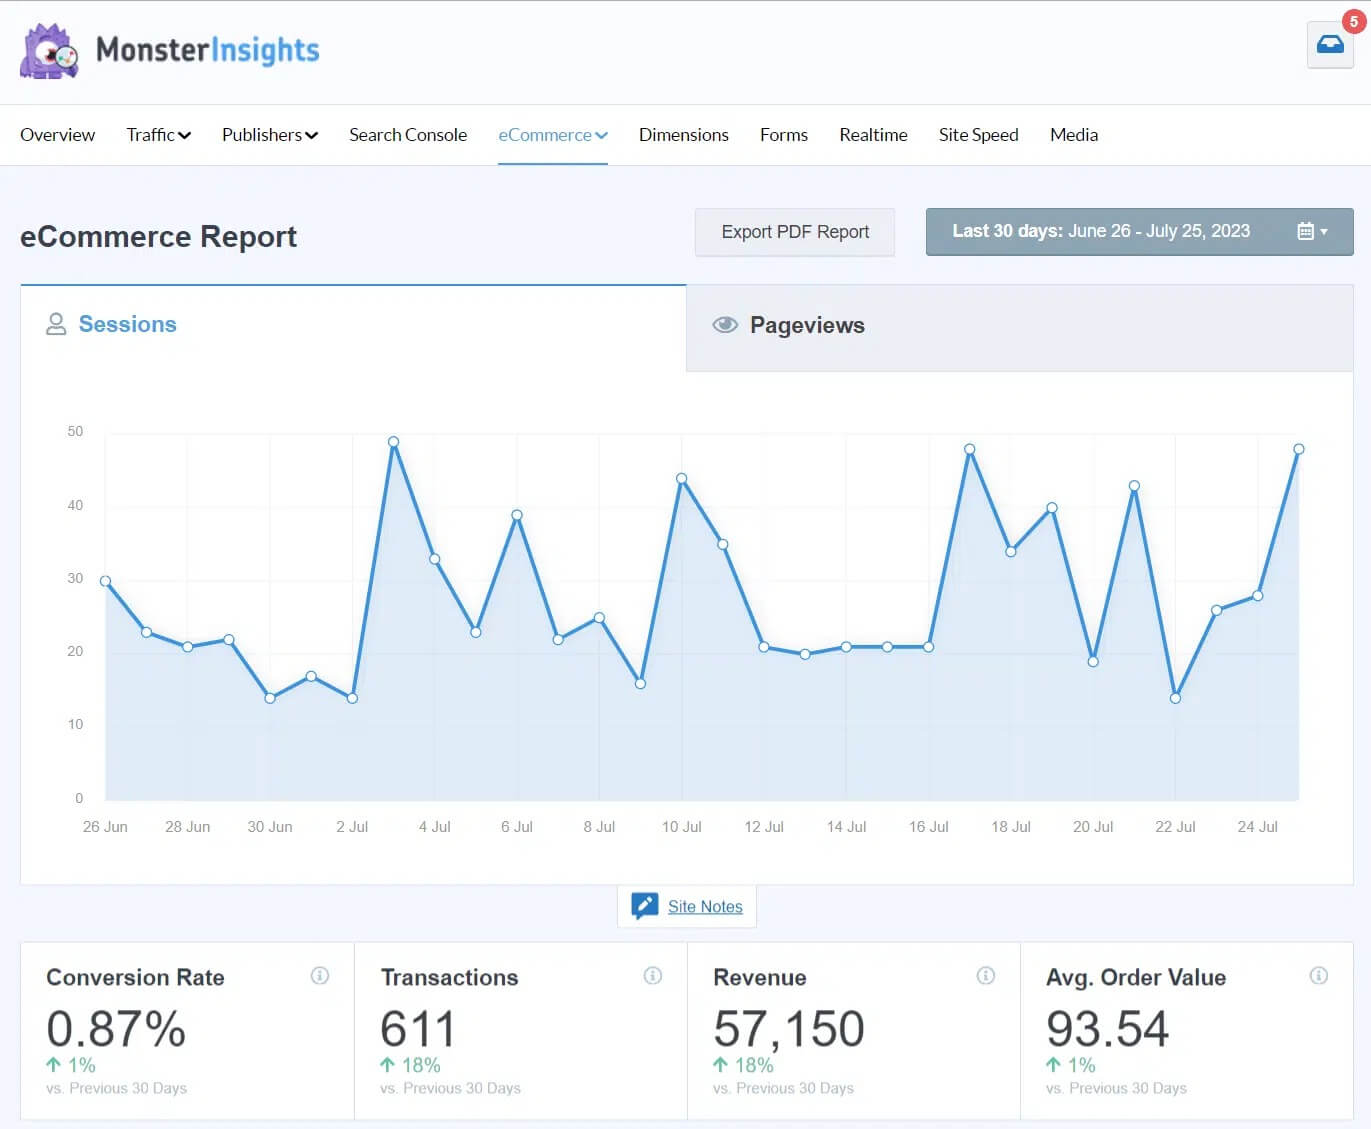
Effortless eCommerce Performance Tracking
Enable e-commerce with just a few clicks using MonsterInsights. The plugin integrates seamlessly with WooCommerce, Easy Digital Downloads, GiveWP, MemberPress, and more.
Track revenue, conversion rates, popular products, and other crucial metrics in Google Analytics. Understand customer behavior, including page visits, cart interactions, and abandoned checkouts, and utilize the User Journey addon for comprehensive customer journey analytics.
- Integrate with popular eCommerce platforms
- Analyze customer behavior and purchase paths
- Utilize User Journey addon for detailed insights
Ad Conversion Tracking Codes & Pixels
For users involved in digital marketing with platforms like Google Ads, Bing Ads, or Meta (Facebook) Ads, MonsterInsights simplifies the process of ad conversion tracking. Copy and paste your conversion ID and label or pixel ID directly into MonsterInsights settings for seamless integration.
Wrapping Up
Installing Google Tag Manager (GTM) in WordPress can provide site owners with important analytics and insights into user behavior. The process requires adding the GTM code snippet to the header or footer of your site. While step-by-step instructions are available, it does require some technical knowledge or assistance from a developer. On the other hand, you can use MonsterInssight to track the data from the plugin dashboard.
Once the code snippet has been added, you can configure tags, triggers, and variables within the GTM dashboard to track events like button clicks or form submissions. With some time invested to set it up properly, Google Tag Manager offers the potential to better understand your users and improve the WordPress site experience and performance over time.


