
As you know Elementor is the most popular page builder out there for WordPress. Creating an effective draggable menu will work as both an engagement for the audience and an enhancement for your website.

Elementor comes with built-in customizable widgets which allow you to achieve interesting results with some creativity and simple tweaks here and there. In this tutorial, we will go through the process of creating a Draggable Menu with the Nav Menu Widget.
What Is A Draggable Menu
A draggable menu allows the users to have full control over it. A draggable menu seems like a normal menu but can be dragged anywhere on the page.
While the draggable menu can be displayed anywhere on your website with all the items you want to display.
Create Amazing Websites
With the best free page builder Elementor
Start NowThe draggable menu is versatile and can be used for a lot of purposes. You can use it as a portfolio menu to display links to your media profiles. If you own a Woocommerce store, you can use the draggable menu to list different product categories and so on.
How To Build A Draggable Menu
Now let's move ahead and start creating the draggable menu on WordPress using Elementor. We will need to use some JavaScript for this tutorial while everything will be demonstrated step-by-step to make sure you don't find a problem.
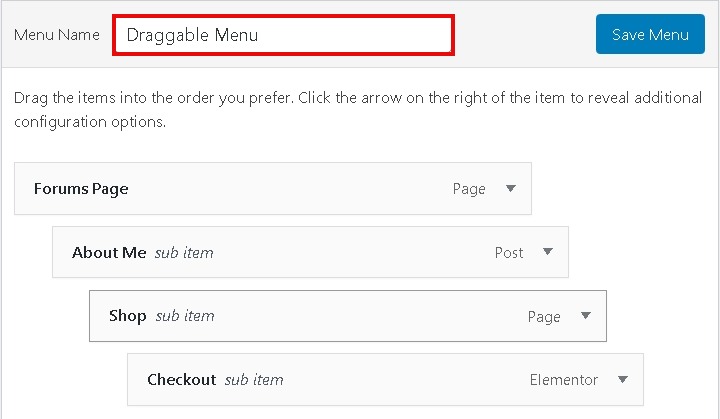
To get started, create a Regular Menu on WordPress by going to Appearance in the WordPress dashboard and then choose Menus.

Add all the items that you want to keep in your draggable menu.
Now you need to decide the page you want to display your menu on. You can choose to create a new page or edit a pre-built page.
Press the Edit with Elementor button to enter the Elementor editing interface.

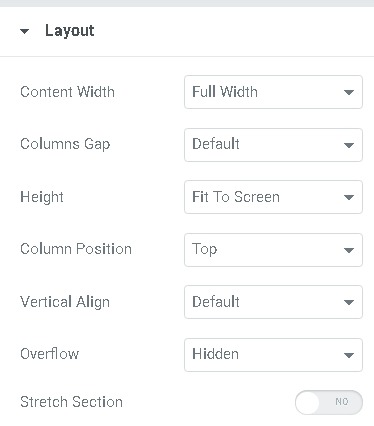
Create a new one-column section and open the make the Content Width to Full Width and Height to Fit to screen in the Layout tab in section settings.
You can also add the background, header or any other elements that you want to display on your draggable menu.
Now, drag the inner section widget to your full section widget. This will create an inner section in your full section widget.
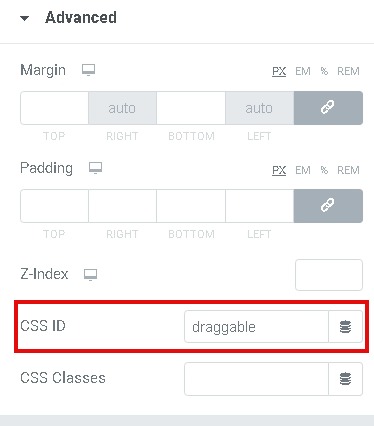
Next, you need to go to Column Settings of your inner section widget and press the Advanced tab. Enter draggable in the CSS ID setting.
Drag and bring the Nav Menu Widget to your newly created inner section widget. Choose the WordPress menu you created initially from the Nav Menu Widget drop-down settings.
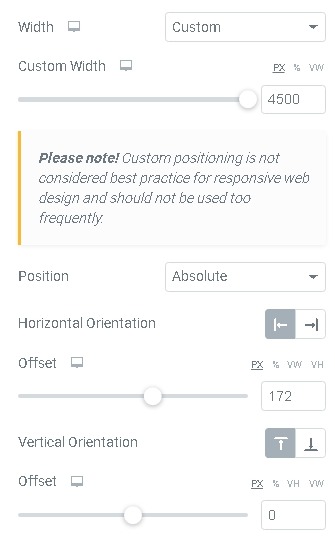
After you have made your changes, head over to the Advanced tab of widget settings and in the positioning settings, copy the following settings.
Finally, you will need to add custom JavaScript to turn your normal navigation menu into one draggable menu.
Under the main section, create a new section and add an HTML Widget. Copy the following code and paste it into your HTML Code Box.
<script src="https://code.jquery.com/ui/1.10.4/jquery-ui.js"></script>
<script>
jQuery( document ).ready( function ( $ ) {
$( "#draggable" ).draggable({containment: [-2000, 0, 300, 0], axis:'x'});
});
</script>
After following all the steps here, you can save the page and preview it to see how it looks on your browser.
This is how you can create an amazing Draggable Menu Widget out of a simple Nav Menu to enhance the quality of your website. Make sure to follow us on Facebook and Twitter to never miss a tutorial.


