
Of course, as web designers, we desire our website to be unique. This means we must make a good first impression on guests. Styling our website with particle effect is one approach to help visitors have a good impression and make them more likely to return.

The particle effect is quickly becoming one of the most important aspects of modern design processes. In this article, we'll show you how to use Happy Addons to add particle effects to Elementor. Happy addons provide three different particle effects - Polygon, NASA, and Snow. However, if you need to personalize the particle effect, there are numerous possibilities for doing so via custom effect.
Add Particle Effects in Elementor
The first step is to install Happy Addons Pro on your WordPress site, as the Particle Effects function is only available on the pro edition. Happy Addons Pro can be downloaded from the official website. Once you've downloaded the Happy Addons file, simply install and activate it.
We will now begin to use this plugin to add particle effects to Elementor. You can either create a new page or choose an existing one. In this case, we'll make a new page. Go to Pages -> Add New from your Dashboard. Then, click the Edit with Elementor button to open the Elementor editor.
Create Amazing Websites
With the best free page builder Elementor
Start Now
So, we're all set to design our page. To begin, we first create a new section by clicking on the plus (+) Add New Section symbol and then selecting a single column (or any structure you want).
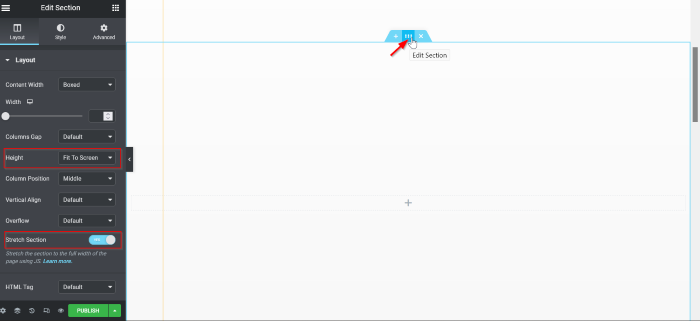
You may apply a few basic settings to the section before applying the particle effect. To open the options panel, click the section handle. In this case, you must complete the following two things:
- Height: Fit To Screen
- Stretch Section: Yes
Then, by clicking the addition sign (+), you may add a widget. The Image widget is used in this example. Add the Image widget to the column by dragging it there. Click the image selection to select your image. You can select an image from your collection by clicking on the Media Library button, or you can upload an image by hitting on the Upload files button.
After you've selected the image, change the image size to Shop Single by selecting Shop Single - 600 x 0 from the Image Size drop-down menu.

You can customize the area by adding more widgets. After you've finished adding the widgets, proceed to the following step to add the particle effect.
Finally, we'll add the Happy Particle Effects to the area. To open the section settings panel, click the section handle, then select the Style tab. Open the Happy Particle Effects block on the Style tab and toggle the Enable Particle Background toggle on (Yes).
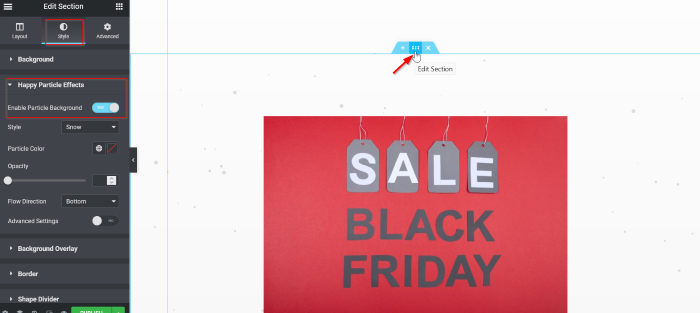
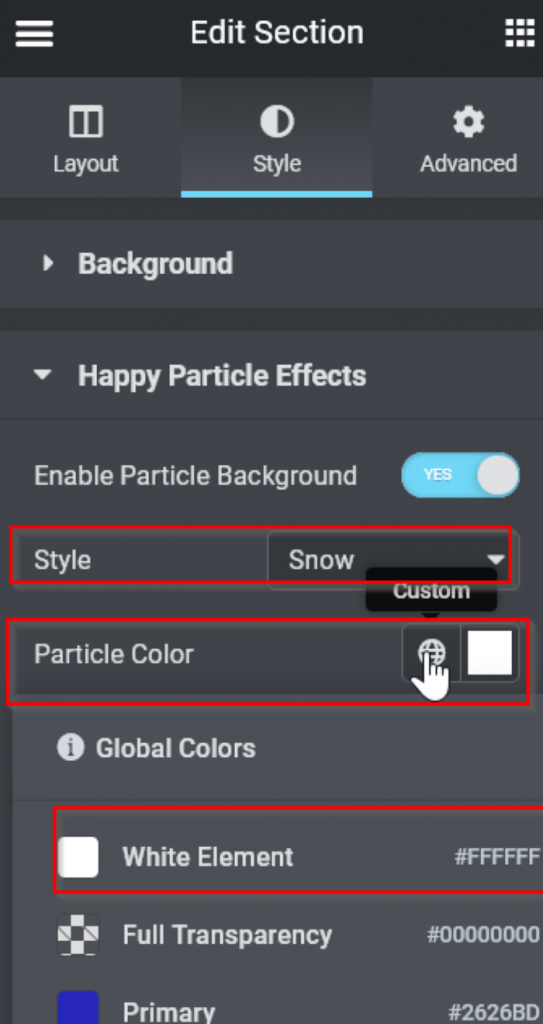
You can now select the style of particle effects. In this tutorial, we'll be using the Snow option. After applying the style, you can experiment with many options such as particle color, transparency, flow direction, and many more. In this example, the Particle Color is set to White Element.
- Style: Snow
- Particle Color: White
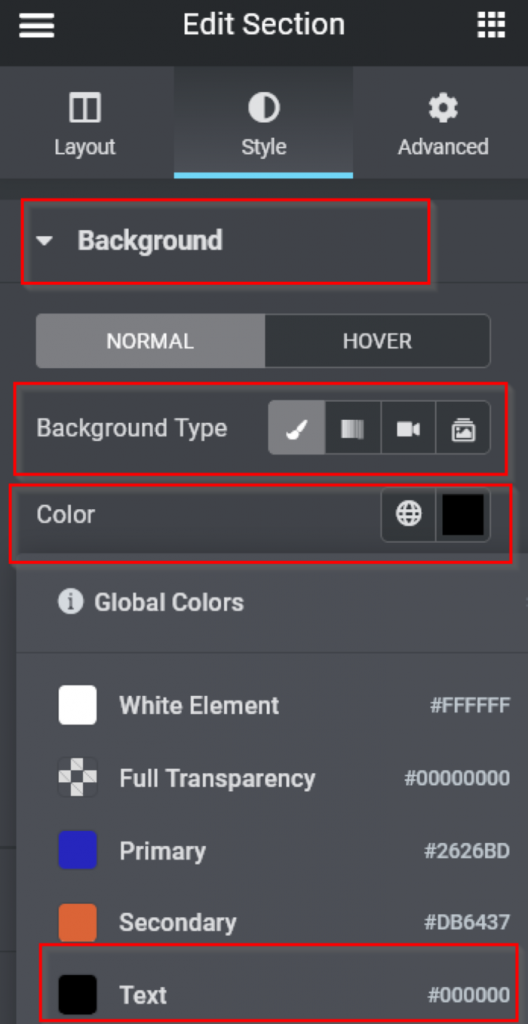
We need to have the particle effects be apparent and dramatic, hence we need to update the background of the section. Open the Background block on the Style tab, select the Classic on the Background Type option, and then set the color to black.
And now it looks like this.
Custom Effect
You're probably wondering what the custom effect is. Happy Particle Effects is one more effect that allows you to create particle effects using your imagination, and that is what this effect is for.
Go to Style and select Custom from the drop-down menu. Read the instructions and then click the here link, which will lead you to an external page (particles.js) where you can configure a custom particle effect.
There are five default effects from which to pick. Let's keep with the snow effect for the time being. Select Snow from the drop-down menu. Under that, you can begin experimenting with the parameters. The only thing we changed in this example was the size. Go to particles -> size, enter 20, and check the () random box.
After you've finished generating the particle effect, click the Download current config (JSON) button to get the JSON file.
After downloading, open the JSON file in Notepad or your preferred plain text editor, select all, and copy the text. Return to the Elementor editor and paste it into that spot.
Wrapping Up
Particle effects were a major topic four to five years ago, and they were quite fresh. However, it may be a tad overused and cliché at the time. As a result, we recommend that you only employ particle effects once or twice on your entire website. As elementor gives you independency to go such diverse with your designing, why don't you try it on next Christmas sale on your site? Check out the Christmas landing page tutorial and share it with your community!


