
Have you ever wished to try something new with your website? Maybe adding a new tool, changing the look, or giving your design a complete makeover?
But, unfortunately, you worry that making a mistake could crash your website and make it useless. The fear of driving away your users with these changes holds you back from exploring and experimenting.
But don't worry anymore. There's a way for you to do whatever you like with your website, even if it means breaking it, without affecting your users' experience. All you need is a staging site.
This step-by-step guide assumes that your WordPress website is already running. However, if you're not sure how to create a WordPress site, we offer a helpful tutorial.
Create Amazing Websites
With the best free page builder Elementor
Start NowWordPress Staging Site
A staging site is basically a duplicate of your live website. It's a place we make where we can play around and test our website before making it live so that your real site remains unaffected.
On this staging site, you can sort out issues like bugs and clashes between plugins, or you can experiment with things like switching the theme, adding fresh plugins, and using new pieces of code – all without any risk.
Importance of a Staging Site
Let's draw a comparison to understand why a staging site is essential. Think of it like drug testing in a laboratory. When developing a new drug, the best place to start is in a controlled lab environment where you have complete control over everything. Once the drug shows promise, it's ready for clinical trials where it's tested on subjects.
Similarly, in website development, the local staging site is our lab. It's the place where we have the most control. On the other hand, the live site is like the trial phase, where the environment is less predictable and mirrors real-world conditions.
Using a staging site offers several benefits:
- Troubleshooting: Websites are rarely flawless; WordPress errors, plugin conflicts, and bugs can crop up. When you try to fix one issue, sometimes you unintentionally create more. A staging site is the perfect space to address these problems. Even if you make more issues than fixes, it won't affect your live website or user experience. It's a secure space to work on your website until all technical glitches are resolved, making it ideal for quality assessment.
- Safety: In addition to being a safe work environment, a staging site is excellent for creating backups of your website. Since it's essentially a copy of your live site, having a staging site ensures you always have a secure backup. If something goes wrong, you can easily revert to the latest version of your website, saving time and keeping your users happy.
- Practice: A staging site is the perfect playground for your experiments. Since it's not accessible to the public, users won't encounter any issues or downtime caused by your experiments. Plus, you can configure the settings to ensure that search engines like Google won't index this site, preventing negative SEO impacts. Here, you can make any changes you want to your website, from a complete overhaul to trying out new features, experimenting with code snippets, animations, and more, all without any consequences.
Ways to Create a WordPress Staging Environment
Here are three main ways to make a staging site:
- Make a staging site with your WordPress hosting provider. Some popular hosting services like Elementor Hosting, Bluehost, WP Engine, SiteGround, and Flywheel provide tools to create a staging site right from their dashboards.
- Use a WordPress plugin to create a staging site. You can employ plugins like WP Staging or WP Stagecoach for this purpose.
- Create a staging site manually. This option is not recommended for those who are new to this.
Stating Site With Hosting Provider
Create A Staging Site on Elementor Hosting
Staging sites are accessible for Elementor Hosting subscribers who have bought a Business, Grow, or Scale subscription plan. Creating a staging site is most straightforward when you duplicate or clone your current website. Here are the steps to follow:
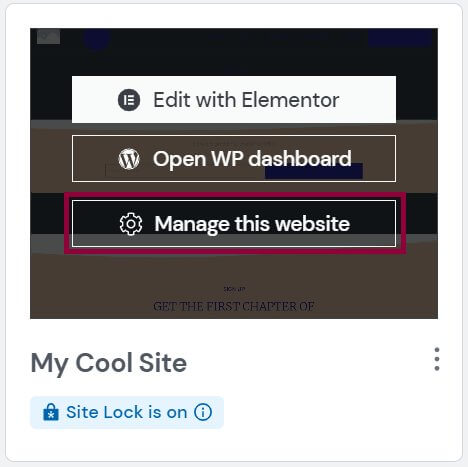
Visit your My Elementor dashboard.
Find the card for the website you wish to duplicate.
Select "Manage this website."
Scroll down to the section titled Staging Environment.
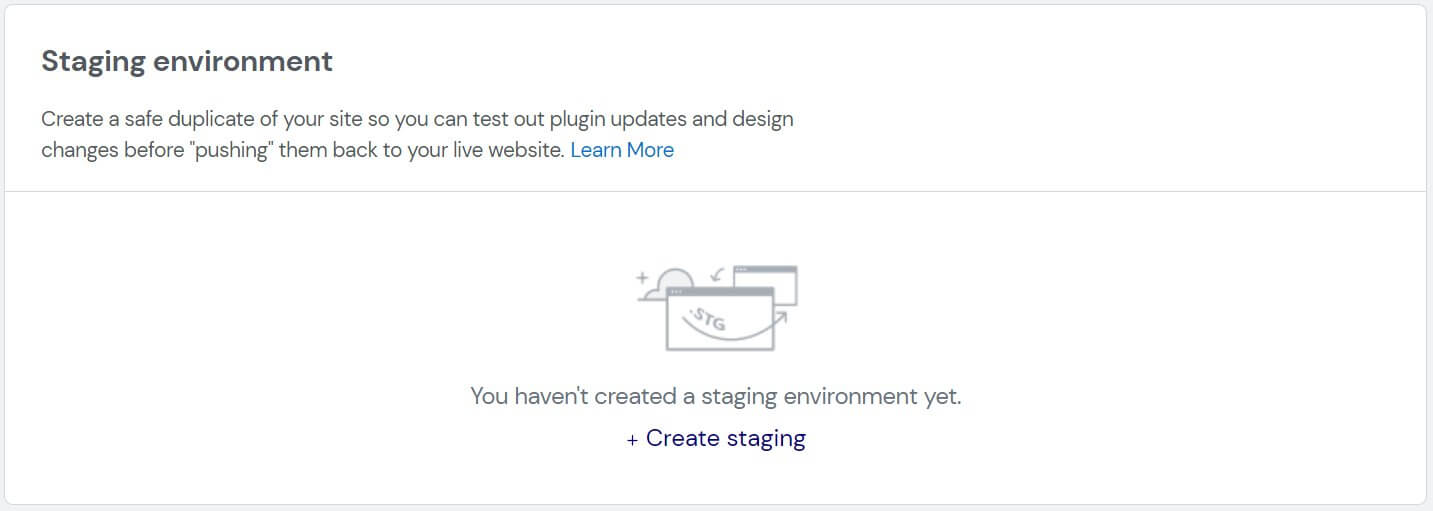
Click Create Staging.
Verify that you want to create a staging site before clicking Create Staging.
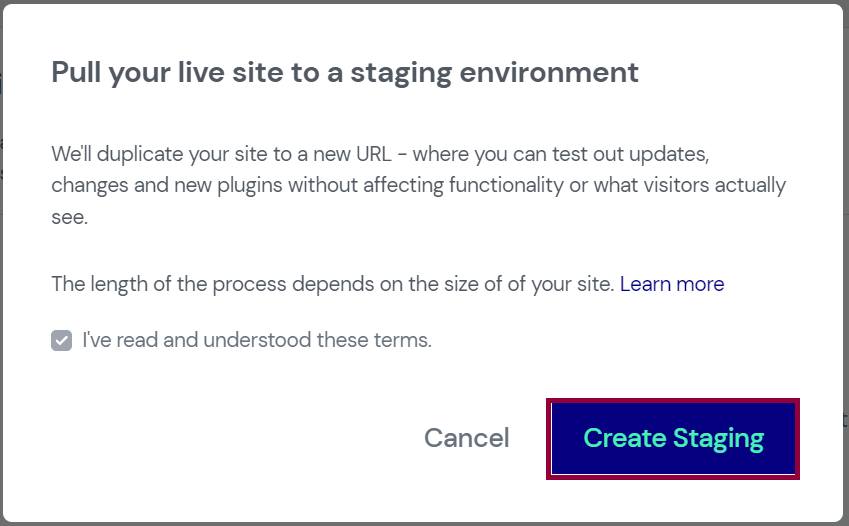
Your staging site will receive a copy of your live site.
Your staging site's information will be added to the section on the staging environment.
Create a Staging Site on Bluehost
Your site may be staged with only one click thanks to Bluehost. If Bluehost is your hosting company, all you have to do to create a staging site is the following:
Access the WordPress Admin section by logging in at (http://www.yoursite.com/wp-admin/). From here, select Staging and then Bluehost from the left-hand sidebar.
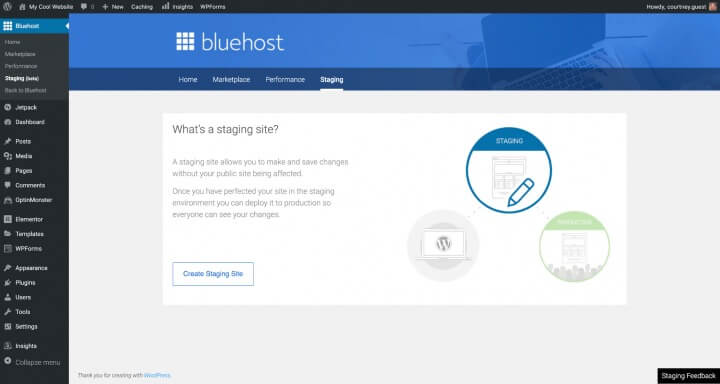
Next, select Create Staging Site and wait for the procedure to be completed.
The Go to staging site button should be clicked.
Now you are in the waiting room. This is a staging environment, as shown by the red button at the top.
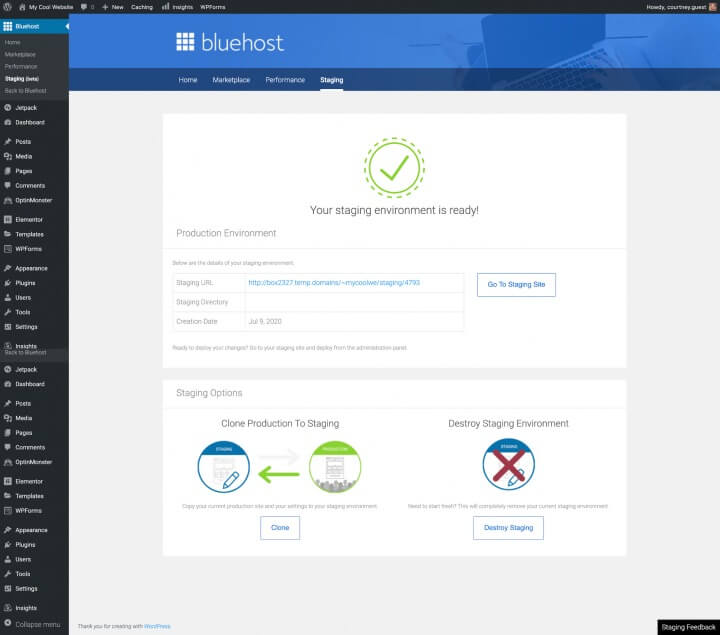
When you're ready to publish the changes, return to the staging page (from your WordPress admin area), scroll down to the Deployment Options section, and select the one that works best for you. Confirm your choice, then wait for the procedure to finish.

As a Bluehost user, that is all there is to it.
Creating a Staging Site on SiteGround
Another well-known host, SiteGround, provides a one-click option.
Log in to the dashboard of SiteGround, scroll down to WordPress Tools, and select Staging.
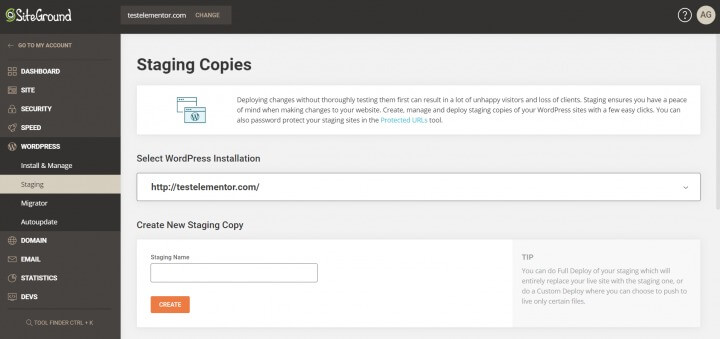
Click Add WordPress after adding your website to the staging site manager.
Choose your website's URL. You can select Create Staging Copy once SiteGround has identified the website.
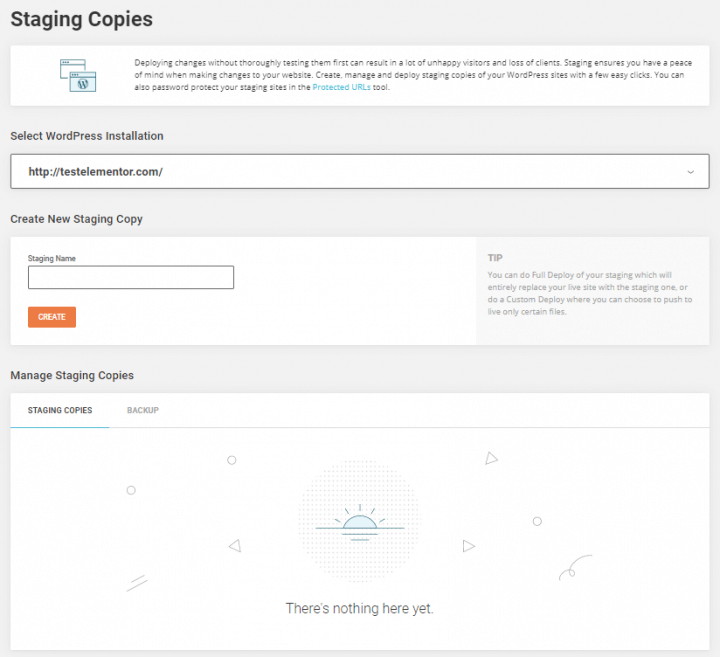
Add a password, then enter your login information.
Your copy is currently editable.
Once you're finished, you can head over to the SiteGrounds dashboard, publish your site by selecting Manage Staging Copies and then pressing the Push to Live button, and presto, your updated WordPress site is now live.
Stating Site With Plugin
Next, we'll explain how to establish a staging site using a plugin. It's important to note that, unlike the simpler one-click methods discussed earlier, this option is slightly more advanced and has a few drawbacks. Specifically, it offers limited control over the hosting server and stores the staging site on the plugin's servers, which raises concerns regarding privacy and data protection.
Let's delve into two staging plugins:
- WP Stagecoach
- WP Staging
WP Stagecoach

WP Stagecoach is a widely-used plugin for creating and deploying staging sites. The process becomes quite straightforward after installation.
- Upon installing the plugin, you can access it via your WP dashboard.
- You'll need to provide a username and a license key, typically found in the confirmation email or on the plugin's website within your account information.
- Now, navigate to WP Stagecoach in your WordPress dashboard and select "Ride the Stagecoach."
- Follow the guided wizard, which involves several steps to complete the staging site setup.
- Once finished, you'll receive a URL where you can preview the staging site and begin editing it.
- To make it live, you'll have to "Import Changes," as WP Stagecoach phrases it. This can be done by accessing WP Stagecoach from the WordPress dashboard and clicking on "Import Changes." The process may take a few minutes.
- After completion, you'll have the option to choose from three types of imports. Select the one you need and click "Import." Give it a moment, and you're all set.
WP Staging
WP Staging is another popular staging plugin at your disposal.
- Begin by installing the plugin.
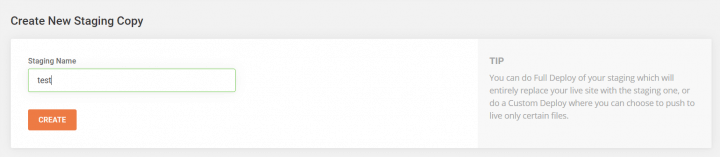
- Click on the "WP Staging" tab within your WordPress dashboard and choose "Create New Staging Site."
- Assign a name to the staging site and click "Start Cloning."
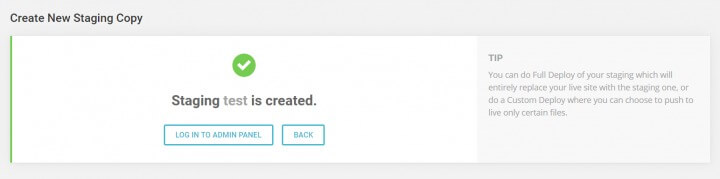
- The plugin will initiate the staging site creation process, and once it's done, you can access it following the provided instructions.
- You'll recognize the staging site by the orange admin bar at the top.
These steps will help you set up a staging site with either WP Stagecoach or WP Staging.
Make Stating Site Manually
This method is intended for more experienced users and requires some technical knowledge. However, it has a significant drawback: your website will be temporarily unavailable when you transfer changes from the staging site to the live one.
Here's how to do it:
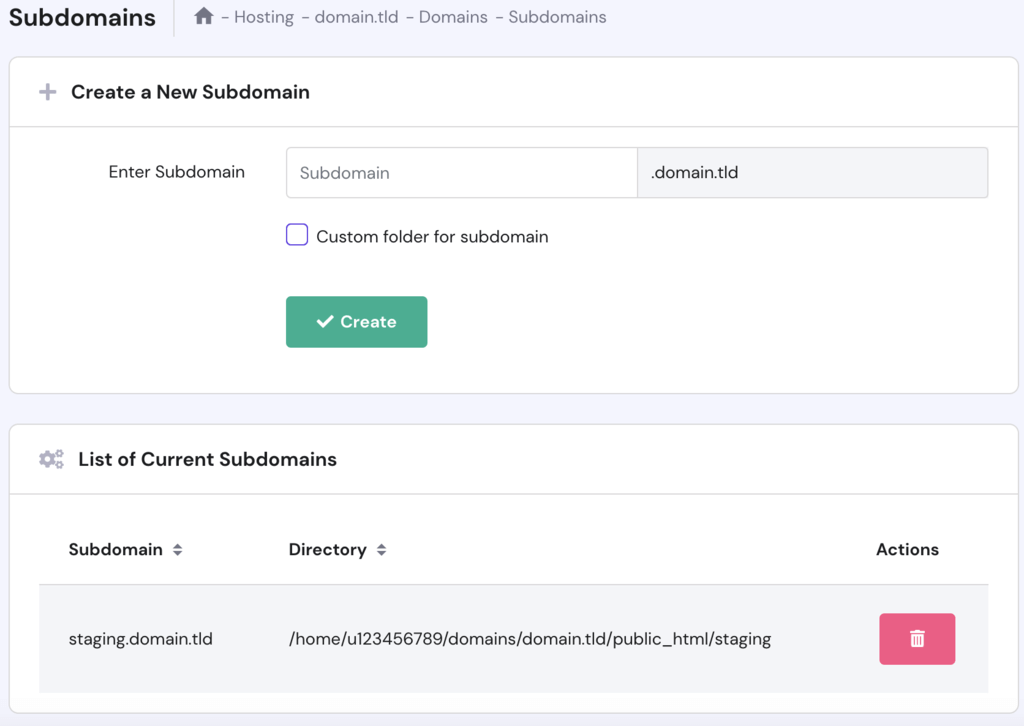
First, you'll need to establish a subdomain for the staging website. Go to your hosting account's dashboard and locate the Subdomains section, which is typically available with most hosting providers. Name your subdomain and click the Create button.
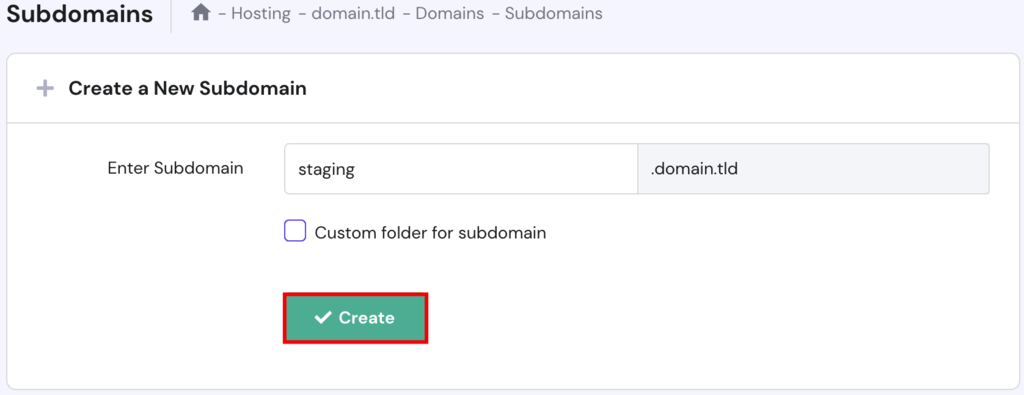
Your hosting provider's dashboard or control panel will then add the subdomain, and you'll see it listed.
The next step involves duplicating all the files from your WordPress site to the new subdomain.
To achieve this, you can choose to use either the File Manager or an FTP client, as the process is quite similar on both platforms. In this tutorial, we will demonstrate how to copy the live site files using the File Manager.
Here's how to do it:
- Begin by opening the hPanel and navigating to Files → File Manager.

- Once you're in the File Manager, locate the public_html directory of your website.
- Now, it's time to copy the files to a new location, specifically /public_html/staging/. To do this, select all the folders and files, excluding the staging folder, and then click on the Copy icon found on the top toolbar.

- After copying the files, select the staging folder and click the Copy option.
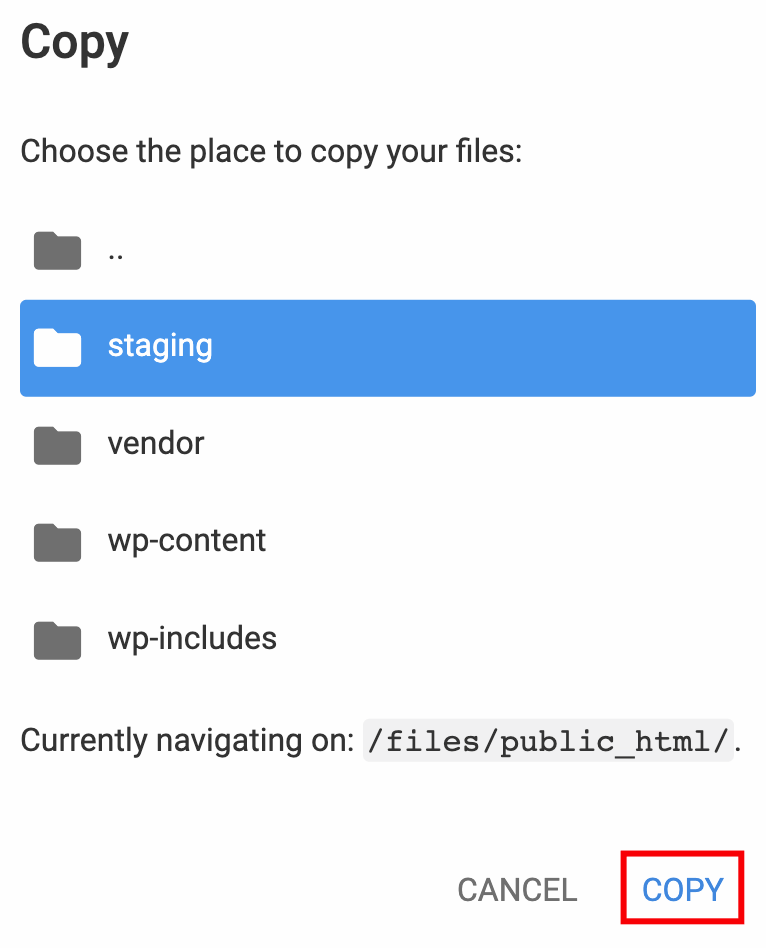
- As the copying process completes, you will be automatically redirected to the staging folder.
The next step involves copying the database from your live website. To accomplish this, follow these simple steps:
- Go to the WordPress → Dashboard section and identify which database your main website is using.

- Proceed to the Databases → MySQL Databases section and establish a new database for your staging website.

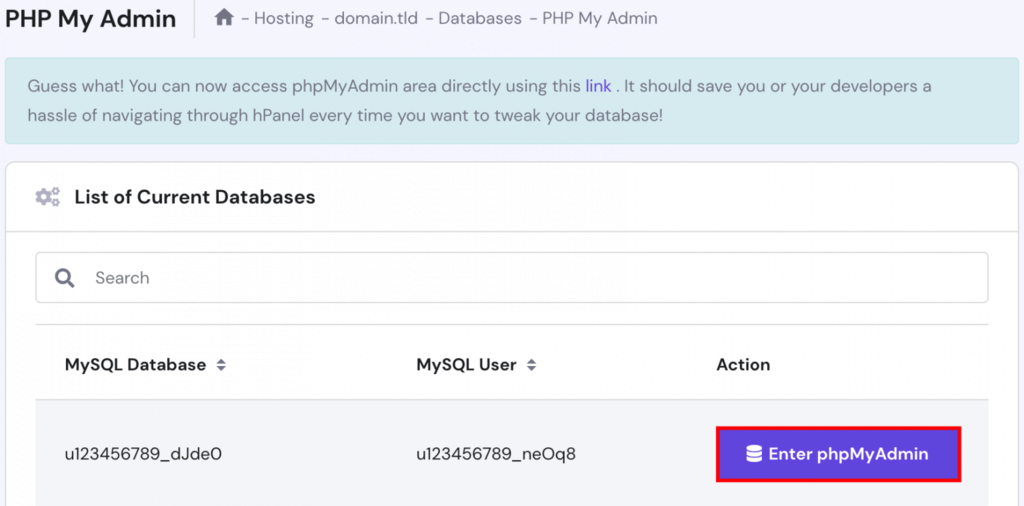
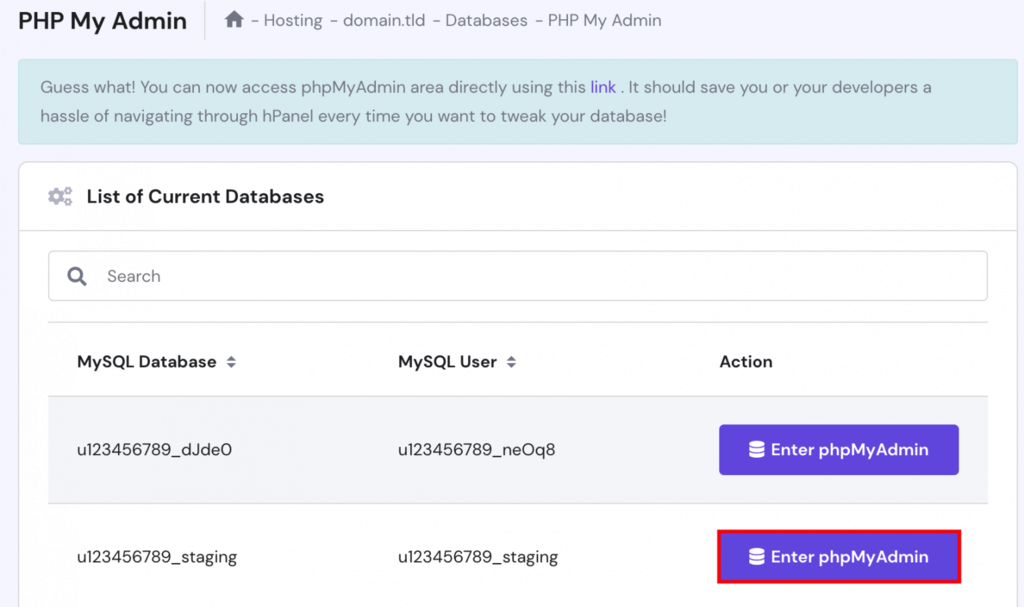
- Now, access the Databases → phpMyAdmin section and locate your live website's database, then click Enter phpMyAdmin.
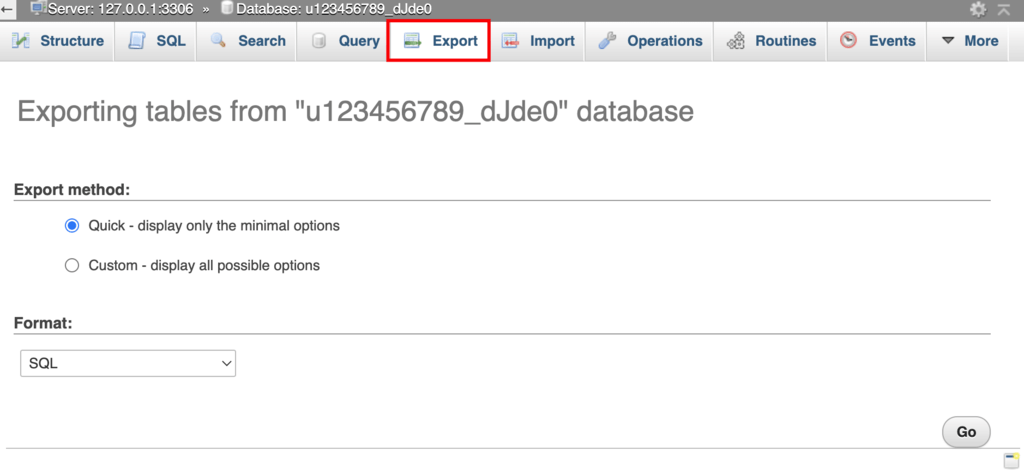
- In the phpMyAdmin interface, select Export and click Go to download the SQL file.
- Return to the Databases → phpMyAdmin section once more and click the Enter phpMyAdmin button corresponding to your staging database.
- Inside phpMyAdmin, opt for Import, pick the previously downloaded SQL file, and click Go to import the database.
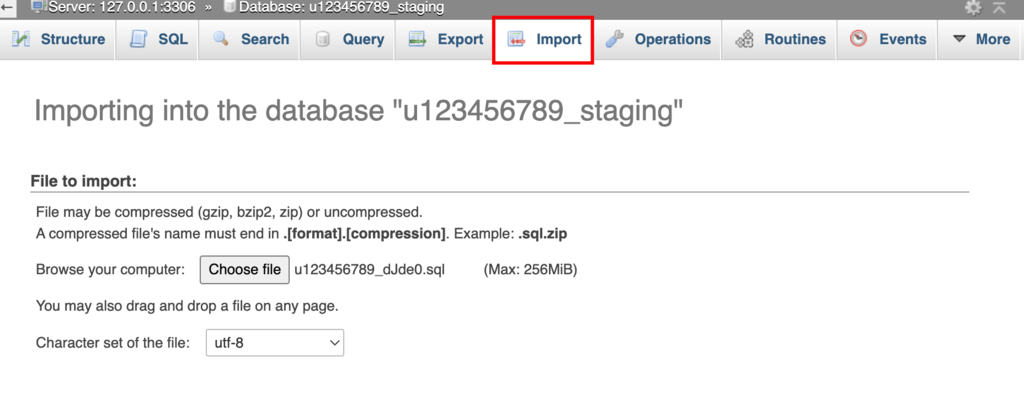
Within a short time, your database table will be appeared in phpMyAdmin.
Now, we need to configure the subdomains wp-config.php file.
Open the files public_html, staging, and wp-config.php in File Manager.
You can discover this information from your web host if you continue scrolling down until you see a line of code that says Database settings. then incorporate the code below:
define('WP_HOME','http://staging.domain.tld');
define('WP_SITEURL','http://staging.domain.tld');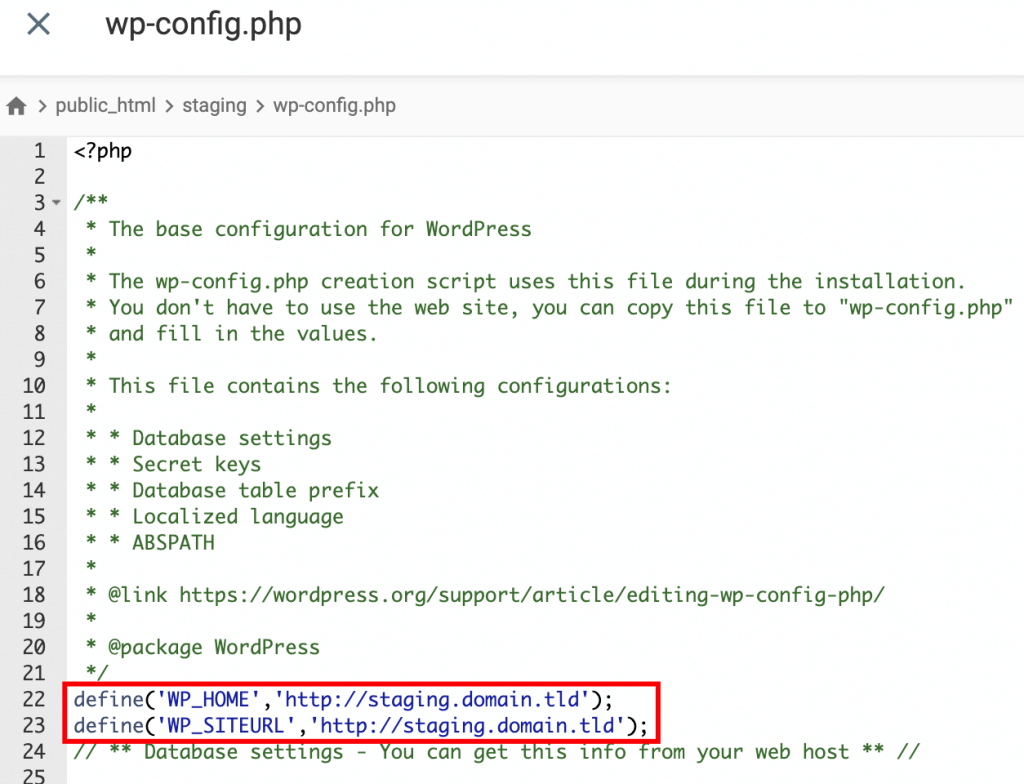
Make sure your staging subdomain is substituted for staging.domain.tld.
Find the lines with the DB_NAME, DB_USER, and DB_PASSWORD in the wp-config.php window by scrolling down. Then, modify the database name, username, and password to match those on your staging site. Save the changes after finishing.
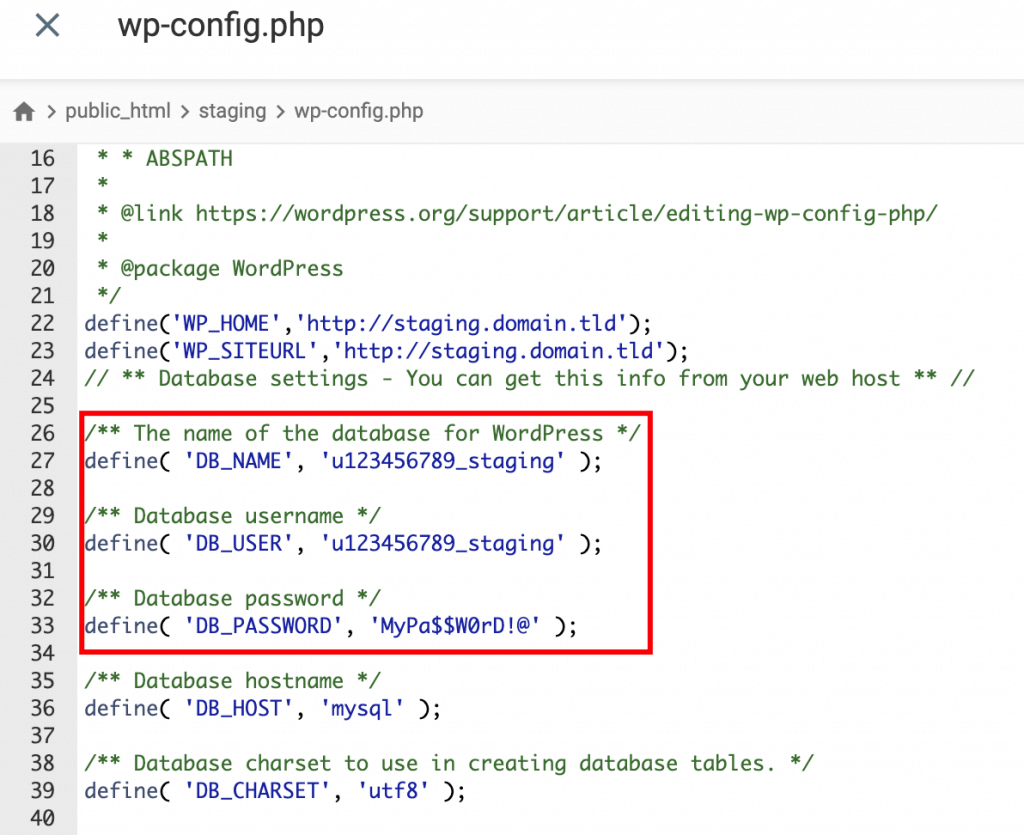
Your staging site is now good to go.
Wrapping Up
Creating a staging site is a smart way to tinker with your website without worrying about breaking it. Essentially, it's a duplicate of your site where you can experiment, troubleshoot issues, and tweak the design before making changes live.
With a staging site, you won't jeopardize your website's SEO or user experience. It's your testing ground, allowing you to make any adjustments you desire.
There are several methods to create a staging site. Using your hosting provider is the simplest and safest approach. Alternatively, you can explore various plugins that offer this service, though some may raise privacy concerns regarding data protection.
Lastly, you can manually set up a staging site via your local server. This method is more complex and comes with the drawback of temporarily making your site inaccessible while transferring changes from staging to the live site.


