
The latest version of WordPress is now out, and it includes a slew of new features. In a nutshell, WordPress 5.9 is the next step toward fully editable websites. However, what does this mean? What is complete site editing, and what can it be used for? We'll explain this in detail in this blog article and show you a few examples of WordPress websites that utilize complete site editing.
What Is Full Site Editing?
You may have heard the term "full site editing" floating around the WordPress community, but what exactly is it? To simplify, complete site editing refers to a collection of new WordPress features:
- Editing templates: This is where you may alter the appearance of your posts and pages.
- Editing your site: this allows you to customize the look of your blog, archives, or 404 page, as well as your site's header and footer.
- A new Styles interface: where you may customize colors, fonts, and spacing.
- A new type of theme: one that is completely changeable and constructed with blocks.
The common thread running across full site editing (FSE) is that all functionalities develop your website using blocks. Additionally, full site editing provides developers with new tools, including a new theme configuration file. Now, to fully utilize the new features included in WordPress version 5.9, you must activate a full site editing theme. Twenty Twenty-Two is an example of a complete site editing theme.
Thoughts Behind Full Site Editing?
People who use WordPress spend a lot of time making changes to the whole site. To put it simply, complete site editing enables you to extend the use of blocks for content creation to the rest of your website. In addition, to empower users and enable new levels of customization for areas of your website that were previously only modifiable through code or sophisticated settings. As a result, everyone who uses WordPress can now customize the appearance of their website and pages.
Create Amazing Websites
With the best free page builder Elementor
Start NowAdvantages Of Full Site Editing
The ability to change and preview your entire website in the editor is by far the most valuable perk. You can place blocks anywhere and change their style from a single interface. Full site editing provides a more comprehensive and consistent editing experience in this way. To change your site's title, menu, or widgets, you don't need to navigate to various administrative pages. Instead, you can carry out all of this work while still in the editor.
Additional advantages include predefined designs for pages (templates), site header and footer components, and block patterns. Simple dragging and dropping of block patterns allow you to construct your designs and save them as templates for future use.
Current State Of Full Site Editing
Since we've already discussed it, the most recent WordPress version is the next step toward site editing in its entirety. However, WordPress 5.9 includes a beta version of the new Site Editor is encouraging. WordPress 5.9 supports the brand-new Twenty Twenty-Two theme by default, and future updates are expected to include bug fixes and enhancements. In addition, it's comforting to know that the Gutenberg plugin isn't required for full site editing.
It takes a lot of work to modify a complete website. New blocks and block settings are included, which were not ready for WordPress 5.9. However, they are planned! There are several upcoming changes, including:
- New comment blocks have been added.
- Controls for spacing and placing blocks, and for selecting font families, have been streamlined.
- Authors of new posts are being blocked.
- The query block, which is used to display a list of posts, has more options (like your blog)
Better responsive controls and the option to create new category page templates are two things that are currently lacking.
How Does It Work?
The WordPress admin, the navigation screen, widgets, and the customizer are all missing when you activate a full site editing theme. As an alternative, WordPress provides a new editor where you may preview and modify your site. Block settings and Styles take the place of the customizer. You no longer need widgets because blocks may be placed wherever. A new navigation block replaces the menu system.
The Site Editor
When you open the new editor, the first page you'll see is your existing home page. The Site Editor navigation, Styles, and Settings sidebars are all optional for the editor. Instead, click on the WordPress or site symbol in the editor's upper left corner to bring up the site navigation:

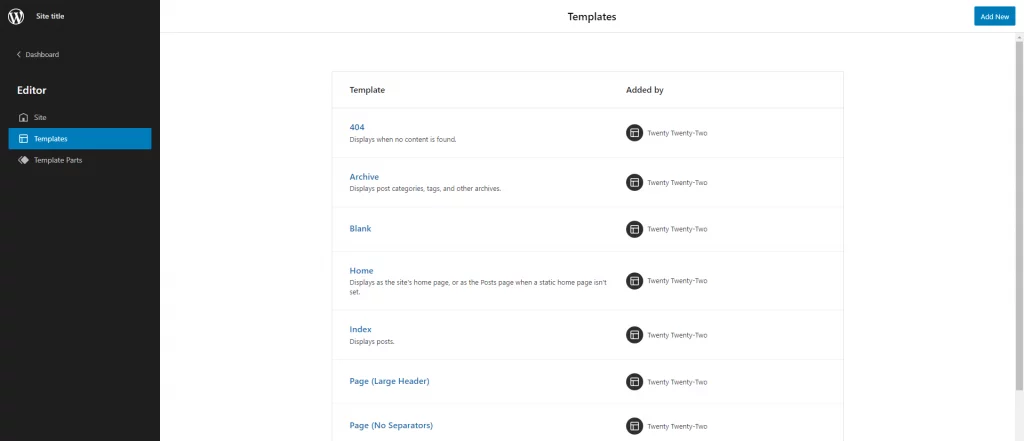
The choices Templates and Template Parts can be found in the editor's side navigation sidebar on the left-hand side. You may view and manage all of your templates and parts on a separate page by selecting one of those.
Site Header And Navigation
Setting up your website's menu is definitely one of the first things you'll want to do (s). Here's how to do that with full-site editing:
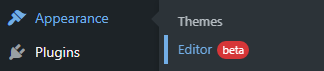
- To begin, go to the WordPress admin and select Editor (beta) from the Appearance menu.
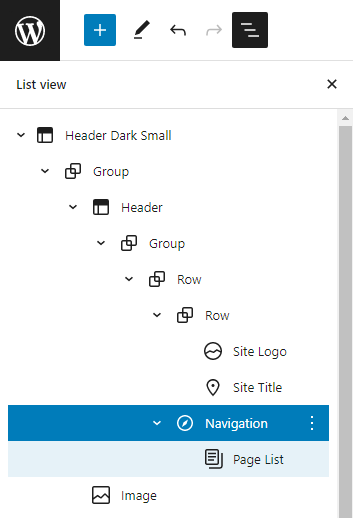
- You can choose to select the navigation block directly in the editor or from the list view. The list view displays a list of all the page's blocks. To access the list view, click the three-line icon in the top toolbar.
- To enlarge the list, click on Header. Then, choose the Navigation block by clicking on it.
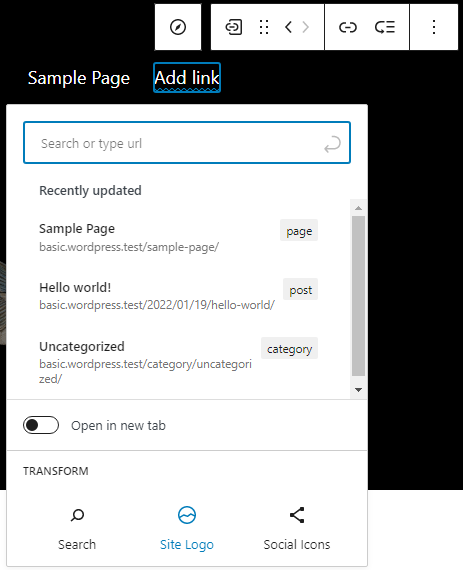
- You can now add new menu items by clicking the + symbol. You may look for a certain post or page, make new drafts, or even add a site logo, social icons, or a search form:
There are various stylistic possibilities for the navigation block. For example, you can modify the colors, the alignment, and the text size, as well as whether or not the navigation should collapse behind a menu button. You can also give your menu a unique name in the Advanced area.
When you're finished configuring your menu, don't forget to click Save. You will be asked if you want to keep the header and menu of your website. Save both and have a look at your website's beautiful new menu.
Changing Site Design Using Styles
To continue with our Twenty Twenty-Two theme example, this one has a black header on the main page, and the rest of the pages are white. Let's start by modifying the appearance of these sites. Assume you want the pages to have a dark background color.
- The first step is to launch the Editor from the WordPress admin's Appearance menu.
- To open the Styles sidebar, click on the black and white circle in the top bar, near the save button. Under Styles, you can customize the typography, colors, and spacing for the website and blocks.
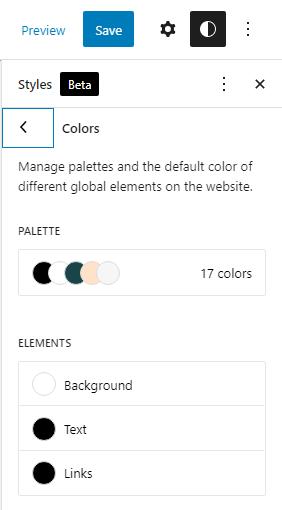
- Select Colors to modify the background color. This view displays the theme's color palette as well as a list of elements such as background, text, and links.
- Change the background color to black. In the editor, you can see how your color changes will look in real-time.
- You must also modify the text and link colors to make them readable: Return to the previous stage and repeat the process for text and links, but this time chooses white.
Changing Specific Blocks Look
As a result, a few fundamental elements on your pages can now be customized. For example, is it possible to change the appearance of individual blocks, such as the post title block?
- Open the Styles sidebar by clicking on the black and white circle on the top bar, near to the save button. Under the accompanying text in the Styles sidebar, click on Blocks: For the entire site, you can change the appearance of individual blocks.
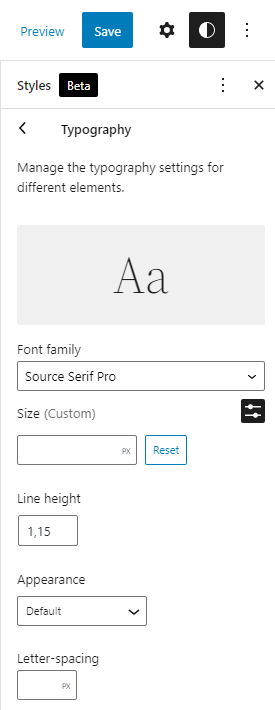
- Open the Typography panel by selecting the post title block.
- You can modify the font family, size, line height, appearance (bold or italic), and letter spacing for all post title blocks at once using this options panel. Play around with a few of the parameters and see how they affect the design in real-time.
- Save any changes you've made. You'll be prompted to save your customized styles: Confirmation is yours to make at this point.
How To Undo Things?
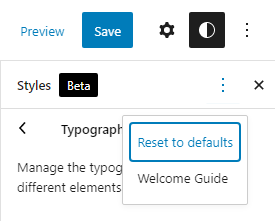
At any time, you can accomplish this. Styles toolbar: "Reset to defaults" under ellipsis menu "More Global Styles Actions."
Creating A Page Template With Sidebar
Templates can be created in the template editor for your articles and pages. If you want to get a sense of how this works, let's talk about developing a new sidebar template.
- Open the page in the block editor where you wish to add the sidebar. To create a new template, go to the page settings sidebar and select New from the Template section. Consider the term "Sidebar" for your new template.
- You'll see the template editor open in WordPress after that. From its dark grey border, you can tell this is the template editor.
- A new sidebar must be added by rearranging the current blocks. Using the list view to select and move blocks can be more convenient. Click on the three-line icon in the toolbar at the top to open the list view.
- Delete the blocks containing the site title, tagline, and separator from the editor's top row to begin. This is because you'll be using a preset header from the theme in their place.
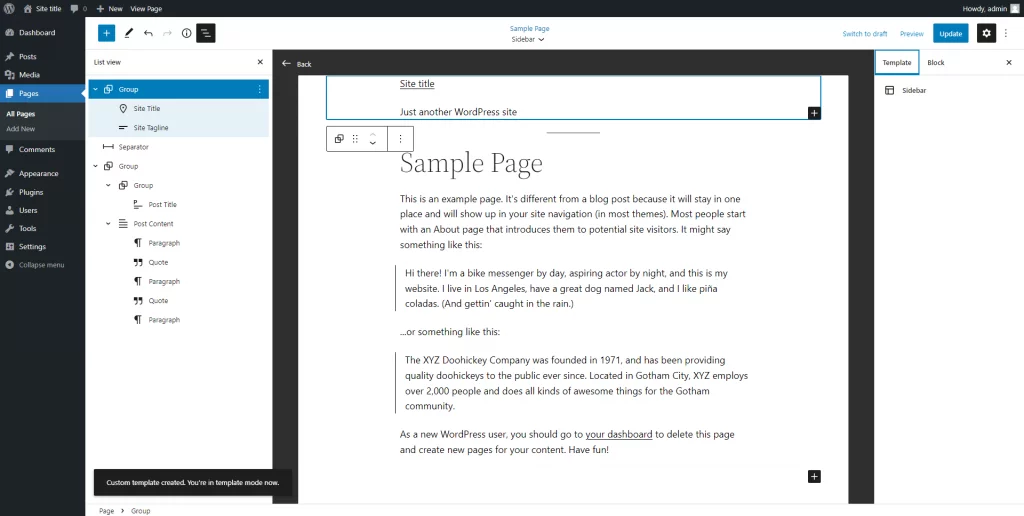
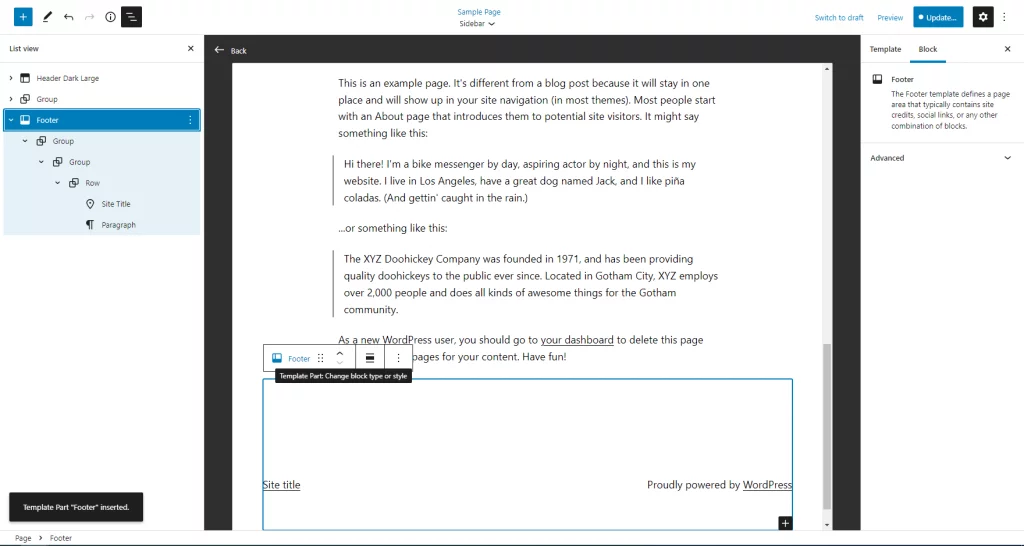
- Insert a template part block and select "Choose existing" from the drop-down list. Selecting a pre-made header is an option after that.

- Add a second template part for your footer at the bottom of the editor, just below the content.
- Before adding the columns block, make sure that your new header and footer are in place first. Decide on a section that sits halfway up and halfway down on your document's page.
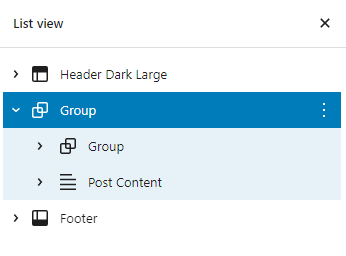
- Make use of a columns block in the group block. Your text and sidebar can benefit from a 70/30 split.
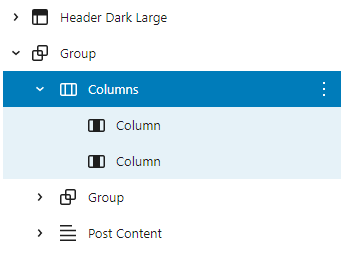
- Select the second Group block and the Post Content block in the list view, then drag all the content into a single, long row in the list view. This is what your page should look like at this point.
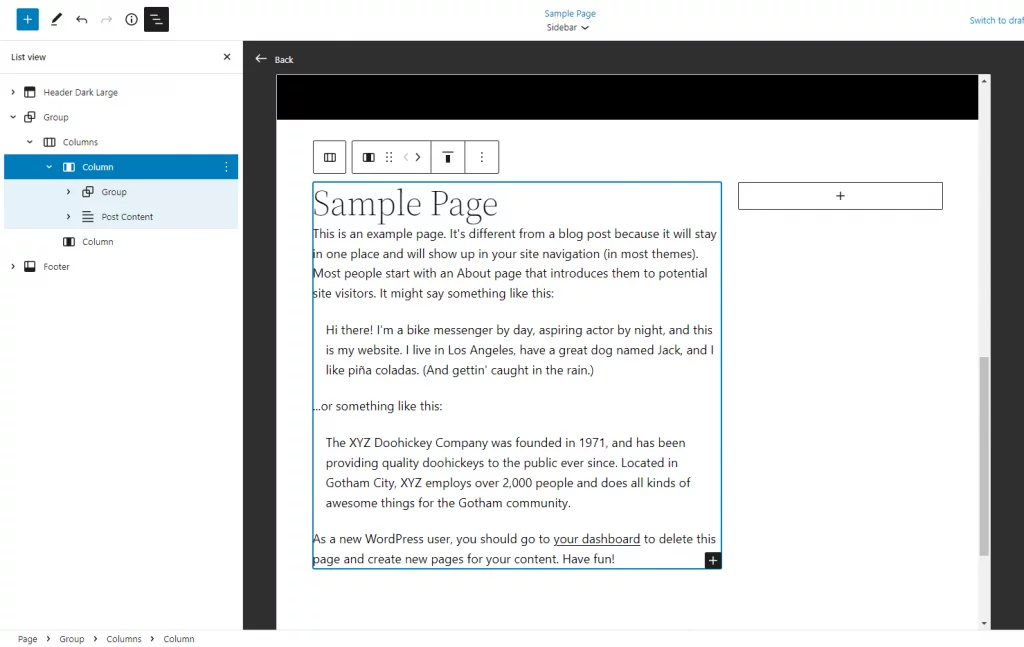
- You can use the narrow column to display blocks you want in your sidebar. This could include, for example, recent postings, the most recent comments, a brief bio of the page's creator, or even a photo gallery. Let your hair down and have fun with it. You can also experiment with various color schemes and font sizes..
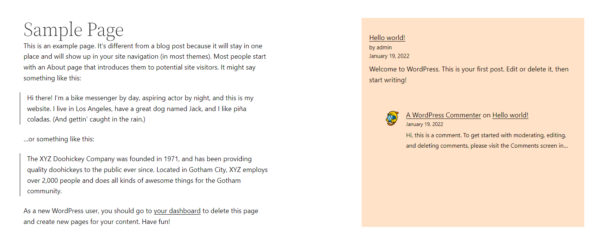
Make sure both templates and pages are saved before continuing. Custom templates can be reused on other pages if desired.
Website Example
So, are you looking for ideas or curious about the results you may expect when you use complete site editing? We've put up a list of websites that you can use as inspiration!
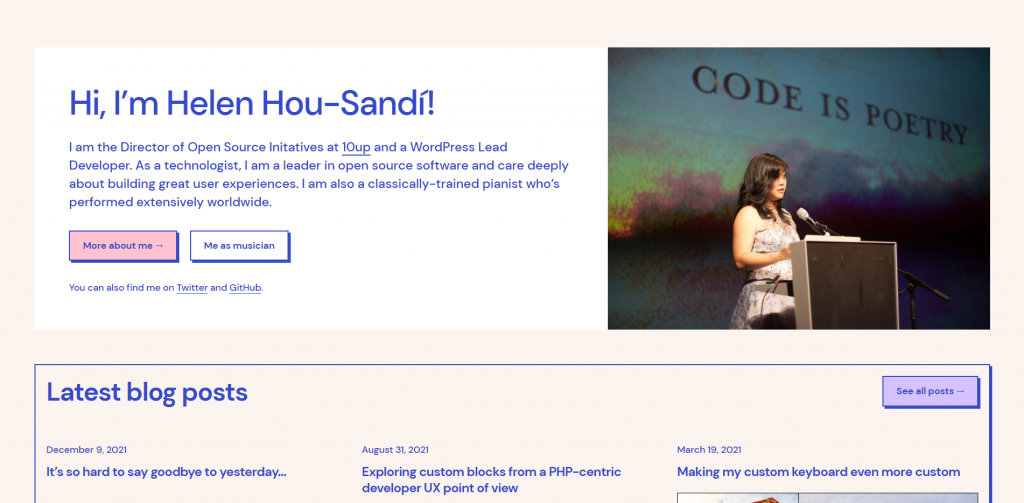
Here is a personal website example.
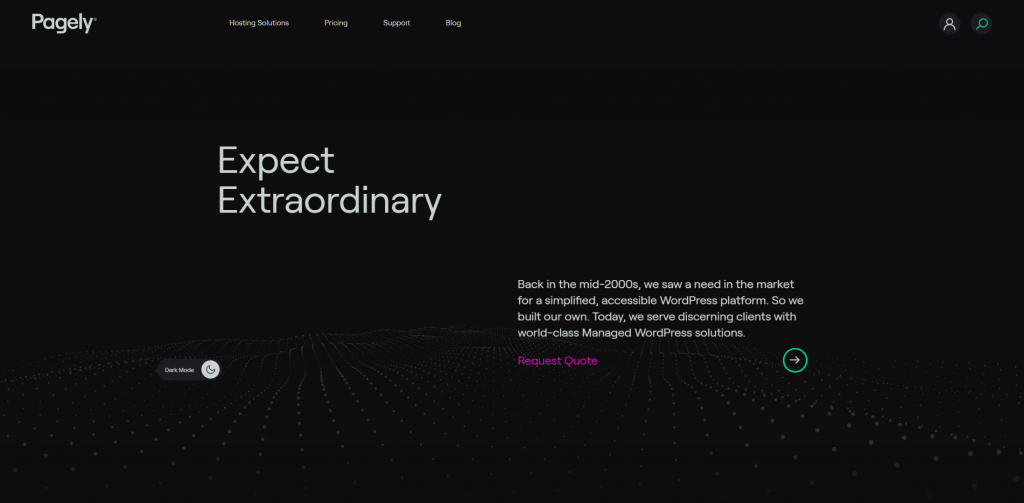
Look at what business websites look like in FSE.
Final Thoughts
Using blocks to manage and alter every aspect of your website can be a little intimidating at first. But we're here to tell you that the new customizability options far outweigh the bits that feel a little rough around the edges. There are many possibilities available to you now that we've covered in this post for making modifications to your website. For example, perhaps you'd like to update the footer text or relocate the site's logo? Full site editing simplifies this because you don't have to alter the theme's code.
However, take some time to think about the adjustments you make. Remember that these functionalities are optional and that you don't have to update the blocks that don't need any changes. Since you have complete control over the look and feel of the site, why not give it a shot and let us know what you think?


