
Are you interested in discovering how to include schema markup on your WordPress site without relying on plugins? Schema markup can significantly boost your website's Click Through Rate (CTR). A prime example of its effectiveness can be seen with Jobrapido, which introduced a Job Posting schema markup on their website and witnessed a remarkable 270% surge in new user registrations from organic traffic.In this article, we will guide you through the process of adding schema markup to your WordPress website without the need for plugins. Additionally, we will introduce you to a more efficient and straightforward method.

Should You Use a Plugin for Schema or Go Without One?
There are two methods to include schema markup on your WordPress website: one involves using a plugin, and the other doesn't. The latter method necessitates coding expertise, while the former does not. So, which approach is superior? It's generally advisable to employ a plugin for adding schema markup. The primary rationale behind this is that plugins are quicker and more straightforward to utilise. Additionally, they assist in ensuring the accuracy of the schema code.That's why we suggest utilising a robust SEO plugin to incorporate your schema markup.
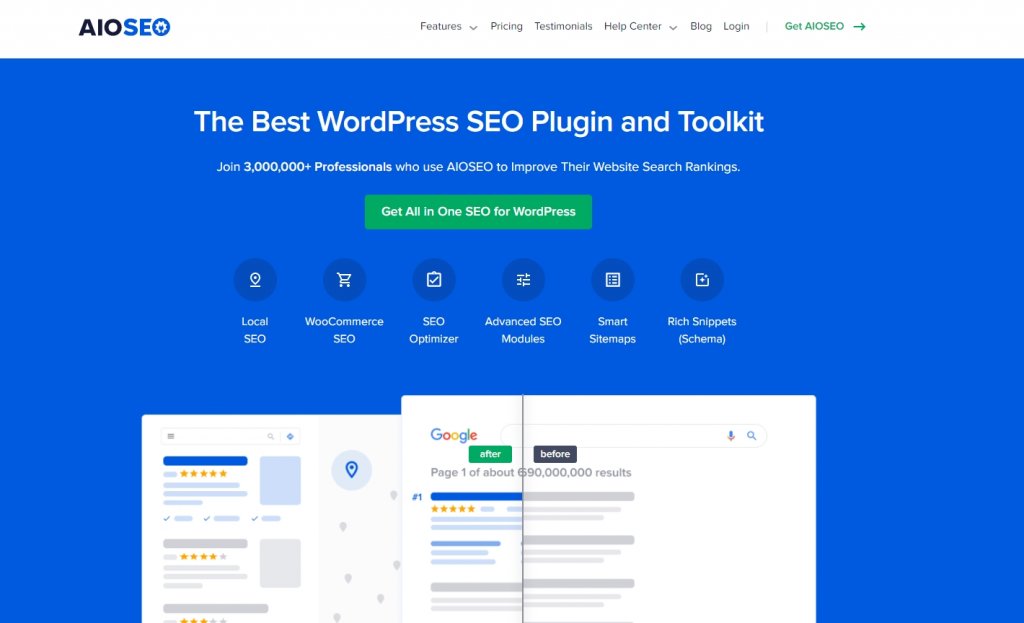
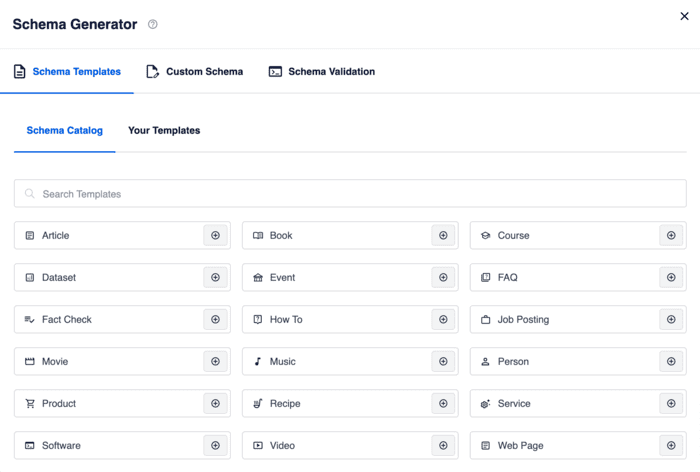
AIOSEO stands as a robust WordPress tool, relied upon by more than 3 million smart marketers for boosting their website rankings and attracting specific visitors. The plugin encompasses numerous potent SEO functions and modules, tailored to enhance your site's SEO performance, even if you lack coding expertise.Among its standout features, the Next-Gen Schema Generator shines brightly. This powerful tool simplifies the process of incorporating schema markup into your content. All it takes is selecting a schema type from their user-friendly Schema Catalogue.
Next, enter all the information required for the output schema.
Create Amazing Websites
With the best free page builder Elementor
Start Now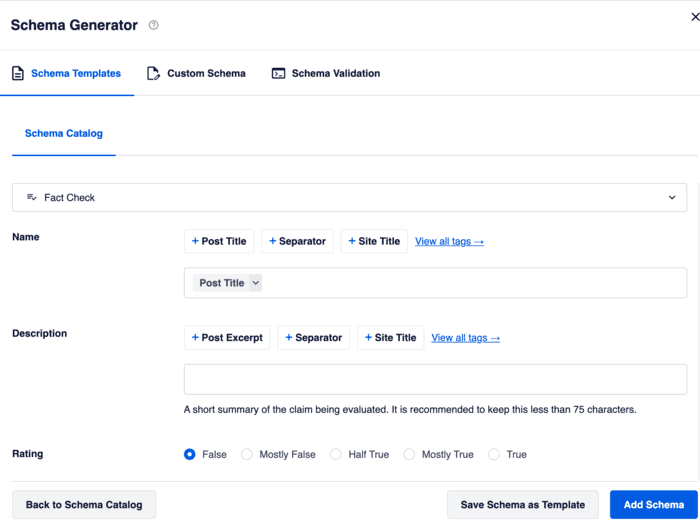
Once you've finished, simply click the "Add Schema" button – that's all there is to it!Alternatively, you can choose to save your schema as a template for future use on other posts or pages. This handy feature streamlines the process of adding schema to similar pages, making it both easy and swift.If the specific schema markup you need isn't available in their Schema Catalogue, don't worry. You can still add custom schema markup by clicking on the "Custom Schema" tab.For a detailed, no-code guide on how to implement schema markup on your WordPress site, you can refer to their tutorial on adding structured data in WordPress.Now, let's discuss why opting to add schema markup without a plugin might not be the best choice for your WordPress site:
- Complexity and Time-Consuming: Creating schema without an SEO plugin can be challenging and significantly more time-consuming. It also requires familiarity with PHP code.
- Incompatibility with Theme Updates: Editing theme files directly is not advisable, as any changes made will be lost when the theme updates.
- Theme Dependence: Custom code for schema markup may only work with a specific theme, limiting your ability to switch to a different WordPress theme.
- Missed SEO Features: Using a robust SEO plugin like AIOSEO provides access to powerful features, including the schema validator.
Advantages of Incorporating Schema Markup into WordPress
There are numerous advantages to incorporating schema markup into your WordPress website. For instance, you may have encountered attractive search results displaying star ratings and prices, as demonstrated in this example:

These are known as "rich snippets," and you obtain them by incorporating schema markup into your web pages. They provide clear information to users regarding a page's content and improve its appearance in search results.In simpler terms, major search engines such as Google, Bing, Yahoo, and Yandex use schema markup to display extra details in their search outcomes.
Furthermore, rich snippets can enhance your Click-Through Rate (CTR) because they make your content look more attractive when it appears in search engine results.Increased clicks will, in turn, eventually lead to higher rankings. This is a valuable method for enhancing your SEO and attracting more organic traffic.


Incorporating schema markup is an excellent method to enhance your website's search engine optimization, increase click-through rates (CTR), and attract more visitors to your site.
Rich Snippets Vs Schema Markup
Are rich snippets and schema markup the same?Not exactly! Although many people use these terms interchangeably, they have distinct meanings.Let's clarify the distinction between the two. In simple terms, rich snippets are meant for people, while schema markups are designed for search engine bots.Schema markup serves as a code that informs Google about the content of your webpage. Rich snippets, on the other hand, are the information snippets that Google displays in search results as a result of the schema markup.In summary, schema markup acts as a language that search engines utilise to comprehend your content, whereas rich snippets are the visual representations derived from schema markup.It's also known as structured data because it employs a code language recognized by major search engines.You can implement schema markup for various types of content, including:
- Articles
- Events
- Reviews
- Recipes
- Books
- Products
- FAQs
- And much more
As mentioned earlier, there are two methods to add schema markup to your WordPress site. The most convenient and effective approach is by using a robust WordPress SEO plugin like AIOSEO.The second method involves manual implementation without the use of a plugin, and that's precisely what we'll demonstrate in the following sections.
3 Methods for Incorporating Schema Markup into WordPress Without Using a Plugin
To begin, you can go to Schema.org to locate the markup you wish to include in your content.

We'll demonstrate how to include Article markup on your WordPress site. You can discover all the supported schema markups by search engines at Schema.org.These markups utilise three different code languages:
- Microdata
- RDFa
- JSON LD
We'll opt for JSON-LD because Google prefers it and it's less prone to causing issues with your site compared to other markups.With that in mind, let's explore how to add Article markup to your WordPress post or page using the block editor.
Block Editor
To begin, just log in to your WordPress Dashboard and go to the Post or Page where you'd like to apply schema markup.
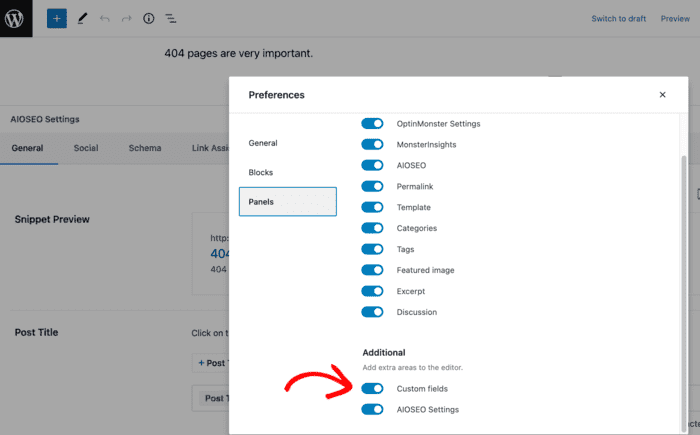
Now, you'll need to activate Custom Fields. To accomplish this, click on the three dots located in the upper right-hand corner. This action will reveal a new screen. Afterward, scroll down to the "Preferences" section and select "Panels."By doing so, a fresh window will appear, displaying various panel choices. Your task here is to tick the box labelled "Custom Fields."
You simply go back to the block editor after that and scroll to the bottom of your post or page to view the Custom Fields options.
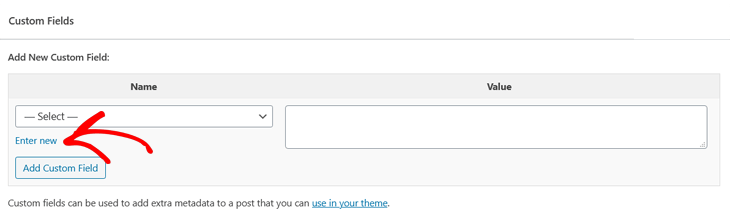
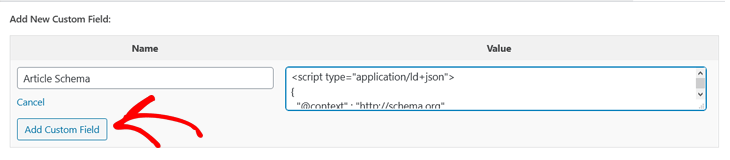
In the "Add New Custom Field" section, click on the "Enter new" tab.Now, you need to give your schema markup a name. In this instance, we've chosen to call it "Article Schema" as we will be adding markup for an article.
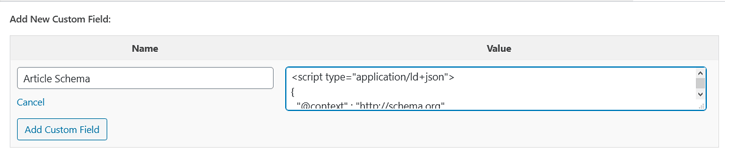
After you've given your markup a name, the next step is to copy the code snippet provided below and then paste it into the "Value" section. If you're not familiar with coding but want to use a different type of markup, you can rely on tools like the Google Structured Data Markup Helper or the JSON-LD Playground. These tools will generate the necessary code for you, even if you have no prior coding experience.
<script type="application/ld+json">
    {
      "@context": "https://schema.org",
      "@type": "NewsArticle",
      "mainEntityOfPage": {
        "@type": "WebPage",
        "@id": "https://google.com/article"
      },
      "headline": "Article headline",
      "image": [
        "https://example.com/photos/1x1/photo.jpg",
        "https://example.com/photos/4x3/photo.jpg",
        "https://example.com/photos/16x9/photo.jpg"
       ],
      "datePublished": "2015-02-05T08:00:00+08:00",
      "dateModified": "2015-02-05T09:20:00+08:00",
      "author": {
        "@type": "Person",
        "name": "John Doe"
      },
       "publisher": {
        "@type": "Organization",
        "name": "Google",
        "logo": {
          "@type": "ImageObject",
          "url": "https://google.com/logo.jpg"
        }
      }
    }
    </script>
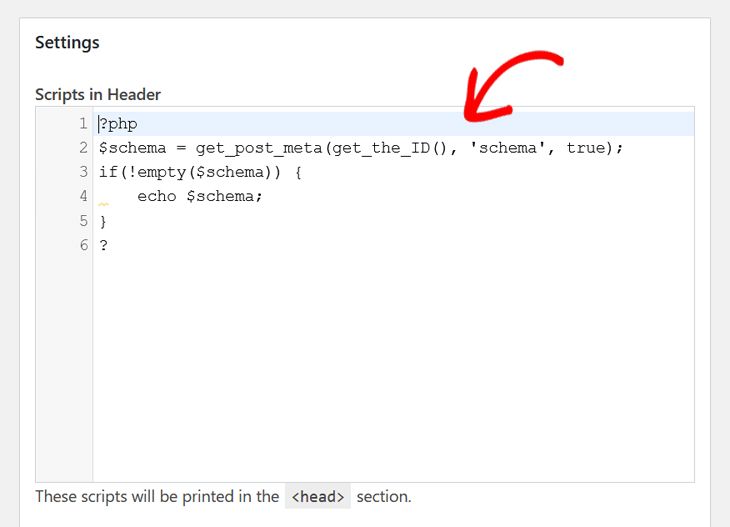
You're nearly done. The next step is to copy and paste the following code into your header.php file:
 <?php
$schema = get_post_meta(get_the_ID(), 'schema', true); if(!empty($schema)) { echo $schema;
}
 ?>
Next, we will demonstrate how to accomplish this.Important Note: It's crucial to be aware that even a single error while making changes to your theme files can potentially lead to your entire website going offline and displaying a blank page. Therefore, it's essential to always create a backup of your website before you begin.
Header.php File
The most reliable and secure choice is typically to employ a plugin for incorporating custom code and features into your website. We highly advise utilising the "Insert Headers and Footers" plugin specifically for WordPress.Before we demonstrate the process of directly modifying theme files, we will first illustrate how simple it is to insert your code snippet into the "header.php" file using the "Insert Headers and Footers" plugin.Once you've installed and activated the plugin, all you need to do is go to your WordPress Dashboard and select "Insert Headers and Footers" from the Settings menu.
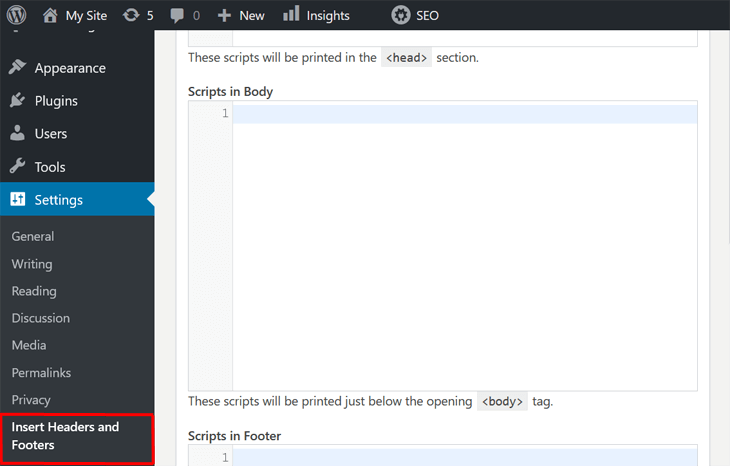
In this section, you'll find various sections where you can insert your code into your website's Header, Body, and Footer. Be sure to place your code snippet in the "Scripts in Header" section.
Simply click the Save button, and you're done!This couldn't be any simpler! What's even better is that it's much safer than directly editing the theme files.
Theme Files
With that in mind, let's proceed to learn how to insert the code snippet directly into the theme editor and the header.php file.Just navigate to "Appearance" » "Theme Editor" and select the "header.php" file under "Theme Files."
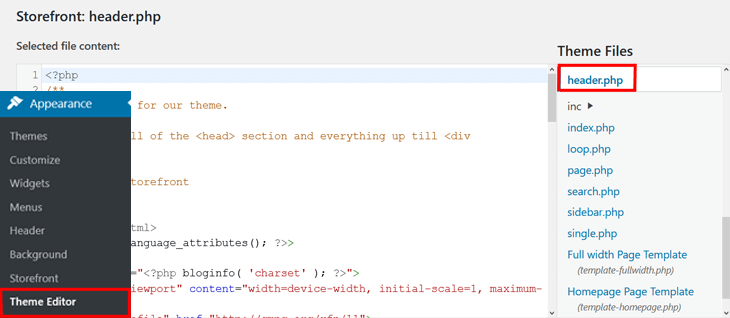
This action will launch a fresh window for you to modify the file.Next, simply insert the schema code into the file editor right before the </head> tag.
Now that you've learned how to add schema without a plugin, we'll introduce you to a simpler and more efficient method for applying schema markup to your WordPress site.That's all there is to it!You've successfully implemented schema markup in WordPress without the need for a plugin.
Wrapping Up
We've explored the exciting world of Schema Markup in WordPress, and you've learned how to harness its power without relying on plugins. By taking this manual approach, you've gained more control over your structured data, opening up possibilities for improved SEO, enhanced search engine visibility, and a better user experience.As you continue to refine your WordPress site and explore new ways to optimise it, keep in mind that Schema Markup is just one piece of the puzzle. Keep learning, experimenting, and adapting to the ever-evolving world of digital marketing and SEO via tools like AIOSEO.
Your dedication to mastering these essential elements will undoubtedly pay off, ensuring your website stands out in the competitive online landscape.Thank you for joining us on this journey through Schema Markup in WordPress. We hope this guide has empowered you to take control of your website's structured data and set it on a path to greater success. Happy optimising!


