
Have you ever wished you could add voice search to your WordPress site and make it easier for your visitors to find what they are looking for easily? Do you feel like voice search is the future of web browsing, but you don’t know how to implement it on your own site?

Are you worried that voice search is too complicated or expensive to set up, and that you need to hire a professional developer to do it for you?
If you answered yes to any of these questions, then this blog post is for you. In this post, I will show you how to add voice search to WordPress in a few simple steps, without any coding or technical skills required.
You will learn how to use a free plugin that will enable voice search on your site, and how to customize it to suit your needs and preferences.
Create Amazing Websites
With the best free page builder Elementor
Start NowYou're probably familiar with voice search if you use Siri, Google, or Cortana. But that's just the tip of the iceberg. The voice recognition technology market is expected to be worth $50 billion by 2029. As a result, you may wonder, "How do I add voice search to my website?"
While voice search may appear to be complicated, adding this functionality to your WordPress site is actually rather simple. You will improve your User Experience (UX) and make your website more accessible as a result.
By the end of this post, you will be able to offer your visitors a fast and convenient way to search your site using their voice and improve their user experience and engagement.
Are you ready to add voice search to WordPress and take your site to the next level? Then let’s begin.
Why Add Voice Search to Your Website?
Adding voice search to your WordPress website can have many benefits for your site and your users.

Here are some of the reasons why you should consider adding voice search to your WordPress site:
- Voice search can improve user experience and satisfaction:
Voice search is a fast, convenient, and natural way of searching the web, especially on mobile devices. Users can simply speak their queries instead of typing them, which can save time and effort. Voice search can also provide more accurate and relevant results, as users tend to use longer and more specific phrases when speaking than when typing. Voice search can also make your site more accessible and inclusive for users who have visual impairments, dyslexia, or other disabilities that make typing difficult. - Voice search can increase traffic and conversions:
Voice search is becoming more popular and prevalent, especially among younger generations and smart speaker owners.
By optimizing your site for voice search, you can reach more potential customers and increase your visibility and ranking on search engines. Voice search can also help you generate more sales and revenue, as voice shoppers tend to be more impulsive and loyal than text shoppers.
Voice search can also enable cross-selling and upselling opportunities, as you can provide voice recommendations and offers to your users. - Voice search can give you a competitive edge:
Voice search is still a relatively new and emerging technology and not many websites have fully embraced it yet.
By adding voice search to your WordPress site, you can stand out from your competitors and show that you are innovative and customer-oriented. You can also gain insights into your users’ preferences, behaviors, and feedback by analyzing their voice queries and responses.
How to Add Voice Search to Your WordPress Website
There are two steps we will follow to add voice search to our website;
- Step 1: Add a search widget to your site
- Step 2: Install and activate the Voice Search plugin
Step 1: Add a search widget to your site
Before you begin using voice search, you should ensure that your website has an active search widget. Your theme determines which widgets are available on your site, and most themes include a search widget in a location such as the header, footer, or sidebar.
If you don't currently have a search widget, you may easily create one. If you're using a traditional theme, you can do this via the WordPress Customizer or the Widgets area of your website.
Go to Appearance > Widgets in your WordPress dashboard to access your WordPress widgets. Then, choose a widget place, such as your footer, and click the Add symbol. Now, add the Search widget:
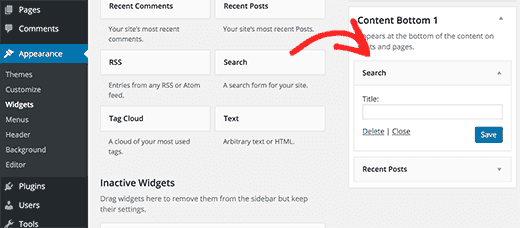
Click on Save to Save your changes.
It's also worth noting that you can include a search widget on any post or page on your website. However, it is usually ideal to add it to a widget area so that the search is accessible from all of your web pages.
Step 2: Install and activate the Voice Search plugin
You may be thinking, "How do I add voice search to my website?" now that you have an active search widget on your site. The simplest method to accomplish this is to make use of a plugin.
One of the most basic voice search plugins available is Voice Search. It is perfect for even total beginners because there are no complex processes or configuration settings:
Once the plugin is activated on your website, the voice search function operates automatically. However, the tool is currently only supported by Google Chrome (on mobile and desktop).
To begin, go to Plugins > Add New and search for "voice search." It's the first option you see here:
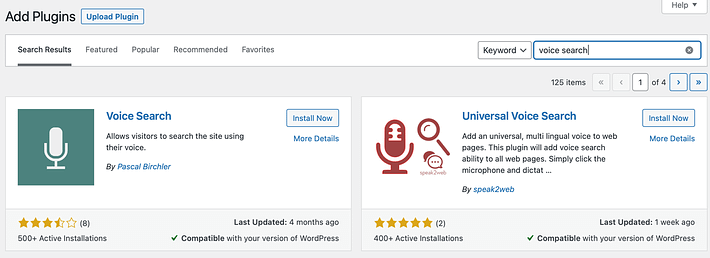
Go ahead and click the Install Now button. Then click Activate.
That's the end of it. So, at this point, your website should be fully prepared for voice search.
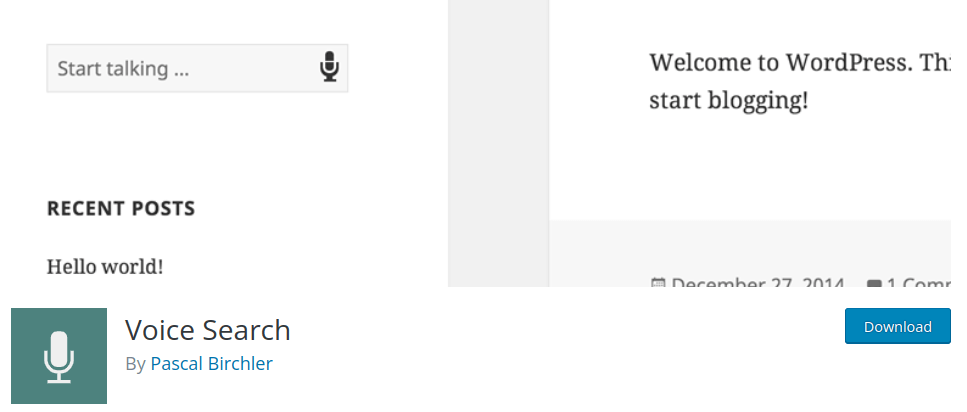
Visit the front end of your website to check if the voice search is active.

That's the voice search icon that appears in the search field which indicates the voice search function is working.
How to Improve Your Voice Search Experience
Despite the fact that voice search is now available on your WordPress website, you may want to take some further measures to optimize your content for voice search. For example, adding structured data markup can assist search engines in better understanding your material.
This will not help your voice search SEO directly. The Speakable feature (which is still in development) allows you to mark specific paragraphs as voice-friendly, which can help your search results. The complete article URL will also be sent to the user's mobile device via the Google Assistant app.
You can also strive to have your material appear in Google's Rich Snippets. When it comes to this, there is no set formula. You can, however, boost your chances by writing content in various parts that include essential information.
To accomplish this, divide the text into paragraphs, each answering a specific question. You can also put numerous lists beneath distinct headers or sub-headings. Meanwhile, consider utilizing bold or italic fonts to accentuate specific sections of material.
Conclusion
You have reached the end of this blog post, and you have learned how to add voice search to WordPress using the Voice Search plugin. You have also learned about the benefits of voice search for your website and your users.
Adding voice search to WordPress is easier than you think, and it can make a huge difference for your site and your users.
Think about it: Voice search can improve user experience and satisfaction, increase traffic and conversions, and give you a competitive edge. Voice search can also help you reach more potential customers and increase your revenue. Voice search can also make your site more accessible and inclusive for users who have disabilities or prefer speaking over typing.
All of these benefits are within your reach if you decide to add voice search to your website today.


