
Do you hate seeing dates in your WordPress URLs? Do you feel like they make your website look outdated, cluttered, and unprofessional? You’re not alone. Many WordPress developers struggle with this issue and wonder how to get rid of those annoying numbers.

But don’t worry, there is a way to remove the date from WordPress URLs without breaking your site or losing your SEO rankings. It’s actually quite simple and only takes a few minutes to do. And once you do it, you’ll be amazed by how much cleaner and sleeker your website looks.
In this blog post, I’ll show you how to remove the date from WordPress URLs. You’ll also learn why you might want to do this and what benefits it can bring to your website. Ready to get started? Let’s begin.
Why Dates may Appear as Part of your WordPress URLs?
Dates appear in WordPress URLs because WordPress uses a default permalink structure that includes the year, month, and day of the post. This is done to make the URLs more descriptive and informative for the visitors and the search engines.
Create Amazing Websites
With the best free page builder Elementor
Start NowNote: A permalink structure is the way that a website creates and formats the URLs of its pages.
However, some WordPress users may not like this permalink structure and may want to change it to something else. For example, they may want to use the post name, the category, or a custom keyword as the URL.
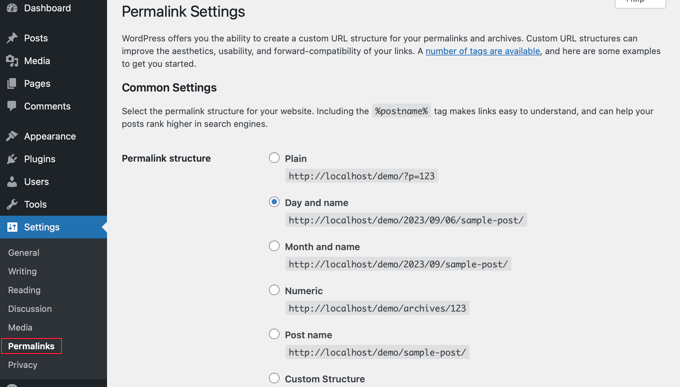
Fortunately, you can quickly replace these default links with more useful and search engine-friendly ones by visiting the WordPress Settings » Permalinks page.
This can make the URLs more user-friendly and SEO-friendly.
What to Consider Before Removing the Date From WordPress URLs
It is safe to delete the date from WordPress URLs if you are creating a new website or blog and haven't launched it yet.
But if your website has been up for a while, there are a few things you need to be aware of.
Both users and search engines may receive 404 errors if the URL structure is changed. This implies that your Google Search Console reports may contain errors and warnings.
Furthermore, since backlinks to your older articles may now result in 404 errors, your search engine results might be impacted.
Redirects can be used to resolve both of these problems; we'll go through how to do that later in this post.
How to Remove Date from URL
You must first make a full backup of your website using WordPress. This will enable you to roll back your website to a previous version in the event that things don't go according to plan.
To start with, go to Settings » Permalinks from your WordPress Dashboard, and from there you will see various permalink structures from which you can choose.
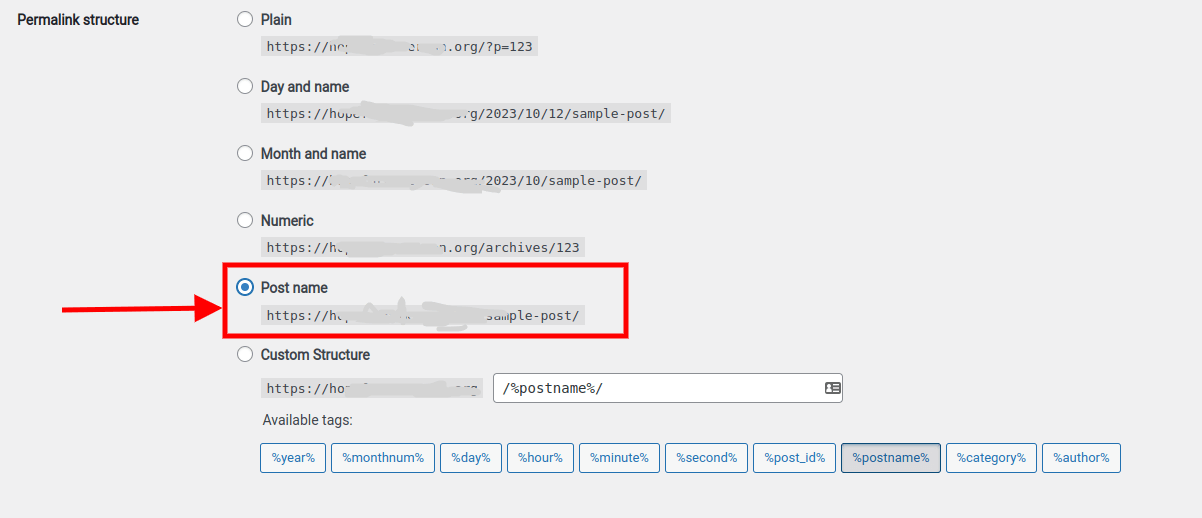
In this tutorial, we will choose the Post name.
Why Post name Permalink?
A post name permalink is a type of permalink structure that uses the title of the post as the URL. For example, if your post title is “How to Remove the Date From WordPress URLs”, your post name permalink would be something like; https://www.example.com/how-to-remove-the-date-from-wordpress-urls.
Post-name permalinks are popular because they are simple, descriptive, and SEO-friendly. They make it easy for users and search engines to understand what your post is about and to share it with others. They also help to avoid duplicate content issues and improve your site performance.
Setting Up Redirects and Preventing 404 Errors
After deleting the date from your WordPress URLs, you must configure the correct 301 redirects. This will, as we mentioned, prevent your users from receiving 404 error messages when they click on an outdated link.
Users won't see a 404 error when they are sent to the updated URLs by these redirects. This will also assist search engines in recognizing that you have migrated the old URLs to the new URLs.
We'll go through two techniques for setting up 301 redirects in WordPress:
- Using AIOSEO to set up redirects (Recommended)
- Using Redirection to set up redirects (Free)
Method 1: Using AIOSEO to set up redirects (Recommended)
Using the All in One SEO (AIOSEO) plugin is the most effective technique to set up redirects. This is due to the robust Redirection Manager tool it has, which enables you to set automatic redirects, whole site redirection, 404 error tracking, and bulk 301 redirects among other things.
Note: In order to use the redirection manager, AIOSEO Pro is required. AIOSEO is also available for free, however, it lacks 301 redirects.
First, you need to install and configure the AIOSEO Pro plugin on your website.
You must click the "Activate Redirects" button in your WordPress dashboard after the plugin is activated by going to All in One SEO » Redirects.
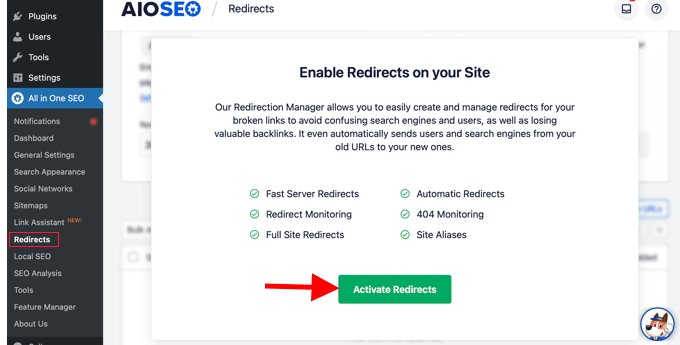
After activating the plugin, All in One SEO will display the "Redirects" tab, where you may add your first redirect.
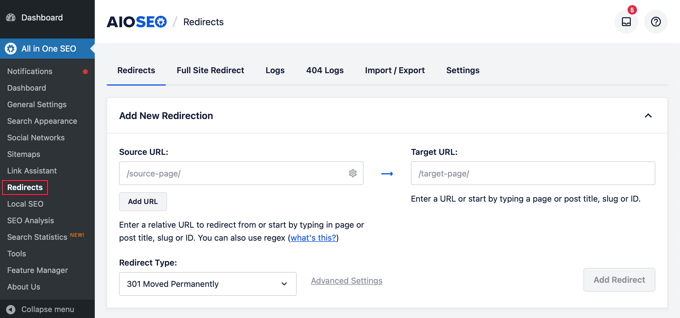
There are settings on this page where you can input a "Source URL" and a "Target URL."
The new post URL permalink you need to redirect to is described by the target URL, while the source URL will describe the previous URL permalink structure.e, you must navigate to the WordPress dashboard » All in One SEO » Redirects and select the "Activate Redirects" option.
We will use regular expressions, or Regex, to accomplish this. Regular expressions offer a strong and adaptable method for manipulating and searching particular character patterns. They will be used to ensure that the URLs we need to reroute fit the permalink pattern.
The following Regex expressions must be entered into the source and target fields if you were previously utilizing "Day and name" permalinks:
- Source URL:
^/(\d*)/(\d*)/(\d*)/([A-Za-z0-9-*]) - Target URL:
/$4
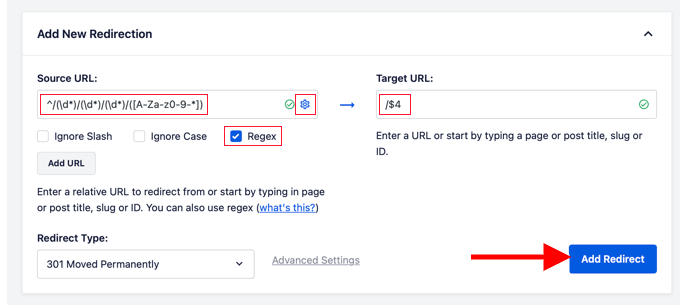
In order to see the three checkboxes, you must additionally click the cog symbol that appears next to the source URL. Verify that the "Regex" box is the only one checked. Regular expressions in the source and destination fields will be enabled by selecting this option.
On the other hand, if you were utilizing "Month and name" permalinks, you will need to substitute these Regex values:
- Source URL:
^/(\d*)/(\d*)/([A-Za-z0-9-*]) - Target URL:
/$3
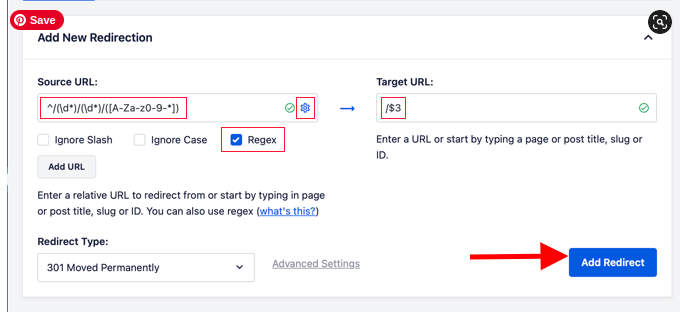
Make sure the Redirect Type is "301 Moved Permanently" after adding the source and target URL values, and then click the "Add Redirect" button.
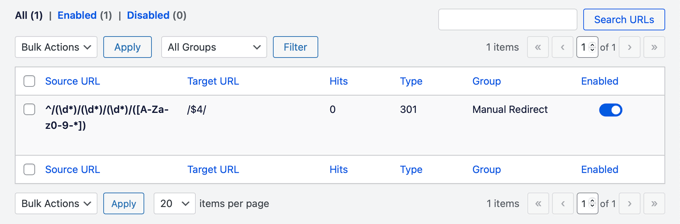
It will build your redirect. By using the new name-based URL, users will be immediately redirected to the proper content in case they click on a link that still utilizes your old permalink structure.
If you scroll down to the logs section, you can see your redirect. The 'Hits' column shows you how many website visitors were rerouted, and the 'Enabled' toggle allows you to turn on or off the redirect.
Method 2: Using Redirection to set up redirects (Free)
If you would rather use a free plugin, you can use our second approach.
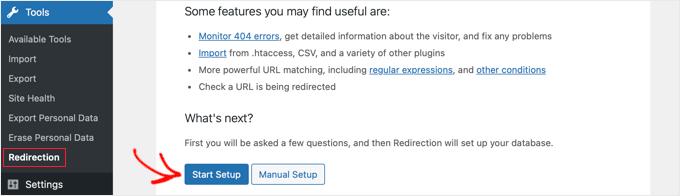
Installing and turning on the Redirection plugin is the first step.
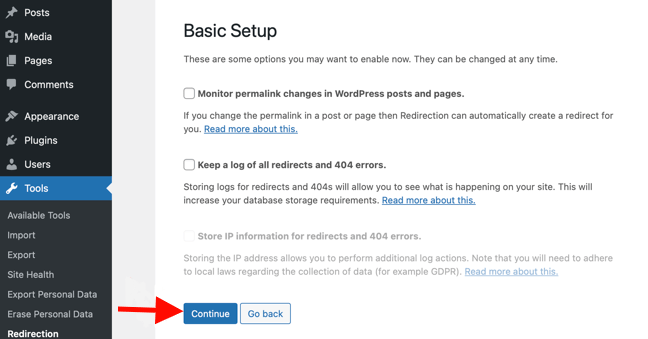
After activation, you must select the 'Start Setup' button by going to Tools » Redirection.
After that, the plugin will present you with a few choices. It can automatically track redirects and notify you if the URL of a post is altered.
Clicking "Continue" is also an option if you leave both of these boxes empty.
After the plugin has completed a few tests, you can click the "Finish Setup" and "Ready to begin!" buttons if everything appears to be in order. The WordPress database will hold the plugin settings.
The settings page for the plugin will now appear. From here, you can either scroll down to the "Add new redirection" area or click the "Add New" button at the top of the page.
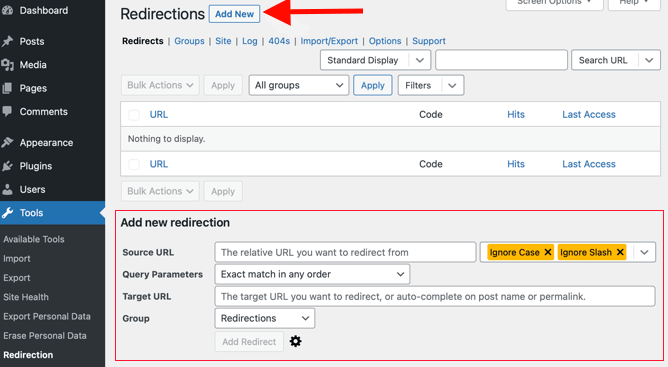
A form with fields labeled "Source URL" and "Target URL" will appear. The old URL structure will be described by the source URL, and the new URLs will be described by the target URL.
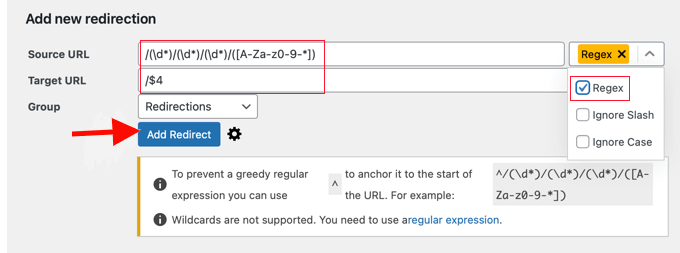
The following values would be entered in the source and target fields if you were utilizing the "Day and name" permalinks:
- Source URL:
/(\d*)/(\d*)/(\d*)/([A-Za-z0-9-*]) - Target URL:
/$4
In the event that you choose to use "Month and name" permalinks, you will input the following values:
- Source URL:
/(\d*)/(\d*)/([A-Za-z0-9-*]) - Target URL:
/$3
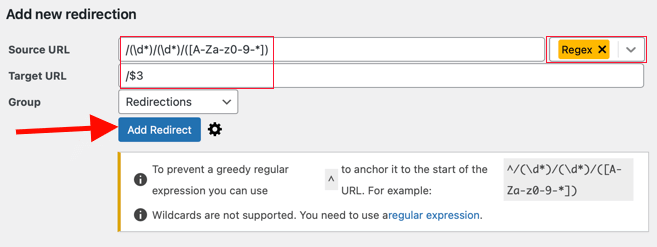
Remember to choose "Regex" from the drop-down menu before clicking "Add Redirect" to apply your modifications.
Users will now be redirected to your new name-based URLs by the plugin.
Conclusion
Congratulations! You have successfully removed the date from WordPress URLs. You should be proud of yourself for taking this step and improving your website.
You may have felt frustrated, confused, or overwhelmed by this issue before. You may have thought that it was too hard or too risky to change your permalink structure. You may have wondered if it was worth it or not.
But you didn’t give up. You followed the instructions in this article and learned how to remove the date from WordPress URLs and set up redirects in case of faults. You also learned why you might want to do this and what benefits it can bring to your website.
Now you can enjoy a cleaner, sleeker, and more professional-looking website. You can also boost your SEO rankings, increase your traffic, and enhance your user experience. You can also avoid duplicate content issues and improve your site performance.


