
If you're using Elementor to design your WordPress website, you may have noticed that wrapping text around featured images can be a bit of a challenge. But don't worry, in this tutorial, we've got you covered! In this post, we'll show you exactly how to wrap text around featured images in Elementor and ensure everything remains fully dynamic. Although there isn't a straightforward way to do this directly, we'll guide you through the necessary steps to get it done easily. So, whether you're a seasoned web developer or a beginner, keep reading to learn how to make your featured images stand out on your website with wrapped text.

Generate Shortcode
To dynamically wrap the featured image around the post text content, it is necessary for them to be on the same DOM level. Thus, we are employing PHP to generate a shortcode that sequentially outputs the image followed by the post content.
To implement this functionality, please create a new snippet in the Code Snippets plugin or include the code in your child theme's functions.php file.
function elementhow_featured_image_shortcode() {
global $post;
$featured_image = get_the_post_thumbnail($post->ID, 'full', array('class' => 'wrapped-feature-image'));
$content = $featured_image . apply_filters('the_content', $post->post_content);
return $content;
}
add_shortcode('wrapped_featured_image', 'elementhow_featured_image_shortcode');
now rename the code snippet as you want. I am renaming it as -
Create Amazing Websites
With the best free page builder Elementor
Start Now[wrapped_featured_image] : feature image + post content shortcode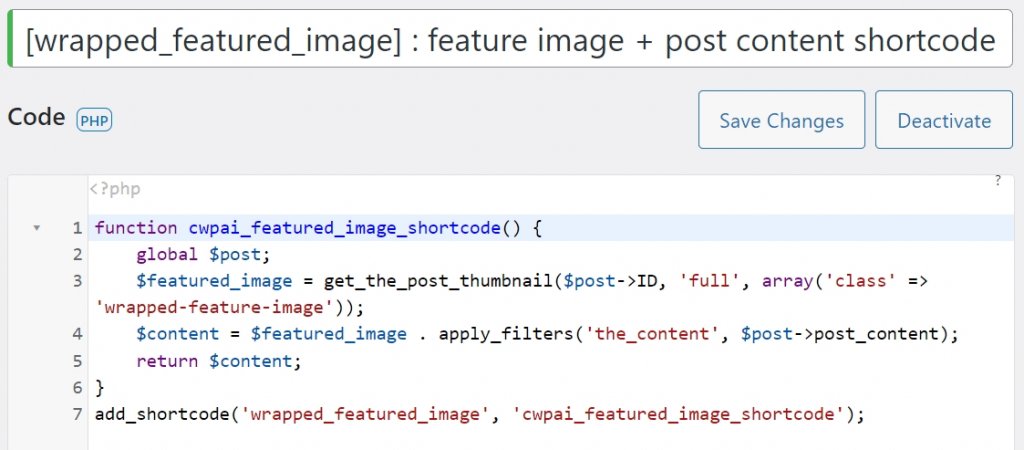
Here [wrapped_featured_image] is the name of the shortcode and once you are done with the code, click activate to make the code operational.
Elementor Settings
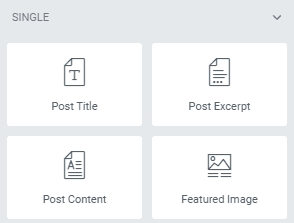
To achieve the desired effect of wrapping featured images around post text, access the Elementor Single Post template. Instead of utilizing the usual elements such as Post Content & Featured Images, follow the subsequent steps.
The text editor element will be utilized for this purpose. While a shortcode element could also be considered, utilizing the text editor element ensures access to the full range of typography styling options available.
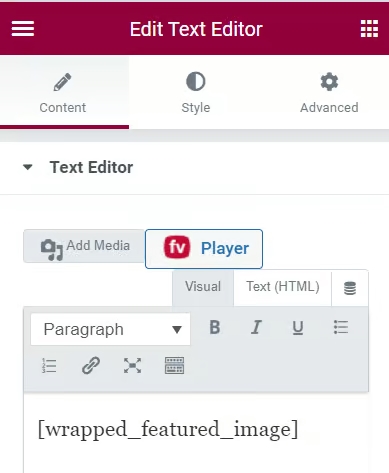
After adding the text editor, insert the [wrapped featured image] shortcode.
The shortcode will render and you will see the result as soon as you click outside of the text editor.
You can change a few settings by using the Style options. To style post content texts, however, you are better off using global styles.
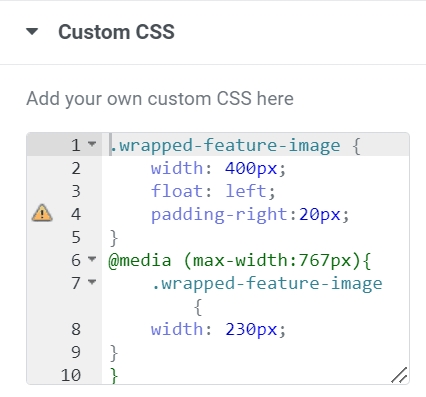
Finally, use this CSS to wrap the image around the text content of the post.
Add the CSS for the text editor element under Advanced > Custom CSS. You can change the image's size and padding by modifying the CSS. The 'float; left' part is what allows the wrapping to function!
.wrapped-feature-image {
    width: 400px;
    float: left;
    padding-right:20px;
}
@media (max-width:767px){
    .wrapped-feature-image {
    width: 230px;
}
}
Wrapping Up
In conclusion, learning how to wrap text around a featured image in Elementor can greatly enhance the visual appeal and readability of your website. By following the steps outlined in this guide, you can easily achieve this effect and create a more polished and professional look for your content. Remember to experiment with different alignment and spacing options to find the perfect balance for your specific design needs. With Elementor's intuitive and user-friendly interface, you can elevate your website design skills and take your online presence to the next level.


