
Have you ever desired the ability to develop and alter the WooCommerce cart page using the visual interface provided by Elementor?
We have some wonderful news! The updated Elementor WooCommerce Builder comes with new capabilities in November 2021's Elementor Pro 3.5 release, including specialized widgets for your store's shopping cart, checkout, and my account pages.
Previously, you had to rely on your WooCommerce theme to handle the design, layout, and content of these crucial pages. Now, you can handle the design, layout, and content of these elements completely from Elementor.
This article will demonstrate how you use a single element - the new Cart widget. More precisely, you'll learn how to leverage Elementor Pro's new Cart widget to manage and improve your store's cart page without ever leaving Elementor.
Create Amazing Websites
With the best free page builder Elementor
Start NowHow The WooCommerce Cart Widget Works
The shopping cart on your store is a critical component of the user experience on your eCommerce website. Shopping carts streamline the payment process for your consumers and enable shoppers to easily save things of interest.
With Elementor's new Cart widget, you can fully personalize your cart page to ensure it fits the rest of your store's identity and is optimized for sales. The following are some examples of the adjustments that you can make to the Cart widget:
- Choose from a variety of cart layouts, including one- or two-column layouts.
- Customize the colors and typography of every element in your shopping basket.
- Configure the layout and spacing of each element on a per-element basis, for example, by modifying the row space between various cart information.
- Edit the labels for the various sections of your cart page, as well as the wording for the various buttons.
- Customize the forms in your cart, including the coupon form and the shipping rate calculation.
As with all Elementor designs, you'll also have the ability to adjust how your cart appears on multiple platforms, ensuring that every consumer has a positive shopping experience regardless of whether they're browsing on a desktop, tablet, or mobile device.
How To Use The Cart Widget In Elementor
Now, let's walk through the process of installing the Elementor Cart widget on your WooCommerce store.
Edit your store's default cart page.
When you build a WooCommerce store, WooCommerce creates an automatic cart page for you that utilizes the WooCommerce cart shortcode.
For this tutorial, you're going to develop a page based on this one. However, rather than using your theme's default styling, you'll alter this page with Elementor to gain access to all of Elementor's design possibilities.
To start, navigate to your dashboard's Pages list and locate the Cart page. It should be clearly labeled "Cart Page."
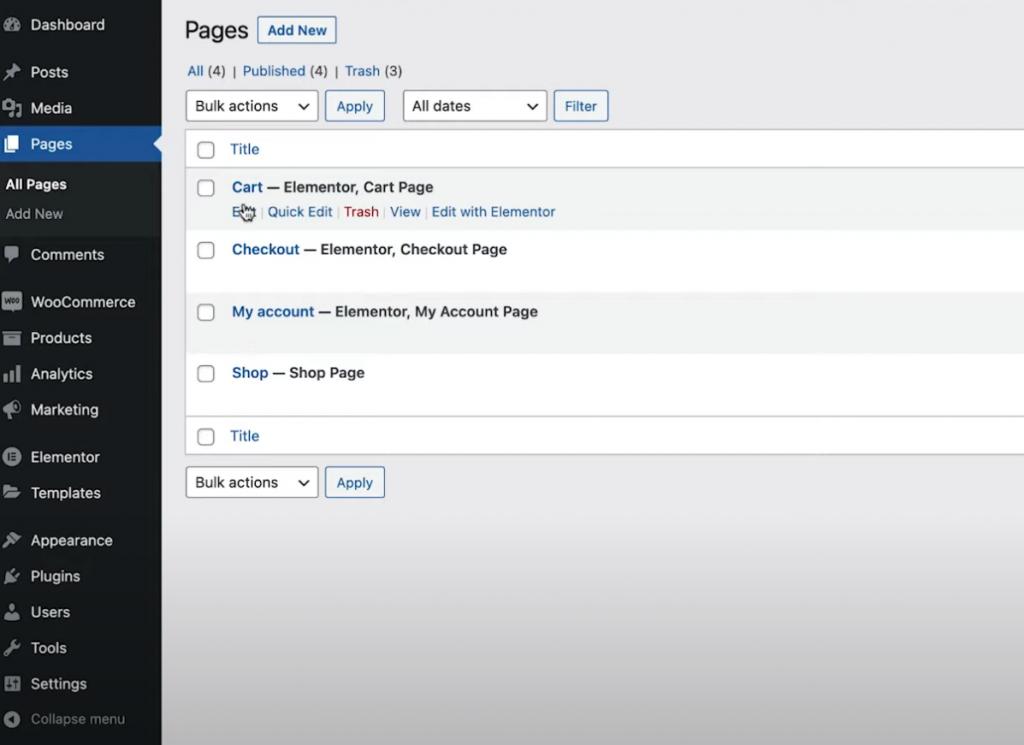
When you've identified it, click the Edit button to bring up the WordPress editor. Then, within the editor, choose the Edit With Elementor option to open the Elementor interface.
Replace The Cart Shortcode With Cart Widget
When you open your store's existing cart page in Elementor for the first time, you'll see the [woocommerce cart] shortcode embedded in an Elementor Text Editor.
To begin, remove this existing shortcode and swap it with Elementor's new dedicated Cart widget:

You're now ready to begin changing the appearance of your cart page.
Note — we recommend adding a few things to your shopping cart to get a sense of what a "full" cart looks like as you work on your design. Otherwise, when you're working in Elementor, you'll notice your cart empty.
This may be accomplished by accessing your store's frontend, adding things to your cart, and then refreshing the Elementor interface. Once Elementor is reloaded, those goods should display in your cart as you work on your design.
If you ever wish to preview an "empty" cart, simply remove the products from your cart on the front of your site and then refresh the Elementor interface.
Cart Layout Setup
To modify your cart's layout, design, and behavior, access its settings in the sidebar, just as you would any other Elementor widget.
To begin, you can pick between a one-column or two-column layout in the General settings' Layout drop-down. Utilizing a two-column layout is advantageous since it elevates the cart totals to the top, making them more visible when browsing on larger devices.
Additionally, you may enable the Sticky Right Column toggle to make the cart totals column sticky on scroll. Additionally, you may wish to include an offset to ensure that this does not overlap with any other information.

Following that, you can edit the "Update Cart" button text using the Order Summary settings.
Similar choices are available in the Totals settings for adjusting the labels and positioning of different cart items, such as the text for the "Proceed to Checkout" button.
You may also change the widget's settings if you've activated the WooCommerce shipment calculator option. By heading to WooCommerce Settings Shipping Shipping options and clicking the box to allow the shipment calculator on the cart page, you can activate the shipping calculator.
Finally, the Further Options settings allow you to toggle the automated cart update feature on and off. Rather than needing shoppers to press the Update button to make changes, enabling this feature automatically updates the cart without having a page reload.
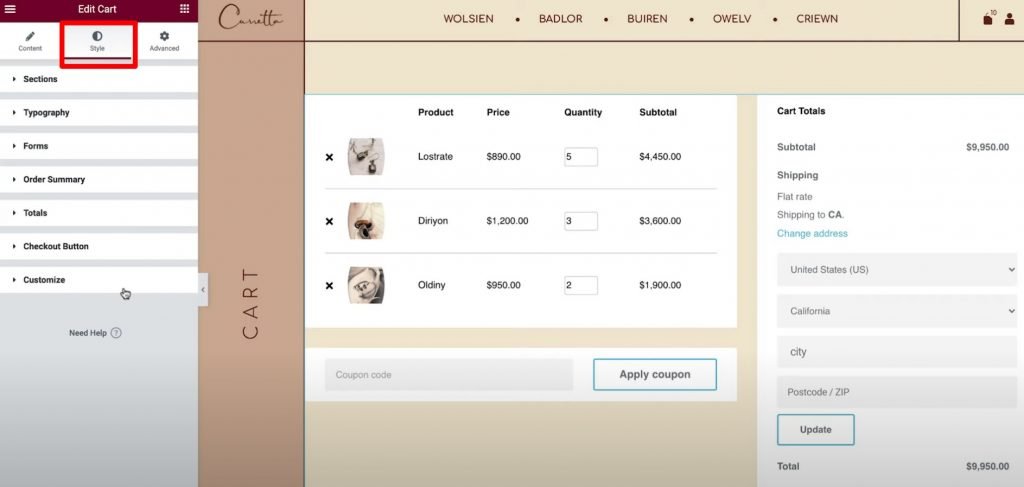
Cart Styling
You may now customize the look and feel of your cart by visiting the Style tab in the widget's settings. You'll find a variety of various settings categories here, including Sections, Typography, and Forms.
The following are typical style options available in each area:
- Sections - you can customize the appearance of all three cart widget components. For instance, you can use a backdrop image or add a box-shadow to the entire cart.
- Typography — You can choose the fonts and colors used for important labels such as titles, descriptions, and links.
- Forms – you can style the coupon field form and the shipping field form (if the shipping calculator has been activated on the cart page). For instance, you can utilize the Rows Gap parameter to separate form fields.
- Buttons – you may customize the Apply Coupon and Update buttons using any of the standard Elementor button styling options.
- Order Summary - you have complete control over the appearance of the products in your cart and order summary.
- Totals - you have complete control over the design of the "Cart Totals" section, which displays the shopper's order's total cost.
- Checkout Button — you have complete control over the look and feel of the checkout button. You'll want to make it visually appealing to ensure shoppers don't miss it, as this is the action you're requesting.
Customize — You can adjust the order summary, coupon, and totals on a more granular level. By including these options, you'll gain access to additional settings devoted to those areas. For instance, you might utilize this to differentiate your "totals" area from the rest of your cart by using a distinct background color, box-shadow, and border.
Customize For Mobile Version
By default, if you're using the Elementor Cart widget, your basket will be responsive on mobile devices. Elementor carts, like other Elementor widgets and designs, allow you to customize the look and feel of your shopping cart to suit the needs of your customers.
To do so, enter Elementor's responsive editing mode and you'll see mobile icons next to the device-specific options.
For instance, you can vary the row gap based on whether the user is on a desktop or mobile device, or the font size of various items.
Adjust WooCommerce Settings in Site Settings
This final step is optional, but it's worth noting that you can also regulate the assignment of essential WooCommerce pages from the Elementor Site Settings tab.
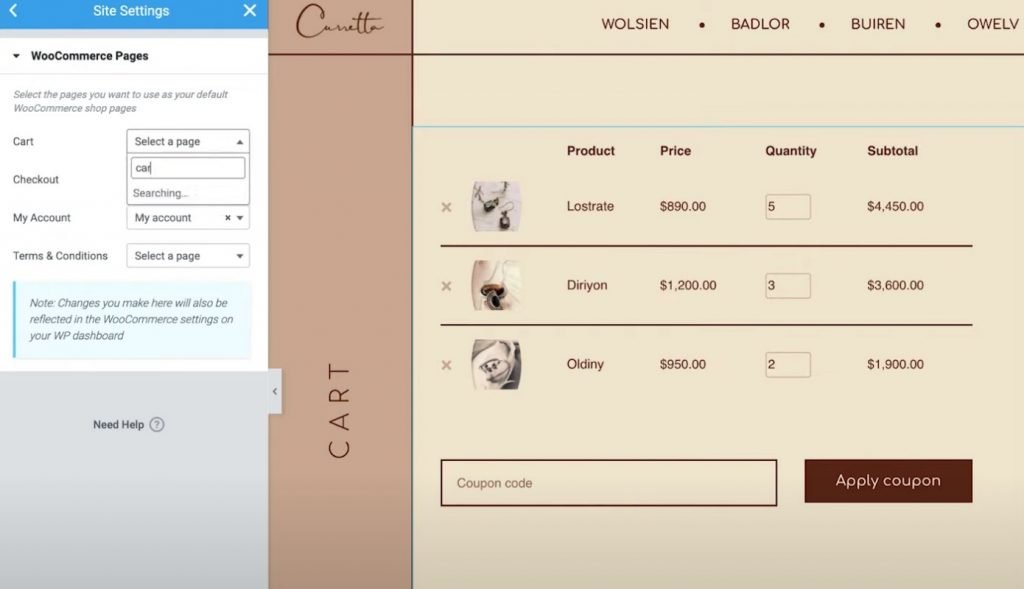
For instance, if you used Elementor to construct a new page for your cart rather than altering the old WooCommerce cart page, you might instruct WooCommerce to utilize the new page using the Elementor Site Settings.
These parameters are accessible via the WooCommerce tab in the standard Site Settings area. Under the header Settings, you'll see the WooCommerce option.
Create And Modify The Cart With Elementor
You can now create and configure your WooCommerce cart page without quitting Elementor Pro, thanks to the new WooCommerce Cart widget.
You may personalize the style of each element, select from a variety of layouts, and adjust the labels using Elementor's options. Having this greater control over the cart page gives you the ability to ensure that it matches the rest of your store's design and to optimize it for increased sales.
Additionally, Elementor Pro includes new widgets for all other critical areas of your store, like the Checkout and My Account pages. These widgets obviate the need for WooCommerce shortcodes and allow you unprecedented flexibility over your store.
All of these new widgets extend current WooCommerce Builder functionality, such as the ability to personalize the WooCommerce individual product page.
If you're already familiar with Elementor Pro and the WooCommerce Builder, you can begin utilizing the Cart widget immediately by following this guide. If you haven't upgraded to Elementor Pro yet, do so today to gain access to the new Cart widget, WooCommerce Builder, and all of Elementor Pro's other amazing features.
Are you still having issues with the WooCommerce Cart widget in Elementor Pro 3.5? Tell us in the comments section!


