
Branding is one of the most important parts of running a WordPress site, and a logo is the best way to stand out. Your logo is an important part of your brand, so you need to know how to use it properly. In this post, we'll show you how to use the WordPress site logo block to add a logo to your site. We'll also talk about the different block settings and give you some tips on how to use a logo well.
What is the Site Logo Block In WordPress?
Now that full site editing is more popular, the site logo block is one of the many site blocks that are available in the WordPress editor. In WordPress, the block lets you add your site's logo to a page template or the main header.
It is also dynamic because it can pull your site logo from the data on your website as dynamic content. So, if you change your site logo in the block or on the back end, all of the site logo blocks on your site will be updated automatically. When you use the site logo block on a template, you also have more control over the design of your global logo.
It's important to remember that the Site Icon and the Site Logo are two different things. The Site Icon is the smaller image you see in your dashboard, browser tabs, and other places. But if you want, you can also use the site logo as the site icon by changing the block settings tab, which we'll talk about below.
Create Amazing Websites
With the best free page builder Elementor
Start NowAdding Site Logo Block In WordPress Header
In this example, we'll show you how to add or change the site logo in the Twenty Twenty-Two theme header of a WordPress template. Here's what you need to do.
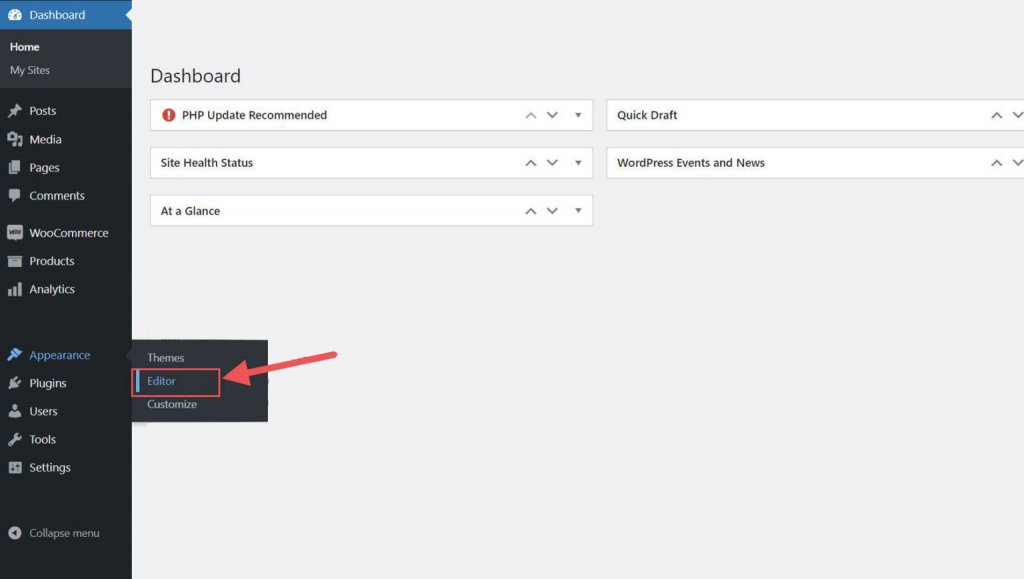
Go to Appearance > Editor from the Dashboard of WordPress.
On the left side of the Site Title, there should already be a site logo in the header area of the page template. You can also look for it in the list view.
You can click on the + block inserter icon to add the Site Logo block to the template.
Then look for "Site Logo" and click on it or drag it to where you want it on your page to add the block.
If you haven't set your logo yet, you can upload it by clicking the upload sign on the Site Logo Block.
Once you change your site logo using the site logo block, all other copies of the site logo will show the same image. This is how the block's dynamic functionality works.
Settings and Options For Site Logo Block
The Site Logo Block comes with extra configurations and options that make it easy to make it fit your website. Here is a quick summary of the settings you can use.
Toolbar Settings
When you move your mouse over the block, you'll see a menu of ways to format it.
- Change the block into a different kind of element
- Making changes to your logo's shadow, highlights, or tone
- Adjusting the size, shape, and angle of your logo
- Changing your name and logo
- Shows more advanced options like copy, duplicate, move, lock, group,
- Add to blocks that can be used again, or take the block out.
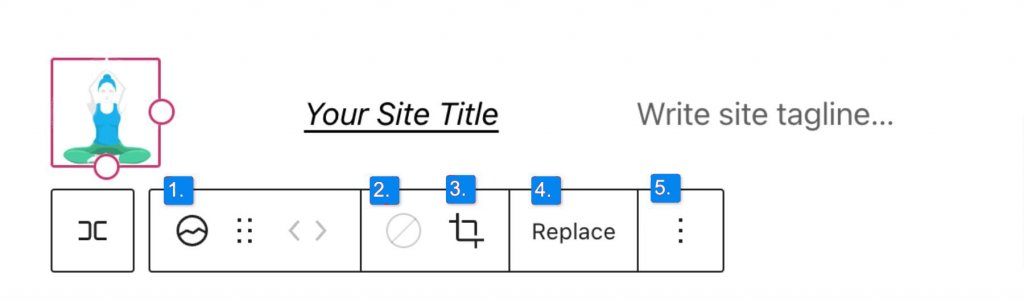
As you may have noticed, these tools can help you change the way your logo looks so that it fits in with the style of your website.
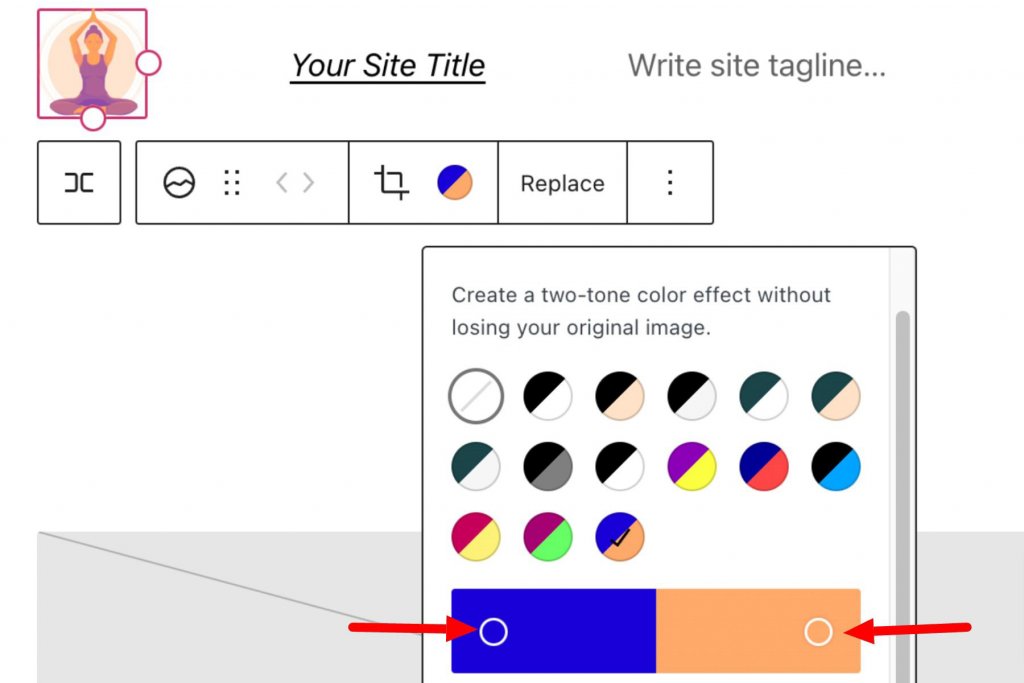
To change the logo's color, click the duotone tool and choose the color scheme you want.
To change the colors, click on the dots in the color bars:
Site Logo Block Settings
If you open the sidebar's extra options or block setup toggle, you can change more block settings.
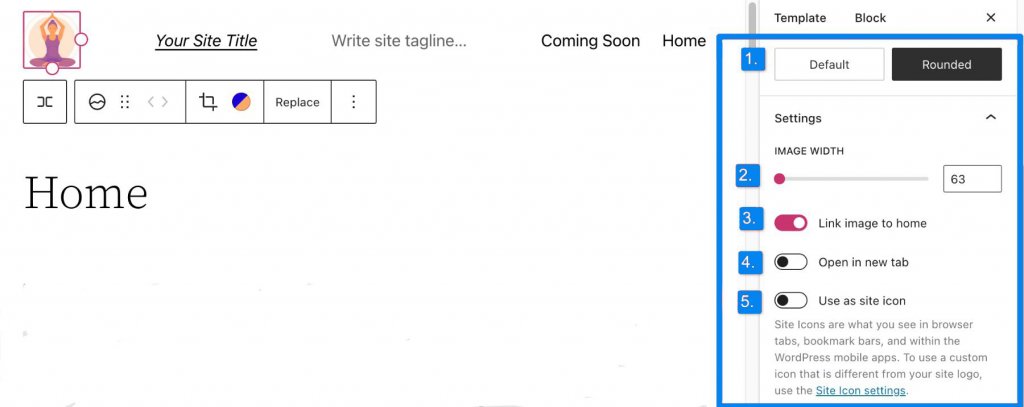
Here, you can change your logo to:
- Look round instead of square or rectangle, which is the default setting
- Change the width of the image to make the logo bigger.
- If the Link image to the home is turned on, users who click on your logo will be taken back to your home page.
- If you click "Open in a new tab," your home page will open in a new tab.
- If you turn on Use as site icon, your logo will be used as the site icon or favicon.
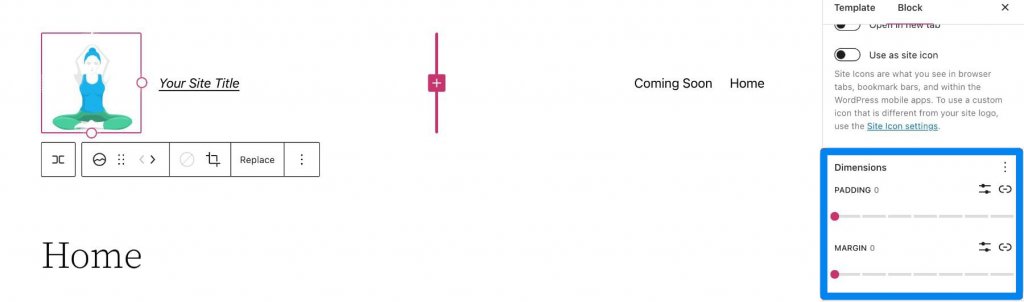
Under the "Settings" section, you'll find the "Dimensions" tab. This is where you can change your logo's padding and margin.
That's everything you need to know about the settings for your logo block, so you can change the style of your logo to fit in with the rest of your site. Now, let's look at some suggestions for how to use this block well.
Using Divi to Add a Site Logo In WordPress Header
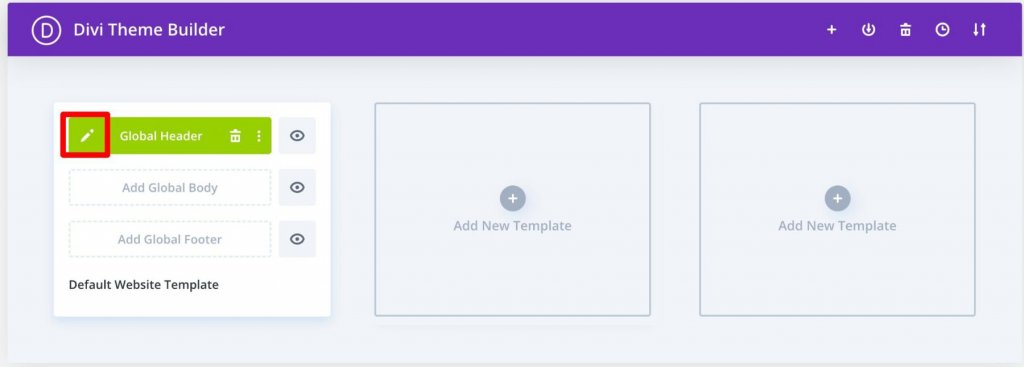
When you use Divi, you can easily add a site logo to your global header by using the Divi theme builder. Initiate by clicking the edit button next to "Global Header" in your default website template.
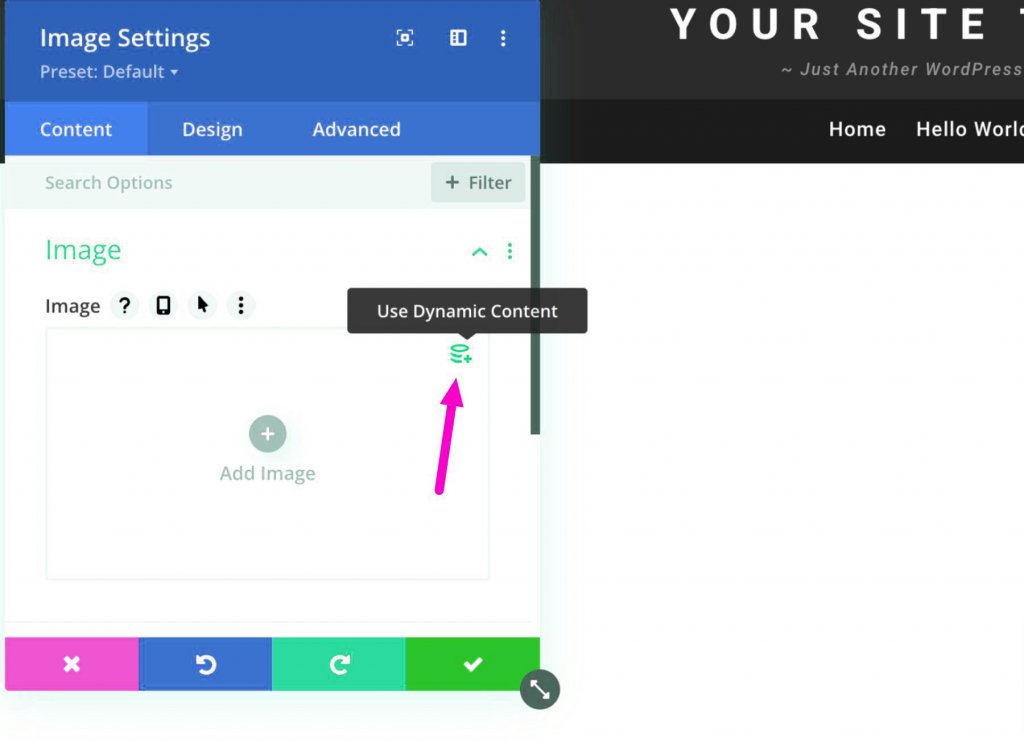
Now, all you have to do is add an image module to the header and choose the Use Dynamic Content option in the top right corner.
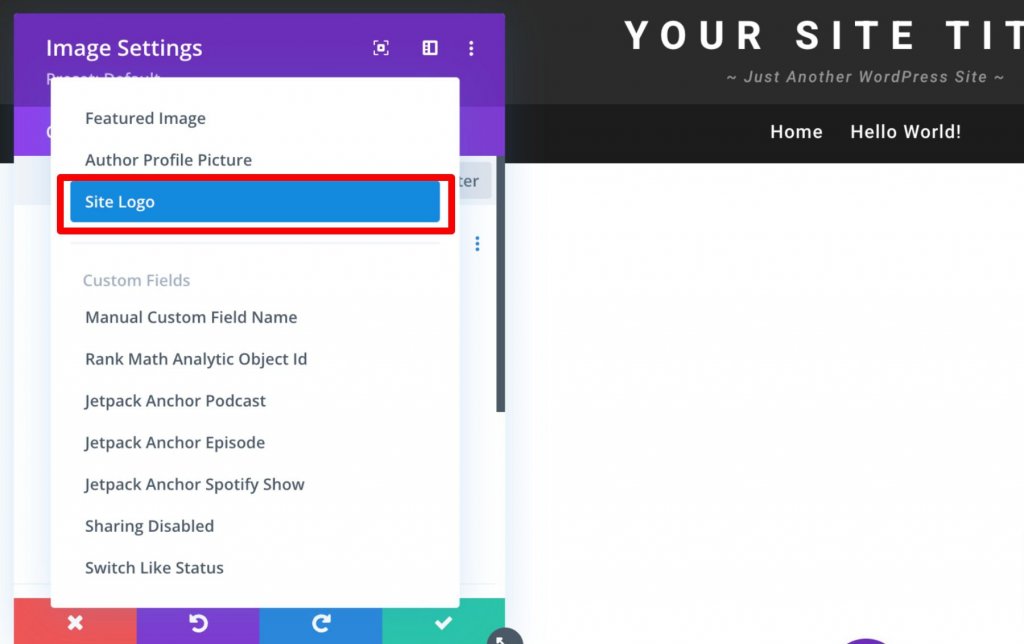
Then, you'll be asked to choose from a list of all the dynamic content that you can access. Choose Site Logo to add the logo that changes with your site to the header.
Wrapping Up
You can't say enough about how important your brand's logo is. But if you want to brand your site well, you need a methodical approach. This is especially true if you want people to remember it for a long time. Using some of the tips above, you should be able to make your perfect logo and use the logo block correctly and well.


