
One of the reasons for the beauty of our website is its beautiful design and various WordPress themes that help us to enhance that beauty. However, to maintain the uniqueness of the website, many people customize the theme where the developer omits various things from page to page. For example - omitting a sidebar or textbox. So to do that, we need to have an idea about two specific CSS properties - visibility and display. With these two properties, anyone can easily hide page elements. And that is what we will see in today's tutorial.

Reasons Behind Hiding Elements
When a developer creates a WordPress theme, he thinks about the preferences and needs of all kinds of people. However, not everyone is the same, so customization is needed. Usually, what people omit from a website is a header or navigation menu.
Usually, we need this kind of action when we want to remove something from a specific page. To put it more bluntly, suppose you want to remove a review or rating section from a blog post. Now, if you remove the review section from the entire theme settings, it will be removed from all post pages. Since we want to remove it from a specific page - we can simply hide that element of the page using CSS.
Targeting The Element To Hide
You know which page element you want to hide, but what you don't know is what it says in the language of coding or how the developer specified it.
We can easily find out. Right-click on the element you want to hide and then select Inspect.
Create Amazing Websites
With the best free page builder Elementor
Start Now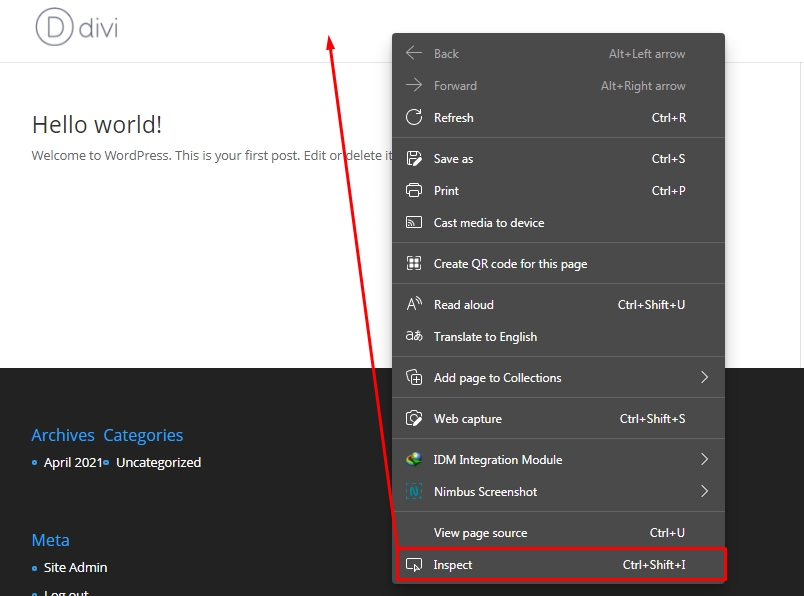
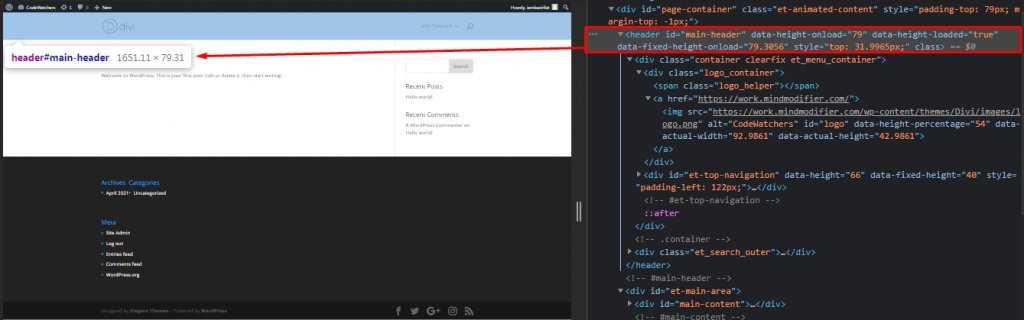
Then go to the Elements section on Dev Tools. There you can see the CSS ID of your selected elements. Now hover your mouse on the elements code, and there will be a highlighted section on the page. Click on the correct line to lock your selection.
Now we need to change to CSS using this selector.
Use Of Display CSS
The easiest way to hide any element is to obliterate it. We can easily do that through the "display:none" property. As a result, that element will no longer appear on that page. And the part that covers that particular element will be automatically removed and filled. Besides, there will be no issue with responsiveness.
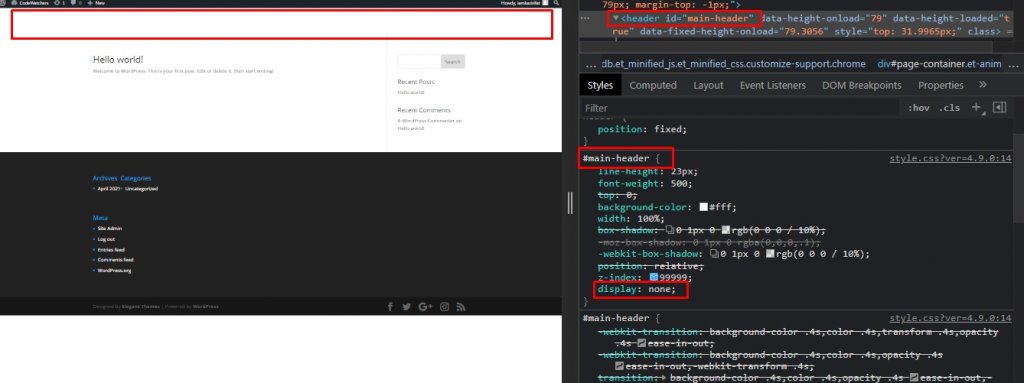
Here in this image, you can see, we wanted to remove the main header. At first, we have clicked on the element id, then we move to the Style panel for CSS adjustments and add the code given below.
display:noneAnd we are done with the easiest way to remove an element from entire website.
Use Of Visibility CSS
Like display CSS, we can also use the visibility CSS to hide any element. Theoretically, they both do the same job but in practical, here we are just hiding the element, not removing it. Visibility CSS helps you to make the element invisible and It will hold the space allotted for it.
visibility:hidden;
Visibility or Display: Which should be used in which situation?
We already know which CSS code does what job. If we want to completely delete an element from the page, we will use Display CSS. And if we want to make an element disappear with a condition of holding the position, then we will use the Visibility CSS.
For example - if we want to remove the background of a single column row, then we will use "visibility:hidden" because it will only remove the background but will leave the single column row and the content in it. And if we use the "display:none;", the content, rows and columns in it along with the background will be deleted and the page will be auto-organized in a new way.
Hide Element In A Particular Page
If any changes are made through what we have seen so far, the effect will be on the whole website. Now we will see how we can make an element disappear on a specific page. For this, we need to find out the specific Page ID Class. Remember, it's a simple Page ID number, not a CSS ID.
You can simply find this ID by hovering the mouse on the page. Here we are taking a post as an example. You can see "post=3" in a rectangle marked place in the link, and that is the Page ID for the "Privacy Policy" page of a website.

You can also check this id from any Edit or Preview page.
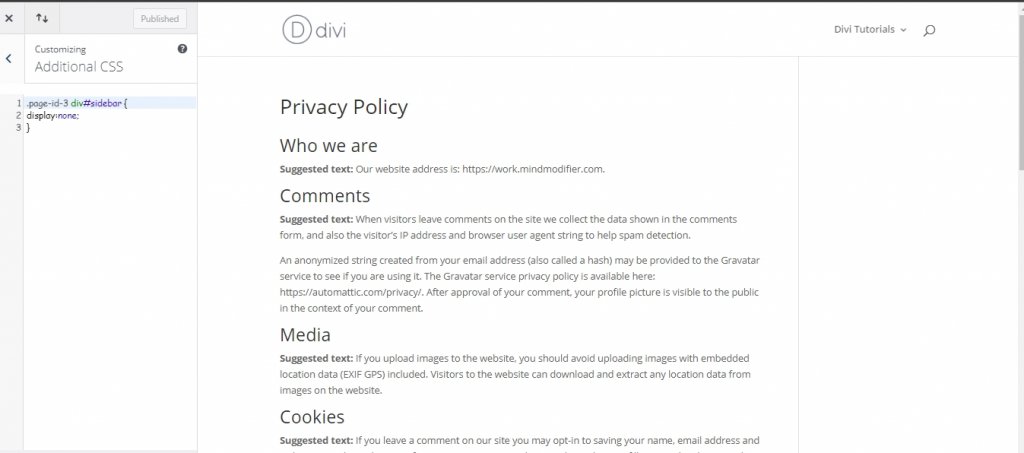
Now we will add Display CSS to this page to hide sidebar. We can do this from Theme Customizer.
.page-id-3 div#sidebar {
display:none;
}
The code written above will just remove the sidebar from specific page where the code written bellow will remove the element from everywhere.
dev#sidebar {
visibility:hidden;
}
Final Words
In today's tutorial, we want to explain the difference between Display and visibility CSS properties and which property you should use when customizing your WordPress site. We hope you find this blog post useful. If YES, a share will be phenomenal!


