
Divi buttons are an excellent method to enhance your website's navigation, interactivity, and calls to action. But occasionally, rather than linking to a different page or URL, you might wish to attach your buttons to a particular area or section on your page.

Anchor links are useful in situations like these.
Anchor links use a special ID that is assigned to a certain area of the same page to direct users to that area.
Why Use Anchor Links on Your Website
You can use anchor links, for instance, to allow users to quickly get to the portion they are interested in without having to browse through the entire page if your website's page or post is lengthy and divided into numerous sections.
Create Amazing Websites
With the best free page builder Elementor
Start NowIn this tutorial, we will show you how to use anchor links to make your Divi buttons more functional and user-friendly.
Adding Anchor Links in Divi with the Button Module
In HTML, an HTML ID property and a link are needed to create anchor links. You can give your link a name by using the ID attribute.
To get your anchor to link to an element, you must first construct it and give it an ID.
Next, you assign the ID as the link's destination. You must precede the ID with the hash character # when linking to an anchor.
This is what will set your anchor link apart from links that are internal or external.
In Divi, anchor links can be added using the same process. Let's examine how we may accomplish this using the Divi Online Course FREE Layout Pack's Landing Page Layout.
Installing the Layout of Our Page
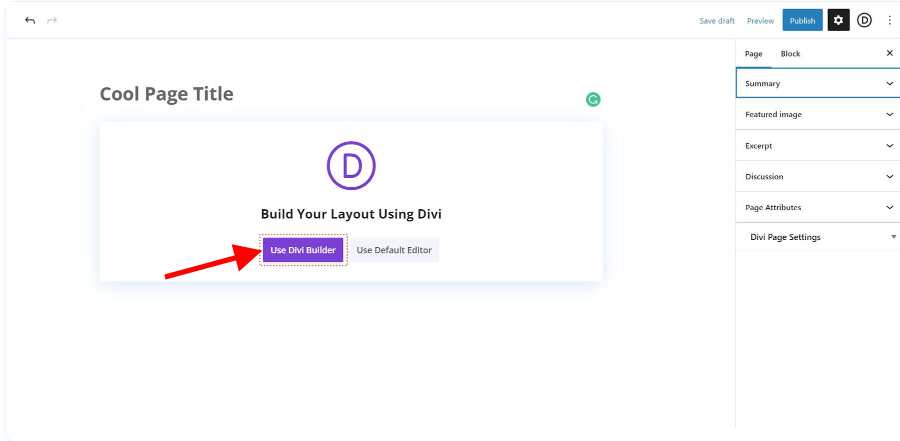
We must first create a new page in WordPress before we can install the page template. Go to Pages > Add New from your WordPress dashboard.

Set a title for your page and click on the purple 'Use Divi Builder' button.
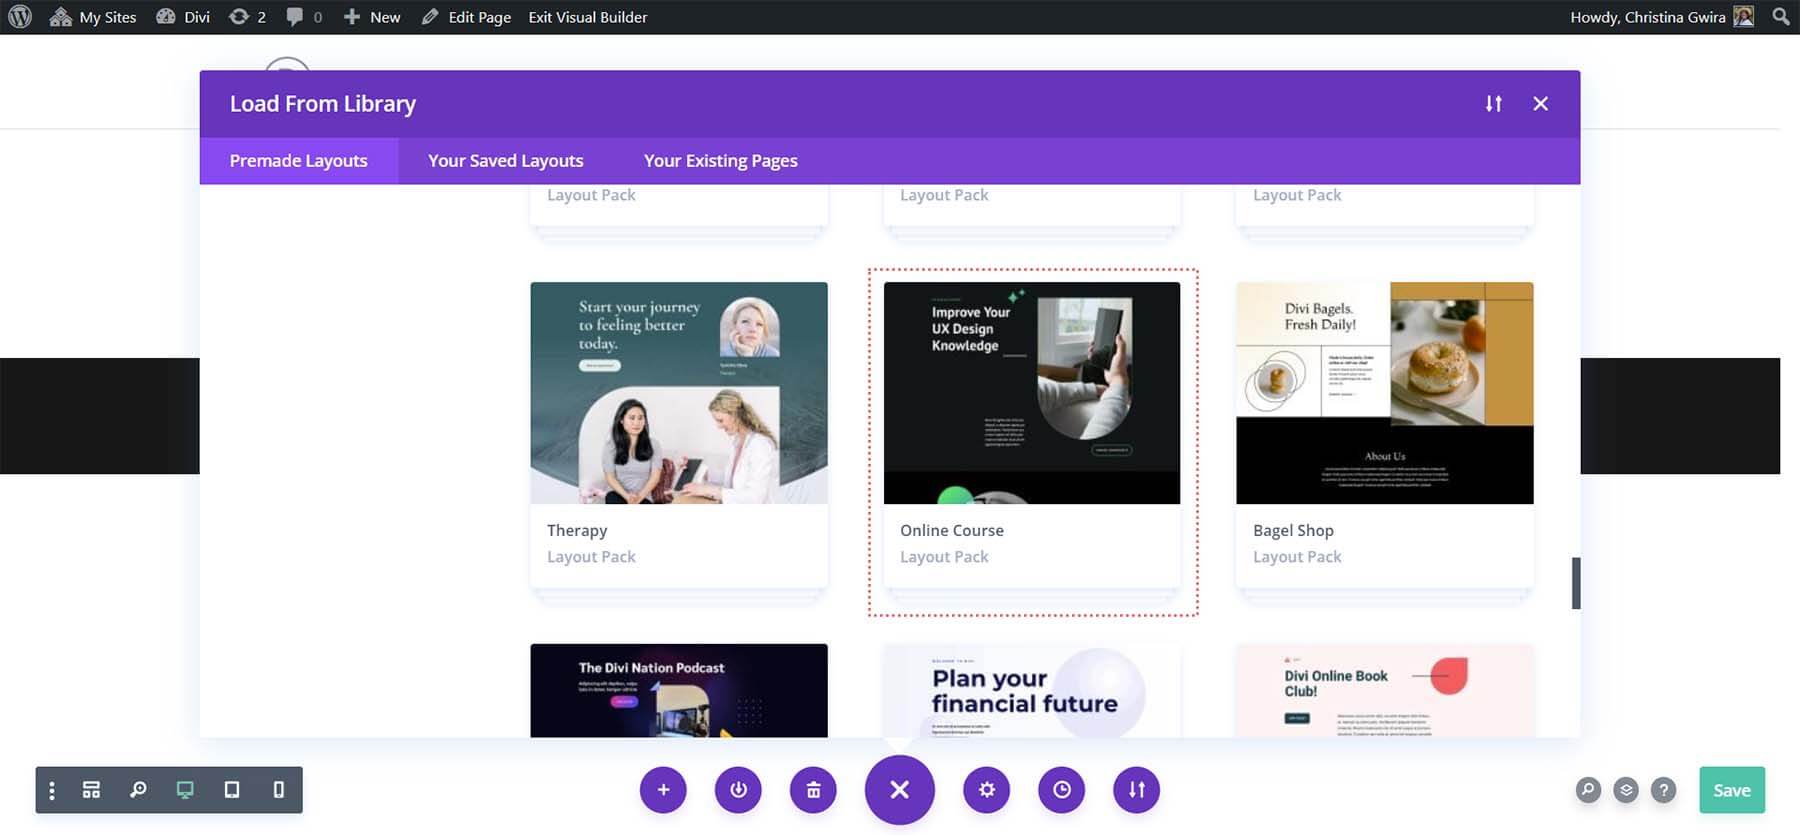
After that, you'll be given three choices. We're going to select Browse Layouts by clicking on the purple, middle button.

This will let you access Divi's extensive layout library, which is filled with numerous pre-made pages. We are going to use the Online Course Layout Pack.
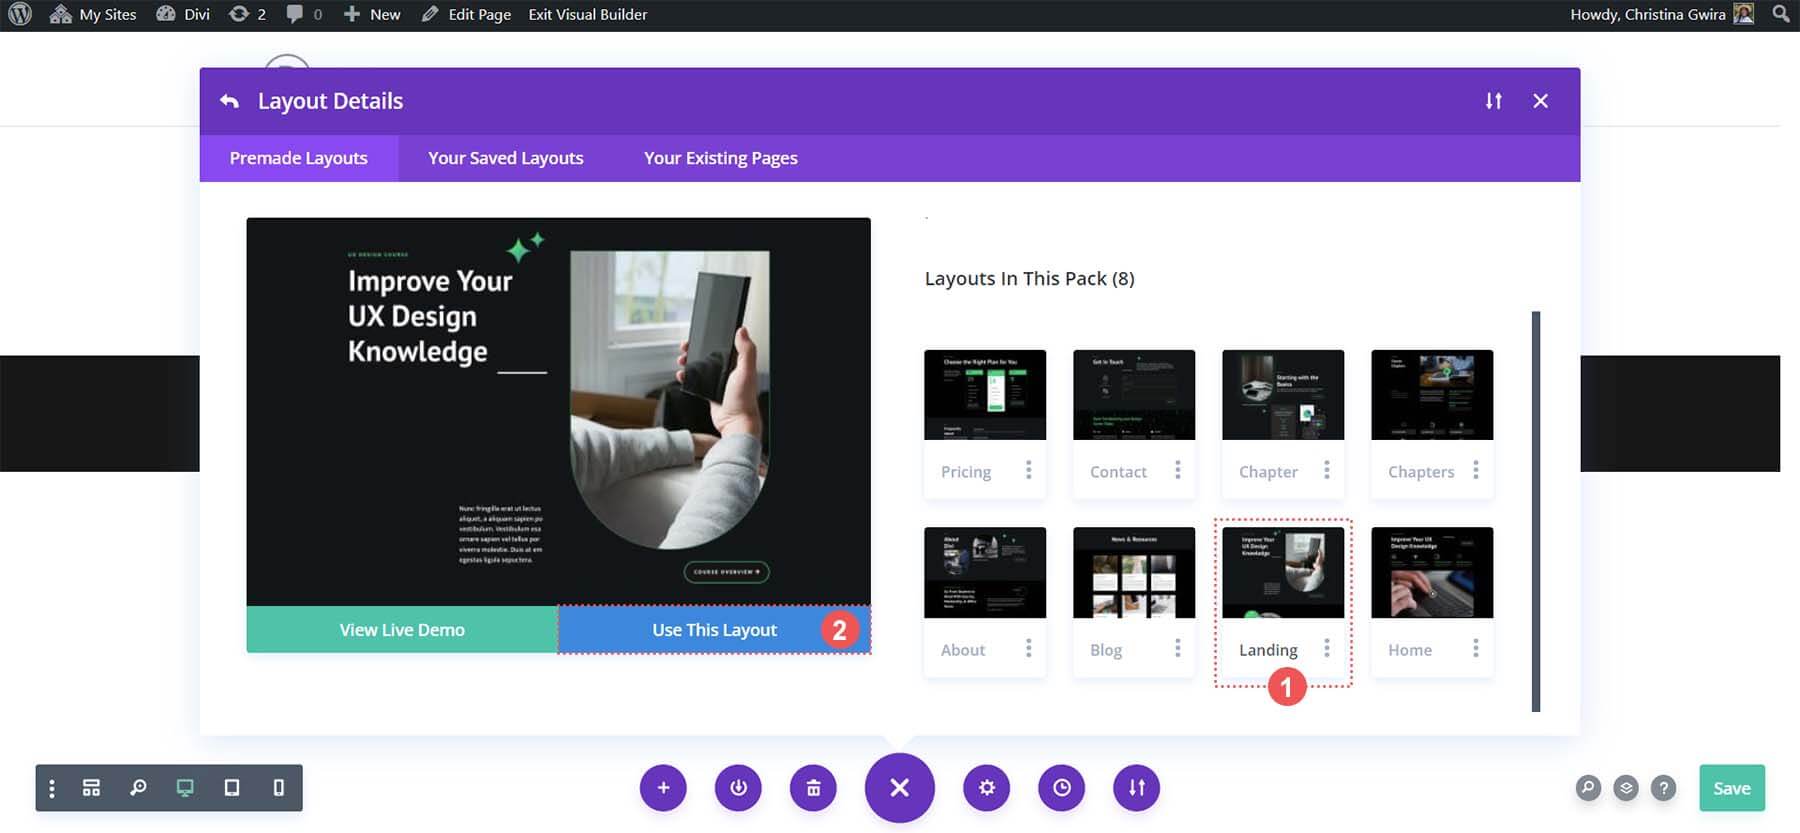
We'll be using the Landing Page Layout from the layout pack. After selecting the layout, click the blue 'Use This Layout' button to load the layout into the freshly generated page.
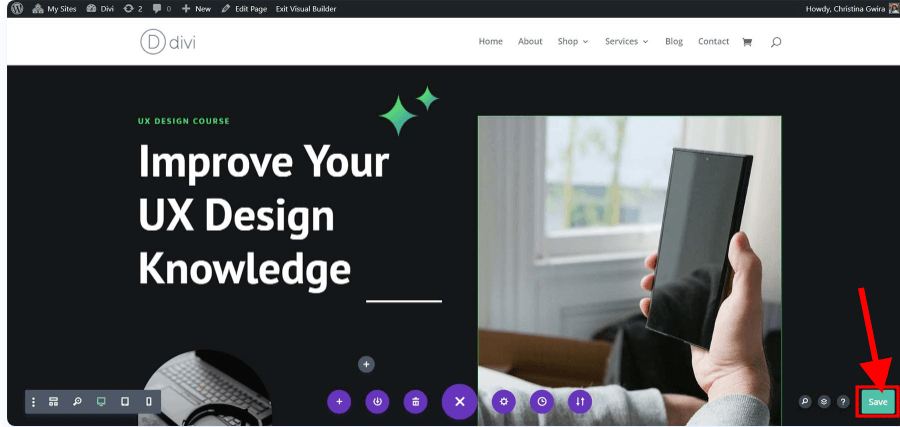
Click the green "Save" button located in the lower right corner of the screen once the layout has loaded.
Declaring HTML ID Attribute
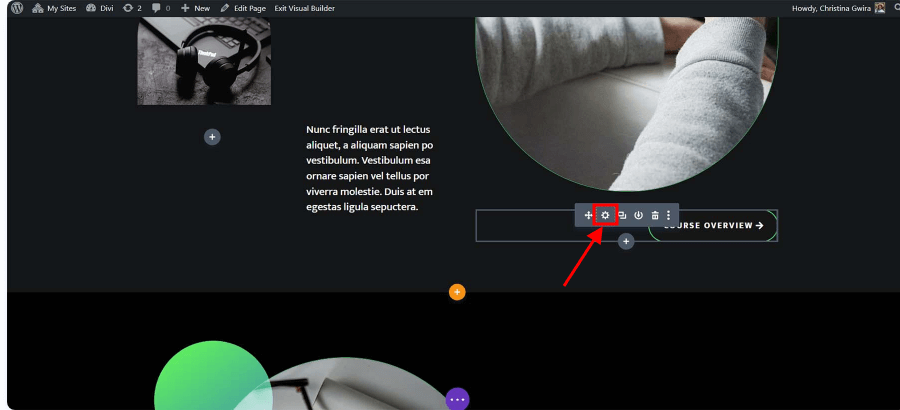
To find out which Button Module to utilize and which area to give an ID to, let's access our template. Look for the "Course Overview" button in the top area.
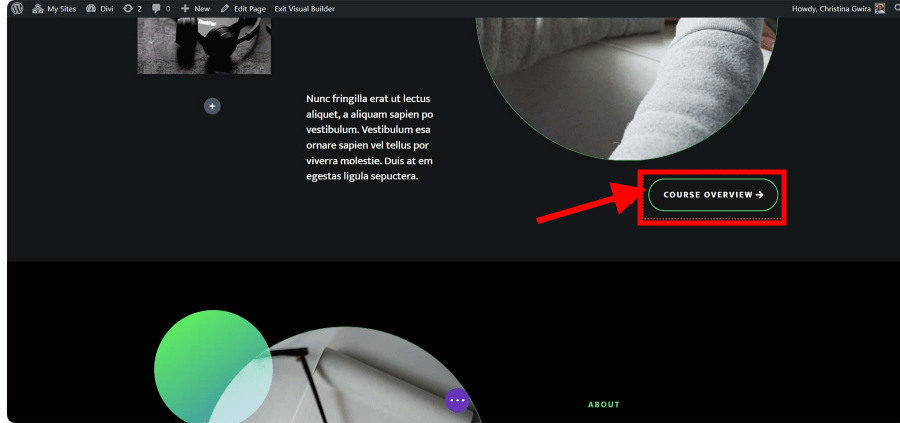
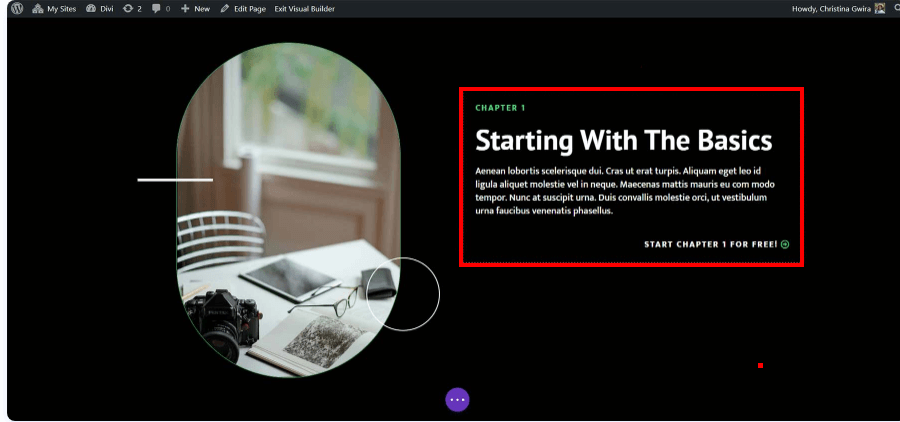
We have a part that outlines our course within the same page layout. Students won't have to spend as much time scrolling over the page if the button in the header is linked to this area.
This is an excellent illustration of how anchor links can improve our readers' ability to browse our pages.
In order to add our HTML ID attribute, we must first click on our row's gear icon. We want the Text Module to be perfectly situated within the client viewport when they navigate to the start of the course overview, hence we don't want to add our ID to the Text Module or the section.
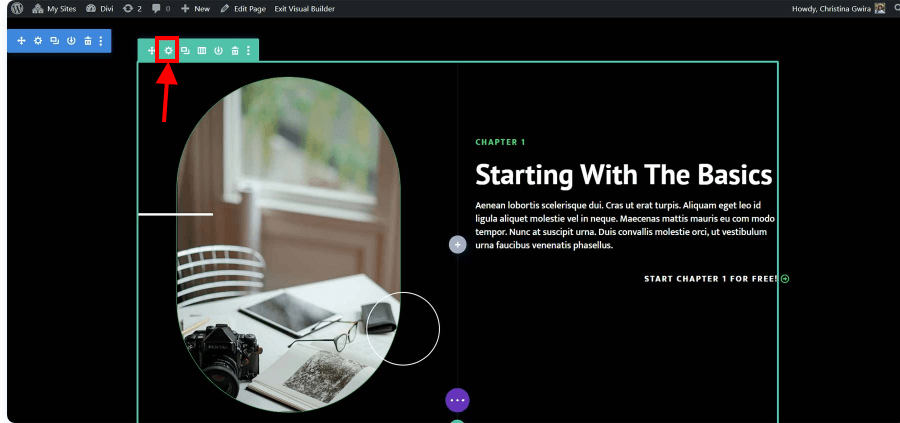
We select the Advanced tab once we are inside the row. Next, we select the tab for CSS ID & Classes. Enter an ID for your row that is simple to remember in the CSS ID box.
Recall that this will serve as both your ID and the anchor link's name. For the sake of both search engines and people, it is advised to use something brief and simple.
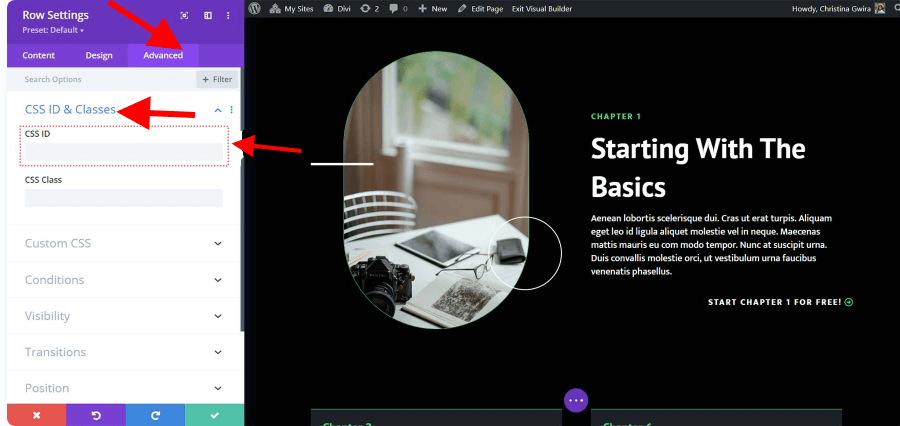
Since it pertains to both the button to which we will be referring and the material included in this row, we have chosen to set a CSS ID of overview in this instance.
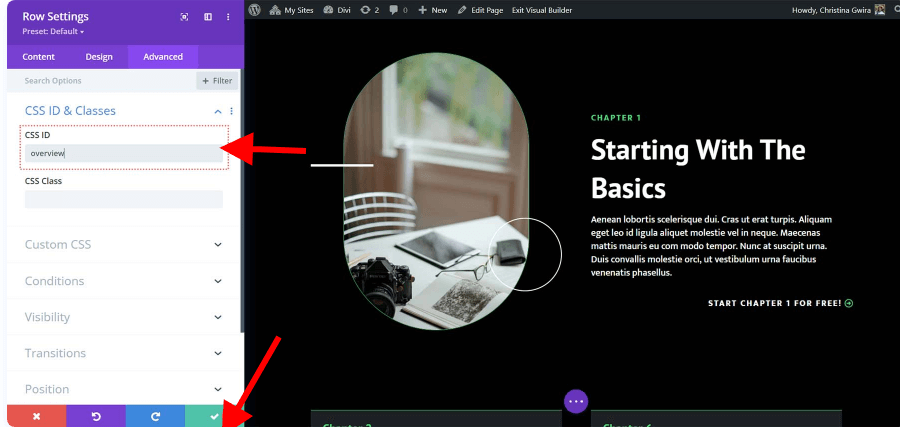
Click the green checkmark icon after adding your CSS ID to save our work.
Let's now finish our anchor link and attach our Button Module to this row.
Linking Our Button to the ID
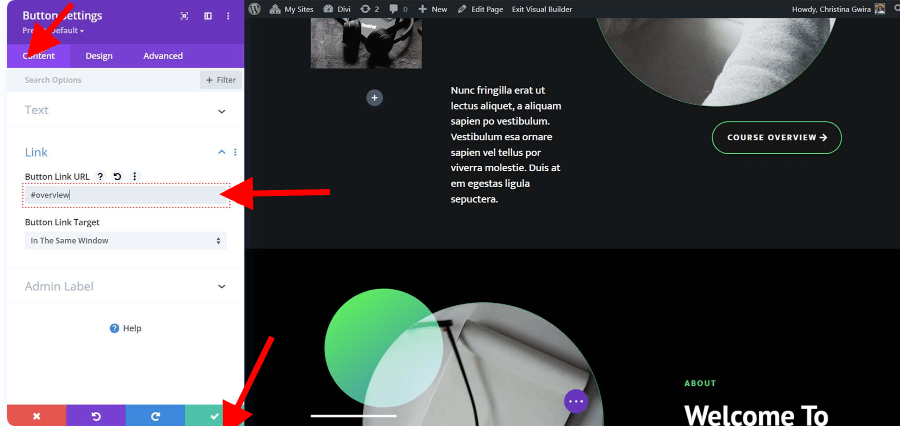
We now need to link our Button Module after setting up our ID. Our intention is for the button to direct users to our landing page's course overview section when they click on it.
Here's how we manage to achieve this. We start by clicking on our button's gear icon.
Next, we click on the Link tab from the Content tab. We're planning to add #overview to the Link box.
Recall that since this is an anchor link, the ID we created for our course overview row must have the hash symbol added before it.
After finishing this, we save our work by clicking the green checkmark.
Bringing it All Together
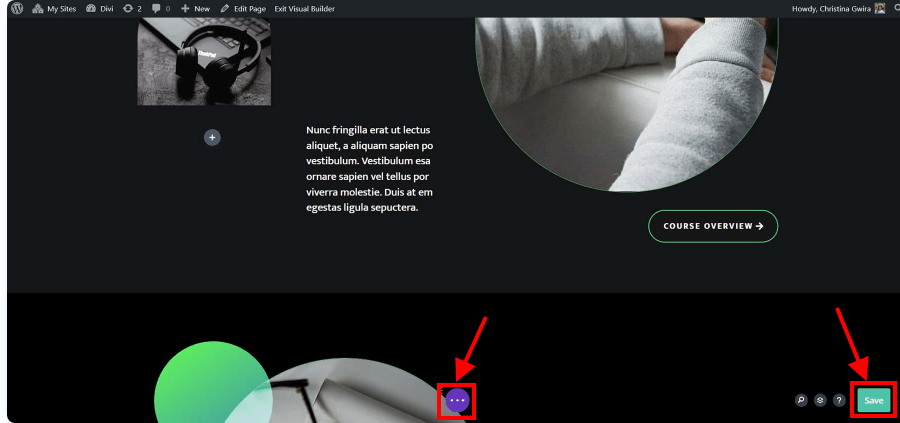
After setting up our anchor link, we can test it out and save our website layout. In the center of the bottom of the Divi Builder, click the purple button with three dots.
Next, click the green Save button located at the lower right corner of the screen.
Conclusion
One quick and easy approach to enhance your website's navigation and user experience is to add anchor links to your Divi buttons to make them more useful and intuitive. A table of contents, a back-to-top button, an entire page website, and more may all be made with anchor links.
With the help of this guide, we hope you can now use anchor links to enhance the functionality and usability of your Divi buttons.


