
When you're in the process of creating websites within the WordPress platform, the quality of your images becomes a critical component of your design. Given that high-resolution screens have become the standard, it's imperative that your images possess the correct dimensions and clarity to look their best on all devices.
However, what can you do when you find yourself in a situation where the image you have isn't large enough or appears fuzzy? One option is to hunt for a new image, but there's another solution: using an image upscaling tool. Harnessing the capabilities of artificial intelligence, a competent image upscaling tool can perform a kind of digital magic, transforming your small, pixelated images into high-resolution masterpieces with just a few clicks.
In this guide, we'll delve into the world of image upscaling, demonstrating how to upscale images on WordPress. Additionally, we'll explore a range of image upscaling tools that you can integrate into your future projects.
Image Upscaling: What Is It?
The technique of enlarging a digital image's size, resolution, or dimensions while maintaining image quality is known as image upscaling. Artificial intelligence (AI) technology can accomplish this by enhancing the image with the extra pixels it requires through the use of deep learning, neural networks, and AI algorithms. For site designers who want to enlarge and improve photographs without sacrificing the quality of the original, this is a potent solution.
Create Amazing Websites
With the best free page builder Elementor
Start Now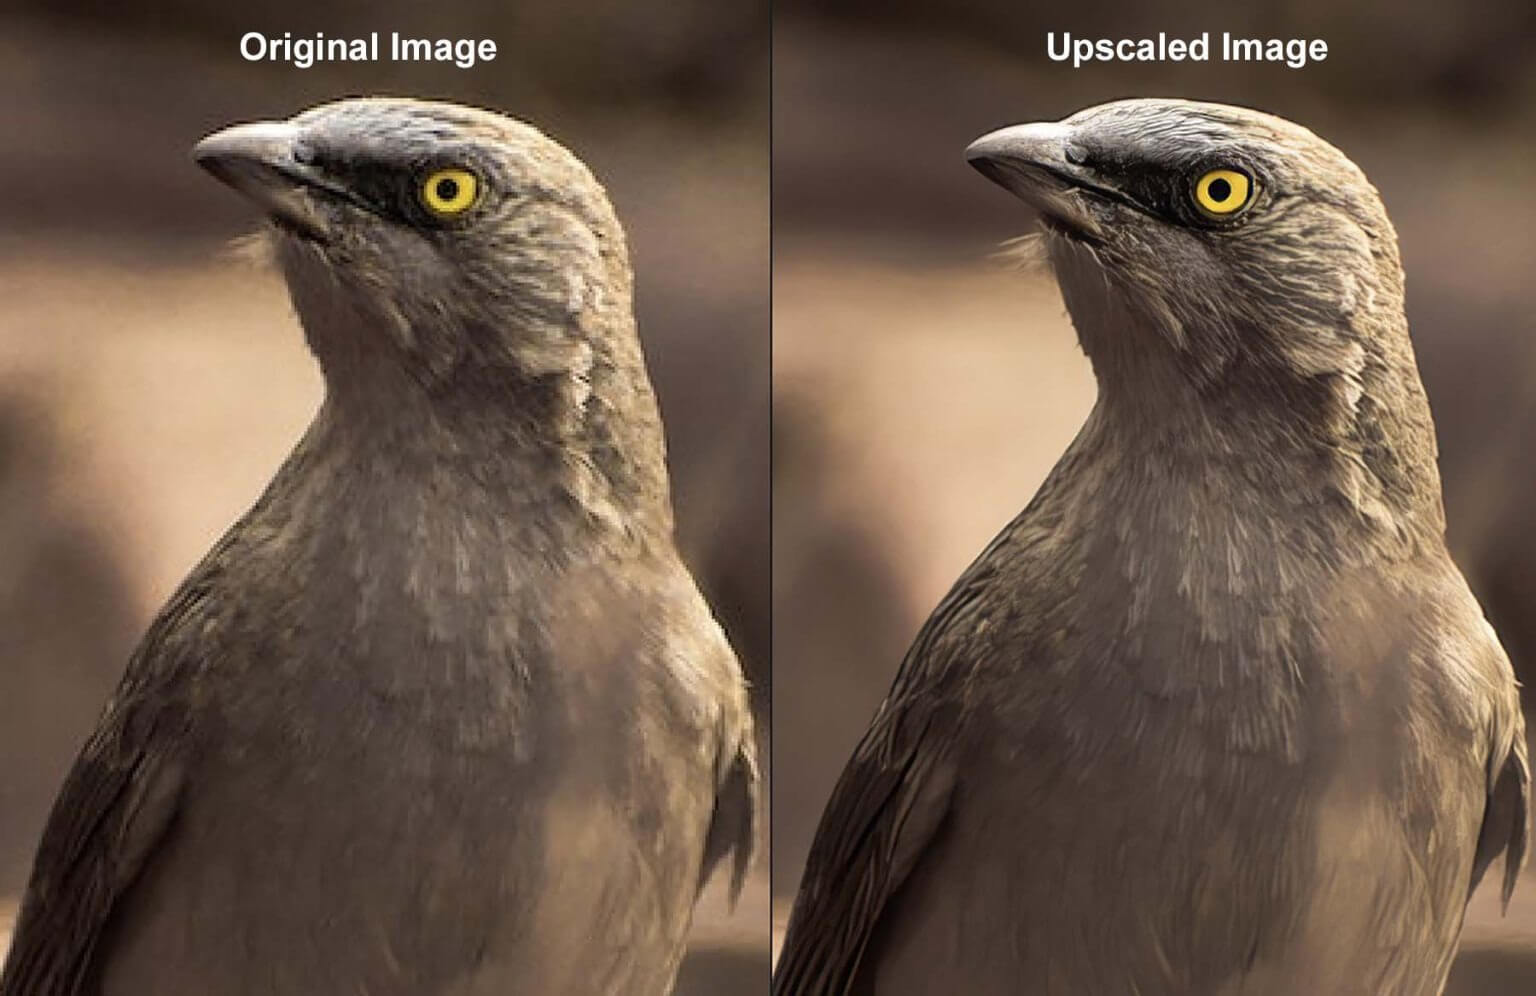
Outside of WordPress, well-known picture upscalers like Topaz Photo AI can accomplish this. We can observe from the image above that the original image was of poor quality. There is some pixelation; a greater resolution will not work and the image looks fuzzy. The details within the features are visible in the second image, which also has richer colours and a larger and smaller version of the finished product. This is a great illustration of why upscaling photos has advantages.
Why Using Upscale Photos in WordPress Is Necessary
Your original image's size and dimensions are fixed in WordPress as soon as it is posted. Yes, you are free to reduce the image's size. To assist you display the proper size on your website, WordPress will actually generate smaller versions for you. Enlarging them, though, is a different matter. It is not possible to simply enlarge an image by adjusting its width and height on your page or by adjusting its dimensions in the Media Library. This will cause the photos to be stretched beyond their inherent value, resulting in a loss of quality and blur.
An image upscaler is required in WordPress in order to enlarge an image. AI is used in upscaling to make sure that the quality of the enlarged image is maintained even as its size and dimensions increase. Even if the image's dimensions are expanded, its quality is often preserved and improved, producing an end product that frequently looks even better than the original. Having this useful tool on hand when working with WordPress eliminates the need to look for better, higher-quality photos or utilise other outside programs for upscaling.
WordPress Image Upscaling Advantages
Upscaling images for your WordPress website brings numerous advantages:
- Enhance Your Website's Visual Appeal: Upscaling images within or for WordPress enhances the overall visual experience for your website visitors. High-quality visuals are the cornerstone of a great website. Achieving crystal-clear images on your site is a straightforward process with image upscaling tools.
- Zooming and Panning in eCommerce: eCommerce plugins like WooCommerce offer various features, such as zooming and panning on product photos. However, when you have low-quality images, it can negatively impact your brand's image. Upscaling images in WordPress enables you to integrate these features with high-quality images, improving your brand's presentation.
- Simplify Image Search and Usage: Upscaling saves you time when searching for high-resolution versions of your images. Image upscaling tools allow you to enhance the images you have on hand rather than hunting for high DPI versions elsewhere.
- SEO and User Engagement: Large images often pose challenges to website performance and page load speed, which can harm your SEO. However, when your images are optimised and high-quality, they can contribute to higher search engine rankings. Consider leveraging an AI image upscaler to process images for your WordPress site and explore additional ways AI can boost your WordPress SEO.
- Future-Proof Your Website: Over the years, screen sizes and resolutions have advanced, from retina to high DPI screens. Ensuring your website maintains its visual appeal in the present and future is crucial. Image upscaling tools can help you keep your images looking fresh, regardless of when visitors access your website.
Now that we've explored the benefits of upscaling images for your WordPress website, let's delve into practical implementation using Divi and Divi AI.
How to Use Divi AI to Create Upscale Images in WordPress
Divi AI is a potent AI helper that comes with Divi, our AI-powered WordPress theme and page builder. It adds several AI functions, such as image upscaling, to your WordPress website. Let's investigate how to make the most of these WordPress options to enlarge our photographs without sacrificing quality.
1. Install Divi and Divi AI after downloading
If you're new to Divi, your journey begins with obtaining a membership and acquiring Divi from your member profile. Afterward, you can refer to a helpful guide that explains the process of installing Divi. This guide covers various essential topics, such as downloading the theme's ZIP file, installing it in your WordPress, and verifying your website with Elegant Themes.
Divi AI is a potent artificial intelligence tool that seamlessly integrates with Divi and the Divi Builder plugin. You will gain access to Divi AI right away through a free trial, and the option to upgrade to an unlimited version is available at any time. This upgrade provides you with complete access to Divi's AI image generator and upscaling features, in addition to Divi AI's writing assistant for AI-generated content.
We can begin upscaling some photos as soon as Divi is installed, enabled, and you have obtained your Divi AI licence! It's fantastic if you already belong to the Divi family! We are glad to have you here!
2. Click on the Divi Builder and choose your picture
Working on an already-existing page or starting from zero, Divi AI's upscaling procedure is the same. Divi AI will automatically re-insert your image in the same location whenever you make edits to it and apply the upscale command. Now let's discuss how to accomplish it using a fresh WordPress page. Select the Pages menu link by hovering over it in the WordPress dashboard. Next, select Add New. For us, this will create a new page.

Click the purple Utilise Divi Builder button after giving your page a name.

Select the first option out of the three that are offered. Once you click the "Start Building" button in blue, you will be able to upsample your photographs without any limitations.
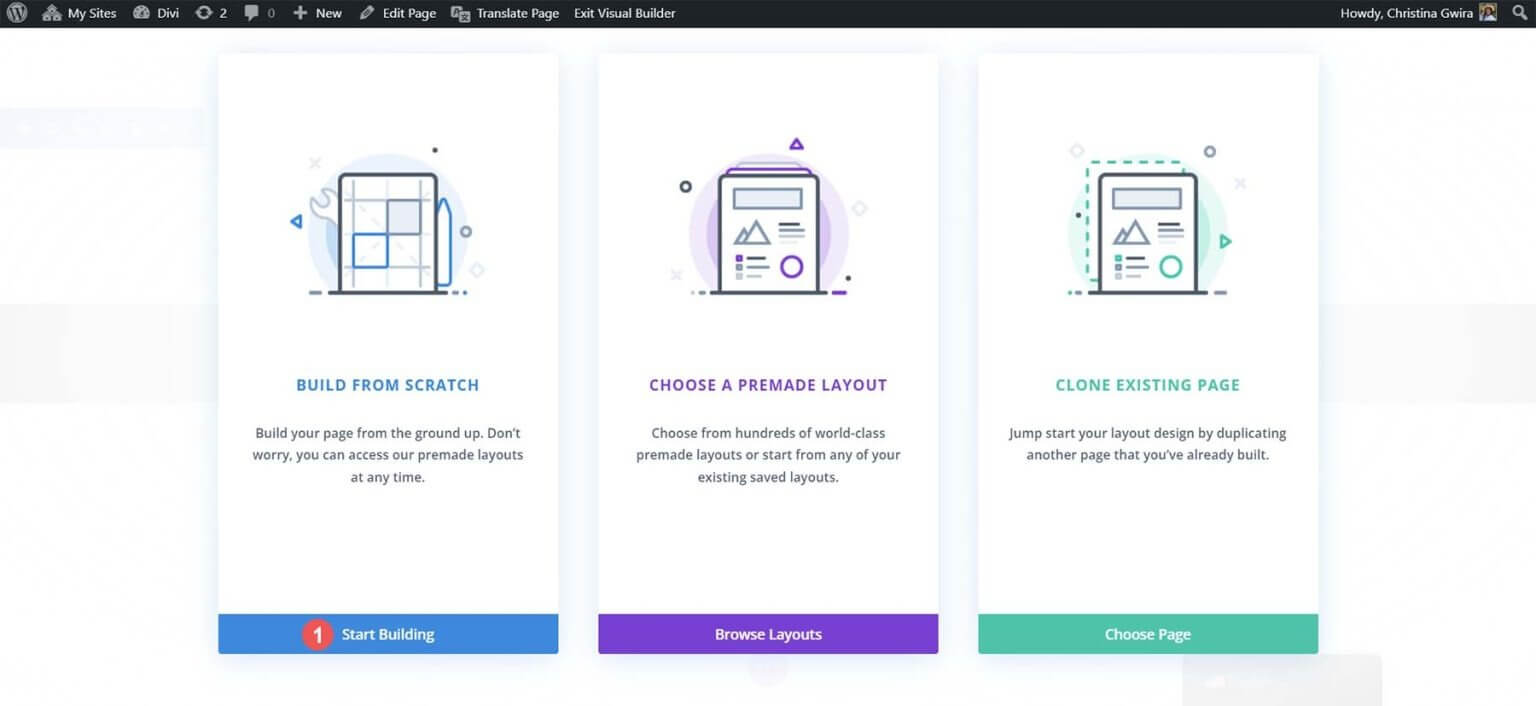
Divi will open the builder and immediately construct a new section for you. But you'll have to include one additional row. To accomplish this, click the row modal box's two-column row arrangement.

Next, type "image" into the Module modal box's search field. To add the Image Module to the first column of your recently created row, click on it.
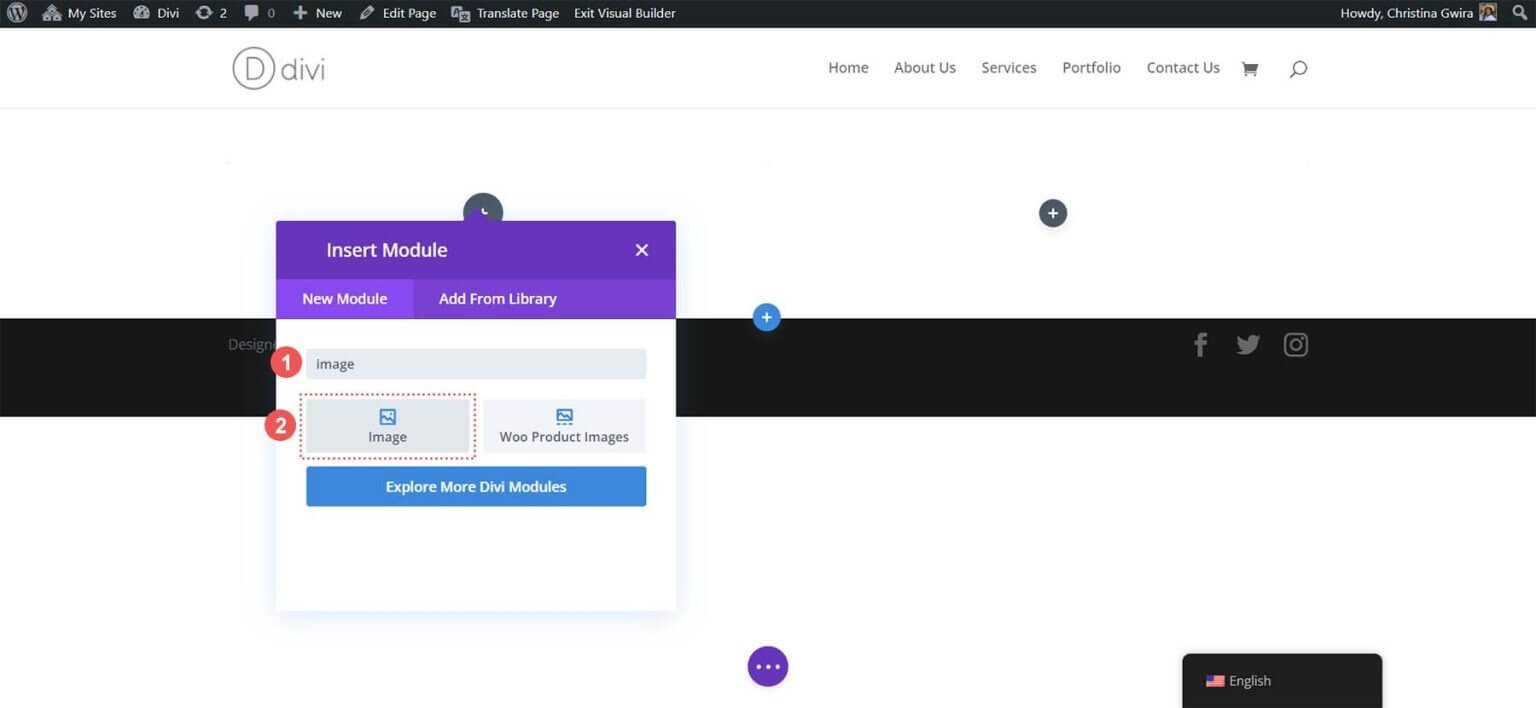
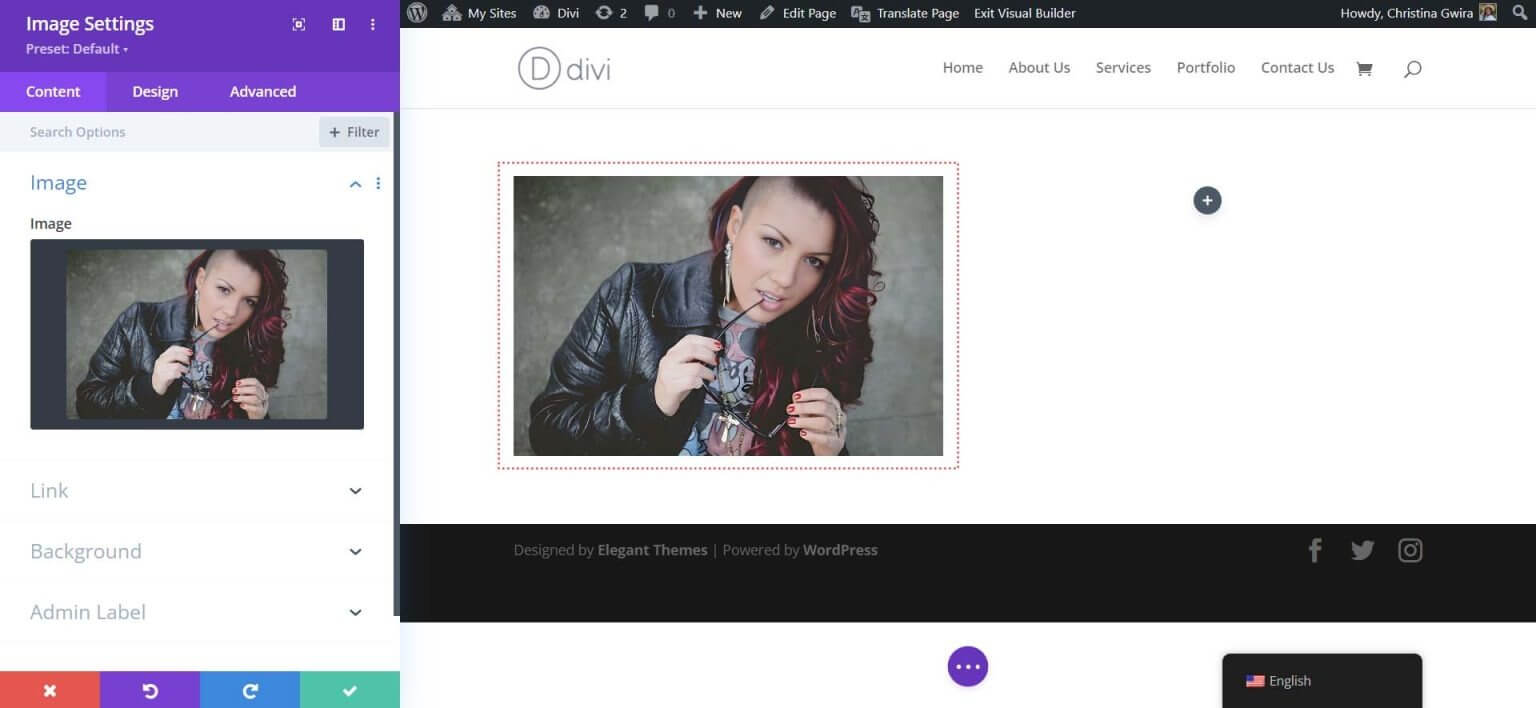
Now that we have our Image Module set up, let's upload and enhance a picture from our hard drive into WordPress. Click the gear icon in the Image Module. The Media Library will be located here. You have the option to upload a new image or choose an existing one from your library. We will choose a picture that is currently in our Media Library.
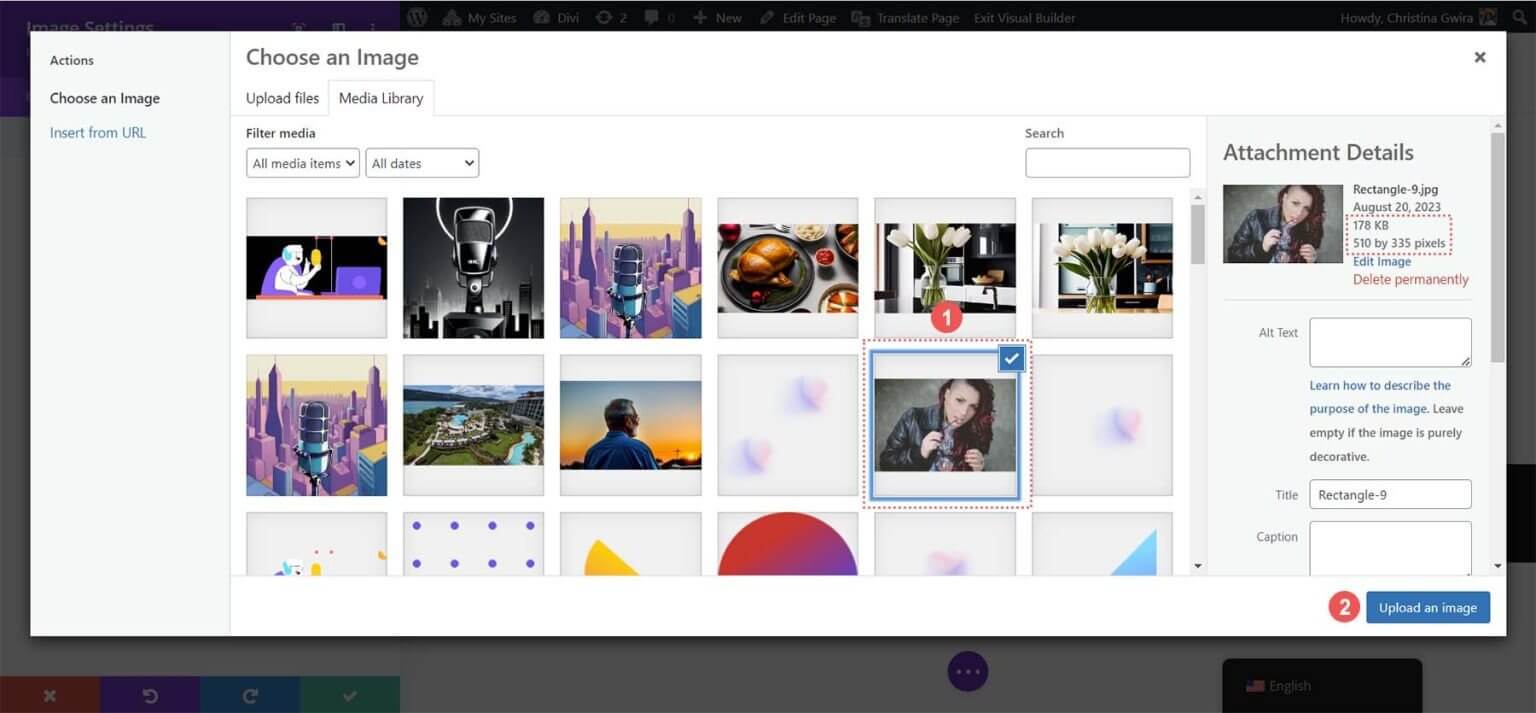
Please consider the image's dimensions and file size after you've chosen it. Later on, we will compare the results of upscaling photos in WordPress with Divi AI using this knowledge. In order to add your image to your page, click the Upload an Image button at the end. We may now utilise Divi AI's image upscaler.
3. Use Divi AI to Enhance Your WordPress Images
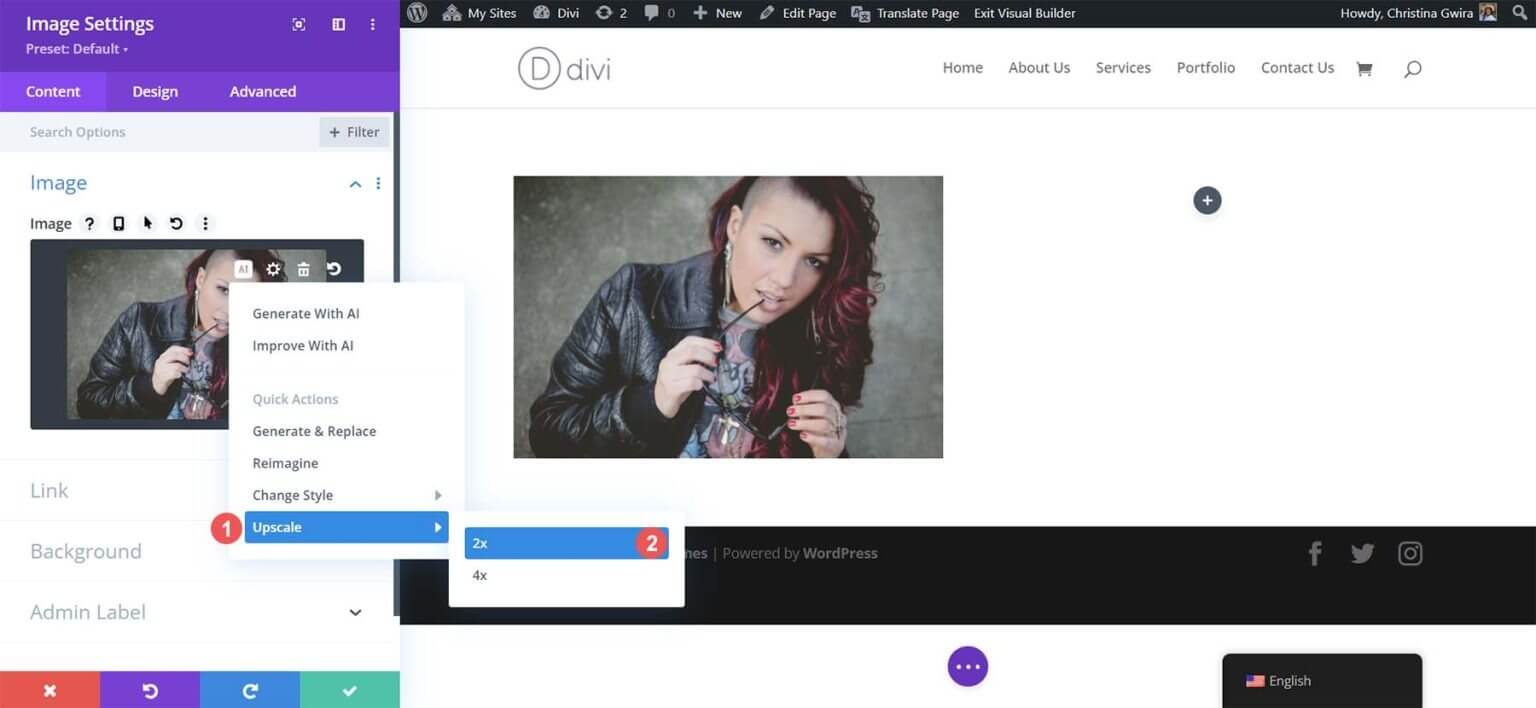
Divi AI can be enabled once our image has been chosen in the Divi Image Module. Next to the settings icon for the image, click the Divi AI symbol.

Next, choose the Upscale function. Lastly, decide which upscaling option to use—2x or 4x.
You never have to leave the WordPress dashboard when you use Divi AI for your WordPress upscaling needs, which is its greatest feature. Upgrading your image doesn't require you to launch a software on your desktop or go to a third-party website. With the Divi Builder, you may enhance your image without needing to download any more software.
You'll find that your page appears the same after a little wait. Well, is it? Let's examine it more closely.
4. Comparing Our Original and Upscaled Images
To view the Media Library and discover what Divi AI has accomplished behind the scenes, click the gear button.

Upon initial observation, we discover that a copy of our original image has been made. Divi AI is intelligent enough to backup our image before executing actions including upscaling. The next thing we notice is that our newly upscaled image has different dimensions when we click on it. It has now nearly doubled in size, consistent with the Divi AI 2x upscaling option we chose. Its file size is still modest and easy to handle, nevertheless.

Additionally, there is a discernible difference in the quality of our upscaled image when comparing the two.

Our enhanced image appears crisper, and the colours in our updated photo are more vivid. The Divi AI not only enlarges the dimensions of our images while preserving their quality but also fine-tunes them. Now, let's examine the updated image statistics in our Media Gallery. The original image measured 510 pixels by 335 pixels and had a file size of 178 kb. Although it was already a lightweight image, upscaling it can further optimise it. With the help of Divi AI, not only did we nearly double the image's size, but we also compressed it without any loss in image quality.

Furthermore, although the image's size has altered in the Divi Builder, its quality has improved in tandem with the shift in dimensions.
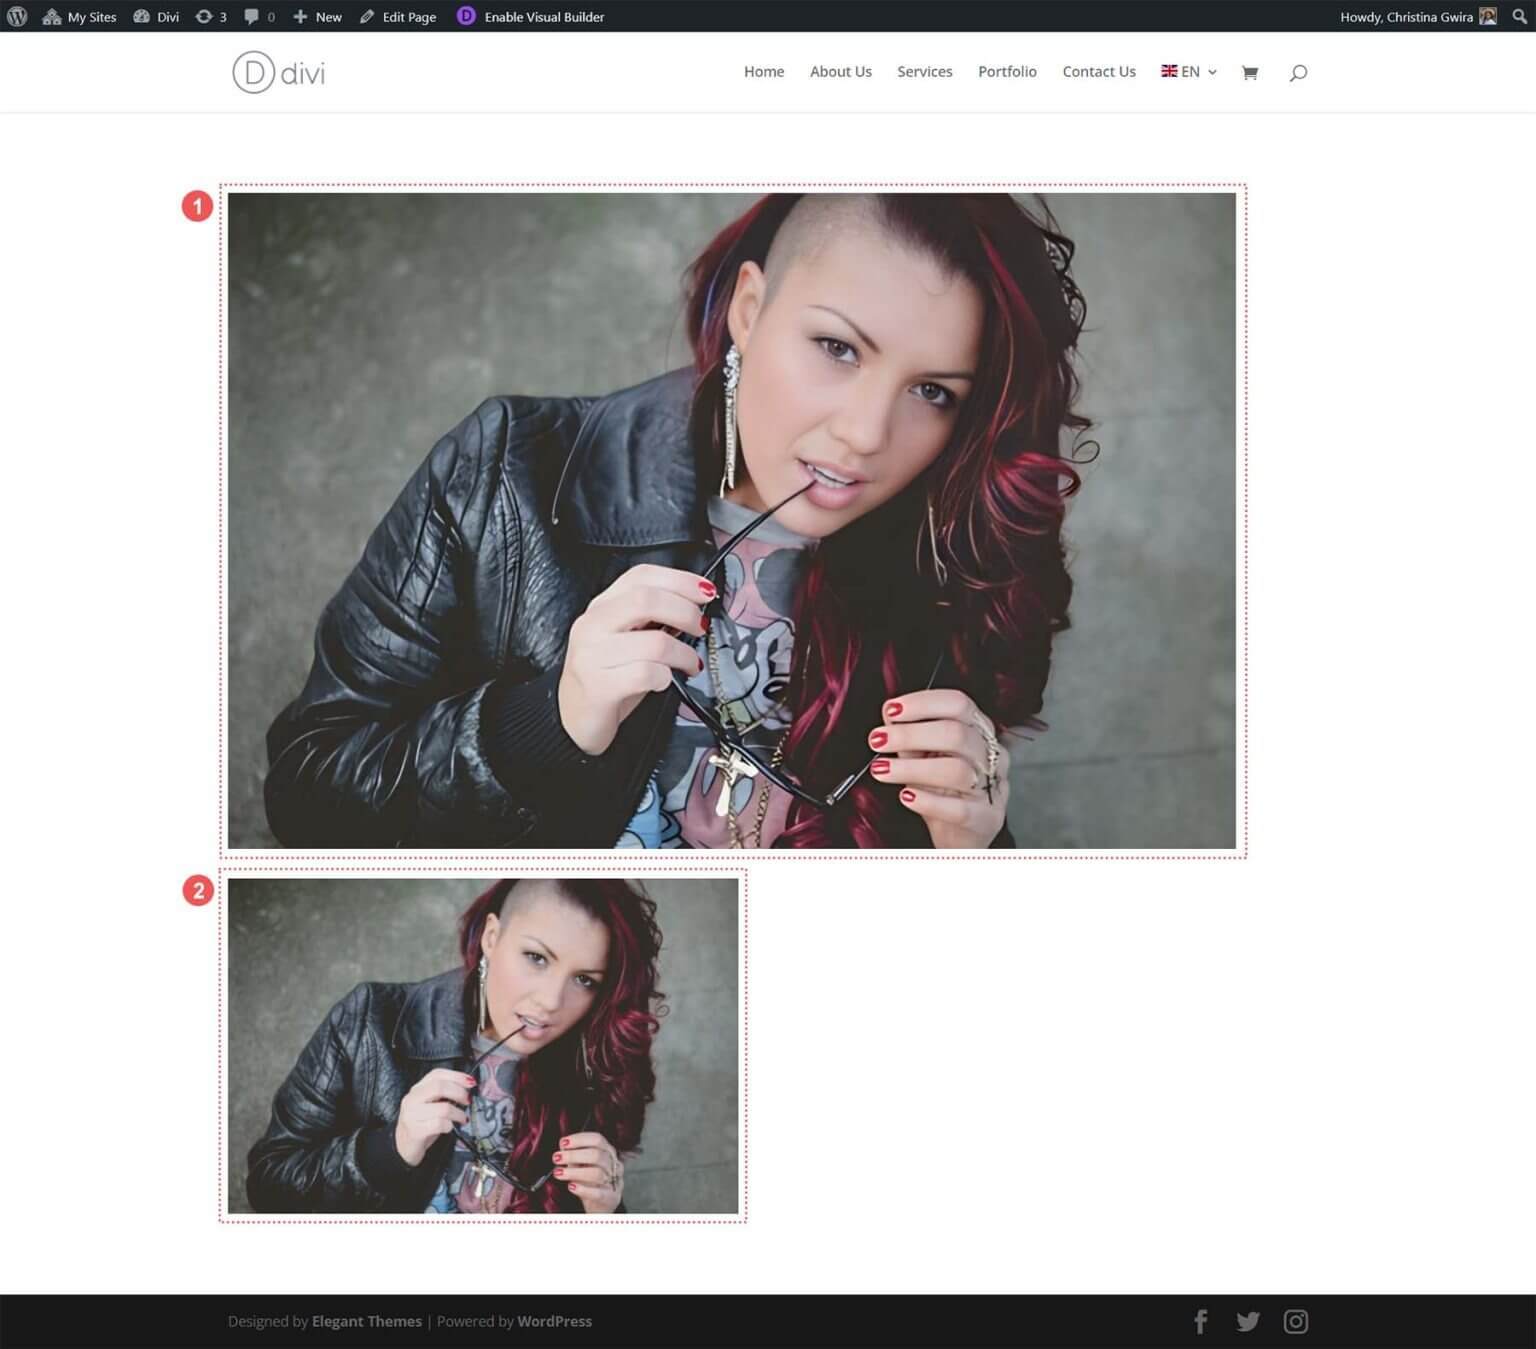
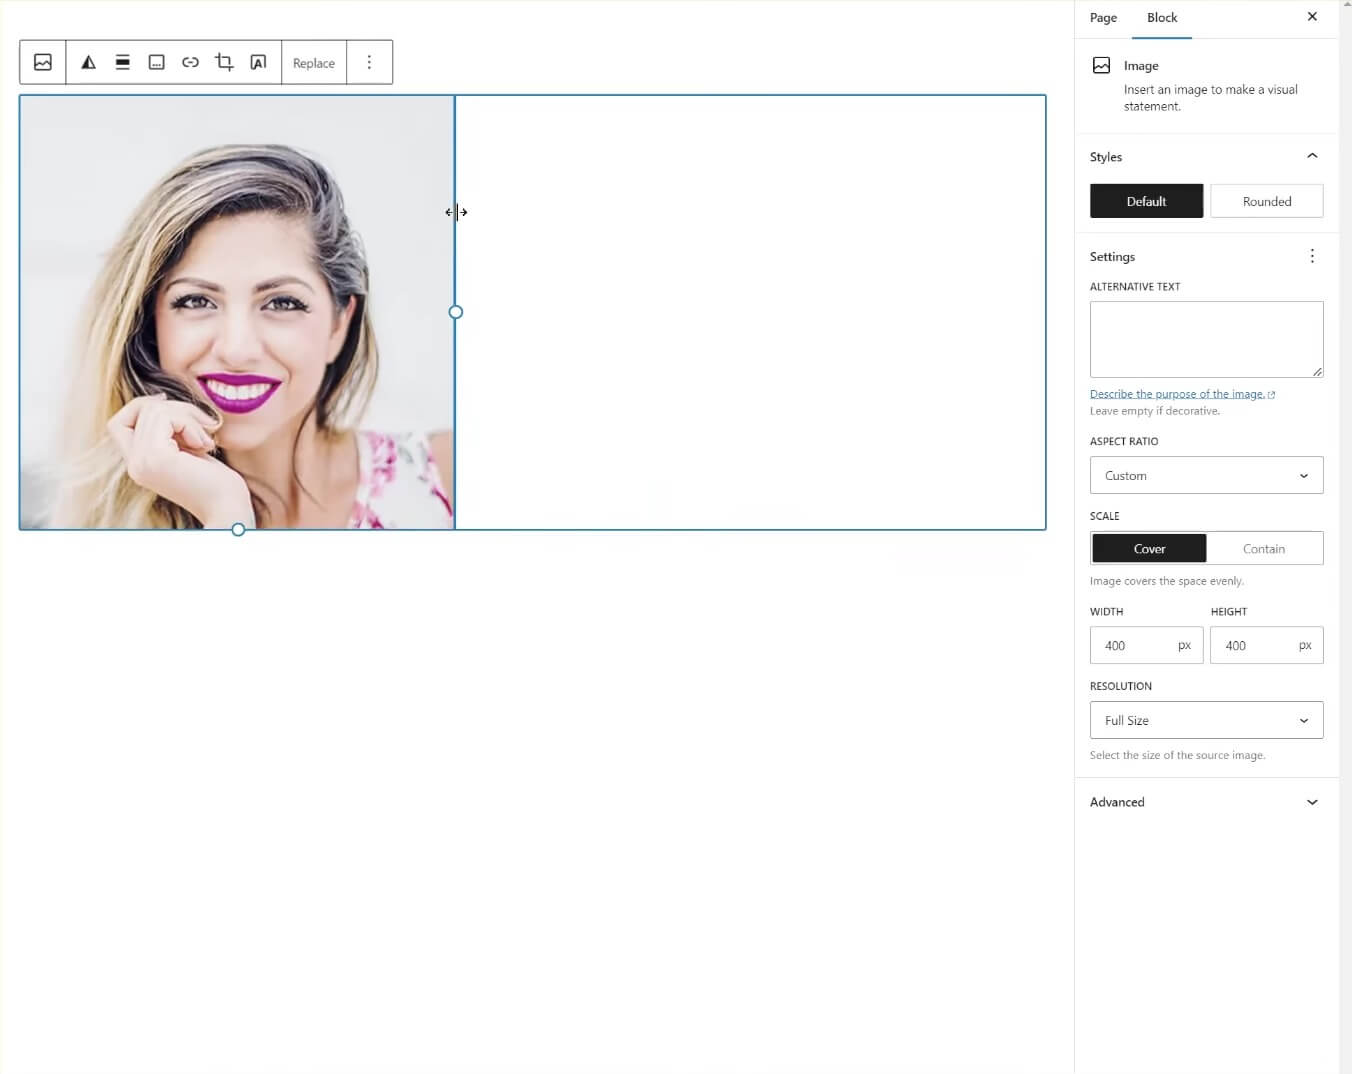
Image 1 represents our updated and enhanced image, while Image 2 showcases the original version. Both of these images are placed within a single-column row layout using Divi. At first glance, Image 1 appears larger, but upon closer inspection, you'll notice significant improvements. The image is noticeably crisper, with more accurate colours (take note of the hair and nails), and the model's skin appears smoother and more refined. Despite the smaller size of the original image, it still doesn't match the clarity of our upscaled version.
This means that by opting for Divi AI as your WordPress image upscaling solution, you can achieve superior image quality without the need to navigate away from the WordPress interface or rely on external tools. It's evident that choosing Divi AI translates to swift, effortless, and outstanding results for the photos and images featured on your website.
Additional Tools for Upscaling Images on Your WordPress Website
While Divi AI is a great choice for upscaling images in WordPress, you might find the need for additional upscaling capabilities not currently offered by Divi AI. In such cases, here are some alternative image upscaling tools to consider:
- Gigapixel AI by Topaz Labs:This user-friendly online platform supports various image formats, enhances image quality, and processes images swiftly.
- Upscale.media: Another easy-to-use online platform, it also supports multiple image formats and enhances image quality with quick processing.
- Icons8 Smart Upscaler: This tool offers a straightforward interface and can upscale images up to 7680px. It provides an API and a Mac desktop application that can also remove backgrounds.
- Zyro AI Image Upscaler: For fans of the Adobe Creative Suite, Adobe Firefly is a great choice. It powers industry-standard tools like Lightroom and Photoshop, offering advanced colour refinement and detailed enhancement.
- Adobe Firefly: Also part of the Adobe Creative Suite, it excels in refining colour, showcasing intricate details, and more.
These external upscaling tools require you to perform the upscaling tasks outside of WordPress and then import the images into your Media Library. While these options offer versatility, using a tool like Divi AI remains a convenient choice that can save you valuable time, making it an excellent resource for efficient web designers.
Wrapping Up
In summary, image upscaling is a vital part of web preparation. Divi and Divi AI provide an integrated solution for image upscaling within the Divi Builder, simplifying website development. If you seek more upscaling options, several AI tools complement WordPress.
Explore the world of AI tools for WordPress in our comprehensive collection, offering various platforms and programs for image enhancement and design. Expect more insights on web design and content creation to enhance your site's visual appeal and performance. Your journey to a remarkable website is just starting.


