
You might have wondered what page your visitors go through the most before filling out your website form. Tracking your user's Journey allows you that information that is essential for engagement and business growth.

Tracking the user's journey enables you to know about how your users interact with your website. By looking at the steps they take before they go on to fill-up the form will help you enhance the quality of those pages.
By having this information you will know exactly where you want to put your energy and which pages are more important than others. In this tutorial, we will understand how to track the user's journey before they fill out the form.
WP Forms

WP Forms is the most popular WordPress plugin that you can use to create forms for your WordPress website. Used by more than 4 million WordPress websites, WP Forms is easy and simple to use.
It offers a variety of features such as Email Marketing Services, Payment Gateways, subscription forms, and a lot more. While it also has some addons to extend its features.
For this tutorial, we are going to use a WP Forms addon for User Journey which will allow us to track the user's path on our website. It will also allow us to see the time a user has spent on a particular page.
Create Amazing Websites
With the best free page builder Elementor
Start Now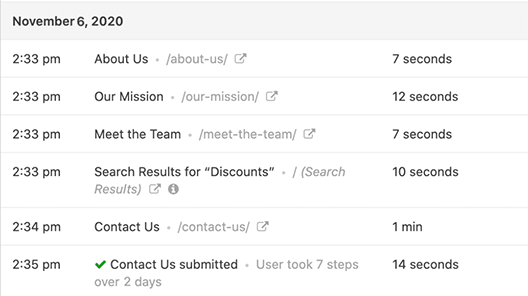
Let's head over to WordPress and start the process.
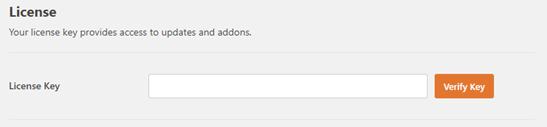
Once you have installed the WP Forms plugin, in the General tab from WP Forms Settings in WordPress Admin Bar, it will ask you for the license key which you will get from your WP Forms subscription account.
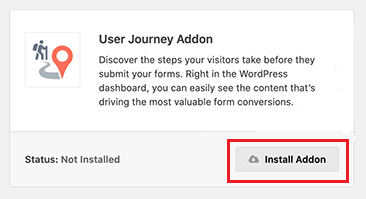
After you have successfully connected your account with the plugin, you need to go to Addons in the Admin Bar under WP Forms.

Next, you need to press the Install Addon button below the User Journey Addon on the page.
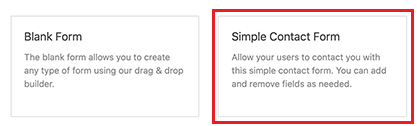
Next up, you can start creating forms. With WP Forms you can create all kinds of forms using simple pre-built templates. Let's go ahead and create a Contact Us form.
To create a form, you need to go to WP Forms and press Add New. You will select the Title for your form and then see a number of Form Templates from which you can choose the one you want to create.
Once you have selected the Template, the plugin will direct you towards the drag and drop builder.
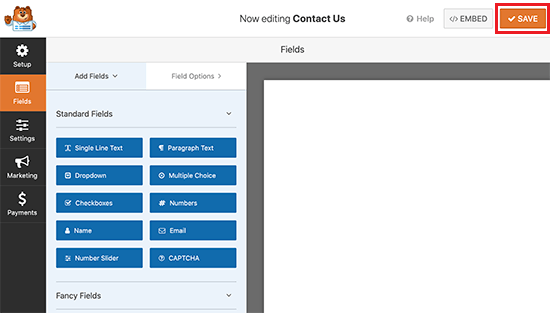
These forms are highly customizable. You can add new fields while you can also remove the pre-existing fields from the template.
Save the form once you are done with the customization. Add the form to any of the posts/pages you want.
To do that, edit the post/page and then press the Add New Block '+' button and add the WP Forms Block.
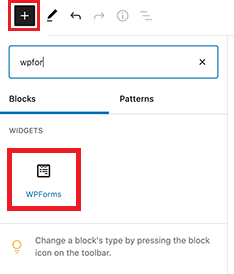
In the newly added WP Forms block, select the form you created.
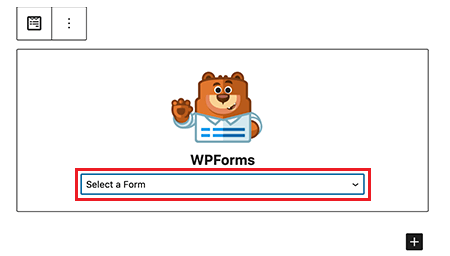
Finally, the form will start appearing on your content page.
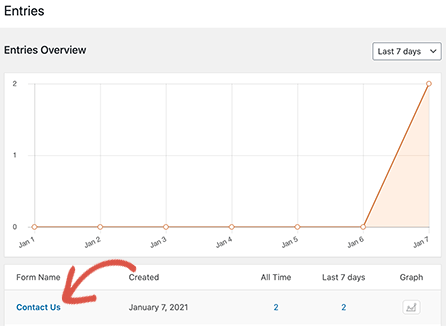
Moving on to track the User's Journey, after a few submissions you can go to the Entries page from the WP Forms in the Admin Bar.
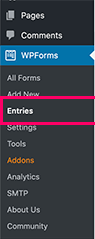
Click on the form you created earlier.
A list of Entries will be shown to you from different users. To track a user's journey, you simply need to click on the View button right below the Actions on their entry.
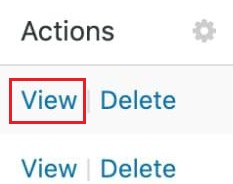
You will see all the details of the user's journey to your form. Alongside seeing the pages your user have visited before filling out the form, you will also see the time they have spent on each of these pages.

You will also be able to see the referral source that the user has followed. Using this information, you will find it much easier to see the pages that are more engaging. While it will also help you improve on the ones that the user does not find much interesting.
We hope this tutorial will help you in making your WordPress experience much more interesting. To stay updated about the content that will help you improve your WordPress site, make sure to join us on our Facebook and Twitter.


