
It is critical to have a section on your website where you can display your work. If you're a stylist, you may set up various projects on your WordPress website to demonstrate your ideas. If you're a brand designer, a portfolio is a great way to show your previous work. Furthermore, we might go a step further and include several categories for our projects. Divi's Filterable Portfolio Module comes in handy here.
With this module, we can show off our hard work in an easy and organized way. In this lesson, we'll style the individual grid objects of the Filterable Portfolio Module. We'll be using free layout packs from the Divi Conference and Divi Online Yoga Instructor that come with every purchase of Divi. As with everything in Divi, we may style this module to meet our specific needs and desires. But before we get into styling, let's learn a little bit more about the module.
What is Divi’s Filterable Portfolio Module?
Projects are a form of custom post that functions similarly to posts. These can be found in your WordPress dashboard.
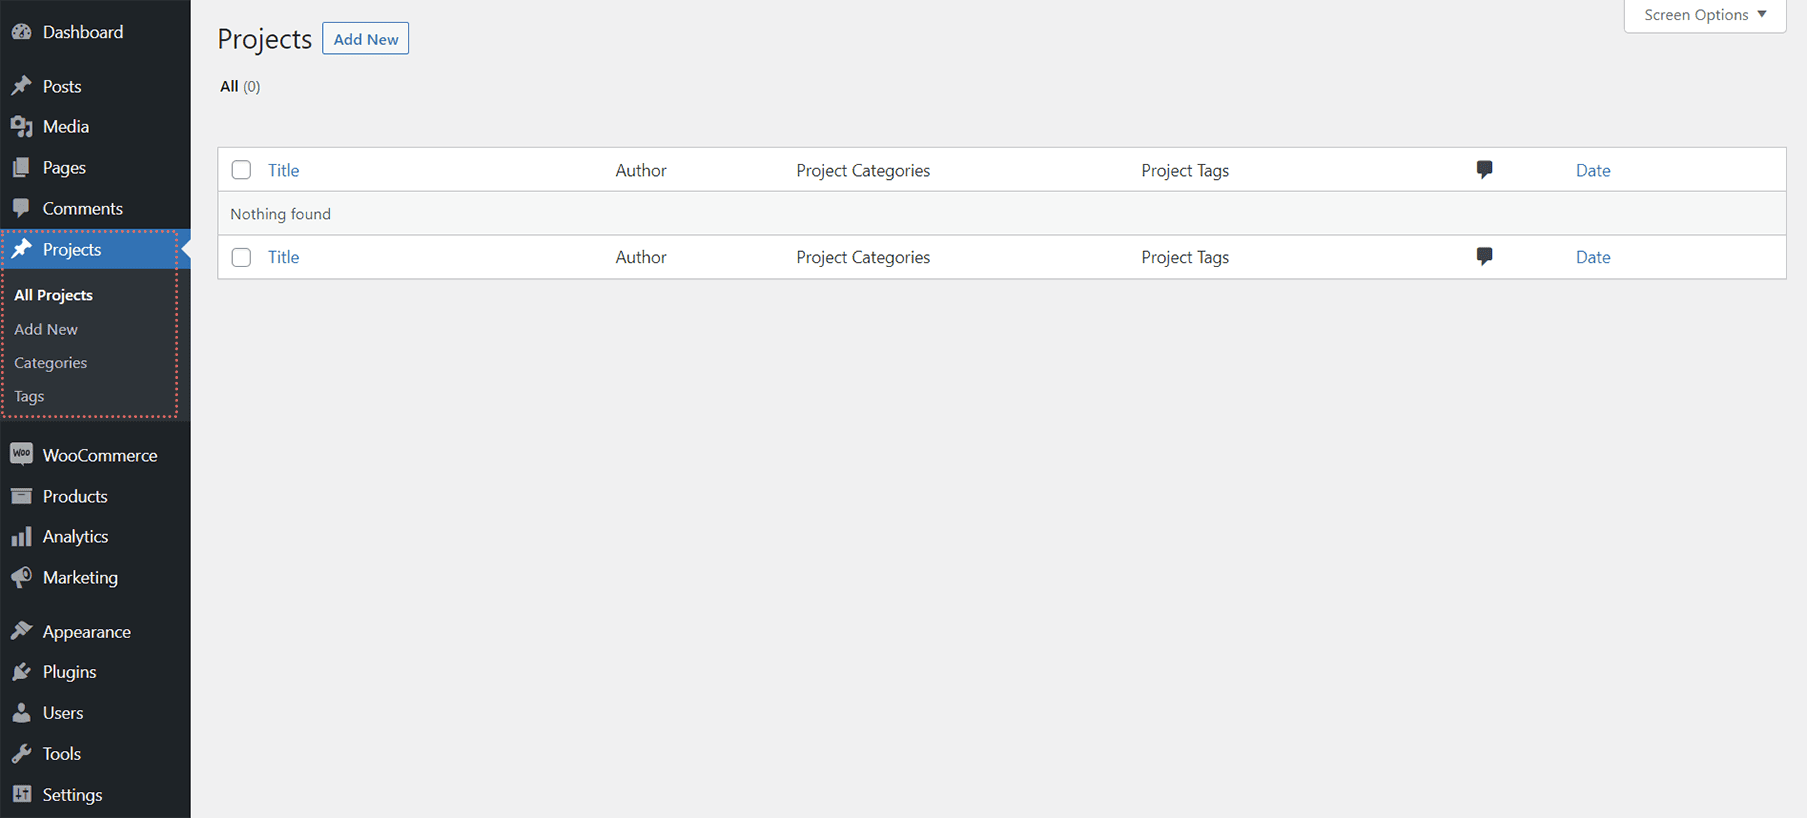
Here you will construct the different projects that will populate your Filterable Portfolio Module. The module provides us with two options for displaying our projects: grid or full width. The grid structure will be used and styled by us. We will be able to highlight our most current projects using the Filterable Portfolio Module. Our site visitors will see a filter bar on top of our portfolio grid. They can then navigate through the portfolio categories that we allow to be shown within the module.
Create Amazing Websites
With the best free page builder Elementor
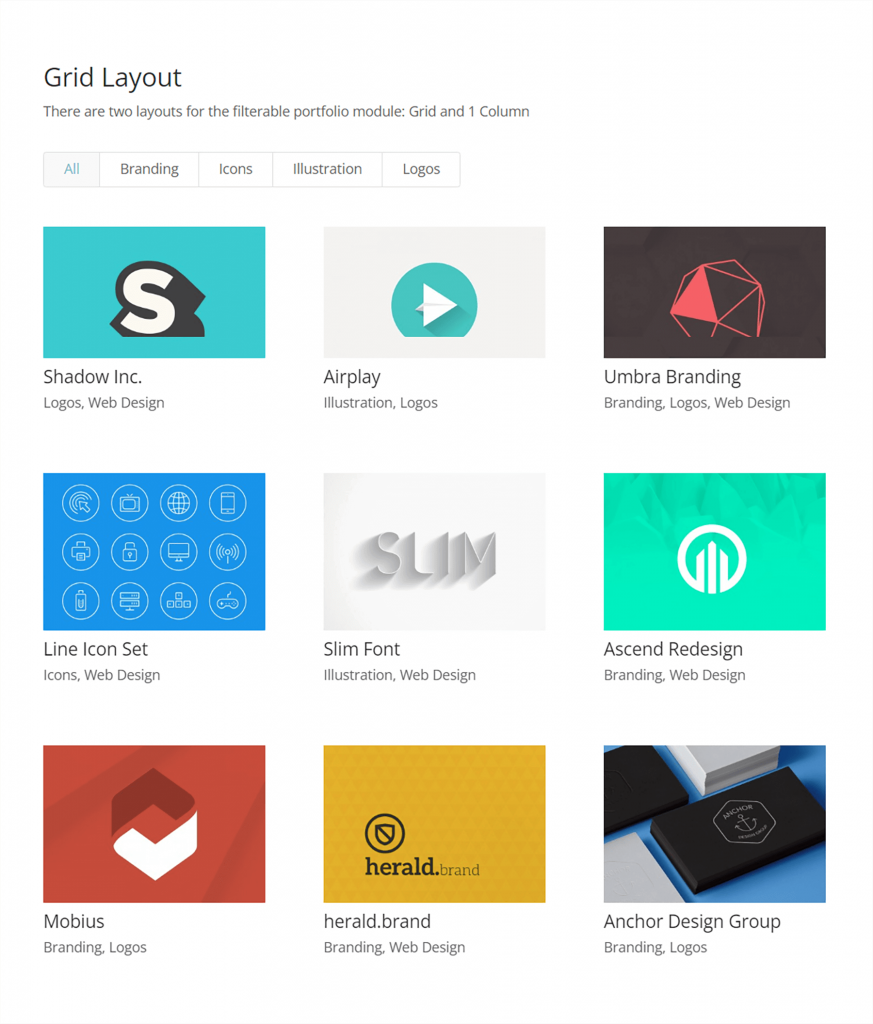
Start NowHere's an example of a basic module setup with some sample projects:
Considerations for Styling Divi's Filterable Portfolio
The Filterable Portfolio Module, like all Divi modules, comes with a lot of features that we may configure to our liking. As a result, the majority of the module's features are modifiable via the Design tab of the module's settings modal box. We can make changes to the following areas, among others:
- Project Title
- Project Category
- Thumbnail
- Filter Text
- Thumbnail Hover
- Pagination
This is not an exhaustive list, and we haven't even begun to discuss how CSS has enhanced the module's customizations!
How We’ll Be Styling Divi’s Filterable Portfolio Module
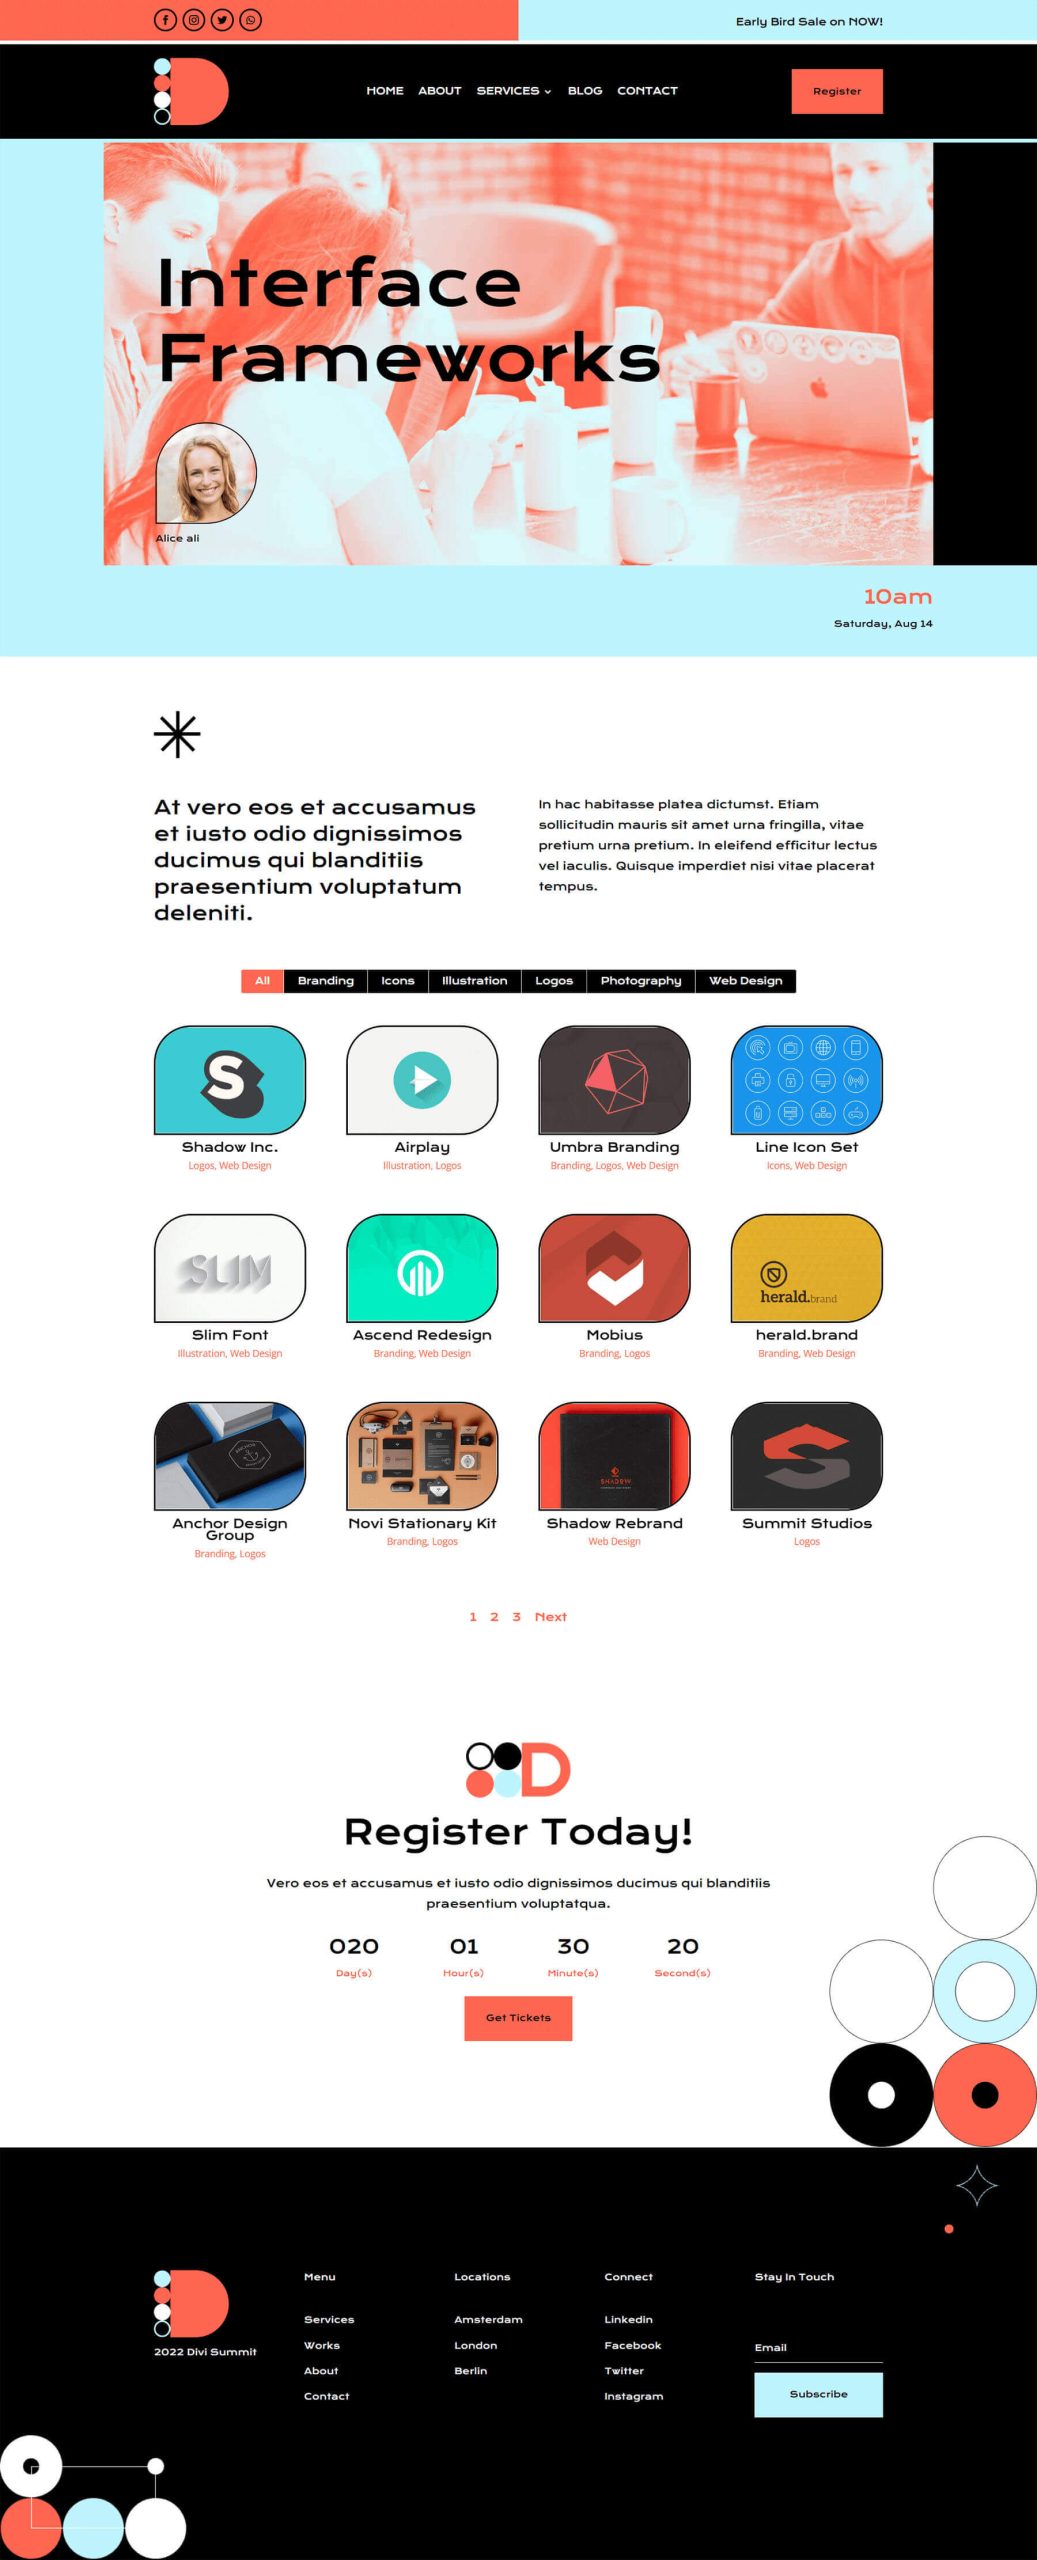
As previously discussed, we will be using two layouts from the Divi Conference and Divi Online Yoga Instructor for this session. You can get a preview of the work we'll be performing during this class below.
This is what the Divi Conference Event Layout looks like -
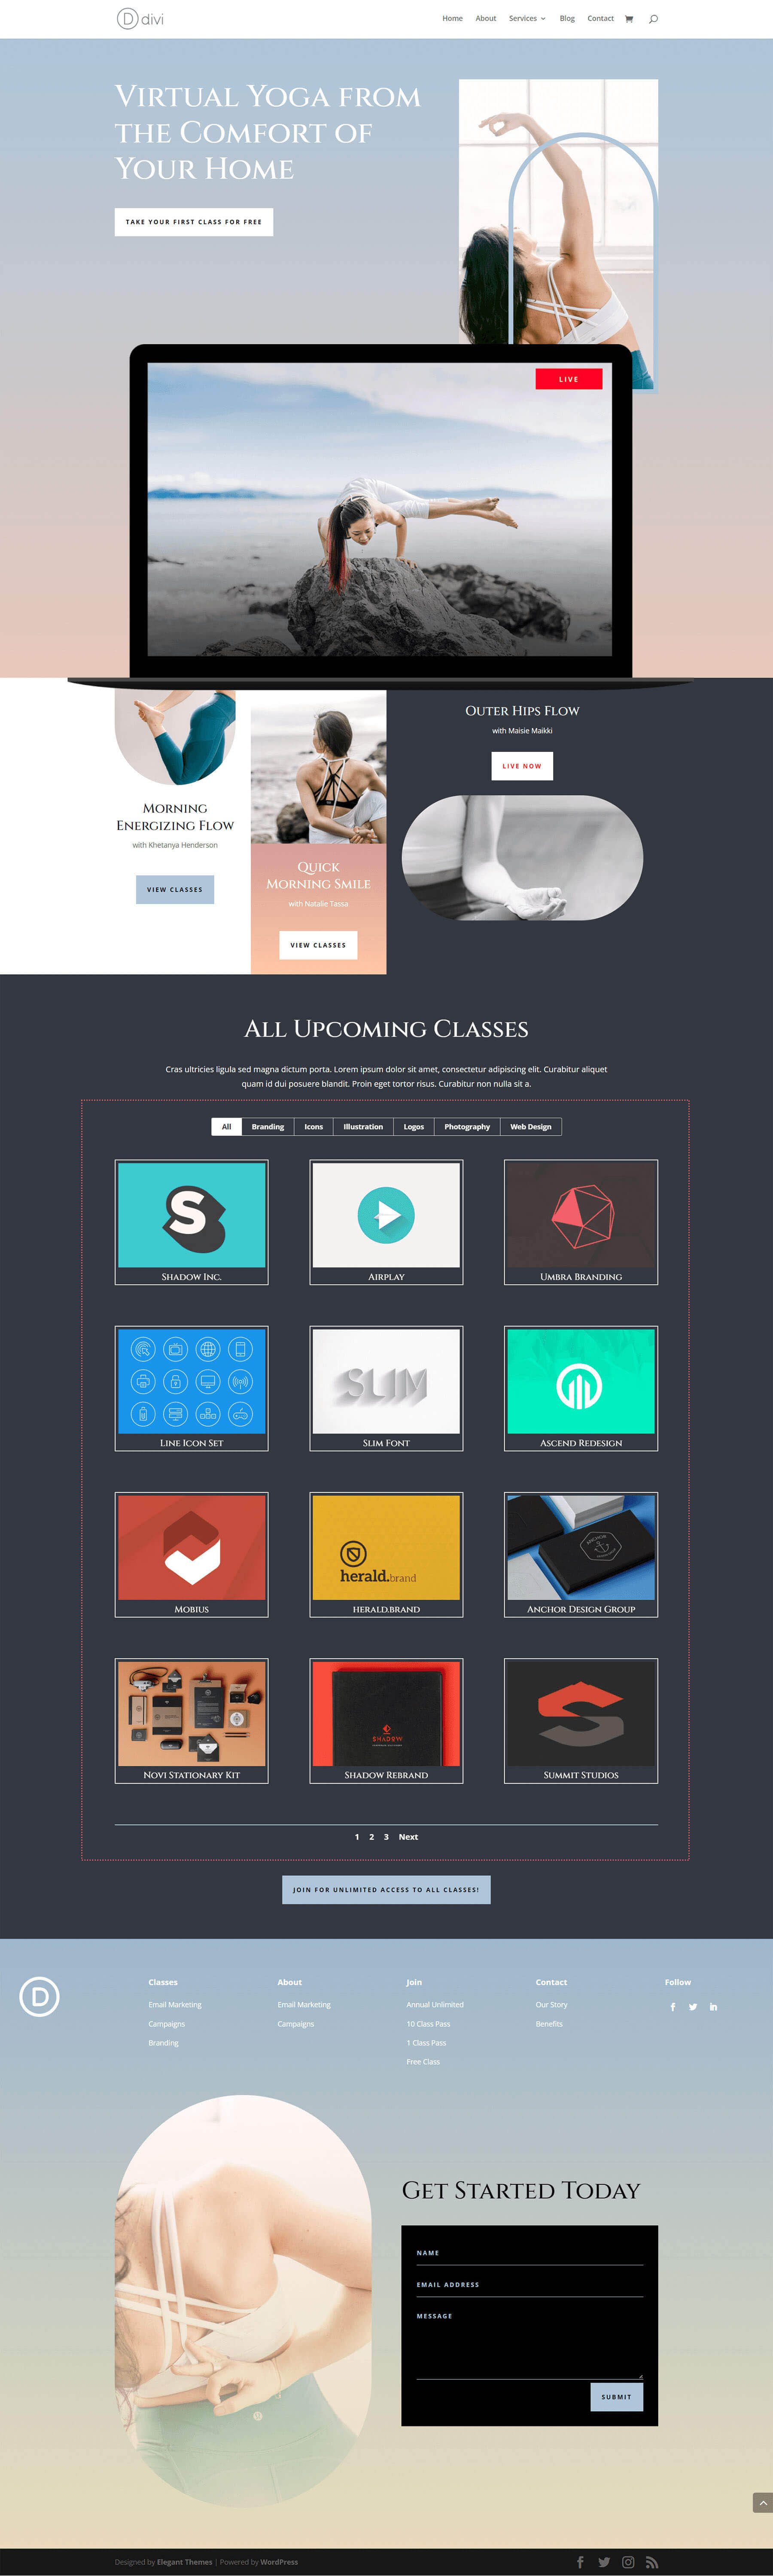
And this is what the Divi Online Yoga Instructor Landing Page Layout looks like-
Both layouts are easily accessible from within the Divi Builder. Let's get this party started!
Styling Divi’s Filterable Portfolio Module: Divi Conference Edition
First and foremost, we'll need to install the Divi Conference Layout Pack's event page template. We'll go into the Divi Library after you've established a new page in WordPress and enabled the Divi Builder.
Enter the Divi Layout Library
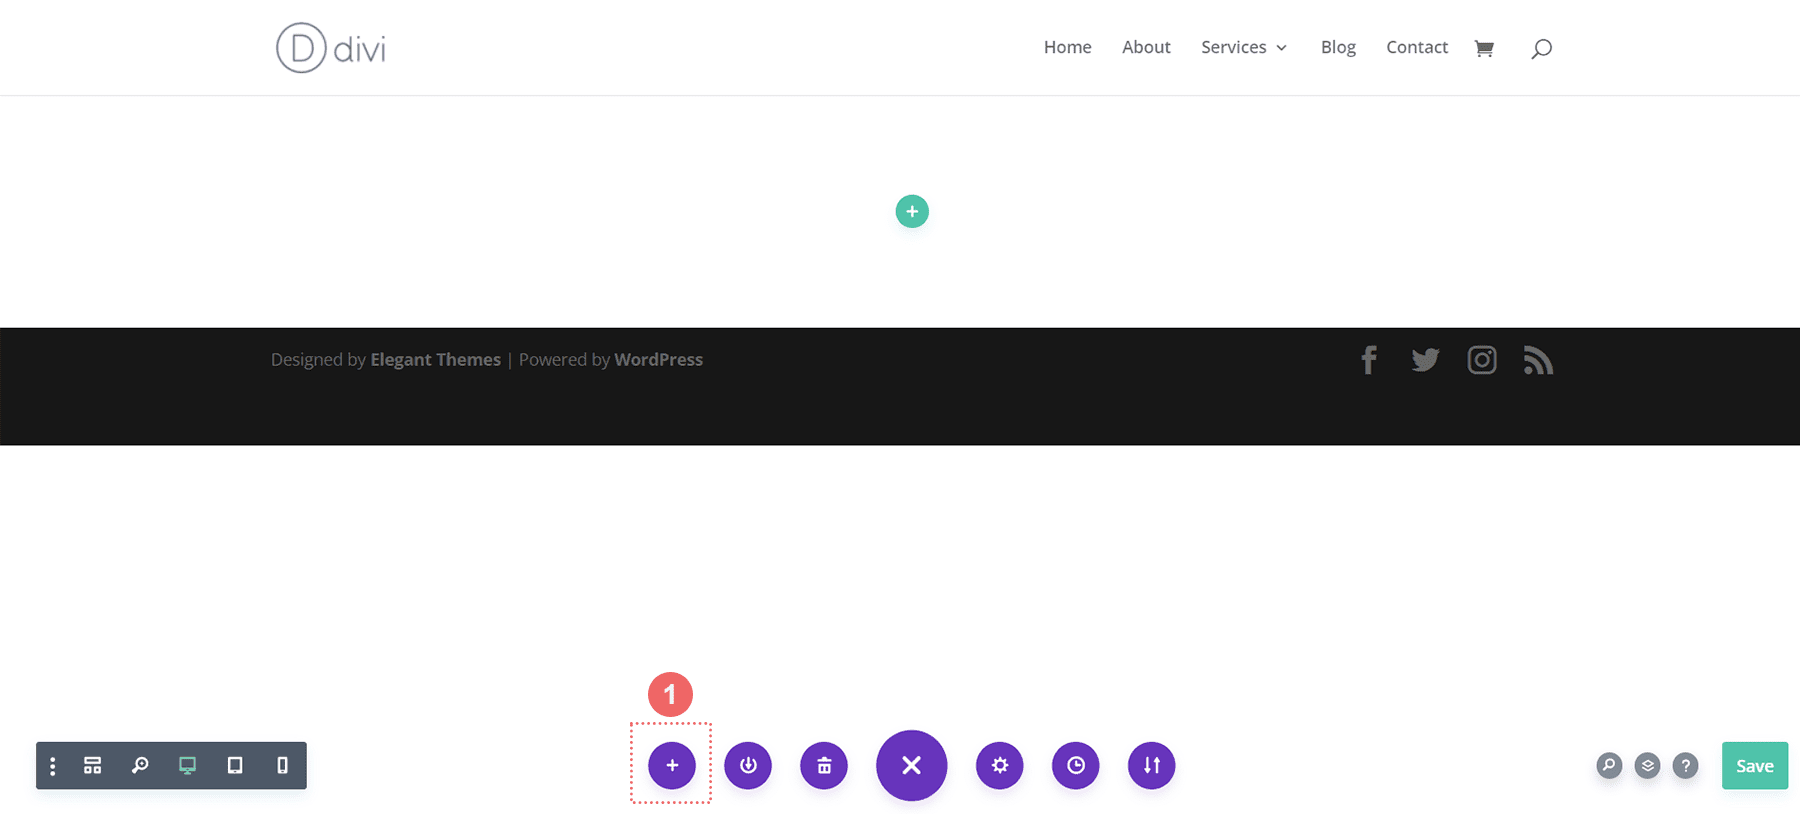
To access the Divi Layout Library, click the Load from Library icon.
Locate Layout Within the Divi Layout Library
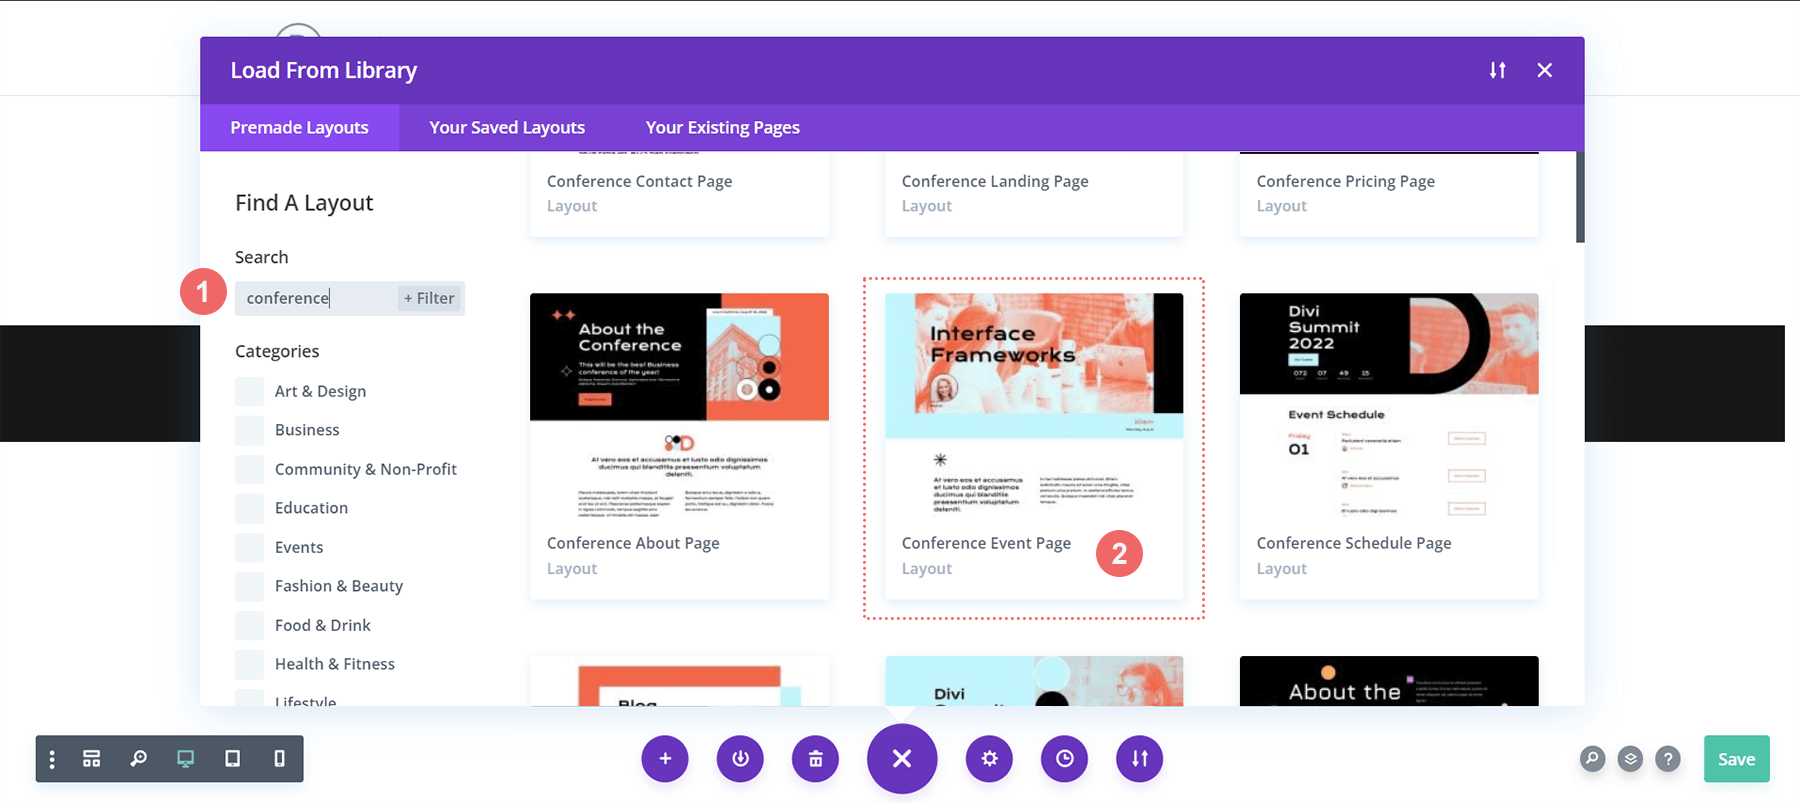
Search Divi's Layout Library for the Divi Conference Event Page layout using the search feature.
Install the Layout
Once you've decided on a layout, click the Use This Layout button to add it to your page.

Remove and Replace Image Module
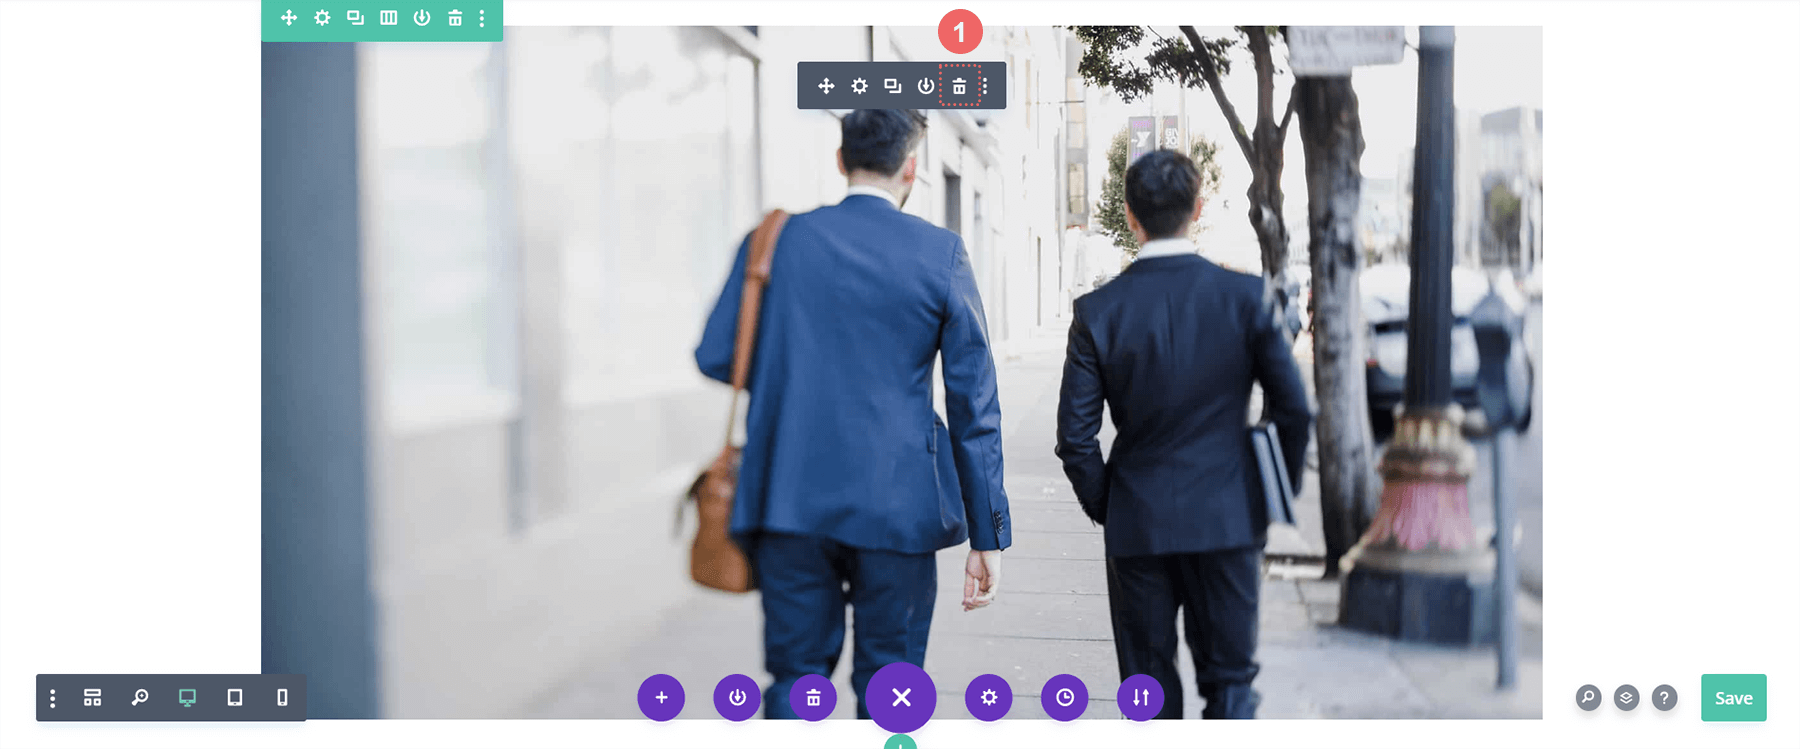
We'll delete the Image Module shown below to create a place for the Filterable Portfolio Module, which we'll style. After hovering over the image, click the Delete icon to erase it.
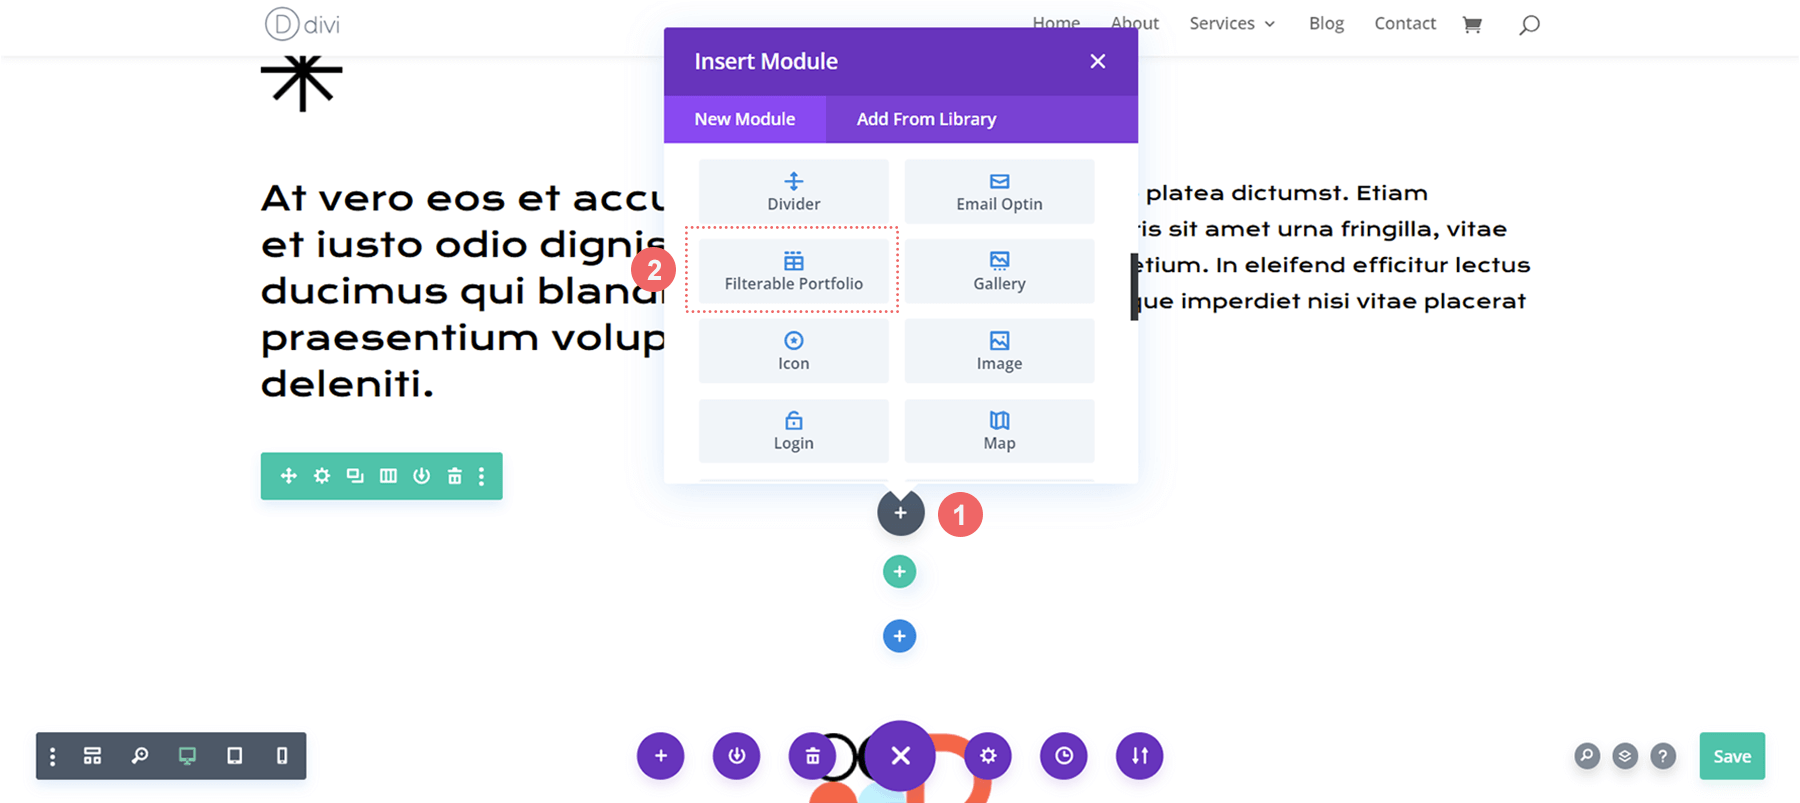
Insert the Divi Filterable Portfolio Module
We can now make room for our Filterable Portfolio Module by removing the Image Module. We will select the module from the module modal box that appears by clicking on the Add Module Icon (the grey plus sign).
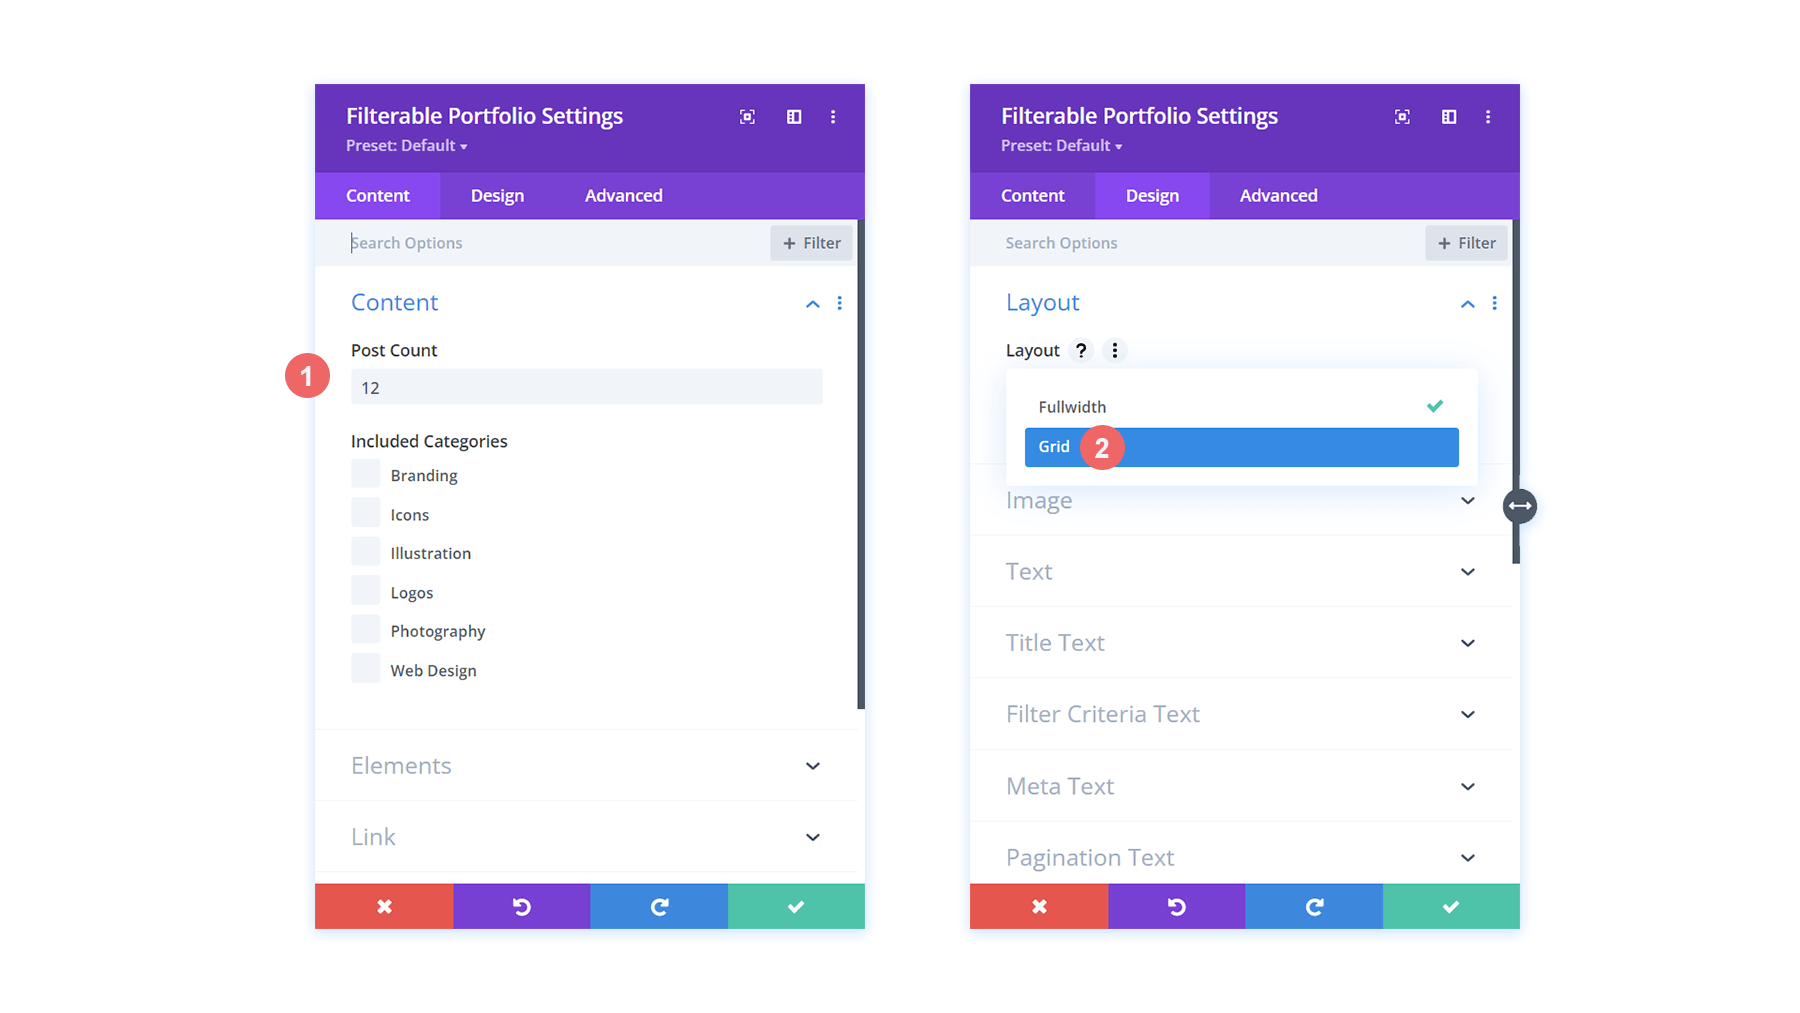
Setting the Post Count and Portfolio Layout
This module will display your work in a single column by default. However, we'll be using the Grid layout, which has four columns by default. As a result, we recommend selecting a number that is a multiple of 4 (4, 8, 12, 16, etc.) as your portfolio's Post Count. We'll be using 12 projects in our grid for this tutorial.
Styling Divi's Filterable Portfolio
Now that our projects are displayed as a grid let's incorporate some of the design aspects from our chosen template. In this scenario, we'll incorporate the styling from the Divi Conference Layout Pack into our new module.
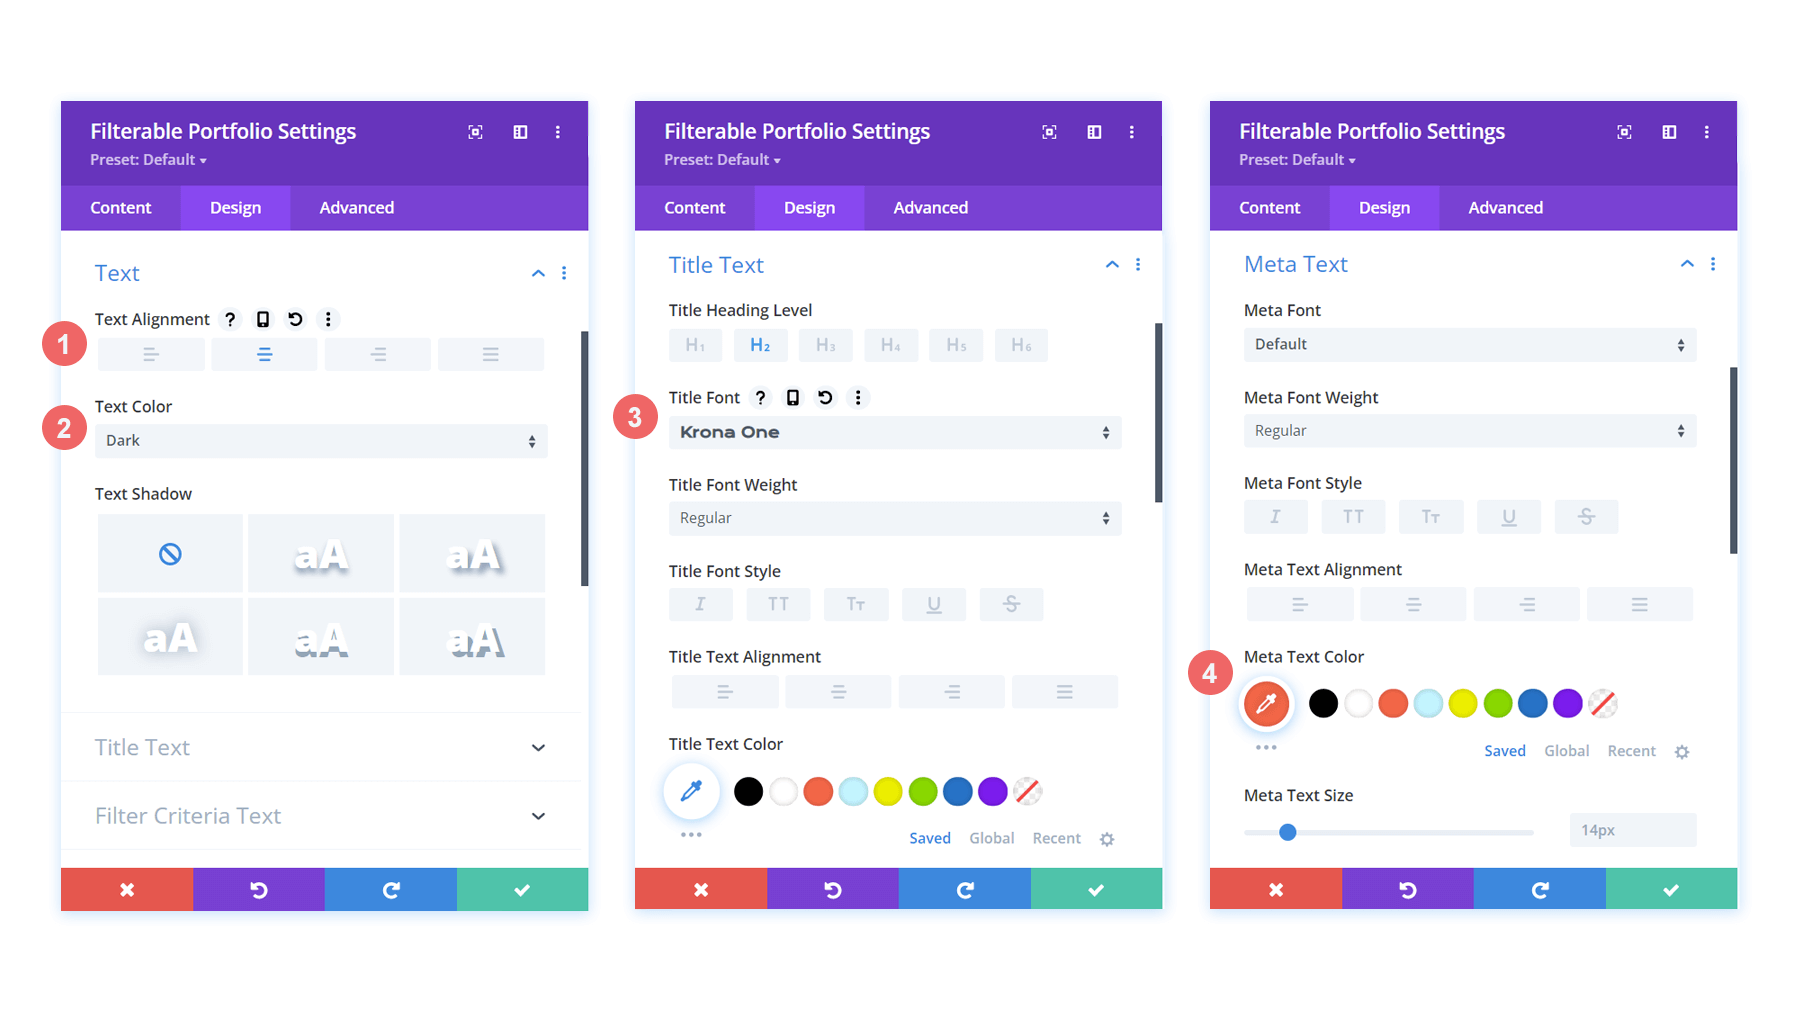
For text styling:
- Text Alignment: Center
- Text Color: Dark
For Title Text Styling:
- Title Heading Level: H2
- Title Font: Krona One
- Title Text Color: #000000
For meta text styling:
- Meta Font: Default (Open Sans)
- Meta Text Color: #ff6651
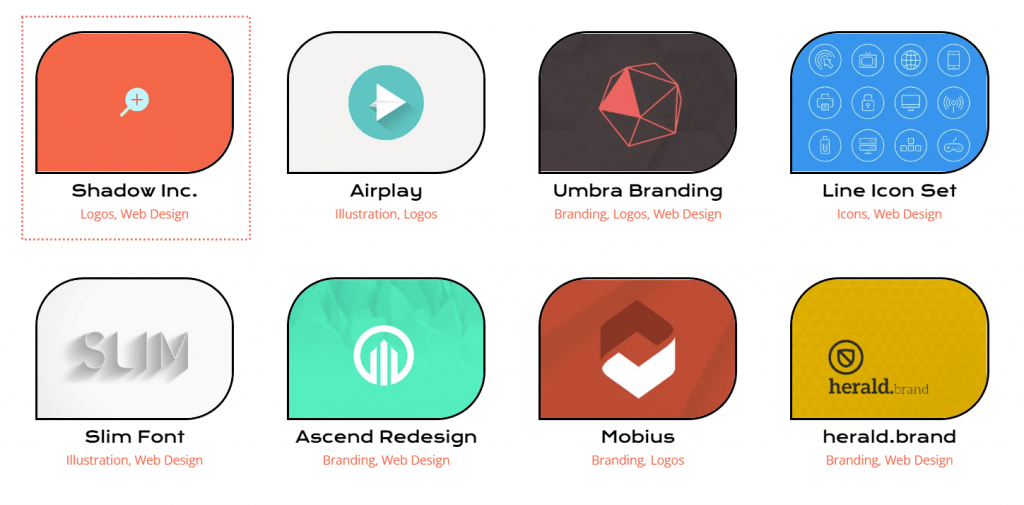
Now that we've styled the names within the portfolio grid let's make some changes to the actual shape of the project thumbnails.
Modify Project Thumbnail
We used a unique blend of rounded corners in our Divi Conference Layout Collection to give some of the important images in the pack a unique shape. Let's add this styling to our module's thumbnails.
To modify the image, apply the following settings:
- Image Rounded Corners: 50px 50px 50px 0px
- Image Border Styles: All
- Image Border Width: 3px
- Image Border Color: #000000
- Image Border Style: Solid


As a result, our thumbnails will have the same shape as the rest of the images in the layout pack.
Hover Overlay
Let's take our styling a step further by making a minor change to the overlay that comes standard with this module. We're planning to update the color as well as the icon that was used right out of the box.
For hovering overlay, make changes accordingly:
- Zoom Icon Color: #bcf5fd
- Hover Overlay Color: #ff6651
- Hover Icon Picker: Zoom
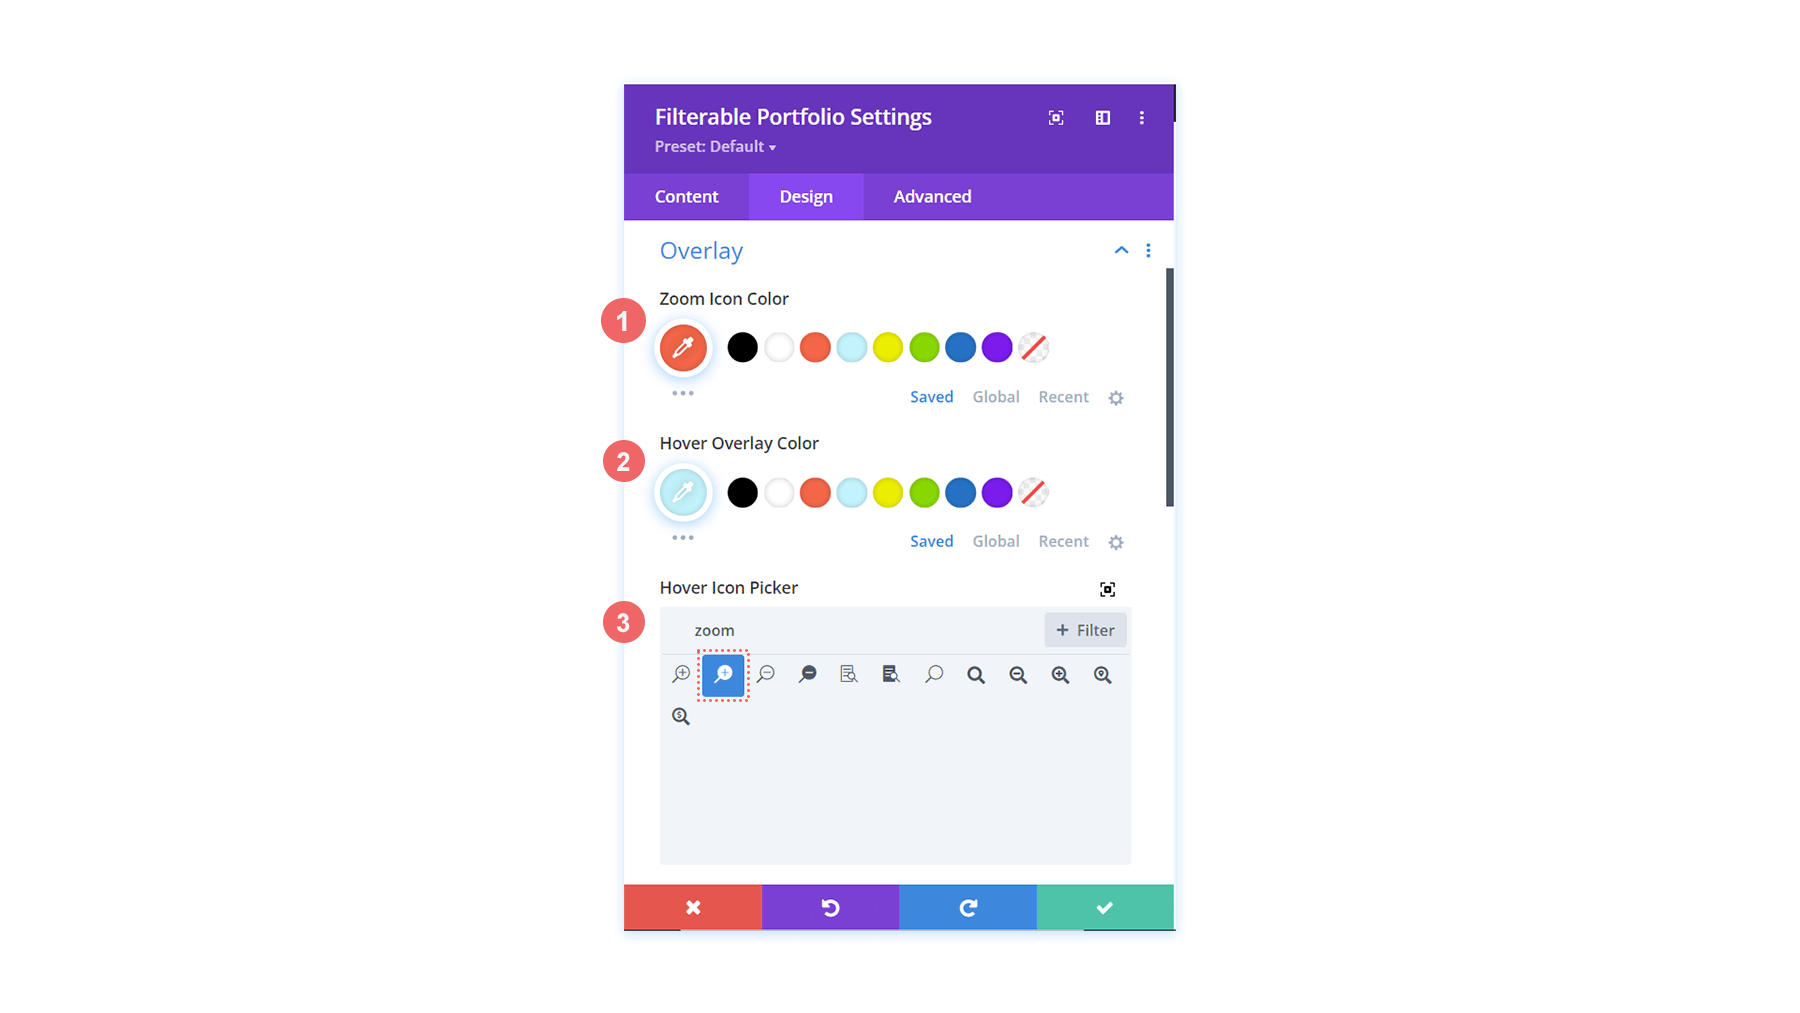
As you can see, we've added the layout's brand colors on the overlay and modified the icon that Divi gives by default for this module's hover overlay feature.
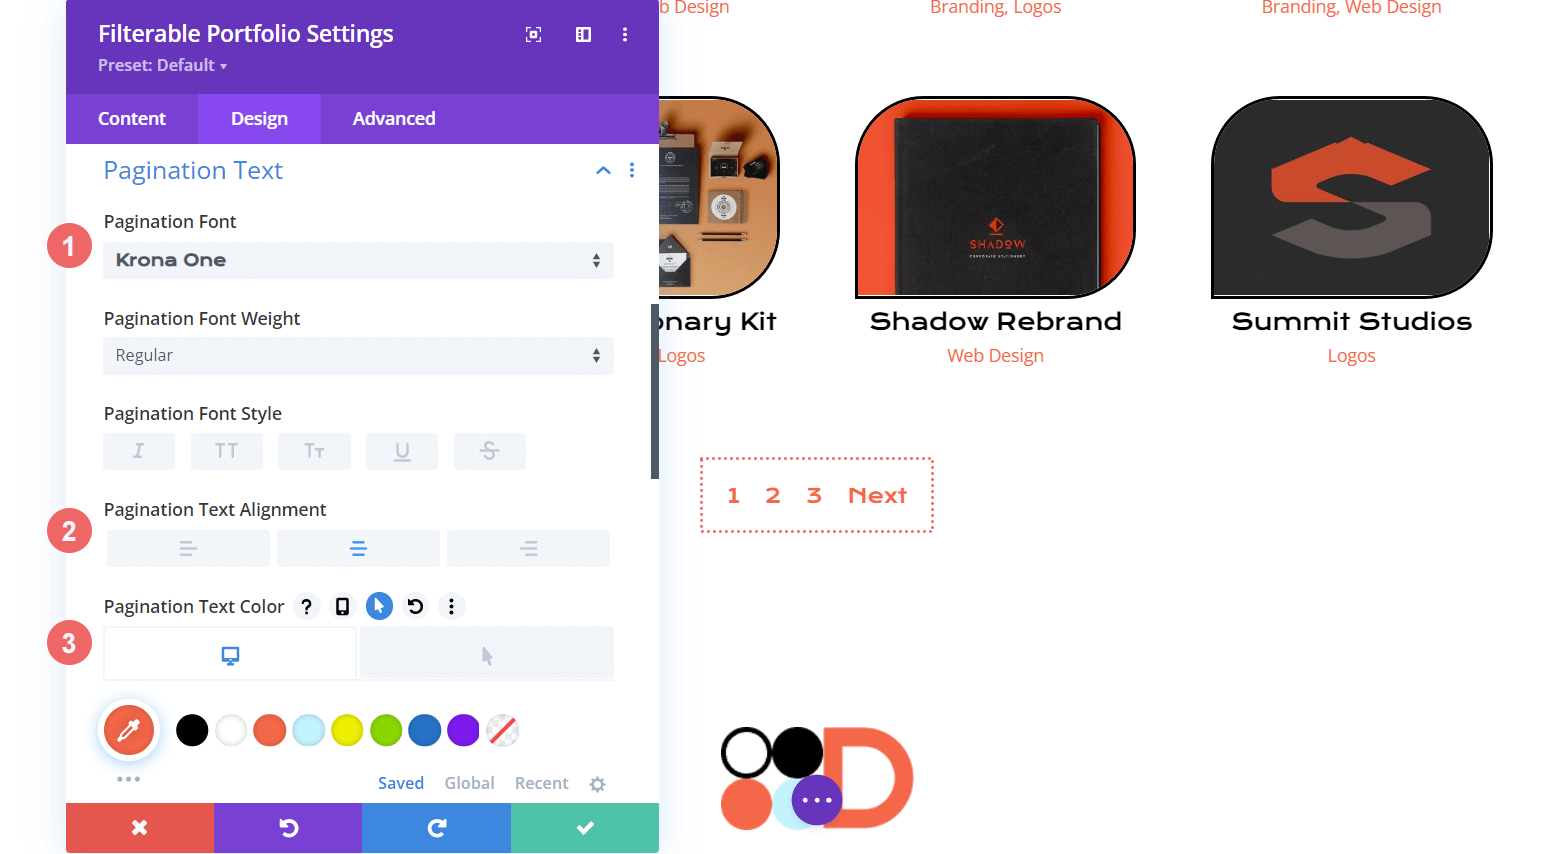
Styling the Pagination
We'll now start using little CSS snippets to provide some more customization to our Filterable Portfolio Module. First, we'll lay out the pagination of this module. With a single line of CSS, we'll eliminate the border that displays above.
For pagination text, apply the settings mentioned below:
- Pagination Font: Krona One
- Pagination Text Alignment: Center
- Pagination Text Color: #ff6651
- Pagination Text Color (Hover): #000000
We'll go to the Advanced tab of our module for our CSS. Second, we'll select the Custom CSS tab. Next, we'll add the following code to erase the border on top of our pagination, giving it a cleaner appearance.
border-top: 0px;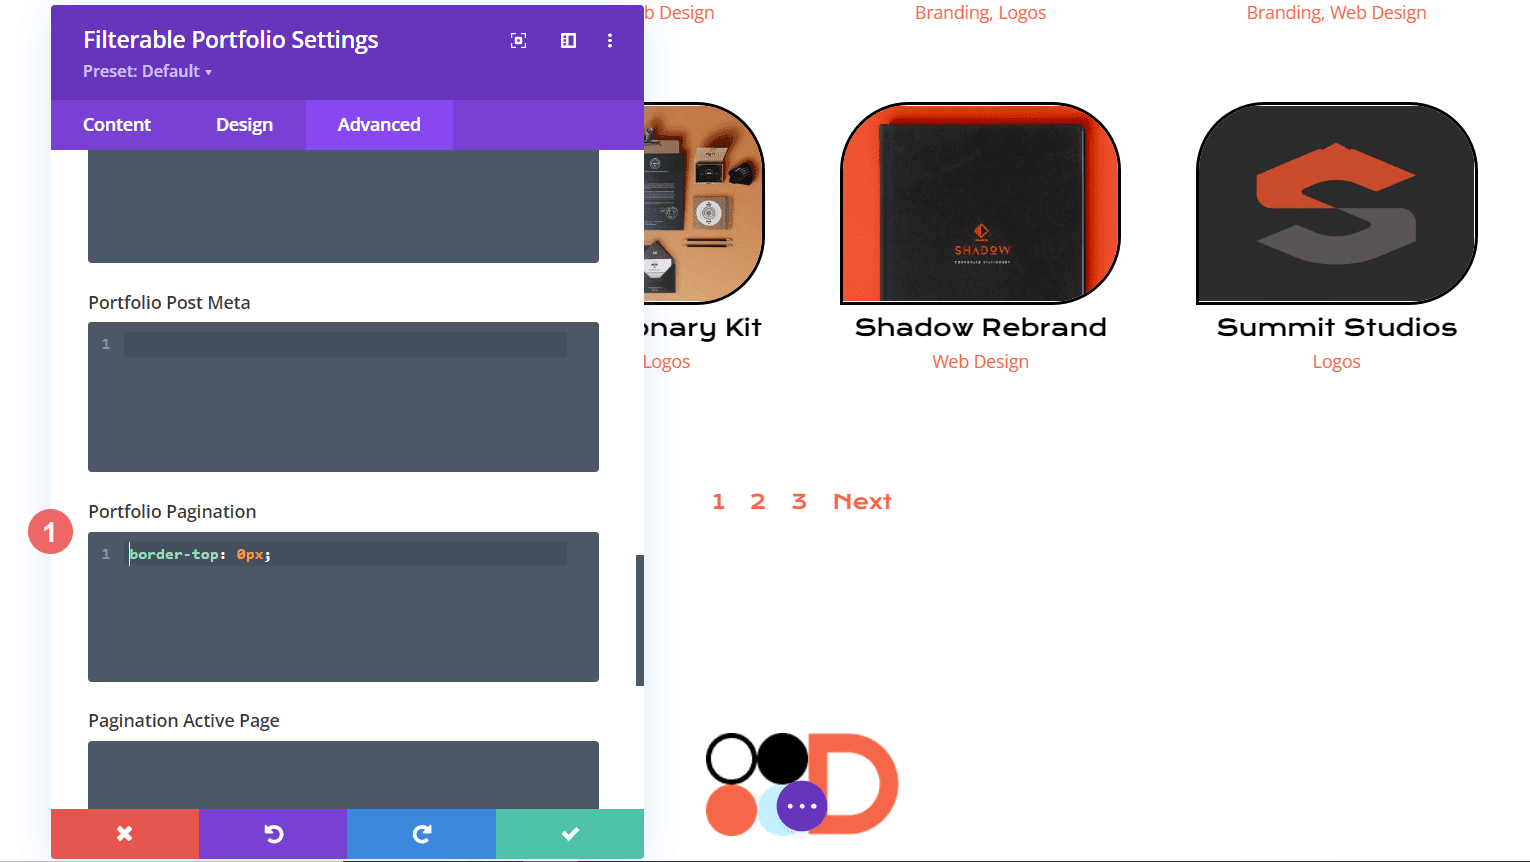
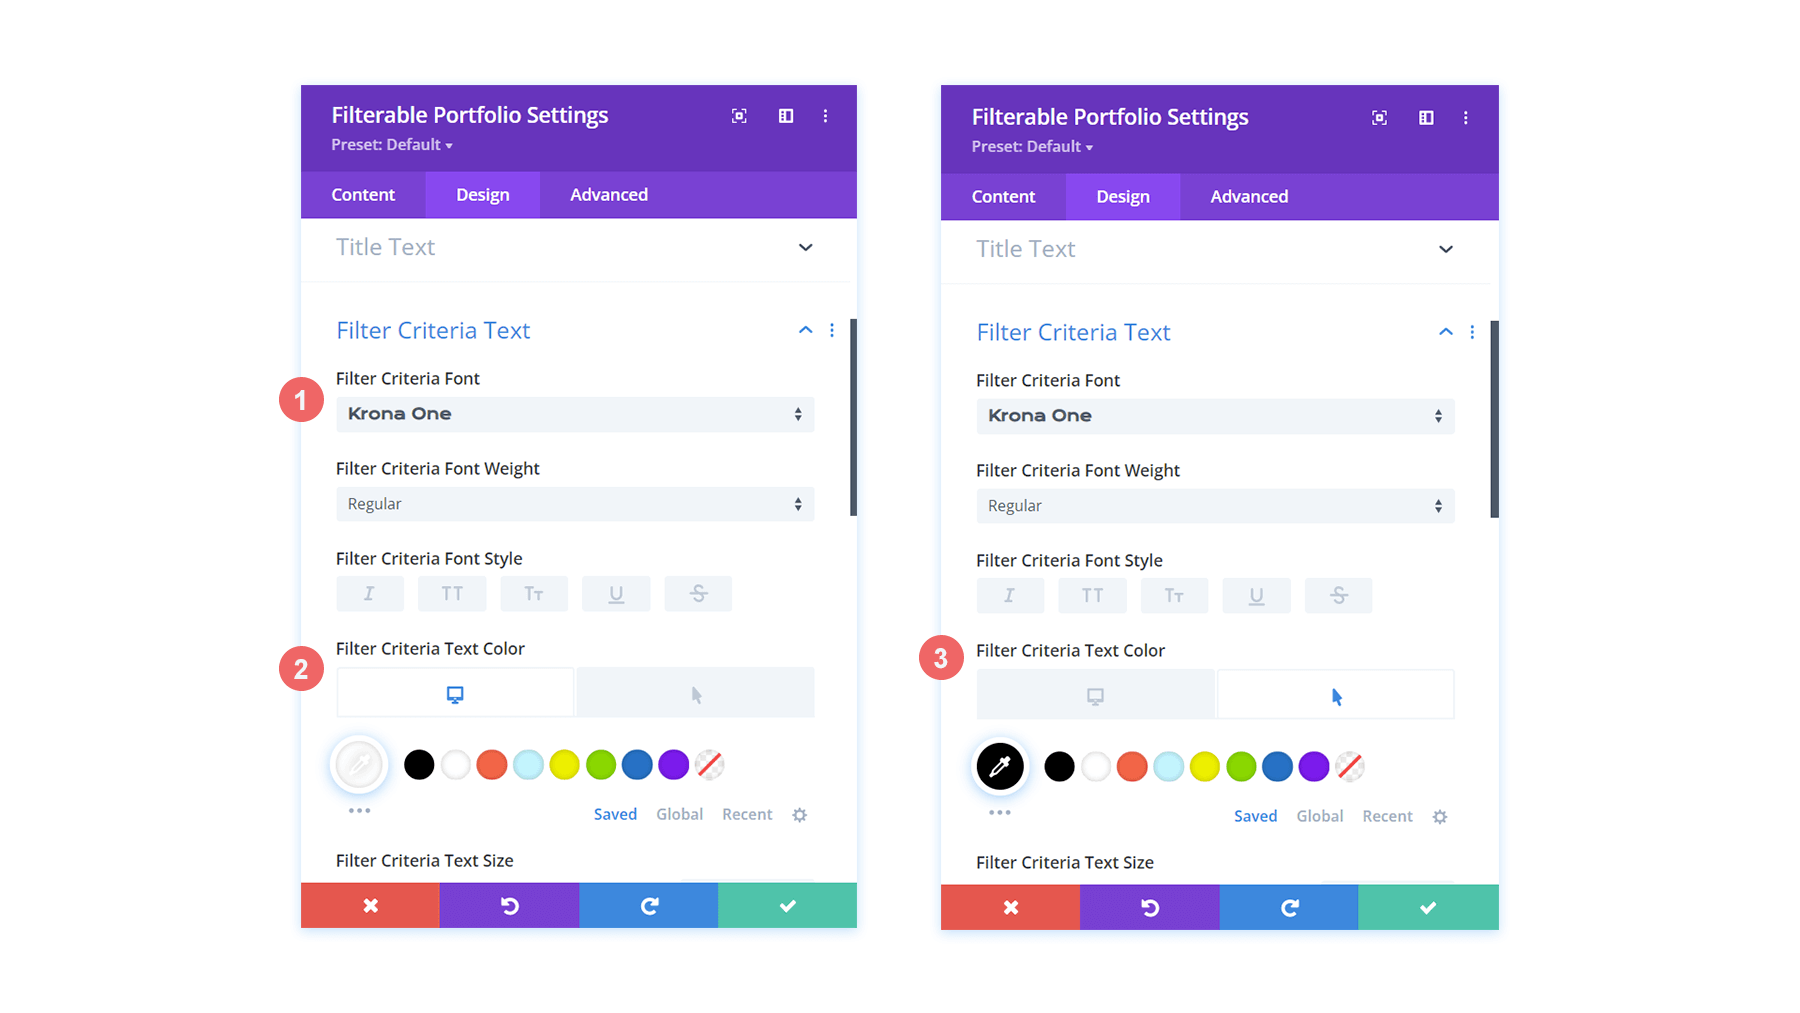
Style the Filter Text
We'll be taking things a step further with the Filter Text. CSS will be used to change the background as well as the hover effects. We want the newly added module to be nearly seamless with the layout pack's styling. Let's begin by entering our Divi font settings.
For filter criteria text, here are the changes you should make:
- Filter Criteria Font: Krona One
- Filter Criteria Text Color: #ffffff
- Filter Criteria Text Color (Hover): #000000
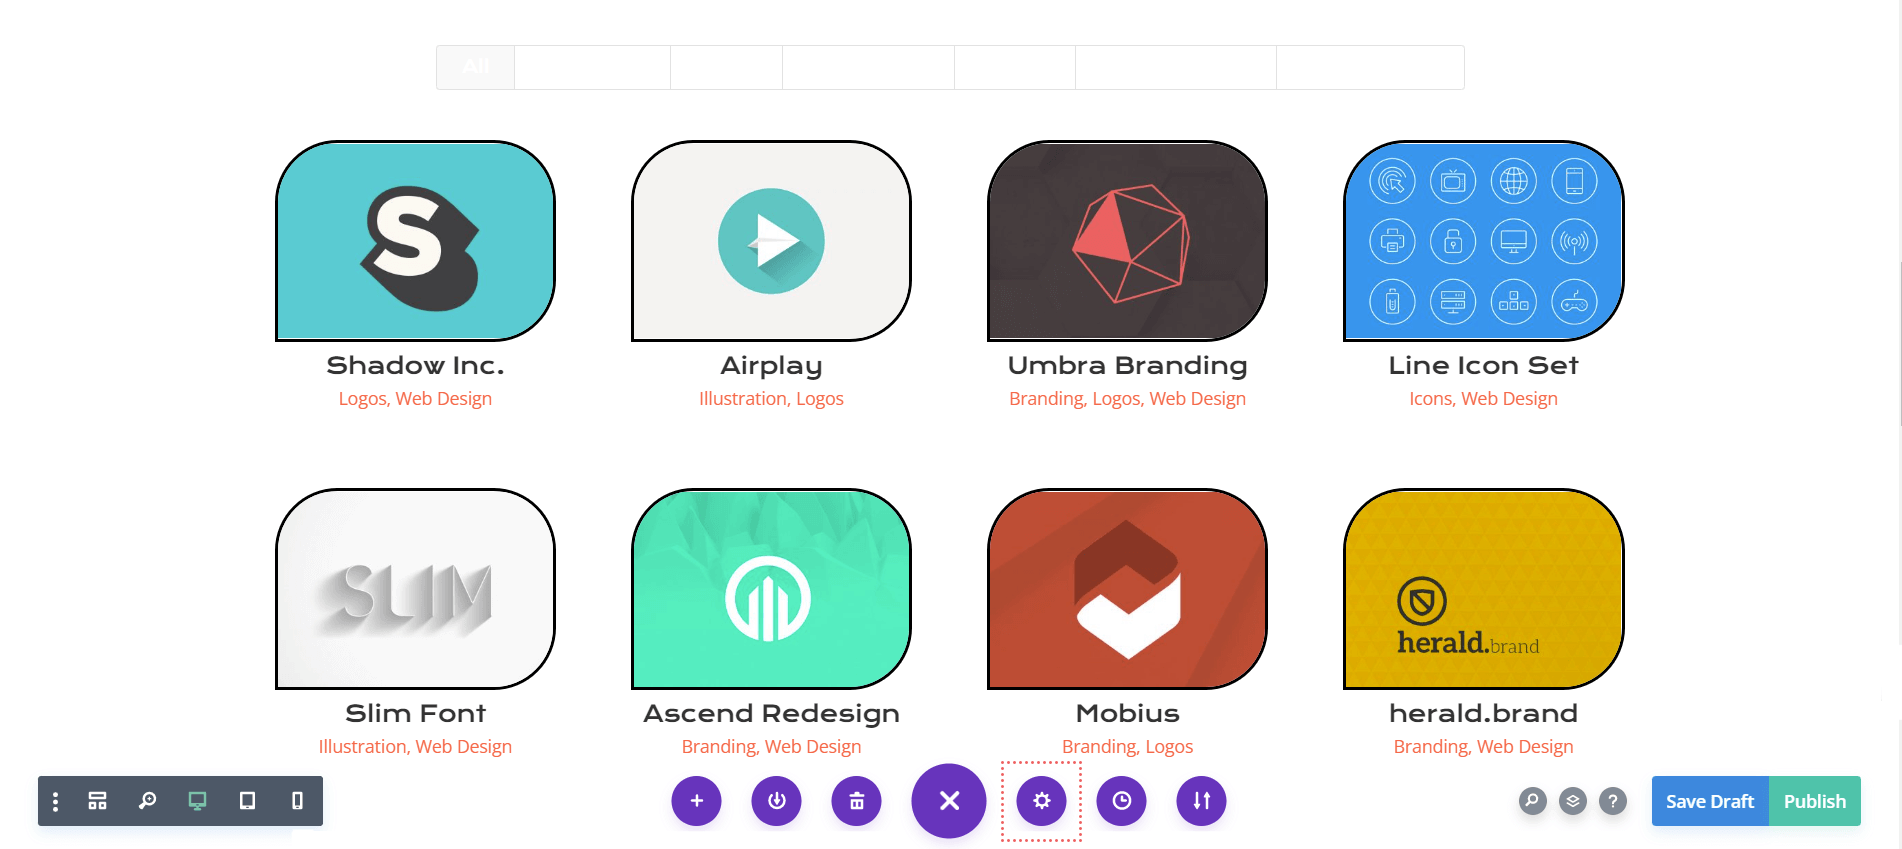
As things stand, our filter appears to have vanished. This is due to the fact that it is white text on a white backdrop by default. However, we're going to modify it in two locations with custom CSS. To begin, we'll add a CSS snippet to the Page Settings that will add a backdrop to the filter text. Second, we'll style the Active Portfolio Filter using the module's Advanced tab.
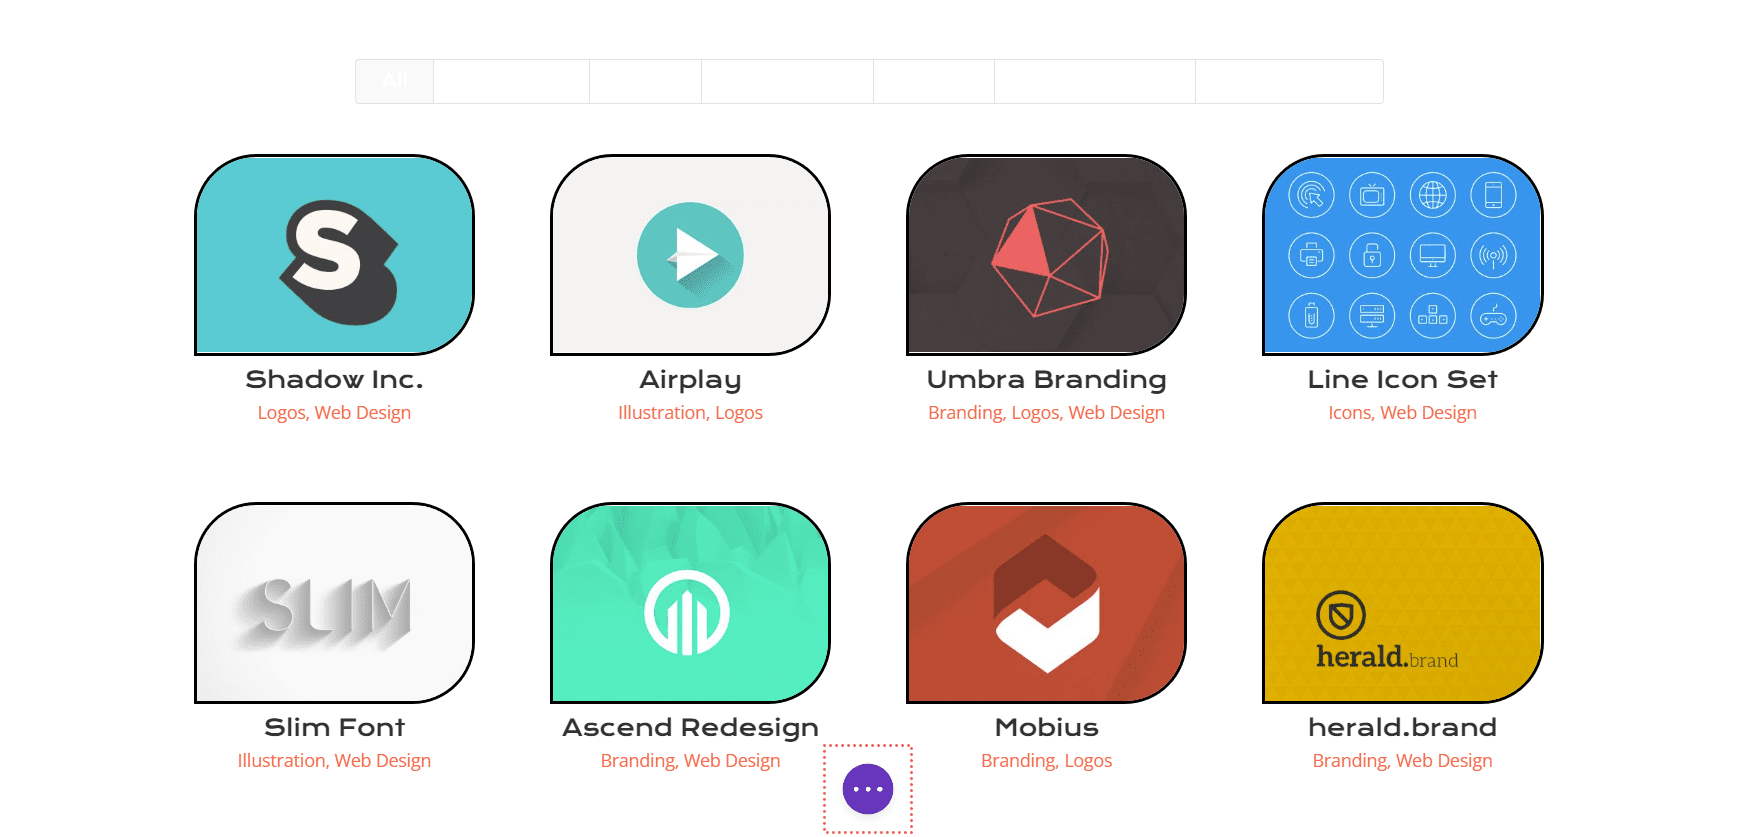
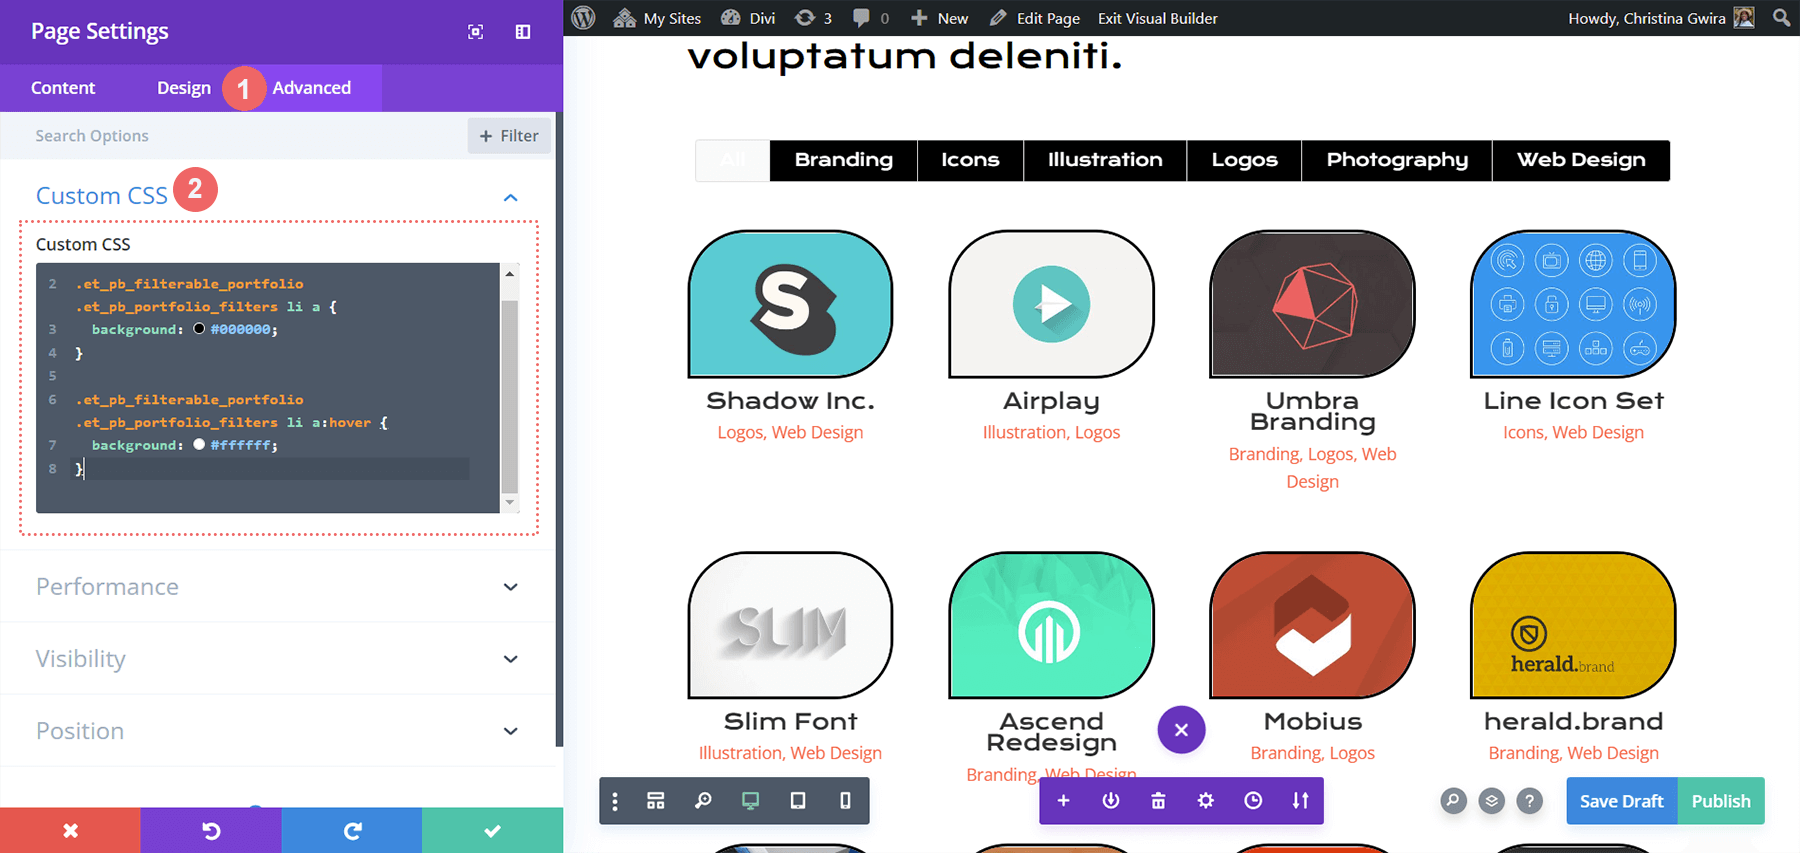
Click on the three dots in the center of the screen to open the Page Settings. Then, click the gear icon to access the Page Settings. To add a backdrop to the Filter Text, go to the Custom CSS tab and input the following code.
The background color of the filter is targeted in this CSS snippet. We're also focusing on styling its hover state. Next, we'll add some CSS to the module and highlight our Active Filter tab more strongly.
/* Change background color of filters */
.et_pb_filterable_portfolio .et_pb_portfolio_filters li a {
background: #000000;
}
.et_pb_filterable_portfolio .et_pb_portfolio_filters li a:hover {
background: #ffffff;
}
Styling the Active Portfolio Filter Tab
The Active Portfolio Filter Tab directs our users' attention to the portfolio category they are currently viewing. This filter currently has white text on a light background. We'll go into the Filterable Portfolio Module's Advanced tab and add some text to the feature's default and hover states. In a default configuration, the following CSS properties will be added:
background: #ff6651;
color: #ffffff !important;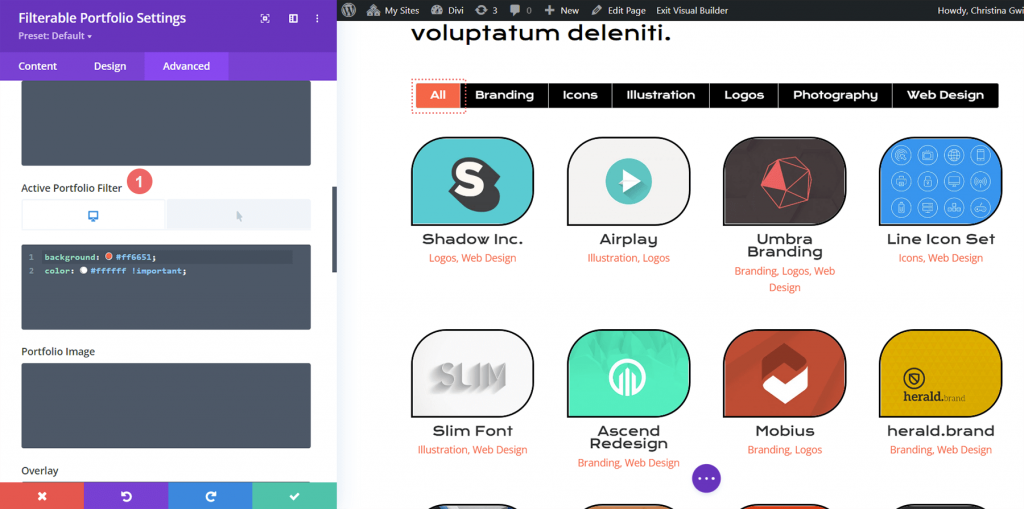
We'll make the background black on hover.
color: #000000!important;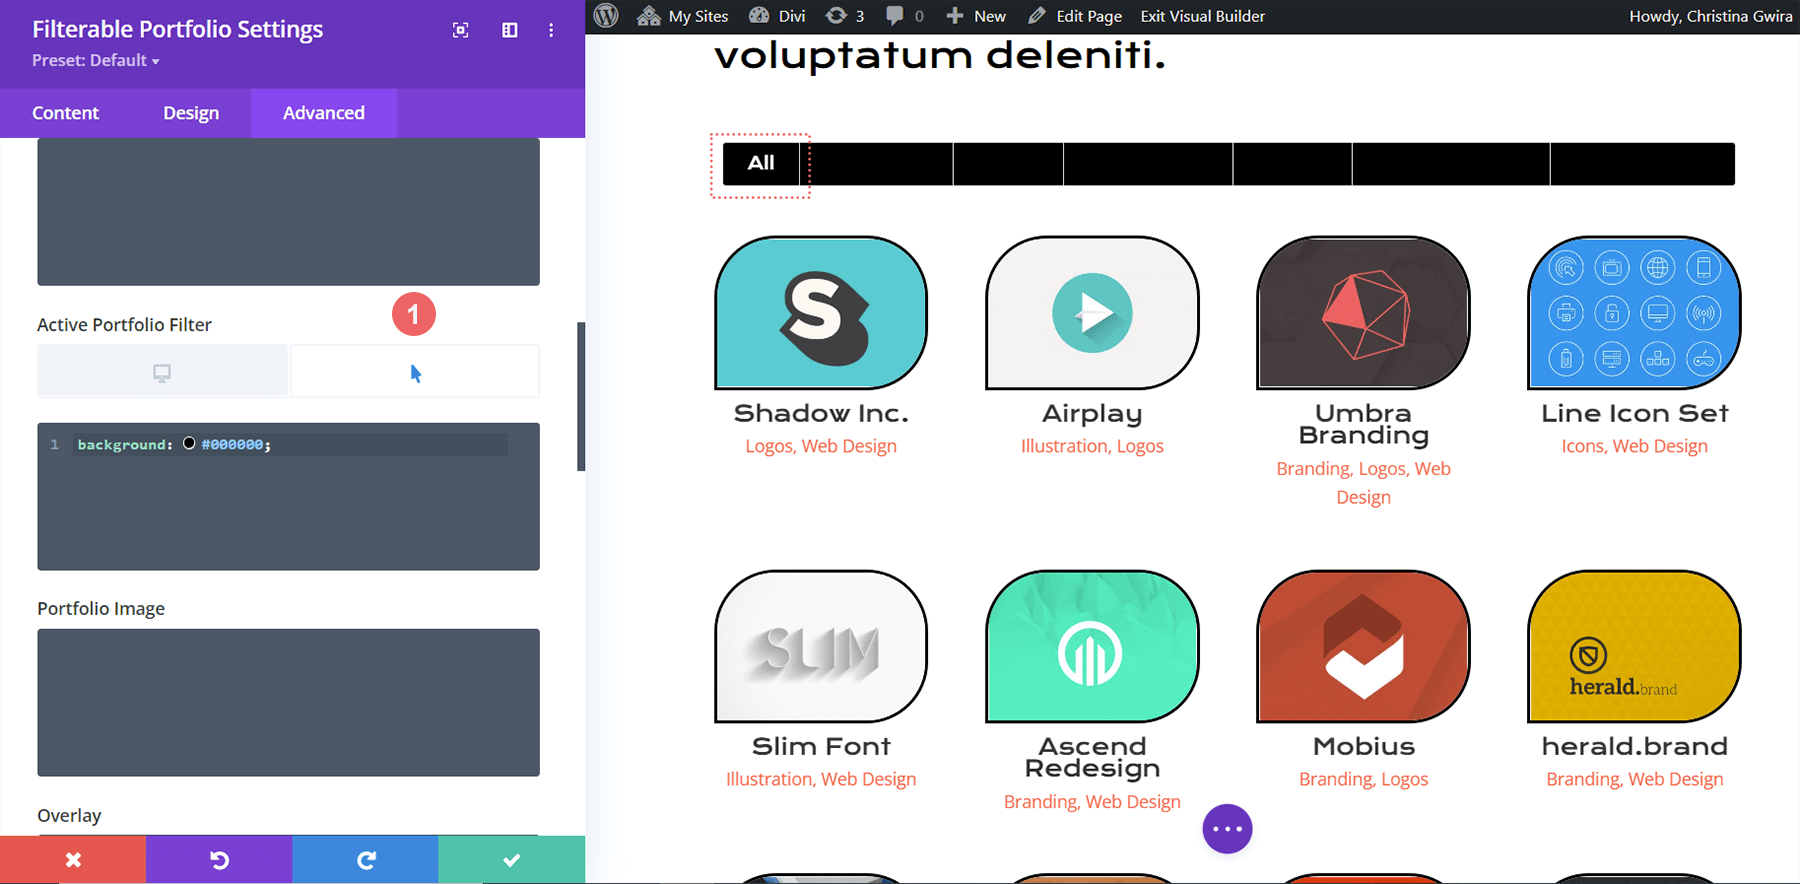
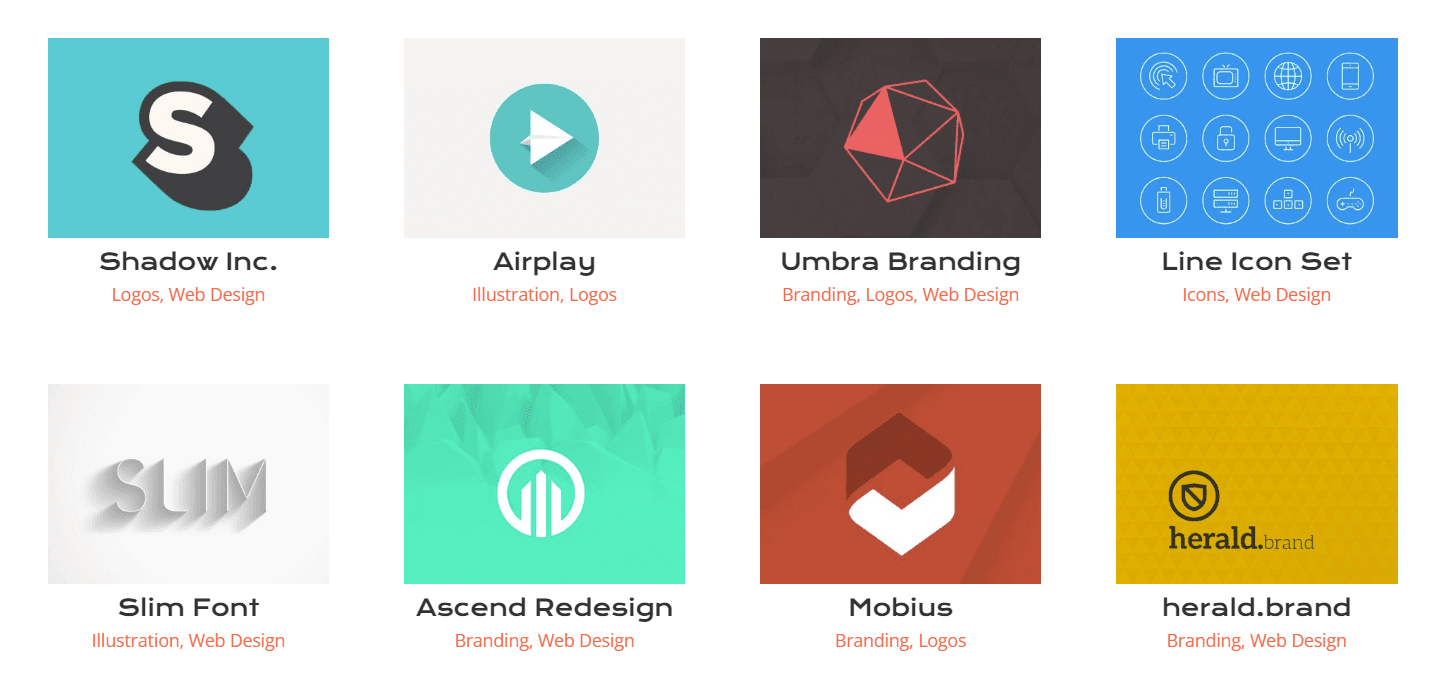
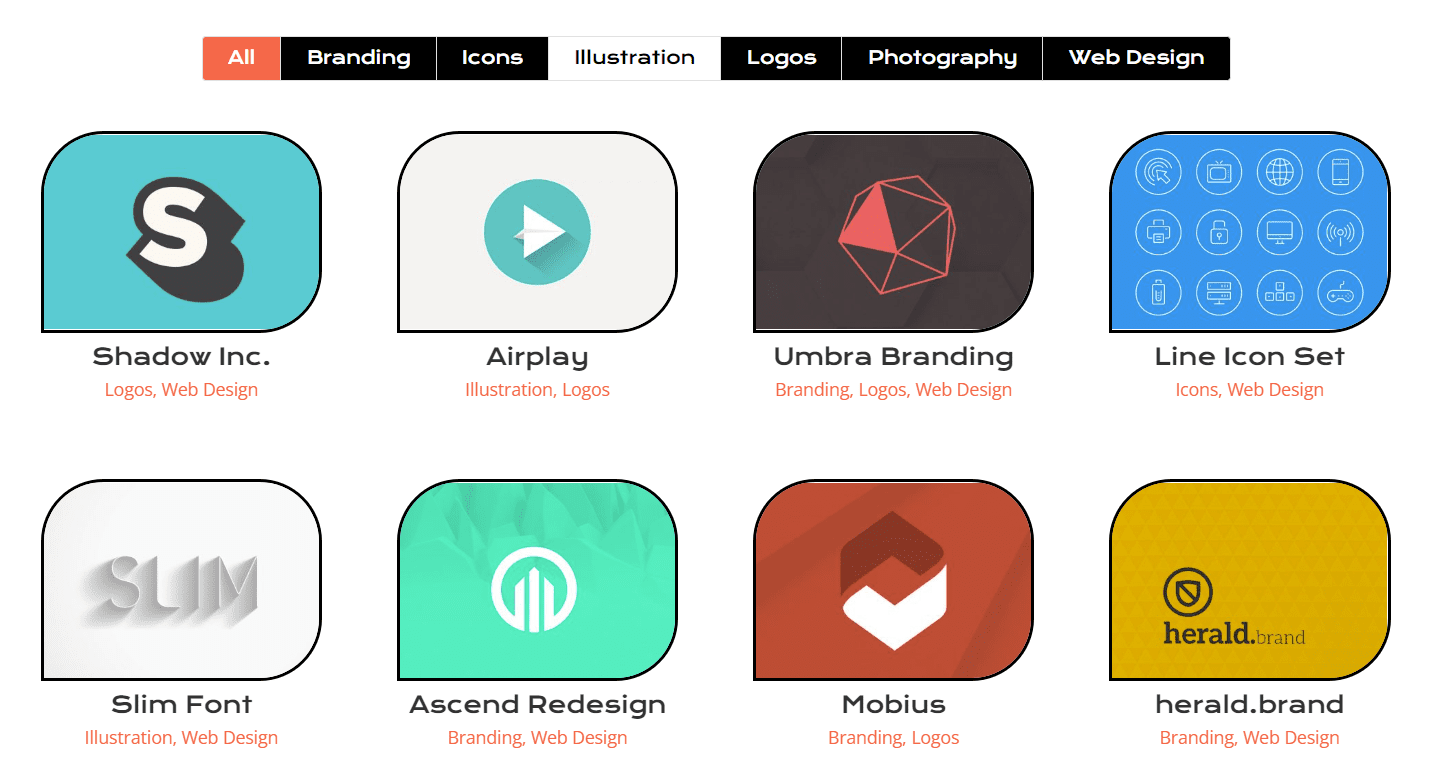
Final Preview
And here is the finished result!
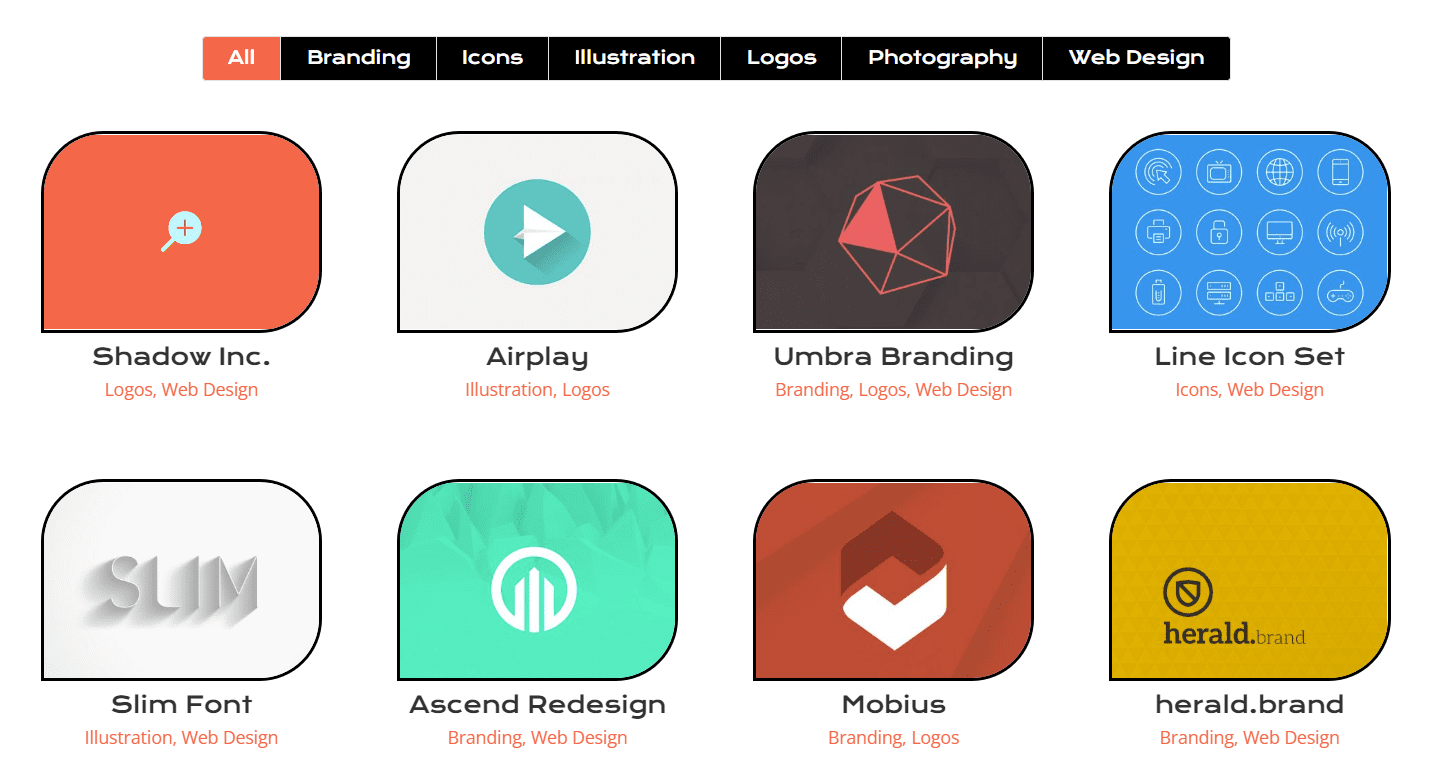
And now you can see what it looks like when we hover!
In Conclusion
The settings that come with Divi, like most of Divi's modules, can be extended with CSS. Your work needs to be shown off if you have an online business, blog, or brand. As a result, having an orderly way to display your work is critical. Use today's advice to start your own path of styling Divi's Filterable


