
Do you wish to display separate WordPress menus to logged-in users? By default, WordPress lets you show the same menu for navigation in a certain theme area. But what if you wanted to show logged-in users on your website an alternative menu?

This post will demonstrate how to simply display different menus to Signed In WordPress users.
Importance Of Different Menus to Logged in Users
Changing various aspects of your WordPress website based on the visitors' actions creates a personalized experience for each user.
This tailored content allows you to enhance the WordPress user experience.
Create Amazing Websites
With the best free page builder Elementor
Start NowIf you operate a website where users do not need to register or log in, you can likely utilize the same navigation menus throughout your site.
Other websites, however, may gain immensely from displaying customized menus to logged-in users.
Websites such as an online store, a WordPress membership site community, and an online learning platform can all benefit from customized navigation menus.
A customised navigation menu for logged-in users facilitates the discovery of items for which they have registered.
For example, a user of an online store can manage their account, and a member of a paid community can quickly renew their subscription or view their purchased online courses.
WordPress allows you to construct as many navigation menus as you desire by default. However, only one menu can be displayed at a given location in a WordPress theme.
Therefore, let's examine how to easily change this behavior and display various menus to logged-in WordPress users.
Creating Menus for Logged in and Non Logged in Users
Regardless of the way you choose, you must first design the navigation menus that will be displayed to logged-in and logged-out users.
Simply navigate to Appearance » Menus in your WordPress dashboard. If you already have a navigation menu that you utilize for all users on your website, you may make this your default menu.
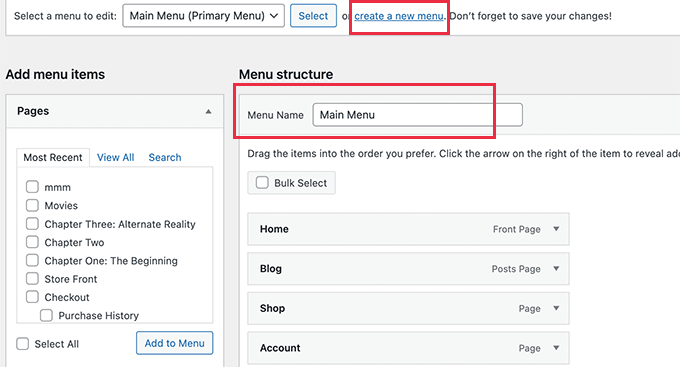
Click the 'make a new menu' link to generate a new menu for logged-in users.
Here, you can provide menu options for registered or logged-in users. For instance, you may choose to include a logout link on your menu.
On the left side of the screen, a list of your website's pages is displayed. To add a page to your menu, simply tick the box next to the page and click the 'Add to Menu' button.
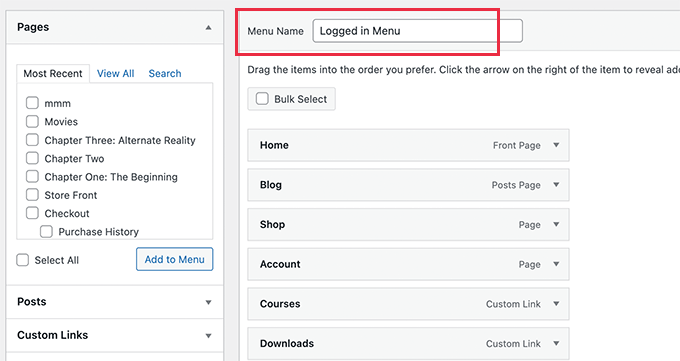
You may also rearrange the menu items on the right side of the screen by dragging and dropping them.
You can select where to display your menu further down the page. You do not need to assign a location to this menu at this time. This will occur later in the article.
Don't forget to click "Save Menu" to save your modifications.
Method 1: Display Different Menu Using A Plugin
This is the recommended strategy for all WordPress users.
Installing and activating the Conditional Menus plugin is the first step. You must visit the Appearance » Menus page and switch to the 'Manage Locations' option after activation.
Here, you will see the list of menu locations established by your WordPress theme, as well as the menus that are presently displayed.
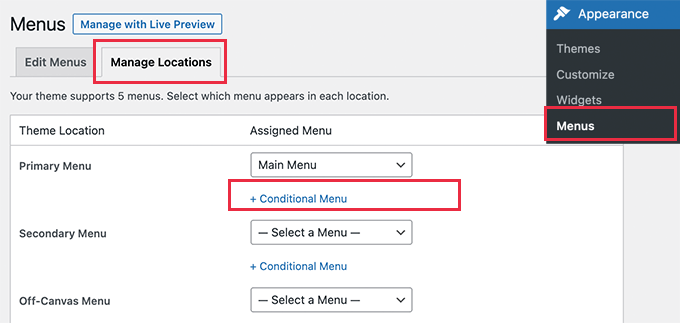
For example, it indicates that our Primary Menu location displays a navigation menu labeled "Main Menu."
Now, we must instruct the plugin to display an alternative menu when a particular criteria is met.
To accomplish this, click the '+ Conditional Menu' option and then select the navigation menu you wish to display for logged-in users from the drop-down menu.
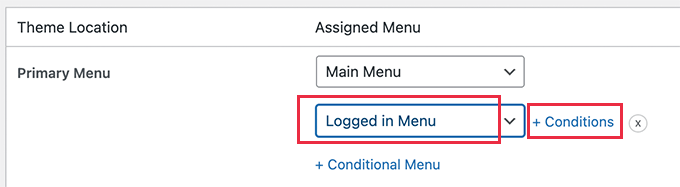
You must then click the '+ Conditions' option.
This will bring up a pop-up with a variety of conditions to select from.
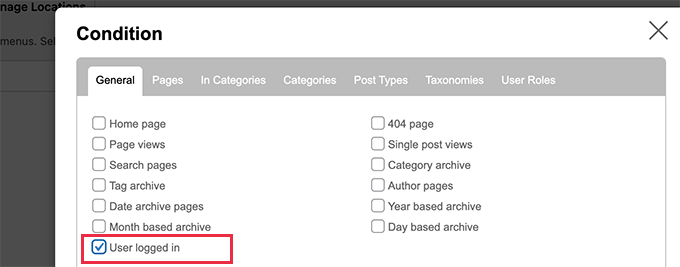
Check the box next to 'User logged in,' then click the Save button.
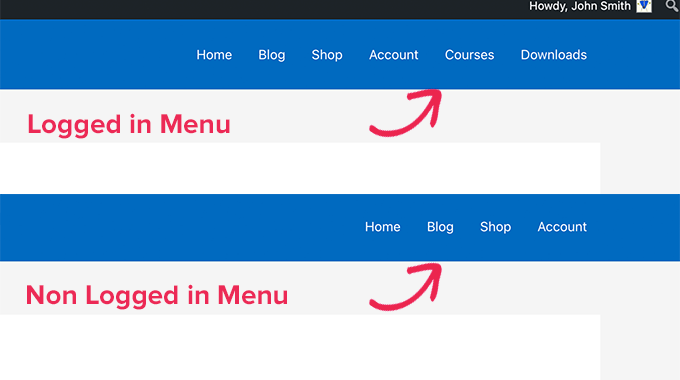
You can now view the logged-in user menu on your website. You can also log out of your WordPress administration panel to view the navigation menu displayed to all other users.
Method 2: Create Different Menu Using Code
This technique needs adding code to your WordPress site. I
The following code must be added to your theme's functions.php file or a site-specific plugin.
function my_wp_nav_menu_args( $args = '' ) {
if( is_user_logged_in() ) {
// Logged in menu to display
$args['menu'] = 43;

} else {
// Non-logged-in menu to display
$args['menu'] = 35;
}
return $args;
}
add_filter( 'wp_nav_menu_args', 'my_wp_nav_menu_args' );
Replace 43 and 35 with the IDs of the navigation menus you already built.
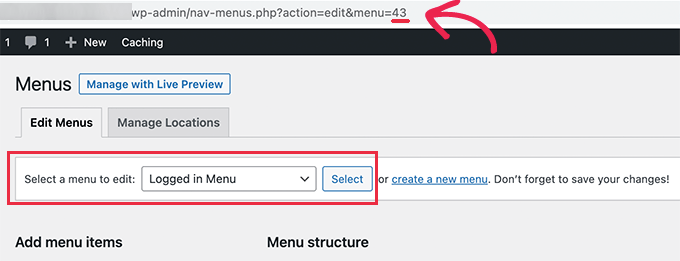
On the Menus page, you can find the ID of a navigation menu by selecting it. You will see the menu ID in the address bar of your browser.
Wrapping Up
If you are utilizing a page builder such as Elementor or Divi, you can still use this method to create a unique menu for logged-in and logged-out users. This article should assist you in creating a menu for a subscription-based or user-based website.


