
The concept of building a brand new WordPress website can be thrilling, but to be on the safe side, you may want to begin with local websites first. With a local website, you have the freedom to experiment however you want without worrying about consequences, since your website will only be visible to you rather than the entire world.
Wondering what a local website is and how you can make one? Today, we’re going to demonstrate the step-by-step guide on how to configure multiple local websites for free using Flywheel.
What Are Local Websites?
When initiating a new website, skilled web developers commonly adhere to a three-step process: development, staging, and production.
Initially, they locally install the WordPress software on a device, craft the website, and conduct thorough online testing.
Create Amazing Websites
With the best free page builder Elementor
Start NowSubsequently, they transfer or push the local site to an online staging website, featuring a distinct URL from the final 'production' website. Additional testing occurs online during this phase, and the site is often showcased to the client.
Upon the website being deemed ready for launch, the staging site can be transferred to the production website, making it accessible to all internet users.
In this tutorial, our primary focus will be on the initial step: creating local websites.
The most straightforward method for this is utilizing Local by Flywheel.
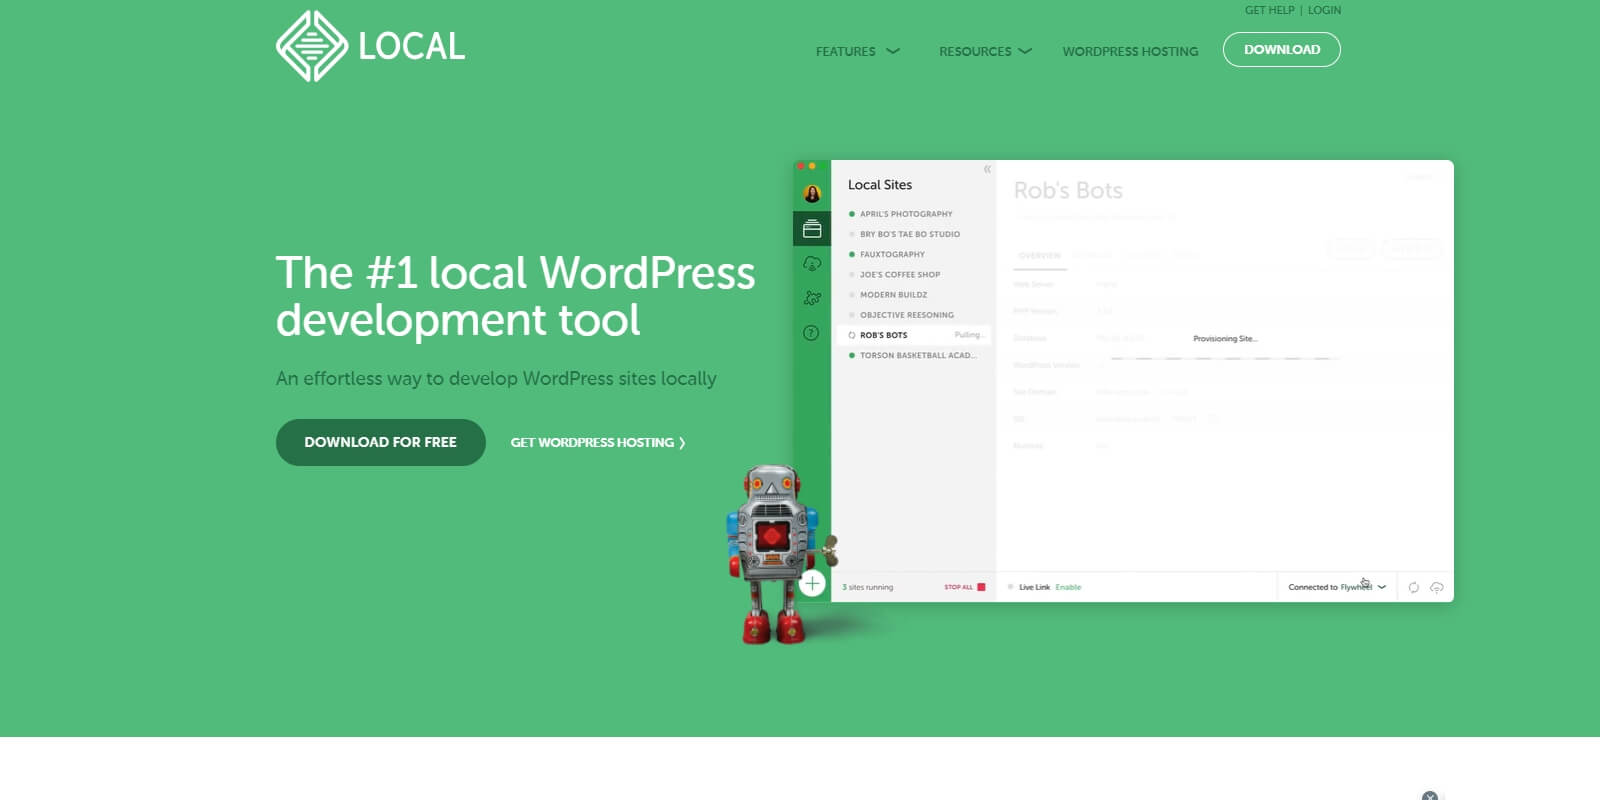
Local by Flywheel stands out as a highly acclaimed tool in the realm of local WordPress development, courtesy of the team responsible for Flywheel, a leading name in WordPress hosting.
As the name suggests, employing Local by Flywheel enables you to effortlessly set up numerous local websites and construct your WordPress website limitlessly on your device.
Whether it's installing plugins and themes or tailoring your site with custom CSS, creating a local website provides you with the freedom to experiment with your WordPress site sans any limitations.
The noteworthy aspect? Local by Flywheel is entirely cost-free, allowing you to establish multiple local websites and test your WordPress creation without concerns about sharing it with others.
How To Set Up Multiple Local Websites Using Flywheel?
To get started with creating multiple local websites using Flywheel, all you need to do is download and install the software on your device and add your WordPress website. Let’s get started.
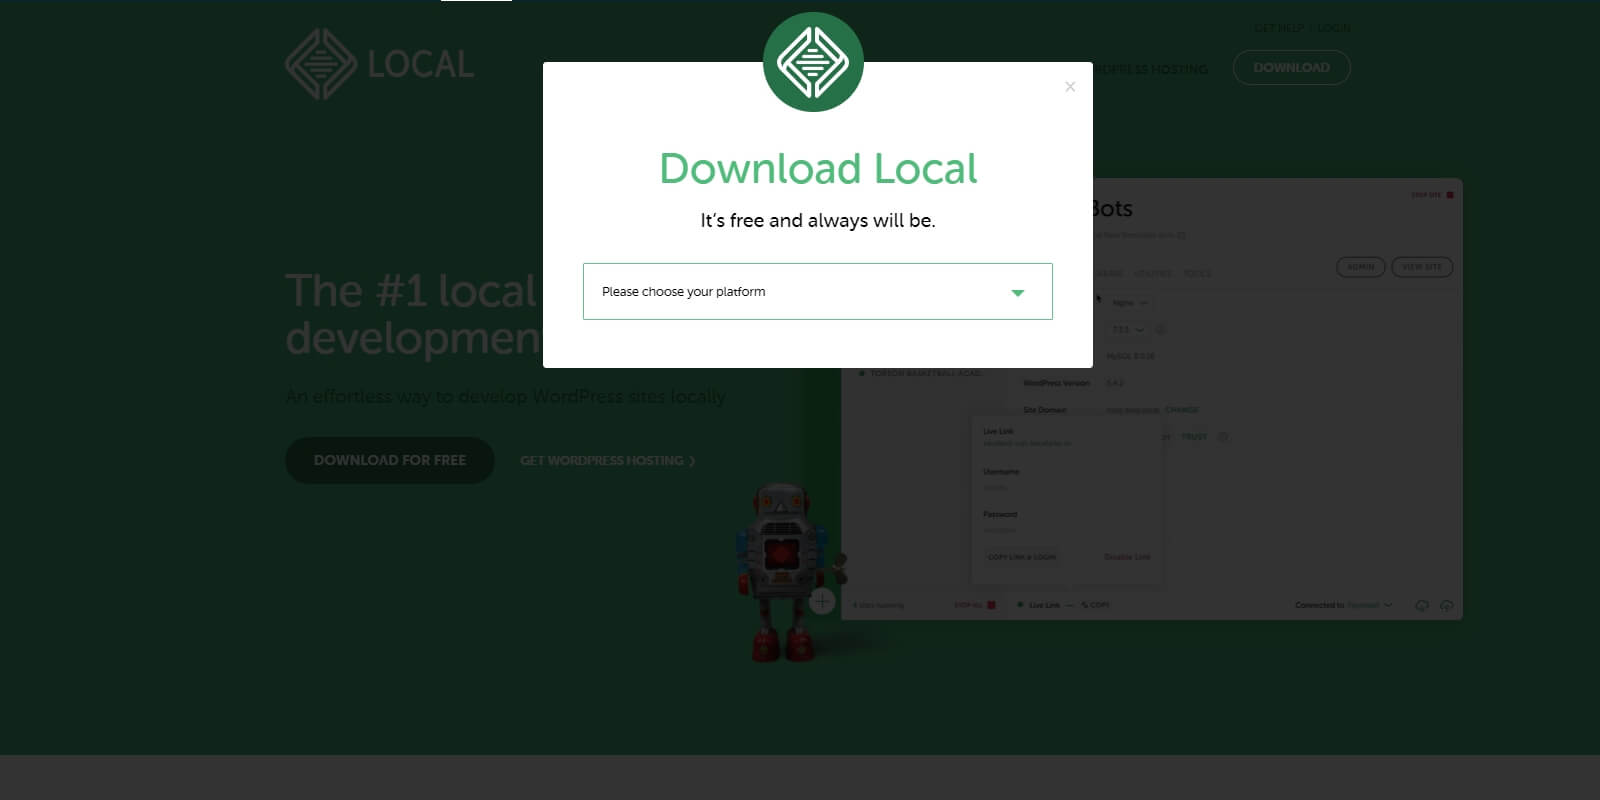
Step 1: Download And Install Flywheel On Your Device
First, head over to Local by Flywheel and download the free tool onto your device. As evident below, Local by Flywheel is compatible with Windows, Mac, and Linux, allowing you to effortlessly obtain and install the suitable software for your specific operating system.
During the installation process, you'll be prompted to establish an account by providing your name, email address, and phone number. Include these particulars and proceed with the on-screen instructions to complete the software installation on your computer, a task that should only consume a few minutes.
Step 2: Create A New Local Website Using Flywheel
Once the installation of Local by Flywheel is complete, initiate the application. This is the default appearance of the application when no local websites are configured.
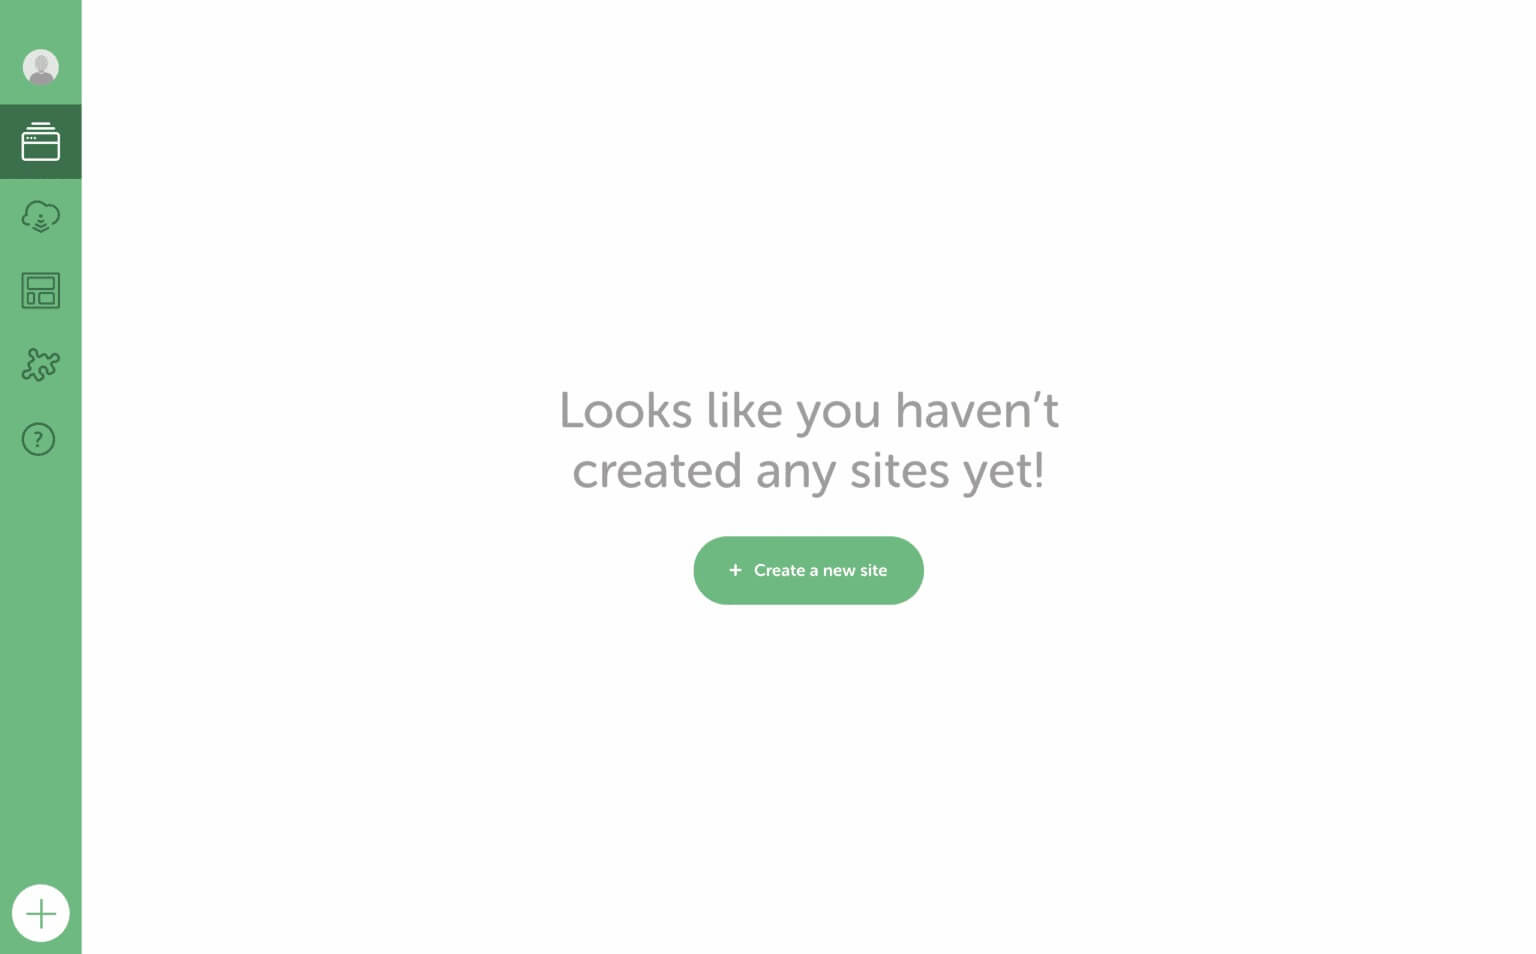
To incorporate your initial local website, select the '+Create a new site' button. This action will guide you to establish a new local website using Flywheel.
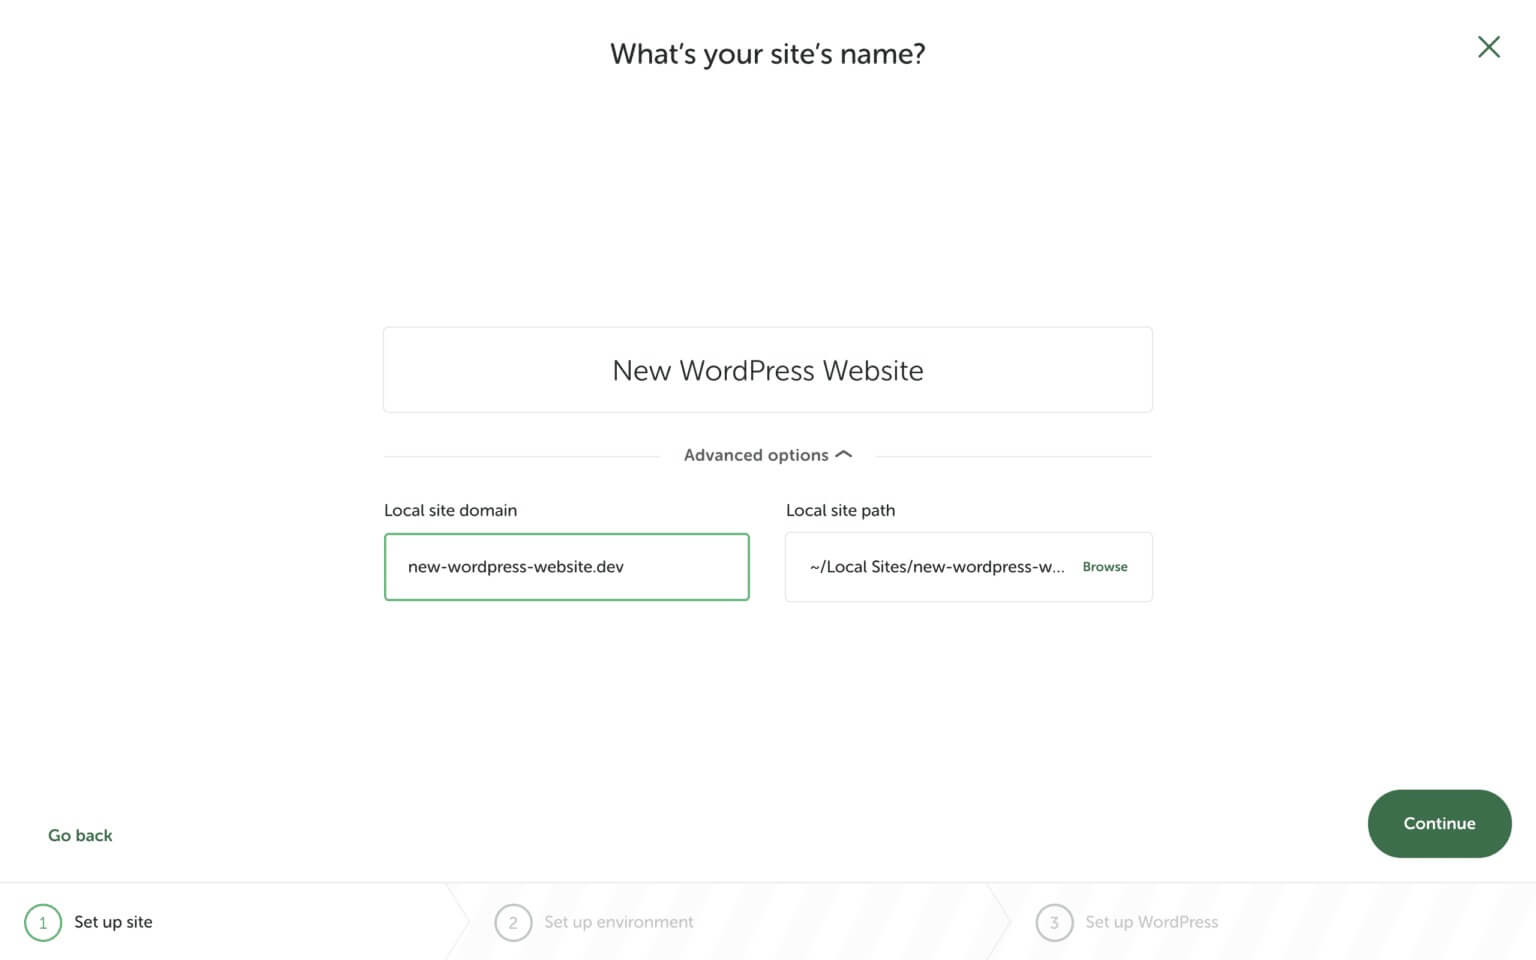
In the subsequent phase, specify a name for your website. Since this is a local website, there's no need to concern yourself with creating a unique name.
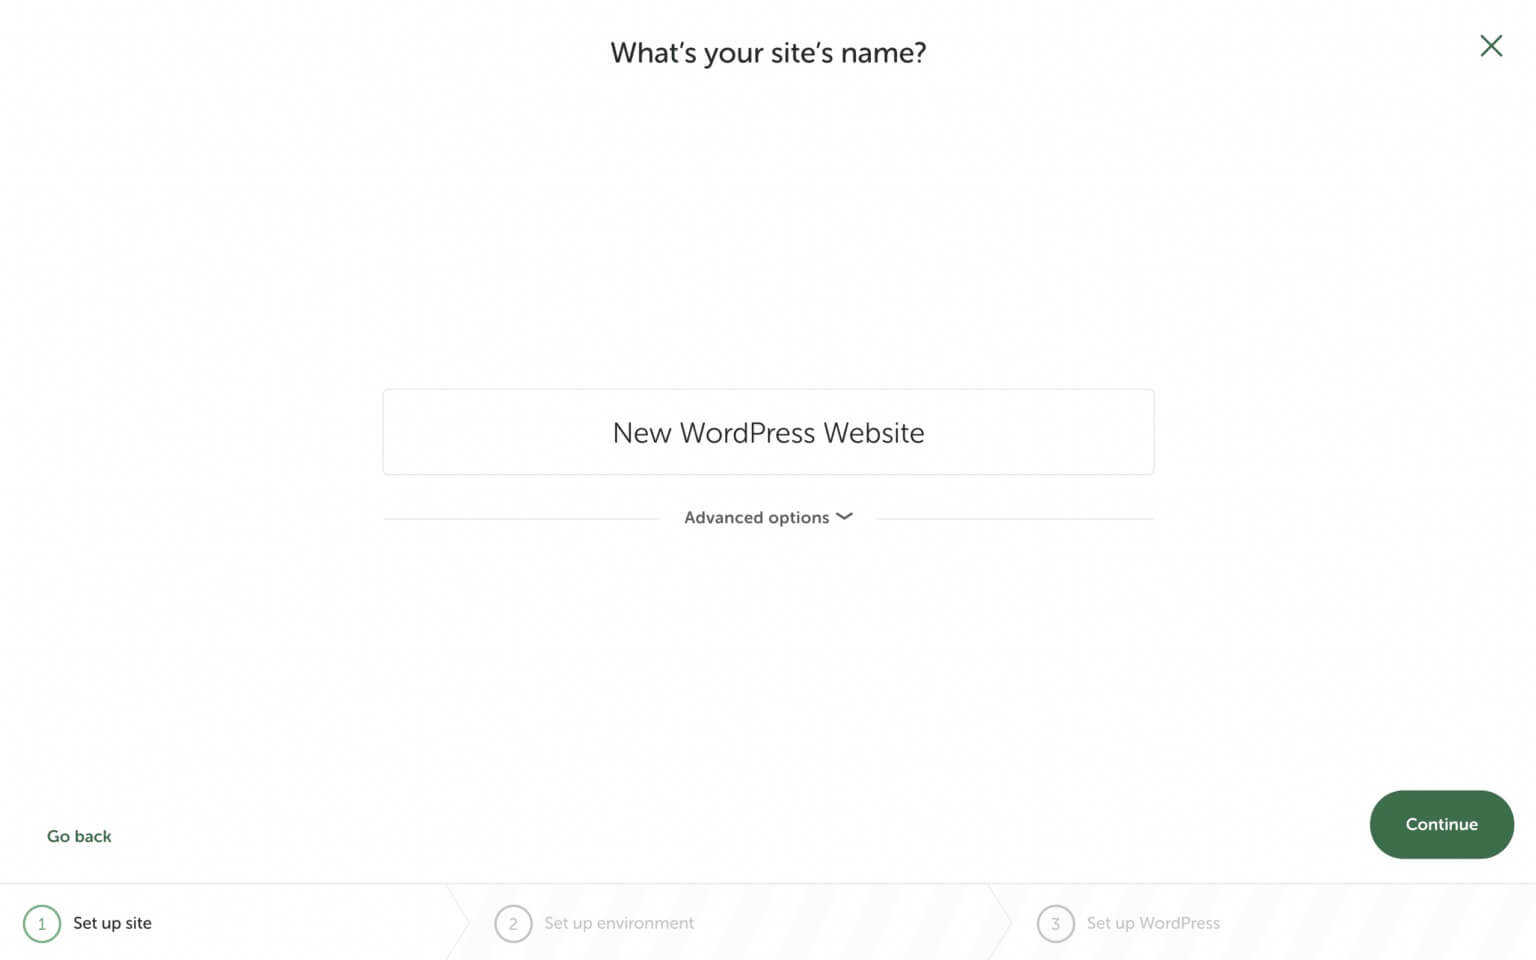
Clicking on 'Advanced Options' will unveil a dropdown menu of choices. From here, you can determine the conclusion of your domain. By default, the domain for your local website concludes with .local, but you have the option to modify it to another suffix, such as .dev, as demonstrated below.
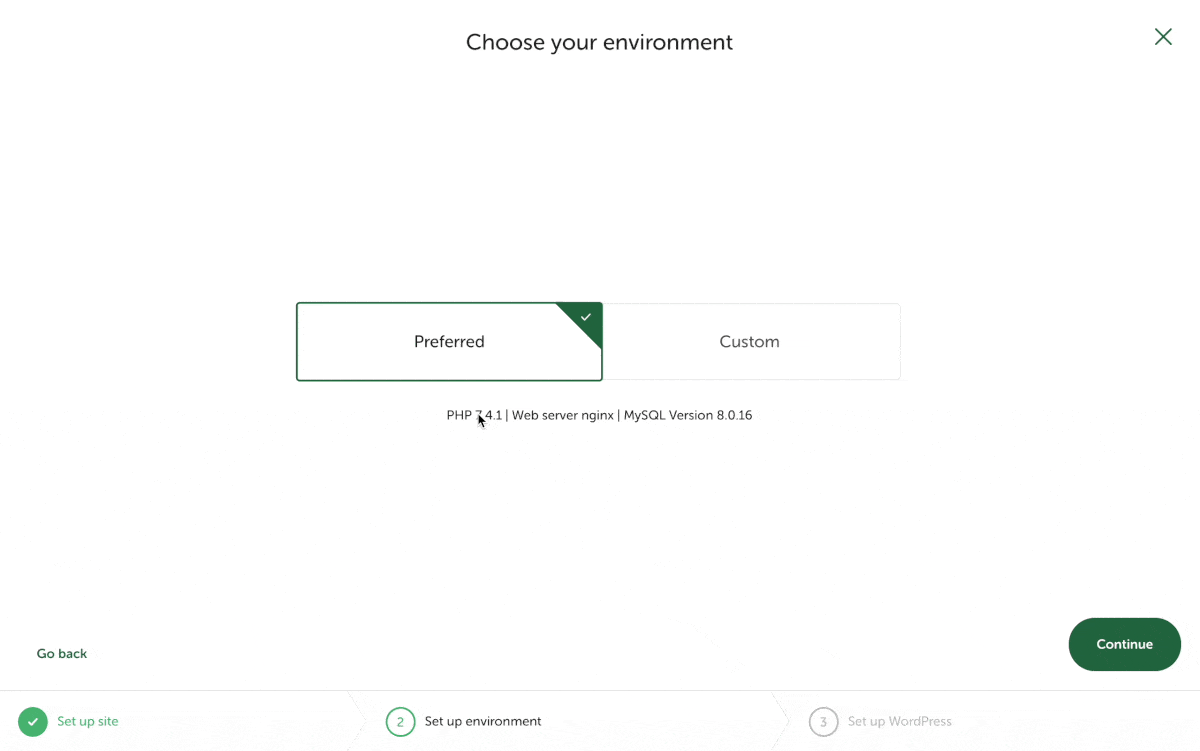
Step 3: Set Up Your Local Website Environment
Next, you get to change how your local website's server works. The 'Preferred' option uses the same setup as Flywheel's own web hosting. But if you want to tweak things more, go for the 'Custom' option. This lets you pick a different PHP version, web server, and database version.
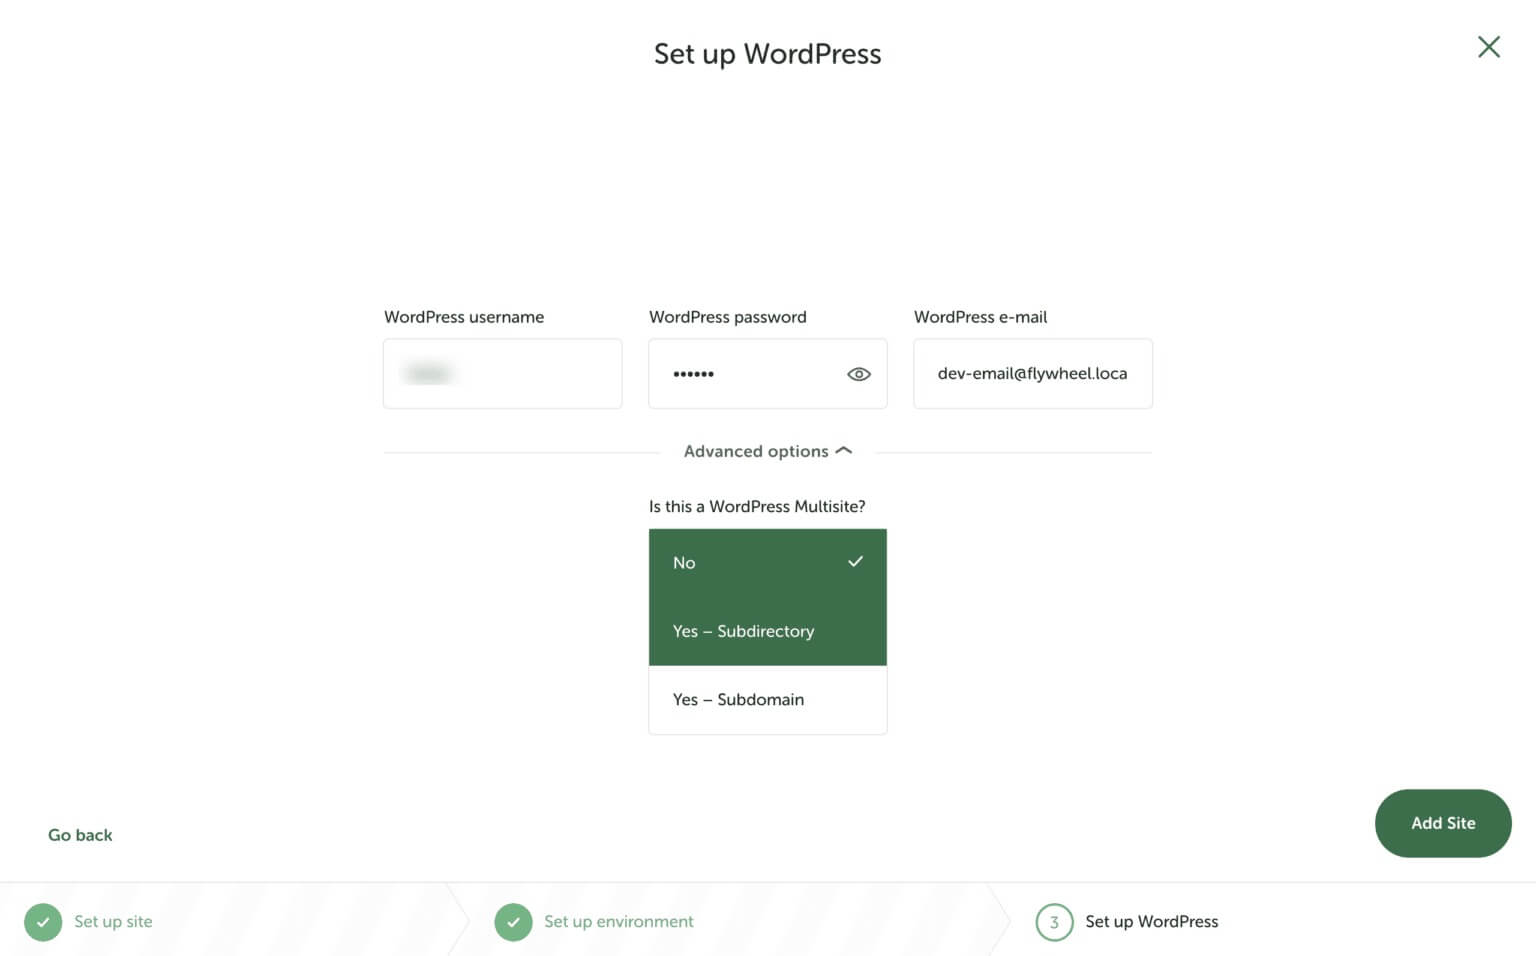
Step 4: Set Up Your WordPress Website
Now, it's time to set up the basic information for your WordPress website. This involves adding your WordPress username, password, and providing a working email address for WordPress.
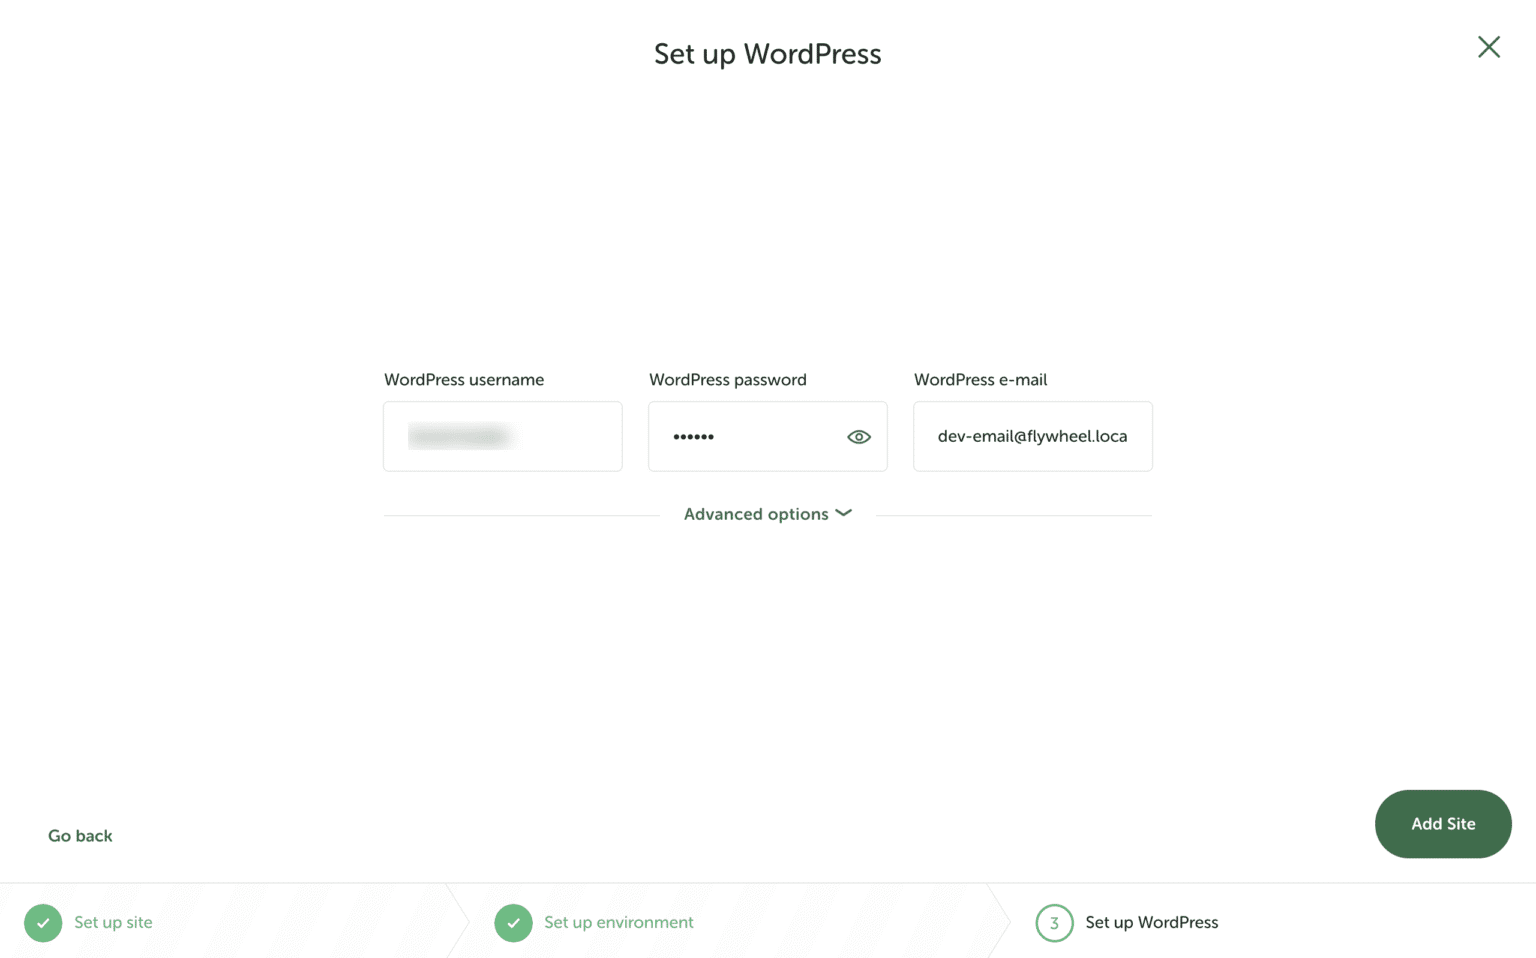
Don't stress about entering your WordPress username and password, but make sure to change the default email to one you actively use.
If you're interested in creating a WordPress multisite, you can enable this option in Local by Flywheel by going to 'Advanced options.'
Once you're ready for the next step, click on the 'Add Site' button, as indicated below.
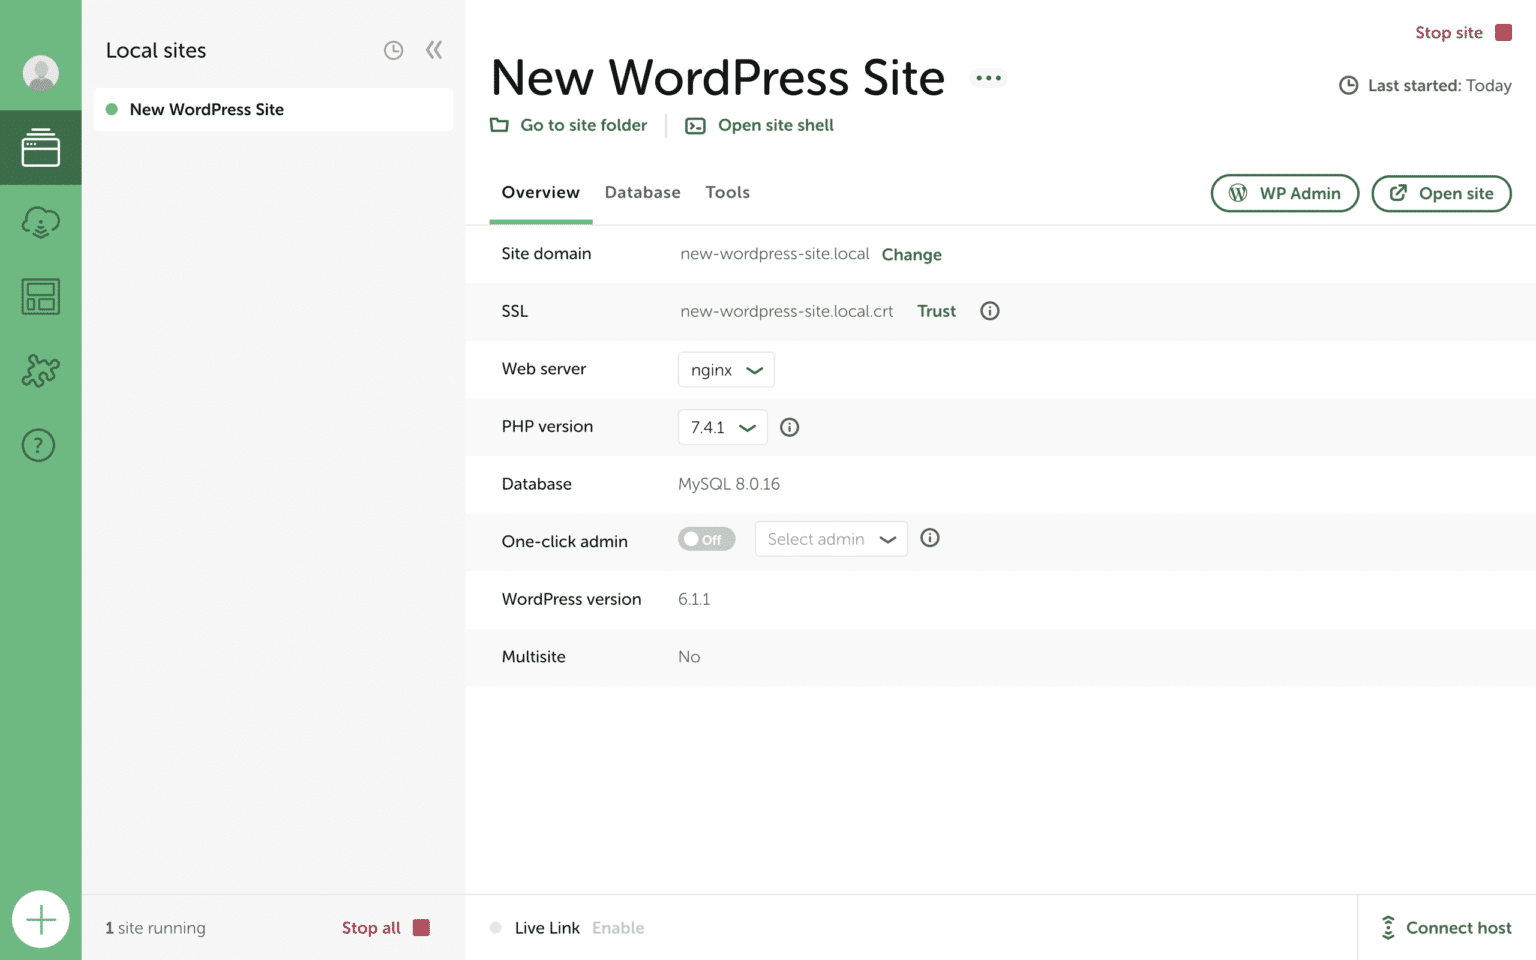
That's it! You've successfully created your first local website with Flywheel. Repeat the process from Step 1 to make more local websites using Flywheel for free.
Wrapping Up
Now that you know how to get started with creating a local website with Flywheel, design your WordPress website and set it up however you want. When you are ready to make your website live, make sure to check out our tutorials to make your website more resourceful.


