
WordPress functions as an Open Source Content Management System (CMS), facilitating content management devoid of the necessity to acquire proficiency in any web scripting language. Through the uncomplicated addition of text, images, and videos, one can construct and subsequently publish a website or blog on the Internet. The operational foundation of WordPress resides in PHP and a MySQL database.

In the process of erecting a website powered by WordPress, the incorporation of themes and plugins is commonplace to tailor content attributes and visual aesthetics. This facilitates the progressive augmentation of website functionalities through supplementary components, including third-party extensions like SEO and analytics. The interdependencies of these themes and plugins find their repository within a MySQL database that serves as the host for the webpage's content.
Contrastingly, Redis constitutes an open-source, in-memory data structure repository, poised to function as a caching system. This software operates as a background service, facilitating the caching and retention of data within the system's memory. Consequently, this stratagem contributes to heightened server response times and overall website velocity.
The forthcoming instructional guide is designed to impart the requisite knowledge for the establishment and configuration of the Redis object cache within your WordPress website or blog. However, before delving into the setup particulars, an exploration of the operational mechanics of both WordPress and Redis, alongside the rationale for their symbiotic utilization, is warranted.
Create Amazing Websites
With the best free page builder Elementor
Start NowHow Redis Work
Consider a scenario wherein a web application is operational on a server, utilizing a database such as MySQL for its functioning. The web application necessitates the retrieval of specific records from this database. The execution of such queries is accompanied by a notable time delay in furnishing the requested records. It is noteworthy that extended waiting periods, exceeding one minute, for data retrieval can potentially lead to a suboptimal user experience.
It is worth noting, however, that Redis offers a solution aimed at enhancing the speed and efficiency of such data processing operations. Through the utilization of Redis, there arises the possibility of storing data that has been processed via a MySQL database query within a dedicated Redis cache instance. This strategic storage enables the direct retrieval of data from the server's memory, thereby obviating the necessity of traversing the entire route back to the database.
The operational mechanics entail the web server interfacing with Redis to ascertain the availability of the desired data. Consequently, in instances where a subsequent request mirrors a prior query transaction, the Redis object, residing within the object cache, intervenes to fulfill the request, thereby negating the need to engage with the MySQL server anew.
In instances characterized by the orchestration of an expansive array of web servers, typifying a large-scale fleet encompassing numerous units, the integration of a singular Redis cache can proficiently aggregate requests and responses emanating from these web servers. This configuration effectively dispenses with the requirement for each individual web server to embark on the entire trajectory to the database during each instance of operation.
Why Integret Redis With WordPress
Enabling Redis Cache within your WordPress Core installation yields the advantage of expediting content delivery to clients. Given WordPress's extensive employment of MySQL query lookups, performance degradation becomes apparent during high-traffic instances.
Under such circumstances, Redis cache assumes a pivotal role, proficiently addressing this scenario. Functioning as a memory-based key-value pair database, Redis conserves all corresponding data within memory, thereby furnishing a rapid server-side caching solution tailored to WordPress.
We shall establish a Redis object cache, a measure devised to refine the utilization of the WordPress database. This Redis object cache serves as a repository for cached outputs derived from specific queries directed at the MySQL server. Consequently, when other users access identical posts or articles, the object cache promptly satisfies their requests, obviating the need to query the MySQL server.
Thus, the recurrent invocation of the WordPress MySQL database is mitigated via the caching of intricate queries, facilitating the delivery of cached results for subsequent akin requests. This strategy circumvents an additional round trip to the MySQL server, subsequently heightening server response times and overall site velocity.
Pre Requirements For The Task
In order to proceed with the instructions outlined within this guide, it is imperative to possess an operational WordPress website hosted on a remote server. The rationale behind this necessity stems from the fact that optimizing a locally hosted site on your personal computer is unfeasible, given WordPress's server-side rendering nature. Consequently, the imperative arises to host WordPress on a remote server, a prerequisite for the configuration of a Redis cache as well as the enhancement of server response time and overall site speed. It is of paramount importance to note that a foundational comprehension of WordPress utilization is indispensable to effectively engage with the contents of this tutorial.
Installing WordPress with AWS EC2 server
Within this instructional guide, I have established a WordPress installation utilizing the Amazon Web Services (AWS) platform. Presented below are succinct procedural instructions delineating the process for its configuration. Initially, it is imperative to ascertain the possession of an active AWS account; it is noteworthy that a free tier account suffices for the purposes of this exemplification.
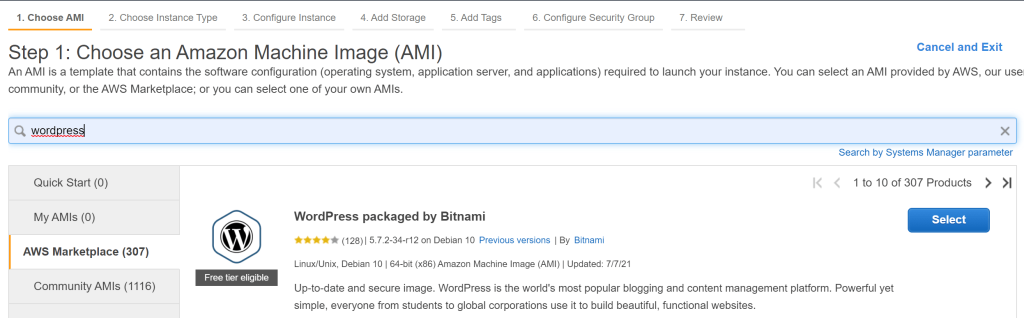
Proceed to access the AWS console and navigate to the Amazon Elastic Compute Cloud (EC2) service, subsequently effectuating the launch of a virtual instance. Thereafter, within the precincts of the AWS Marketplace, conduct a diligent search for the WordPress application. It is pertinent to underscore that the current configuration remains eligible for the free tier category. Accordingly, opt for the Bitnami-packaged iteration of WordPress, which operates atop the Apache HTTP Server architecture.
Select an appropriate AWS instance type. For this specific scenario, opt for the t2 micro instance type, which qualifies for the free tier eligibility. Subsequently, proceed to the "Review Launch" button and, once verified, execute the instance launch.

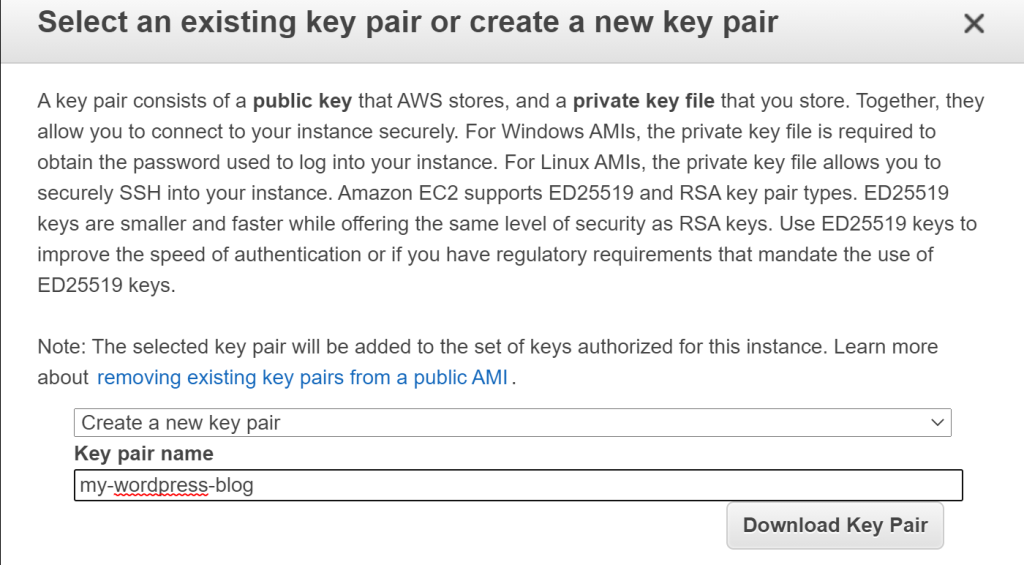
Generate a novel key pair to establish a secure connection between this server and a local computer. Ensure the downloaded key pair originating from this process is retained prior to initiating the instances.
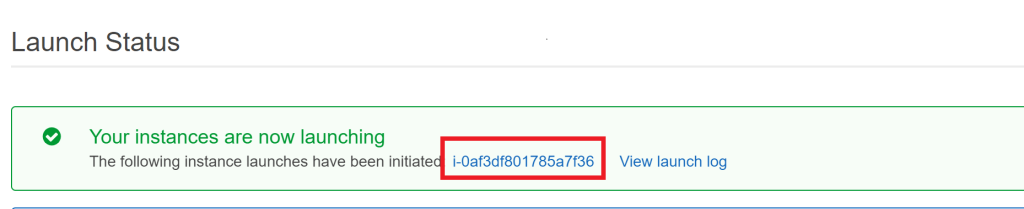
Exercise patience while AWS initializes and commences the instance launches. To gain entry to the launched instances, simply click on the provided launch identifier as indicated below.
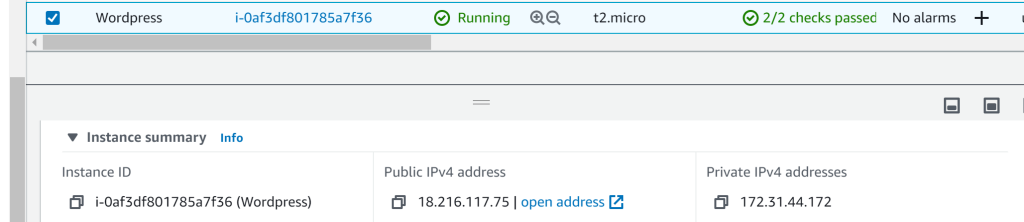
Upon confirmation of the instance's operational status and the successful configuration of WordPress, the assigned IP address becomes evident. To access the recently established WordPress blog, simply input the designated Public IPv4 address into a web browser. For productions environments, direct usage of your domain name suffices.
Accessing the server using PuTTY
Commence by procuring the PuTTY application, an open-source client that facilitates Secure Shell (SSH) and telnet functionalities on the Windows platform. Following the acquisition, proceed to install PuTTY onto your computer.
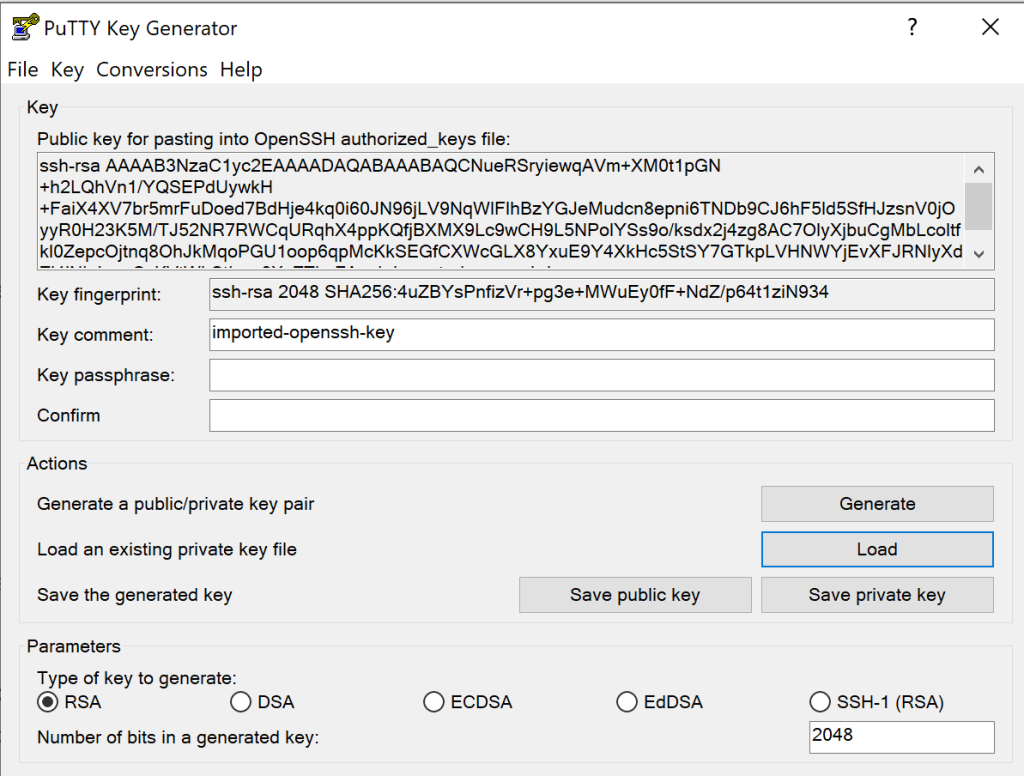
Upon successful installation of PuTTY, locate the PuTTYgen utility within your computer's directory and initiate its launch. This phase necessitates the conversion of the previously generated key pair into a public-private key file. Within the PuTTYgen interface, load the designated key, initiate the key generation process, and subsequently preserve the generated private key.
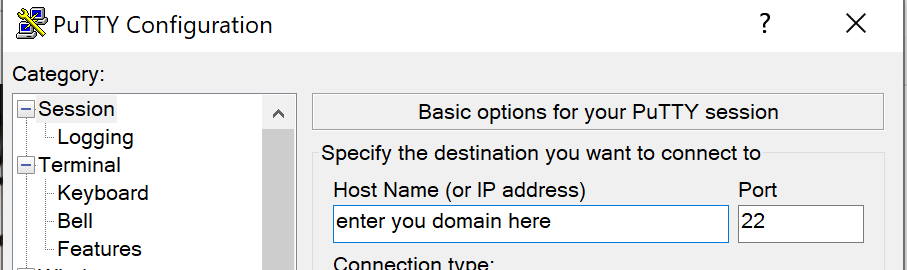
Subsequent to these proceedings, initiate the PuTTY application and input the pertinent server hostname or domain name. Navigate through the interface to the 'Session' section and furnish the associated IP address or domain name, should one be configured.
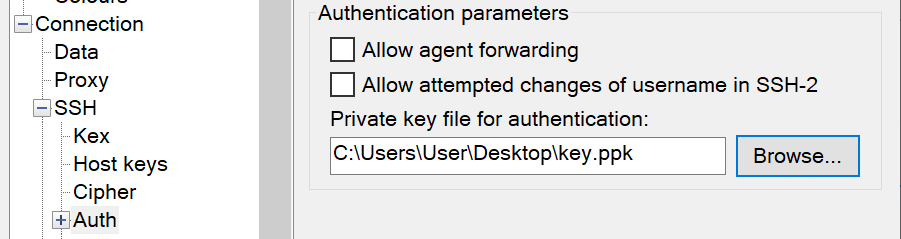
Further configuration is warranted within the 'Connections' menu, specifically under the 'SSH' subsection, and subsequently 'Auth'. Here, the recently saved SSH key must be loaded. Once configured, the connection can be established by selecting the 'Open' option.
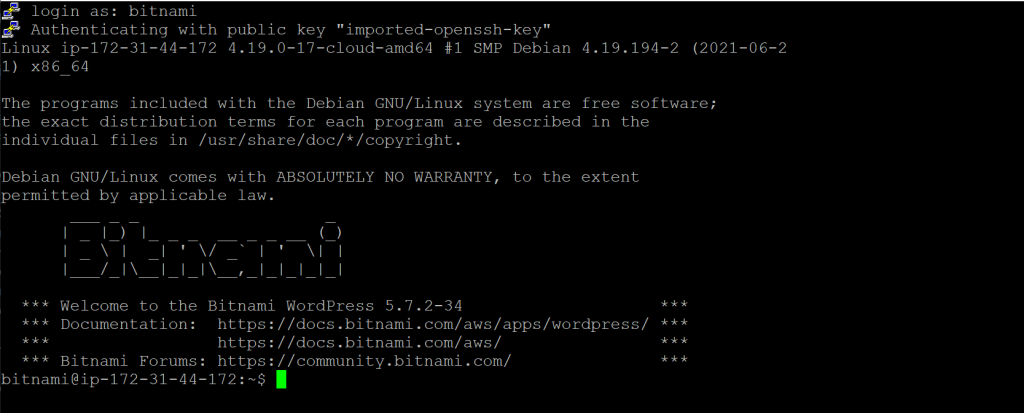
Upon successful connection, a terminal interface will be presented. Input 'bitnami' as the login credential. It's noteworthy that 'bitnami' is the default username prescribed during the WordPress installation. Should any username modifications have been implemented, input the modified username accordingly. This terminal interface provides an interactive platform to introduce additional libraries and extensions to enhance the functionality of the WordPress server.
Adding Redis To The Root Server
Now that WordPress is being run on the same root server, Redis must be added. Run the following command on the PuTTY terminal that we just logged into to accomplish this.
sudo apt install redisRedis will be installed on this IP address as a result. You can restart it with sudo systemctl restart redis.service to allow everything to configure. Let's execute to see if the Redis server is up and functioning.
sudo systemctl status redis
Redis is properly configured on our server. You can observe that we do not yet have any Redis cache keys registered by running redis-cli and the keys * command.
Now that everything is set up, we need to go to WordPress wp-admin and add a Redis plugin. As a result, you just need to input your IP address or domain name and wp-admin as displayed below.
your-ip-address/wp-adminGo to your running instance on AWS, right-click, "Monitor and troubleshoot," and then enter the wp-admin login information. System log, please. To access wp-admin, you will receive your default Bitnami WordPress login information. And you've reached the administrative dashboard.

Add Redis To WordPress
Prior to configuring Redis, it is necessary to proceed with the installation and activation of the Query Monitor plugin.
The Query Monitor plugin facilitates the debugging of various aspects, including database queries, PHP errors, hooks and actions, blocks within the block editor, enqueued scripts and stylesheets, HTTP API calls, and more. Furthermore, it provides the capability to display a comprehensive count of database queries organized by individual plugins.
To initiate this process, navigate to the homepage of your website and access the Query Monitor menu.
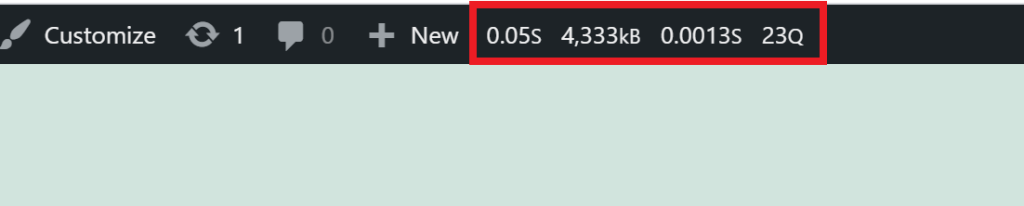
Upon doing so, the Query Monitor dashboard will be launched.

Subsequently, direct your attention to the metrics obtained from this particular page. Notably, this is a relatively uncomplicated webpage, observable with a cumulative count of 23 Database Queries, executed within a mere 0.0013 milliseconds.
With this preliminary step completed, proceed to introduce a new plugin. As an illustrative example, search for "Redis" and opt for the specific "Redis Object Cache" plugin.
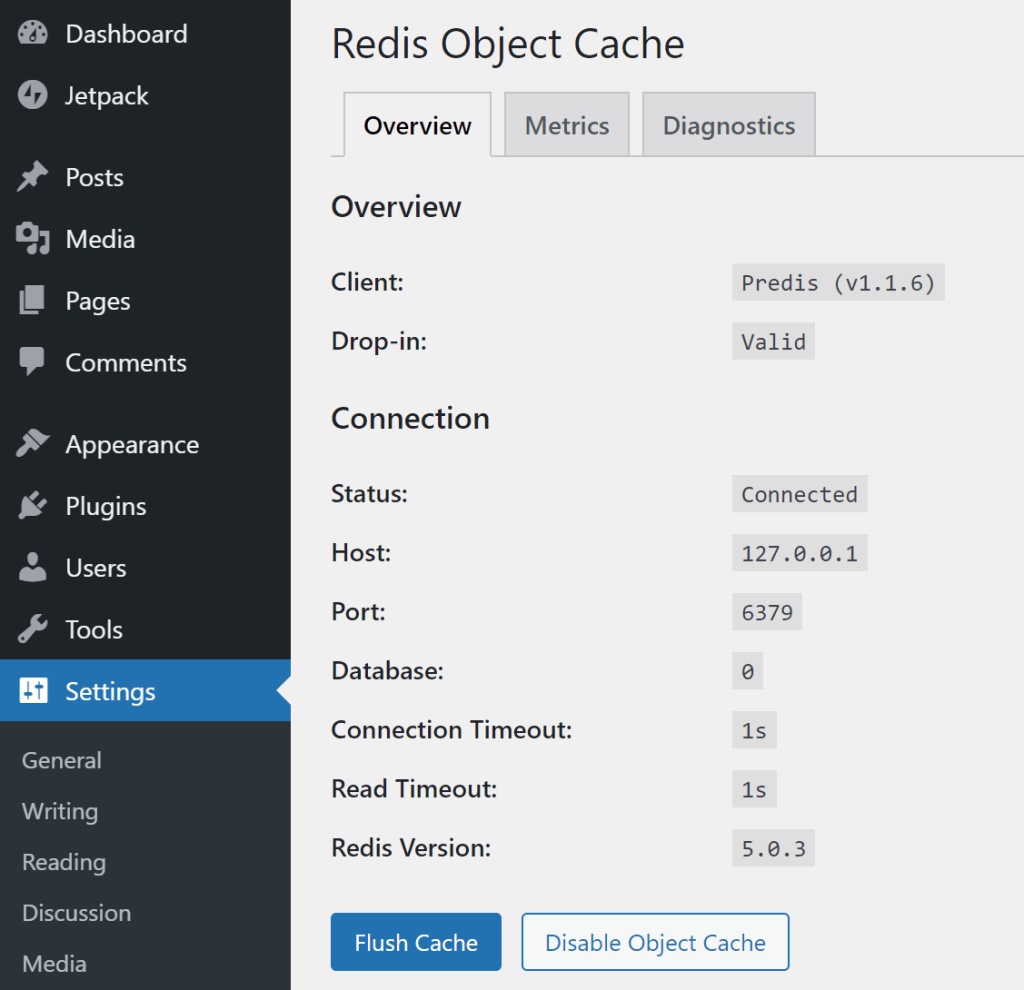
Following the selection, proceed to install and activate the plugin. Proceed then to the Redis settings section within your dashboard menu. At this point, it becomes imperative to enable the Object Cache feature.
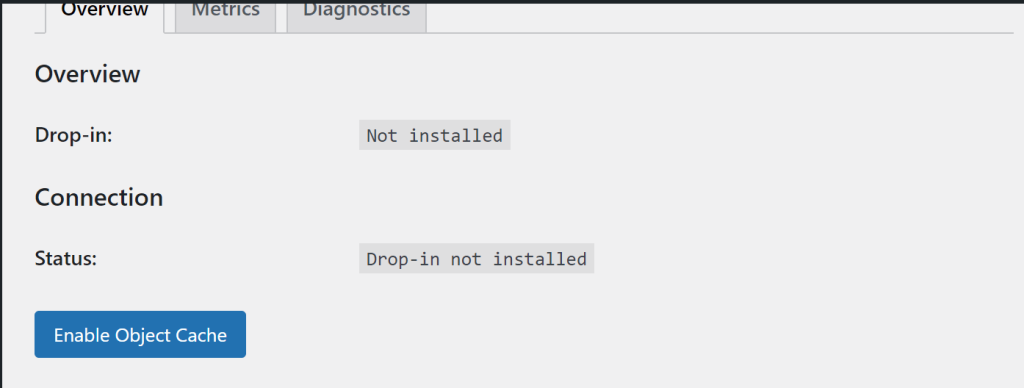
By following these instructions, Redis will be configured using the default settings.
Verification
In the context of website optimization, upon accessing a blog on your website, such as the default "hello world" WordPress blog, the outcomes of this request are stored within the Redis datastore.
Subsequently, navigate to the terminal and launch the Redis Command Line Interface (CLI) using the command "redis-cli" along with the specified keys (denoted as *). At this juncture, you will observe that Redis has duly recorded novel WordPress (wp) keys.
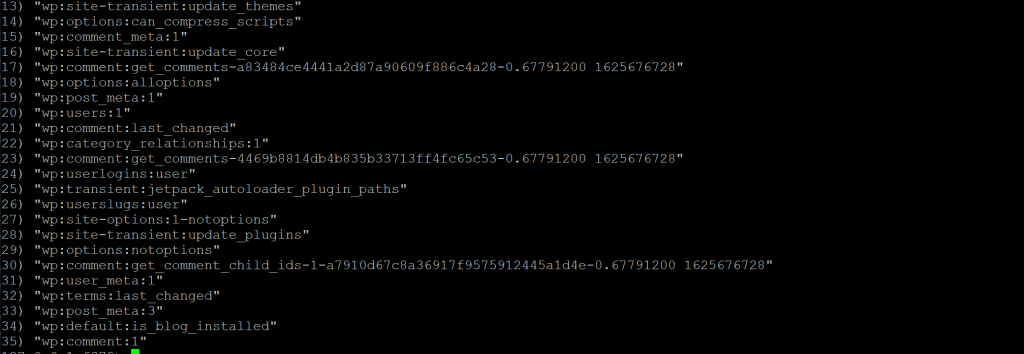
This configuration completes the setup of Redis for caching purposes within the WordPress environment.
To witness the effects, proceed to refresh the homepage that you initially loaded, while concurrently employing Query Monitor.
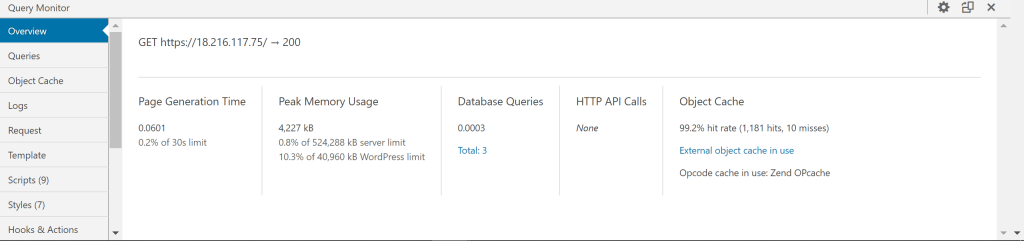
The resulting observation reveals a notable refinement: the page now loads with a mere three database queries, each completed in an exceedingly swift 0.0003 milliseconds. This optimization has substantially alleviated the cumulative burden on our database query processing time. The aforementioned queries are now systematically stored in memory, thereby curtailing the frequency of direct calls to the MySQL database. This orchestration collectively contributes to enhanced backend responsiveness in fulfilling incoming requests.
Wrapping Up
This will be crucial in making your website speedier if you manage a large website like woo-commerce. Additionally, by caching database-intensive processes, the website will be more resilient.
Even when multiple people are placing orders, they are still using the cache to retrieve the data. Less resources will be used, and the backend experience will be quicker.
Redis only caches objects and database queries. This means you can keep using other cache plugins to cache your pages and speed up your website, like Cache Enabler and WP Cloudflare.


