
Have you ever updated your WordPress site and realized something went horribly wrong? Maybe you broke your layout, lost your content, or even crashed your site completely. You know that feeling of panic and frustration, right? It’s like watching your hard work go down the drain in seconds.

Well, what if I told you there is a way to avoid this nightmare? A way to test your changes before you make them live, without risking your site’s performance or security, a way to create a staging site in WordPress with Elementor Hosting.
Sounds too good to be true right? But it’s not. It’s actually very easy and convenient, and I’m going to show you how to do it in this blog post.
By the end of this post, you’ll be able to create a staging site in WordPress with Elementor Hosting in just a few clicks and save yourself a lot of headaches and hassle. Ready to get started? Let’s begin.
Create Amazing Websites
With the best free page builder Elementor
Start NowWhat is a Staging Site?
A staging site is a copy of your live website that is not available to the public. It is used to test changes and new features before they are applied to the live website.
This way, you can avoid any errors or issues that might affect your visitors or customers. A staging site is also useful for presenting your work to clients or collaborators for feedback and approval. A staging site is usually the last step in the development process, after the local and development environments.
Some hosting providers give cloning as a testing option, however, Elementor Hosting provides both (staging for 'Business' plans and above, and cloning for 'Grow' and 'Scale' plans). While staging is an additional layer to your current website, cloning generates an entirely new replica of your website on the live environment, with its own staging environment. The live and staging environments are linked, whereas a cloned website is independent.
Benefits of Using a Staging Environment
Using a staging tool improves your web development process in a variety of ways. A staging site, at its core, provides a safe haven for experimentation, allowing you to test out new themes, plugins, or custom code without impacting the aesthetics or functionality of your live site.
Aside from that, the beauty of staging is its promise of minimal downtime. We've all experienced the drawbacks of direct alterations, such as unanticipated bugs and potential disruptions. These worries are alleviated by staging, which ensures that your live site stays operational while you make behind-the-scenes changes.
This environment also allows for simple updates. As anybody in the online industry is aware, upgrades to WordPress, themes, or plugins can occasionally clash, resulting in conflicts. By testing these in a staging environment first, you'll be in a better position to identify and address issues before they spread to your live platform.
Additionally, for those working on web projects, share the staging link with clients or teammates, solicit comments before launch, and improve your collaboration process. The staging setting serves as a social place.
Creating a New Staging Site With Elementor Hosting
Using Elementor hosting makes staging so easy. You will be good to go with just a few clicks.
- Go to your My Elementor dashboard.
- Locate the card of the website you want to copy.

- Click Manage this website
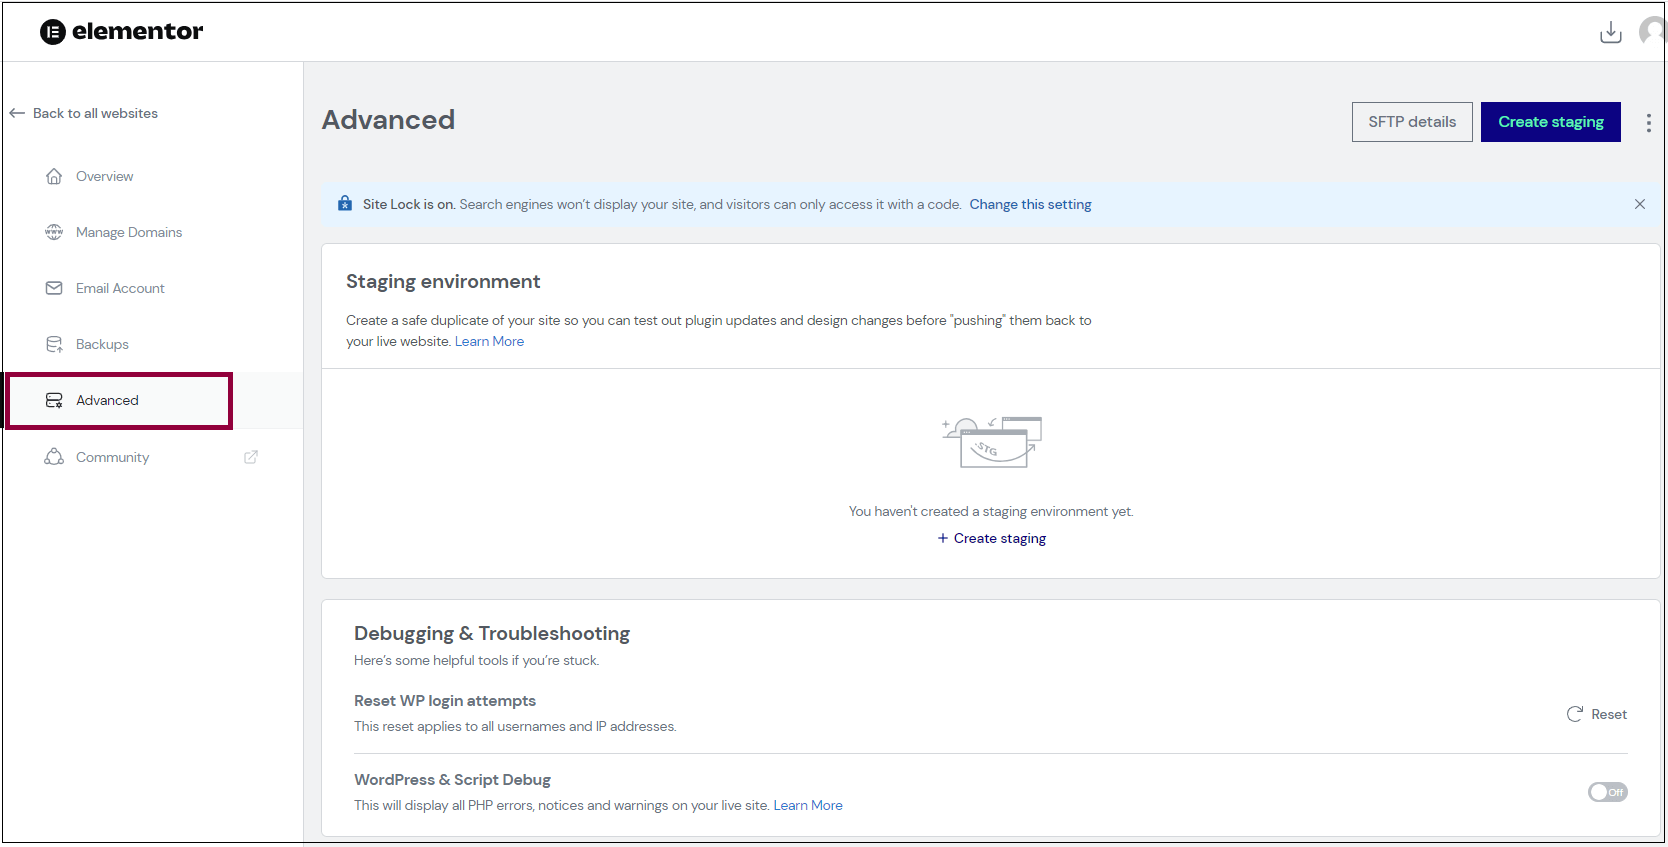
- Select Create Staging
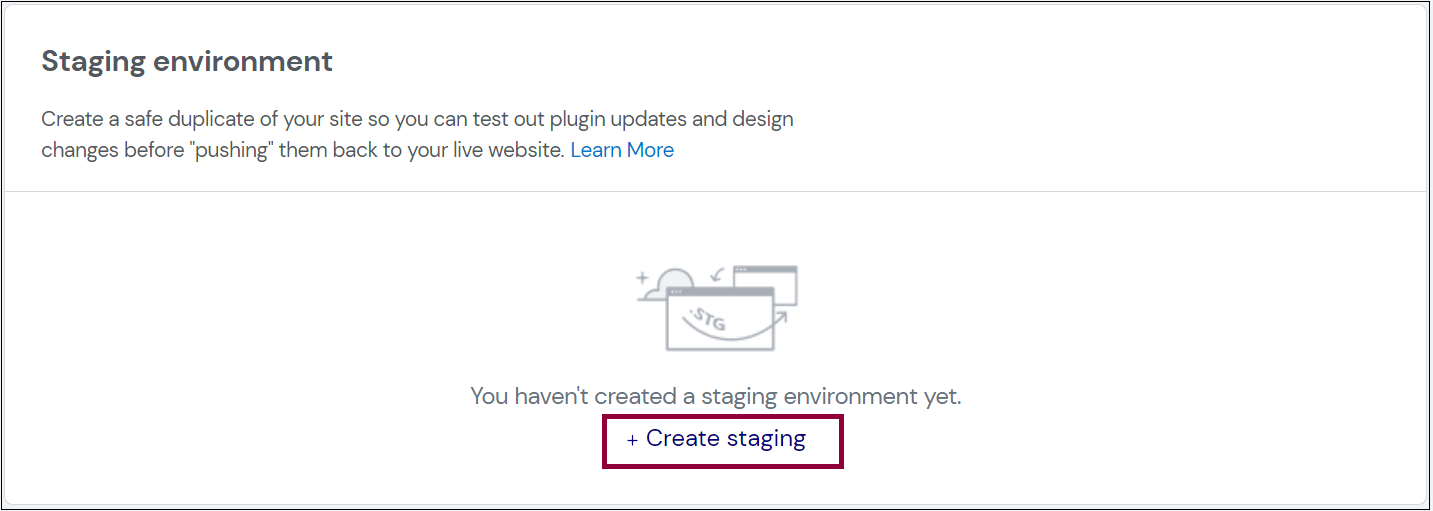
- Confirm you want to create a staging site and click Create Staging

- Your live site will be copied over to your staging site.
- The details of your staging site will be added to the Staging Environment section.
Once inside, you'll notice a top golden bar indicating that you're in the staging environment. Great! You may now access your staging site and test out some new looks and features!
As previously said, each staging site has its own distinct domain, allowing you to test it live and even share it with clients or colleagues to see the new modifications or test the behavior and performance. Isn't that amazing?
Deploying Your New Changes to a Live Website

When you host a website with Elementor, you can take advantage of new features that are always being added, as well as additional changes and advancements. So, now that we've constructed our staging site, we can access it and make modifications.
1. Go to your My Elementor dashboard.
2. Locate the card of the website you want to copy.
3. Click Manage this website

4. Scroll down to the Staging Environment section.
5. Select ‘Manage Staging’ from the Staging Environment section.
A gold bar at the top of the screen, indicates you are accessing the staging environment.
6. Click Open staging WP dashboard.
This will take you to your staging site's dashboard, where you may modify and create pages and posts, add and update plugins, and do anything else you would do on your live site. You may also use the unique link to your staging site to test the changes you've made.
Great! So, now that we've changed a picture, updated some text, introduced a new feature, and double-checked that everything works properly, we can 'Push' the modifications to our live site.
Go to the staging dashboard and press the "Push to live" button. Your live website will be updated with the new changes after you approve them.
Pulling Changes From Live to a Staging Site
If your live site has changed, you may need to copy the live site to your staging site again. To do this:
1. Go to your My Elementor dashboard
2. Locate the card of the website you want to copy.
3. Click Manage this website
4. Click Advanced
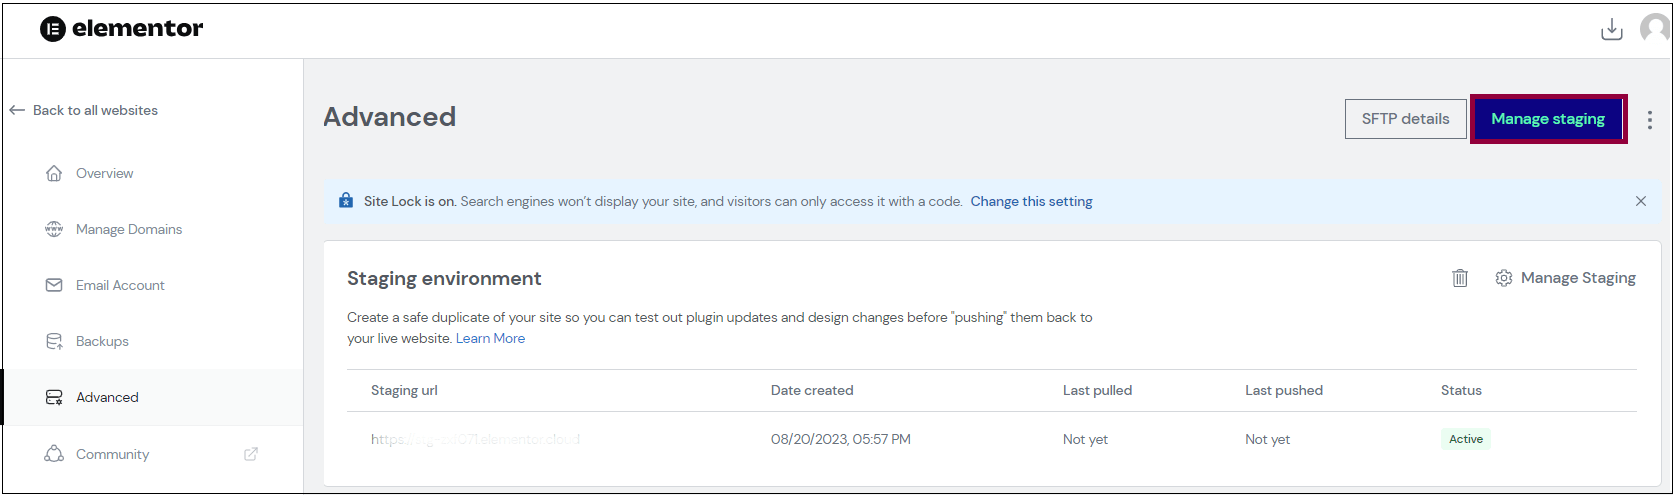
5. Click Manage Staging
A gold bar at the top of the screen, indicates you are accessing the staging environment.

6. Select Pull to staging
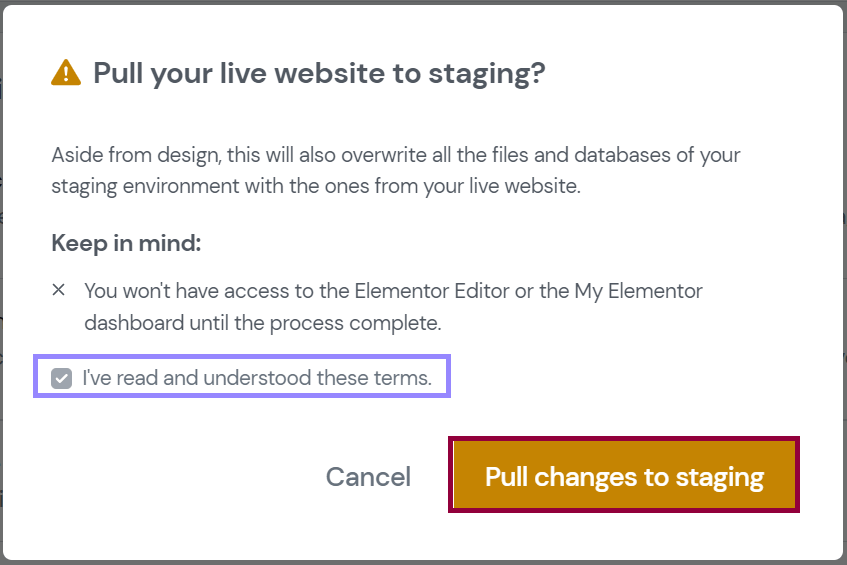
7. Confirm you want to overwrite your staging site with your live site.
The data from your live site will be copied over and replaced on your existing staging site.
Conclusion
And that’s it! You have successfully created a staging site in WordPress with Elementor Hosting. Now you can test your changes and new features without affecting your live website. You can also share your staging site with your clients or collaborators for feedback and approval. Once you are happy with the results, you can easily push them to your live site with just one click.
Creating a staging site in WordPress with Elementor Hosting is a smart and convenient way to improve your website development process. It saves you time, money, and hassle, and gives you peace of mind. You can enjoy the benefits of Elementor Hosting, such as fast performance, security, and support, while also having a safe and easy way to test your website.


