
Stable Diffusion has taken the world of generative AI by storm, allowing users to generate highly detailed and realistic images from simple text prompts.

While there are online tools like DreamStudio and Hugging Face that provide access to Stable Diffusion, running it locally on your own server offers several advantages.
By hosting Stable Diffusion on your server, you gain greater control over the model's parameters and customizations, ensuring that the generated images align more closely with your specific requirements.
Additionally, running the model locally eliminates the need to rely on third-party services, providing you with increased privacy and data sovereignty. In this article, we'll guide you through the process of setting up and running Stable Diffusion on your server, enabling you to unlock the full potential of this powerful generative AI tool.
Create Amazing Websites
With the best free page builder Elementor
Start NowWork Process of Stable Diffusion Model
Stable Diffusion falls under the class of deep learning models known as diffusion models. These are generative models, meaning they are trained to generate new data similar to what they've learned from the training data.
The model is called "diffusion" because of its mathematical similarities to the physical process of diffusion. It works by starting with pure noise (random pixels) and gradually correcting that noise towards the target image over many steps, guided by the text prompt provided.
The key innovation of Stable Diffusion is that it is a latent diffusion model. Instead of working directly on pixel space, it operates in a compressed latent space learned by a prior image-to-latent encoder model. This compressed representation allows for efficient learning and generation.
At a high level, the process works as follows:
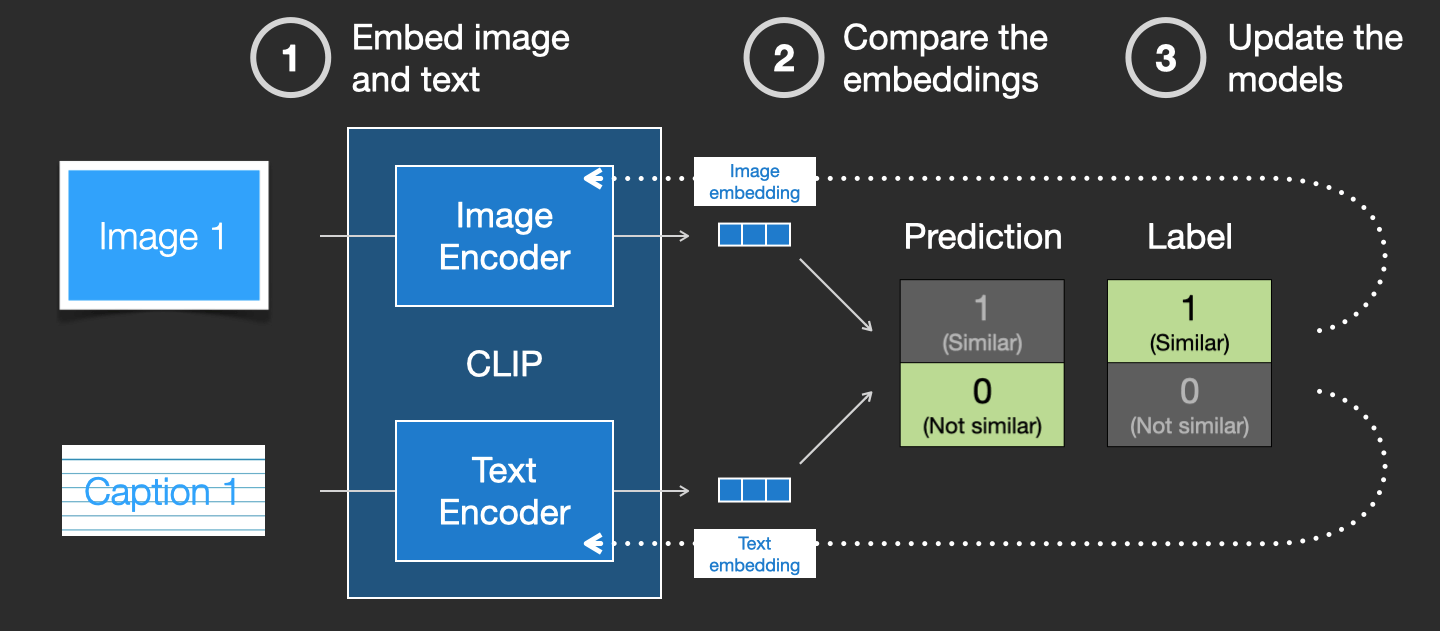
- The text prompt is encoded into a text embedding using an encoding model like CLIP.
- Random noise is sampled in the latent space.
- The noise is gradually corrected towards the target image distribution conditioned on the text embedding through multiple diffusion steps.
- Finally, the denoised latent is passed through a decoder to generate the output image.
This iterative denoising process allows the model to generate coherent images closely matching the input text description. The training utilizies advanced techniques like classifier-free guidance to improve image-text alignment quality.
Running Stable Diffusion on Local Server
Using Stable Diffusion on your computer allows you to try out different text inputs and create images that better suit your needs. Plus, you can adjust the model using your own data to enhance the results based on your inputs.
Note: A GPU is required to run stable diffusion on your PC.
Python & Git Installation
You need to have Python 3.10.6 on your computer to run Stable Diffusion. You can install it from the official Python website.
To confirm that the installation was successful, open the command prompt, type 'python', and press enter. This should display the version of Python you have installed.
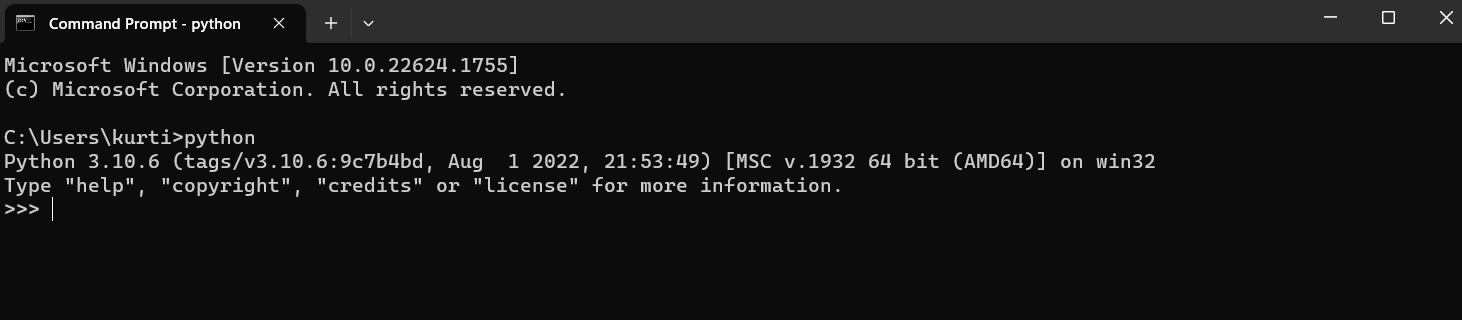
Remember this is the only version you should move forward with.
Then install the code repository management system - Git.
GitHub and Hugging Face Account
GitHub is a place where developers store their code and work together on software projects. They use it to keep track of changes and collaborate with others.
On the flip side, Hugging Face is a community focused on AI and encourages people to contribute to open-source projects. It's like a central hub for different models, like those for natural language processing and computer vision. To download the latest version of Stable Diffusion, you'll need to create an account, but we'll cover that later.
Stable Diffusion Web-UI Cloning
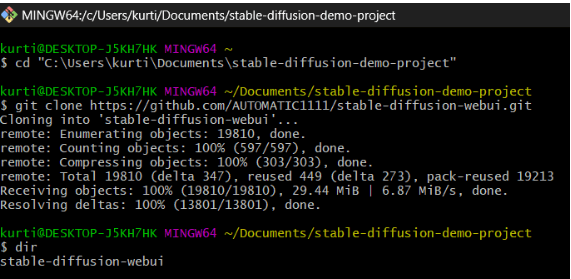
This step is crucial, but it can become a bit tricky. All we need to do is download the basic setup of the stable diffusion installation onto our computer. It's helpful to create a folder (like "stable-diffusion-demo-project") to download the repository into, but it's not mandatory.
To complete this step, you'll need Git bash. Simply go to the folder where you want to clone the stable diffusion web UI by using the following command:
cd path/to/folder Then, you should run the command given below -
git clone https://github.com/AUTOMATIC1111/stable-diffusion-webui.gitIf everything went well, you'll see a folder named stable-diffusion-webui.
Downloading Stable Diffusion Model
First, log in to your Hugging Face account. Then, get a Stable Diffusion model by downloading it. It might take a few minutes because it's a big file.
Once it's downloaded, go to the 'models' folder in the stable diffusion web interface folder. Inside, you'll find a folder named 'stable-diffusion' with a text file called 'Put Stable Diffusion Checkpoints here.'
Now, just move the Stable Diffusion model you downloaded into this folder.
stable-diffusion-webui\models\Stable-diffusionWeb-UI Setup
Next, you need to set up the tools needed for stable diffusion. This might take about 10 minutes.
cd path/to/stable-diffusion-webuiOpen your command prompt and go to the stable-diffusion-webui folder by typing a specific command.
webui-user.batOnce you're there, run another command to create a virtual environment and install everything needed for the process.
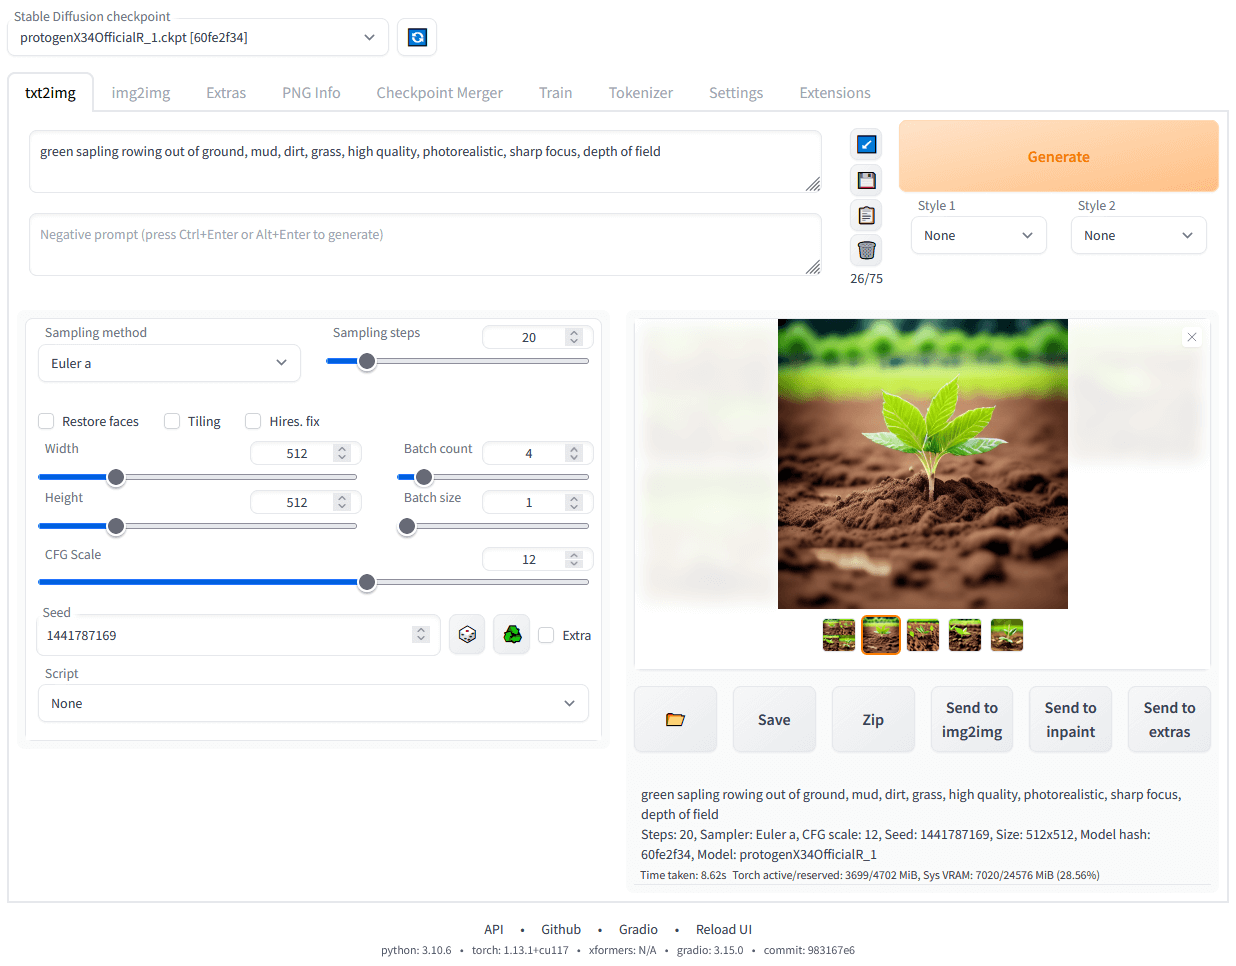
Start Using Stable Diffusion
Once you've installed all the necessary stuff, you'll see a web address like "http://127.0.0.1:7860" in your command window. Just copy and paste that into your web browser's address bar to start using the Stable Diffusion web interface.
Wrapping Up
Running Stable Diffusion on your own server unlocks its true potential, granting you full control over customizations and fine-tuning.
With a local installation, you can tailor the model to your unique needs, experiment with different prompts and techniques, and push the boundaries of generative AI.
As this technology rapidly evolves, having Stable Diffusion locally positions you at the forefront, empowering you to create, innovate, and shape the future of visual generation. Embrace the possibilities responsibly, and let your imagination soar in this fascinating realm.


