
Stable Diffusion is a powerful generative model that has been trained on large datasets of images and videos to create realistic and high-quality samples. It works by iteratively refining a noise input signal to generate images with increasing levels of detail and coherence. This technique has been widely used in the field of AI-generated art, allowing artists and enthusiasts to create unique and fascinating pieces of artwork.
Google Colab, on the other hand, is a cloud-based platform that provides free access to powerful GPUs, making it an excellent choice for experimenting with machine learning models. It also allows users to collaborate and share their work with others easily. By combining Stable Diffusion with Google Colab, we can access pre-trained models and generate our own AI art with minimal setup and cost.
In this tutorial, we will walk you through the steps to get started with Stable Diffusion in Google Colab, including setting up the environment, loading pre-trained models, and generating samples of AI art. Whether you are a beginner or an experienced practitioner in the field of AI-generated art, this tutorial will provide you with the essential knowledge to start creating your own unique pieces of artwork.
Getting Started with Stable Diffusion
To begin, we will provide a brief demonstration of the entire process of running Stable Diffusion on Google Colab, leading up to the generation of our initial set of images.
Create Amazing Websites
With the best free page builder Elementor
Start NowAccount on Hugging Face
To use Stable Diffusion, we will need to download it from Hugging Face, which is a repository that provides a range of models and useful functionalities. To download Stable Diffusion, we will first need to create an account with Hugging Face. A model is essentially a program that can learn to perform certain tasks independently.
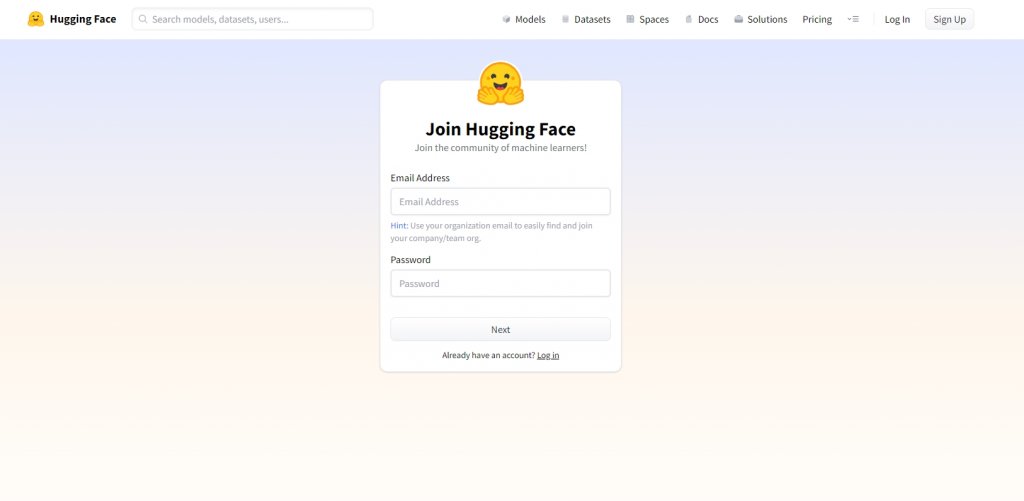
Creating an account with Hugging Face is a simple process that involves visiting their website at Hugging Face and following the standard account creation procedures. After completing the registration, you will receive a confirmation email to verify your account. Once you have confirmed your account, you will be able to download Stable Diffusion and start experimenting with AI-generated art in Google Colab.
Copy the Stable Diffusion Colab Notebook To Google Drive
To begin with, similar to editing any Google document created by another person, you will need to visit the Stable Diffusion Google Colab notebook at Google Collab and select the option "File" followed by "Save a copy in Drive".
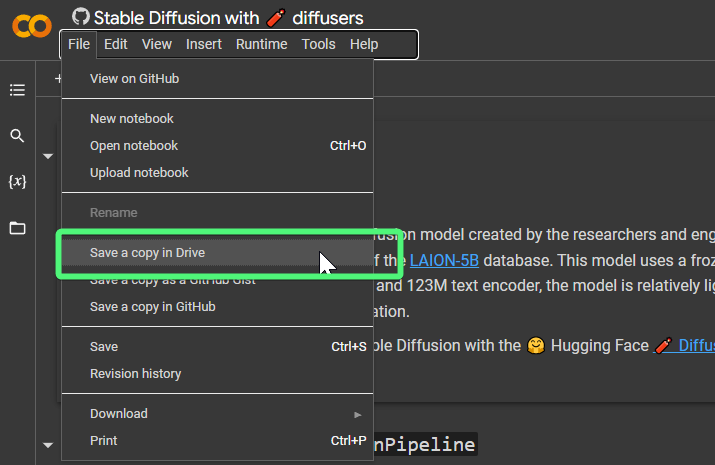
This will open a new tab with the notebook saved to your drive, and its name will be "Copy of Stable Diffusion with diffusers". Feel free to rename it as per your preference.
Make Use Of GPU
Before running Stable Diffusion in Google Colab, it is important to ensure that the notebook is configured to use a GPU. The GPU is an essential component for efficiently processing large datasets and performing complex computations involved in training generative models like Stable Diffusion.
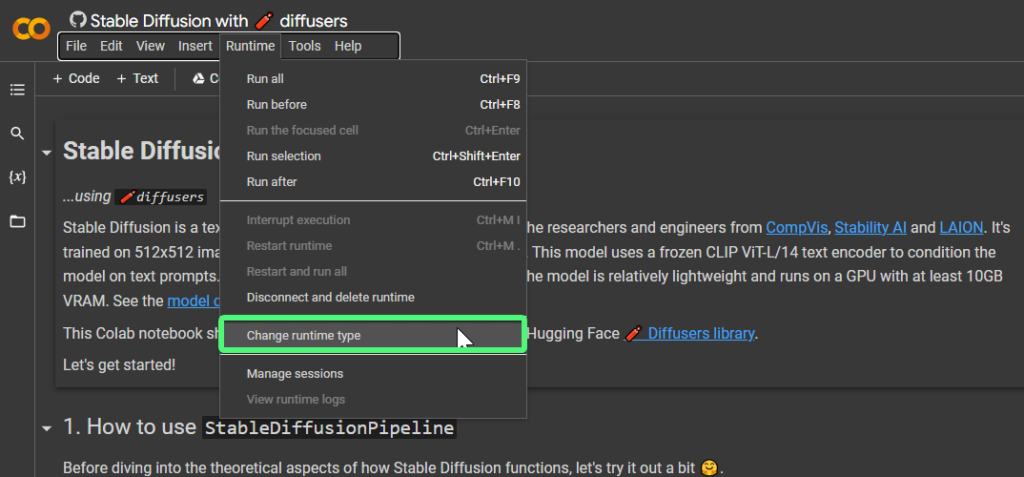
To check if the notebook is configured to use a GPU, go to the "Runtime" menu and select "Change runtime type." A small window will appear with a "Hardware accelerator" dropdown menu. Make sure that "GPU" is selected as the hardware accelerator.
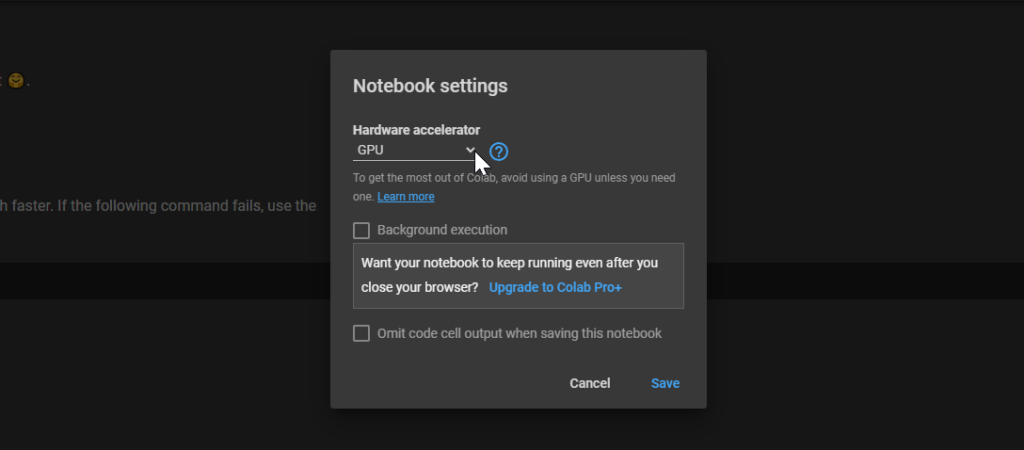
Once "GPU" is selected, click "Save" to apply the changes. Now, the notebook is configured to use a GPU, which will allow us to run Stable Diffusion smoothly and efficiently. With this setup, we can now proceed with loading the pre-trained models and generating our own AI art.
Run The First Cells
We can now execute the initial cells in the Stable Diffusion Colab notebook. To do so, simply hover your mouse over each cell and a play button will appear. Click on the play button and wait for the cell to finish its execution. You will know that a cell has completed its task when a green checkmark appears.
Each cell is accompanied by a description above it, explaining its purpose and functionality. If you encounter a message such as "this notebook requires high RAM," simply click on "OK" to proceed.
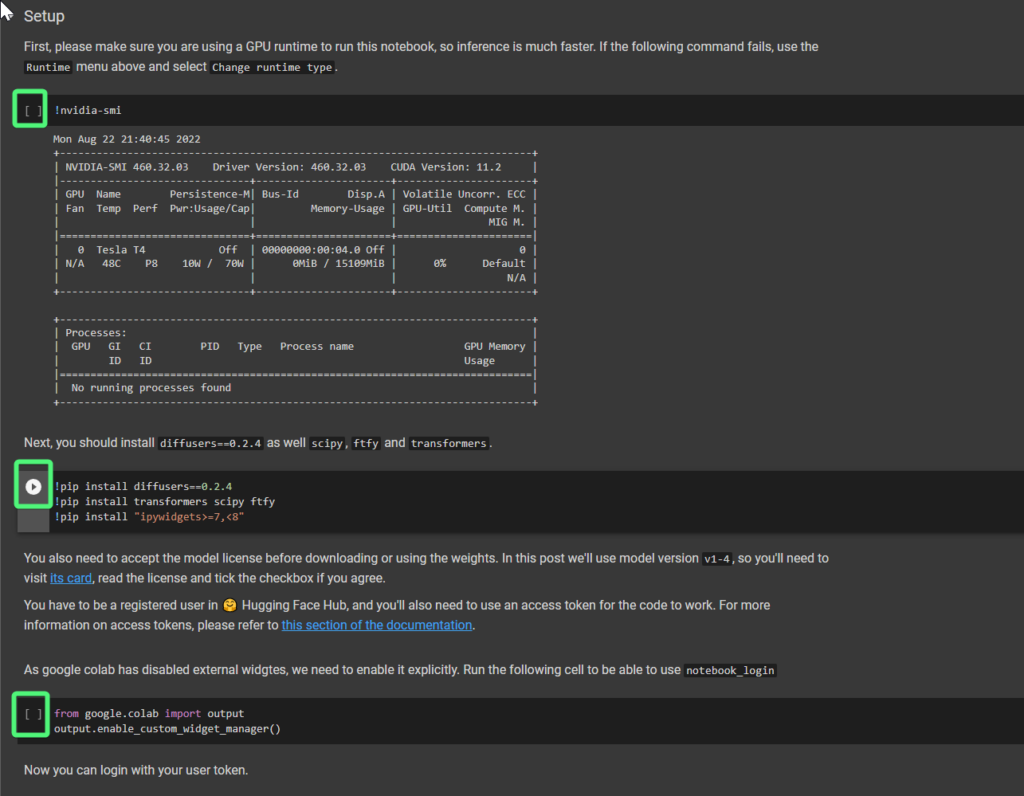
Once you have successfully executed the initial cells, you should be ready to start using Stable Diffusion. The notebook provides a user-friendly interface for loading pre-trained models and generating AI-generated art. Whether you are new to the field or an experienced practitioner, this notebook can serve as a valuable tool for exploring the possibilities of Stable Diffusion in generating high-quality and unique artwork.
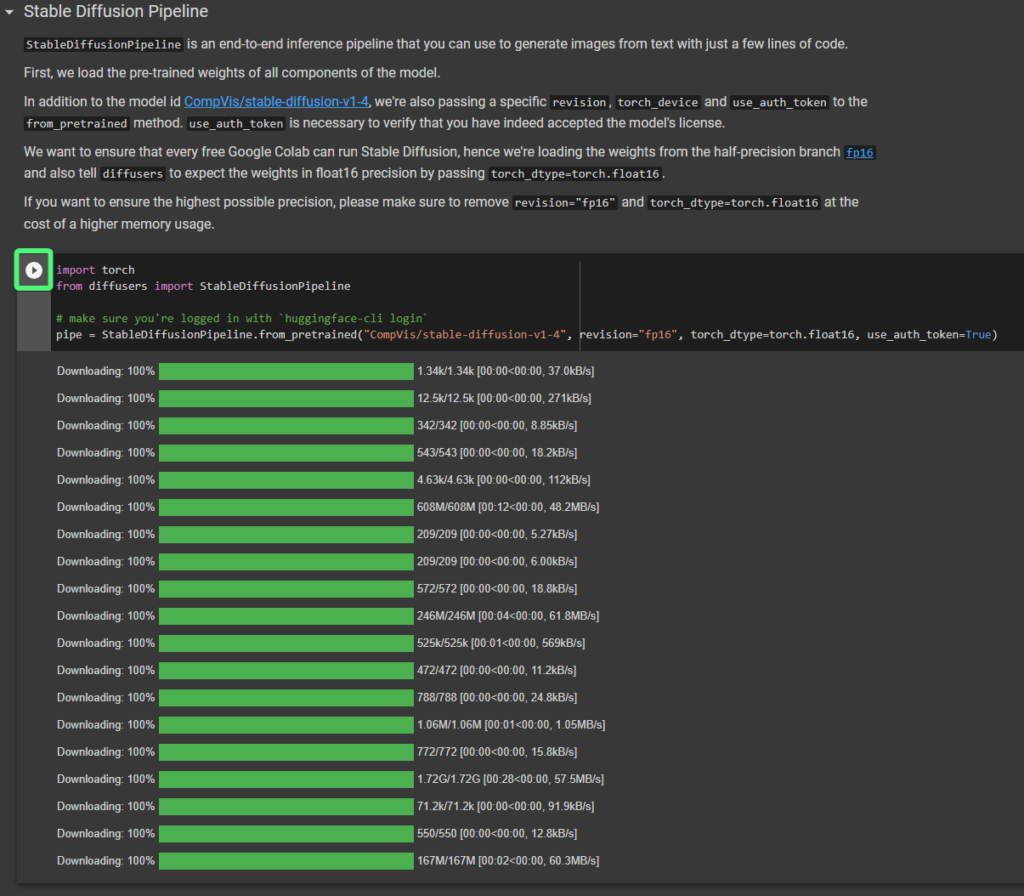
Run The Fifth Cell To Download The Required Files
We will proceed to execute the fifth cell, located under the "Stable Diffusion Pipeline" section, which will download the required components.
Additionally, we need to execute the following cell as well.
pipe = pipe.to("cuda")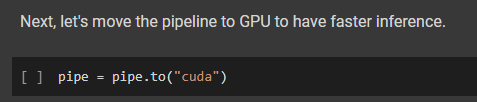
Generate Image
In the subsequent cell, you may have already noticed an image appearing. This is where we will generate our first image. To do this, simply enter a text string within the quotation marks and execute the cell. As an illustration, I have included an example where I entered the following text:
a protoss cityscape with advanced technology, inspired by the game starcraft, making heavy use of light and shadow to create a sense of mystery and foreboding. the city sprawling below is a mix of organic and inorganic, with swirling energy currents and strange crystalline structures, illustrated in a realistic and detailed style by wei wang, artstationa protoss cityscape with advanced technology, inspired by the game starcraft, making heavy use of light and shadow to create a sense of mystery and foreboding. the city sprawling below is a mix of organic and inorganic, with swirling energy currents and strange crystalline structures, illustrated in a realistic and detailed style by wei wang, artstation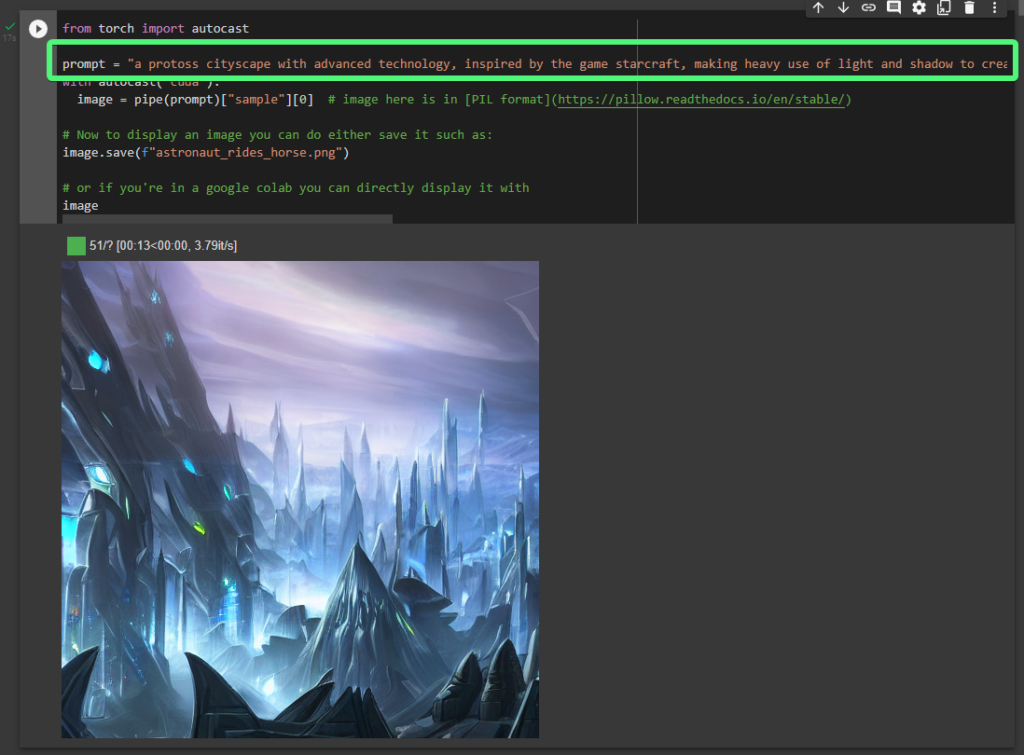
Great job! The process of generating that image should have taken less than a minute.
Wrapping Up
Congratulations on generating your first image using Stable Diffusion from Hugging Face on Google Colab! This is just the beginning of your journey into the exciting world of AI-generated art.
By following this guide, we hope that we have helped you overcome the initial barrier and provided you with the necessary knowledge to start exploring Stable Diffusion further. We encourage you to continue exploring the other instructions in the Google Colab notebook, which will allow you to customize and fine-tune your model for your specific needs.
However, we understand that you may encounter some issues or have questions along the way. Don't hesitate to leave a comment, and our team will get back to you as soon as possible. We are here to support you and help you succeed in your AI-generated art journey. Keep experimenting, and we can't wait to see what you create next!


