
Are you tired of seeing the default "Proudly powered by WordPress" text in the footer of your WordPress website?

While it's a simple message, it can look unprofessional and cluttered, especially if you're running a business or personal brand site.
Fortunately, removing this footer credit is a straightforward process that can help clean up the appearance of your site.
In this step-by-step tutorial, we'll guide you through the process of removing the WordPress footer credit from your website. Whether you're a seasoned WordPress user or a beginner, this guide will provide you with easy-to-follow instructions that will help you achieve a more polished and customized look for your site.
Create Amazing Websites
With the best free page builder Elementor
Start Nowits noteworthy to mention that - the following rules applies to all the theme and page builder like Divi and Elementor.
What is Footer In WordPress?
The footer in WordPress is the section at the bottom of your website, appearing after the main content on each page.
This area typically includes copyright information, privacy policy links, credits, and sometimes code or scripts added by the theme developer.

While it's often overlooked by beginners, the footer can be a valuable tool for enhancing your website's user experience. It can be customized with widgets, links, code, and even unique footers for different pages.
Top WordPress themes include an editable footer widget area. By optimizing this space, you can improve your website's SEO and promote your business.
In essence, the footer is a key component of your website's design and functionality, offering a range of customization options to meet your website's needs and those of its visitors.
How To Edit Footer In WordPress?
There are various ways to edit a footer of WordPress footer, but we are going to talk about the most convenient ways.
We all know that footer is a section of bunch of widgets. You can edit those widgets to add words, pictures, or links to important pages like your privacy policy or legal stuff.
To edit footer widgets - Go to "Appearance" then "Widgets" and click the plus sign in the "Footer Sidebar" section.
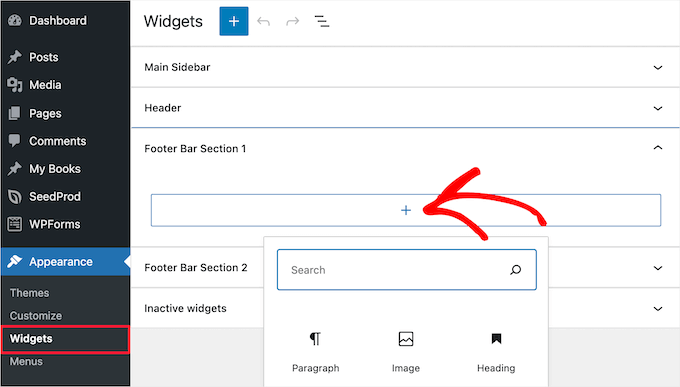
To put something in the footer, just click it, and it will show up. If you need more help, look at our guide on using widgets in WordPress.
Remember, different designs might have more than one space at the bottom, and they might use them differently. After you put things there, you can look at your website to check if they're where you want them to be.
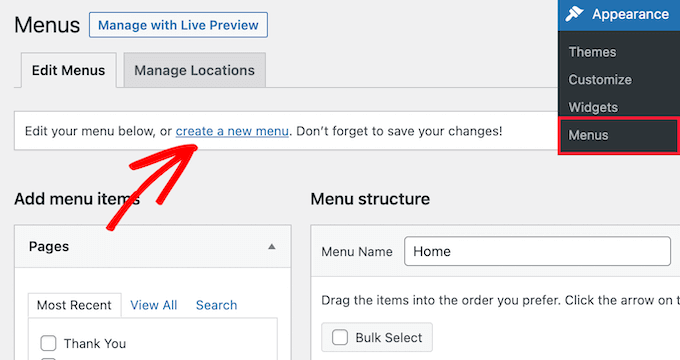
To add links in the footer, go to the Menu section from Appearance and create a new menu.
Give it a name "Footer" as example and them you can select page , post and categories from the left column.
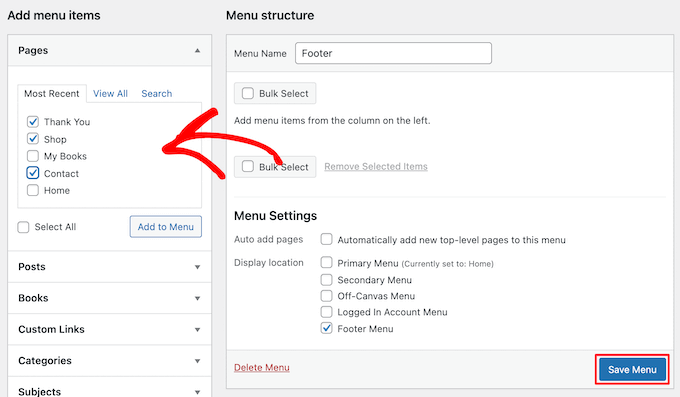
Once finish, save your changes.
From the Appearance » Widgets page in your WordPress admin panel, you can add this menu in Footer. Once there, click the 'Plus' icon and search for 'Menu'. Then, select the 'Navigation Menu' block.
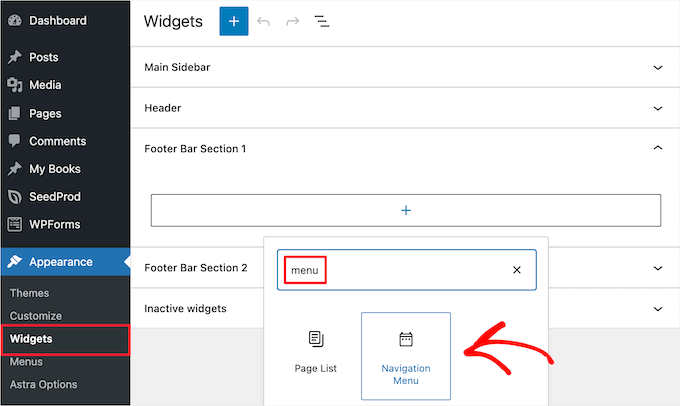
After selecting the block, choose your footer navigation menu from the 'Select Menu' drop-down. If you want, you can also give your widget a title. This title will appear above the menu in your footer.
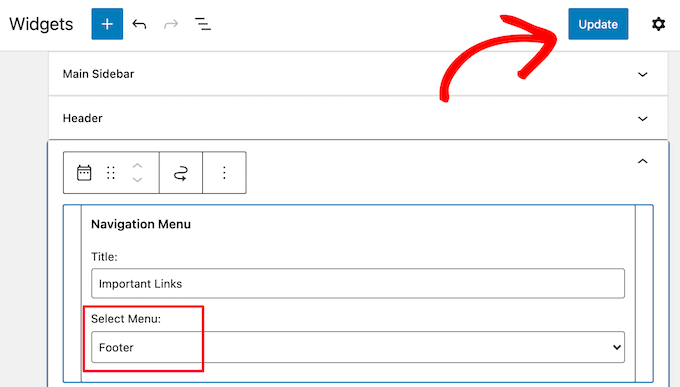
Once you've made your selections, click the 'Update' button to save your changes. Now, you can visit your website to see your footer links in action. If you need to add more links, simply repeat the same steps again.
How To Remove ‘Powered by WordPress’ Text from Footer
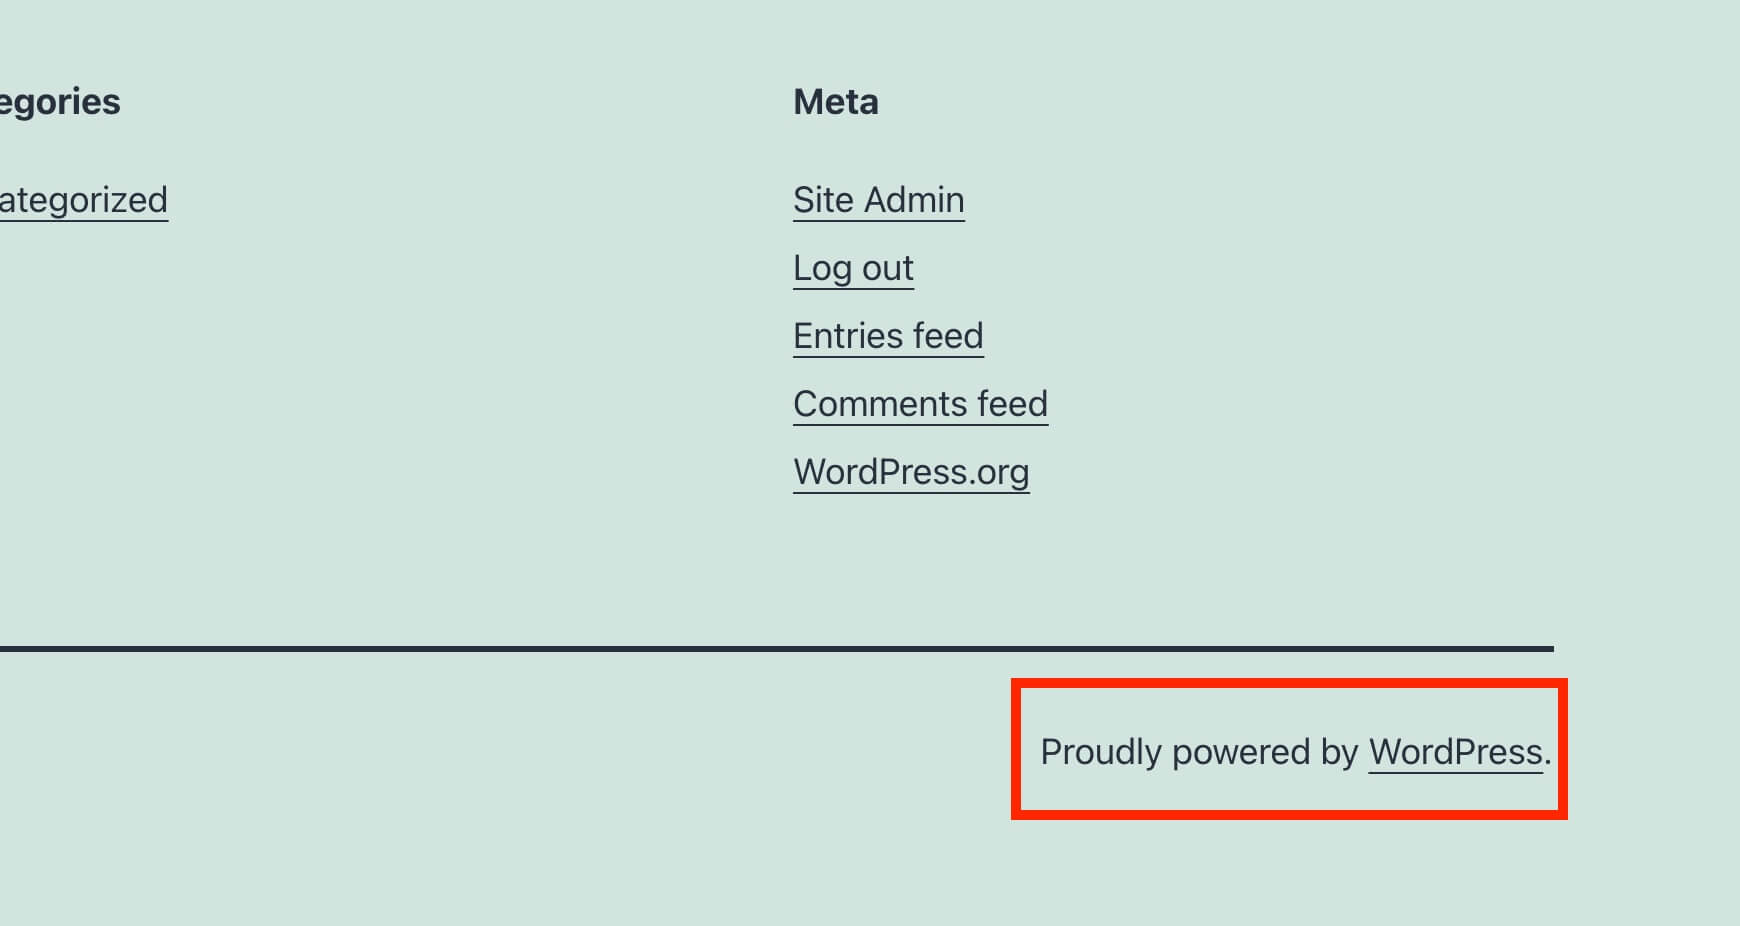
When setting up WordPress, you might notice a 'Powered by WordPress' link nestled within the footer bar at the bottom of your site. Since it's not a widget, the process for altering it can be somewhat obscure.
Certain themes will automatically adjust this to display their own text and links. If this is the case, you can typically modify this text through the WordPress theme customizer. Simply navigate to Appearance » Customize within your WordPress admin panel.
Once there, locate a section labeled 'Footer', or something akin to it.
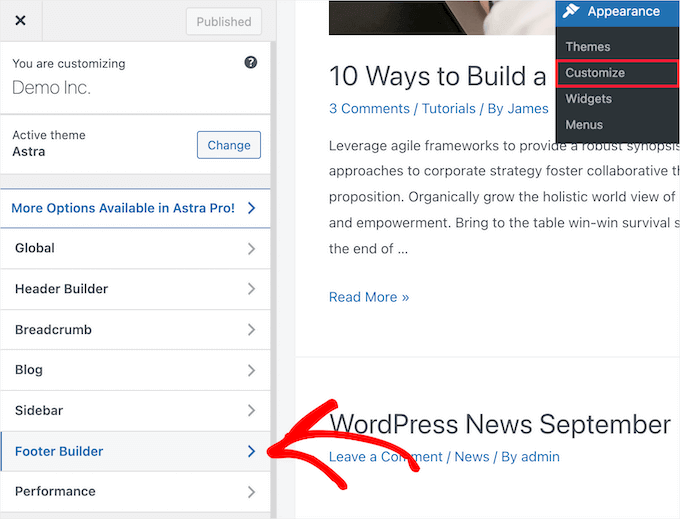
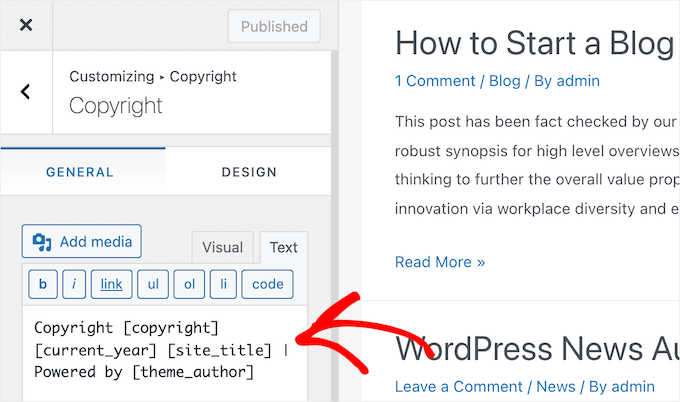
For illustration purposes, let's consider the Astra theme. When using Astra, you'll need to select 'Footer Builder' within the theme customizer.
This action will lead you to a page featuring various customization options for altering the footer text, integrating social media links, and more.
To replace the footer text, simply click on the 'Copyright' button.
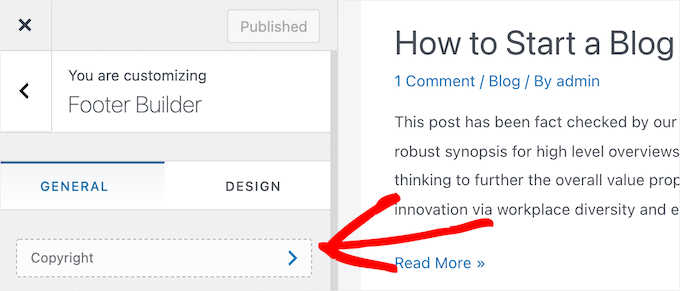
From there, you can remove the existing text and input your preferred message.
After completing the modifications to the footer, remember to click on either the 'Update' or 'Publish' button at the top of the screen to ensure your changes are implemented.
Great right! However, you might also want to change this writeup and add your own or brand name. So, you can change it manually. Again, sometime you theme might not have this text on it and you want to add it , but how? Lets see how to do it manually.
In this scenario, you'll have to directly modify the footer.php file. This file is located in your WordPress theme folder and controls how the footer area appears for that specific theme.
Editing the footer manually is considered an advanced option, as it requires knowledge of PHP code to make changes to the file.
The simplest way to edit this file is by using an FTP client to connect to your WordPress hosting account. For more guidance, refer to our tutorial on how to use FTP to upload files to WordPress.
To begin, download the your footer.php file from your theme folder.
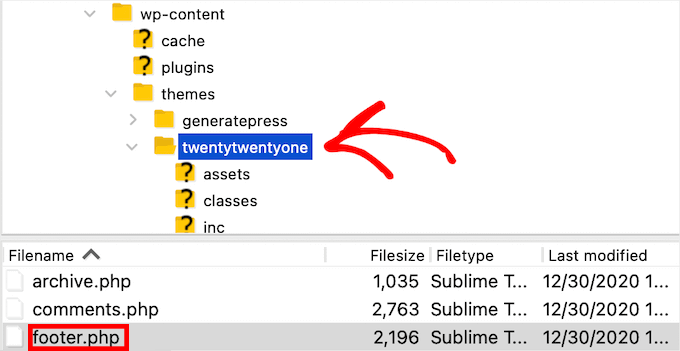
Afterward, locate the specific line of code containing the 'Powered by WordPress' text within the file.
Then, just remove or alter that text, and upload your updated footer.php file.
It's advisable to create a backup of the file before making any modifications. This ensures that if anything goes wrong, you can effortlessly revert back to the original version.
Remove the "Powered by WordPress" text using Plugin
Another choice, which works with a variety of themes, involves using a WordPress plugin. One widely-used plugin that works well with different themes is Remove Footer Credit. This plugin, available for free, allows you to delete or customize your website’s footer credit without the need for coding.
Once the plugin is installed, follow these steps to remove any theme credit:
Go to your website's homepage and inspect its elements. Different browsers have different methods for accessing website elements. For instance, Google Chrome users can right-click on any area and select Inspect. Alternatively, press CTRL + SHIFT + I.
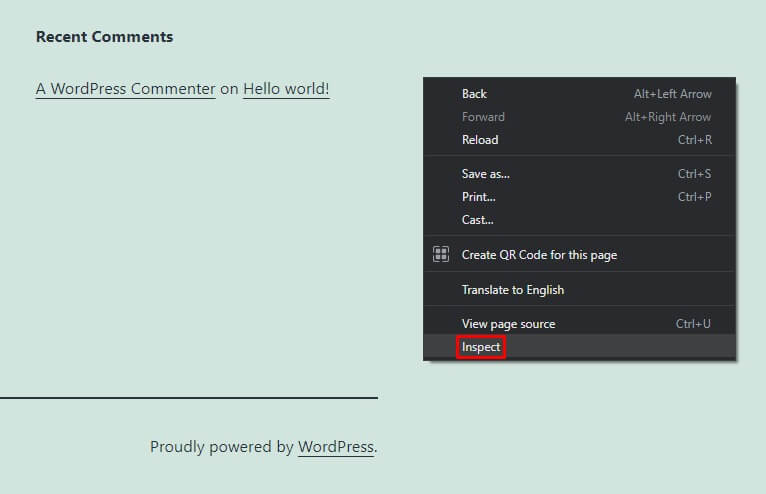
To remove the footer credit from your theme, start by copying the code snippet. For convenience, use the Select tool from the top menu bar to highlight the "Proudly powered by WordPress" message and its code snippet.
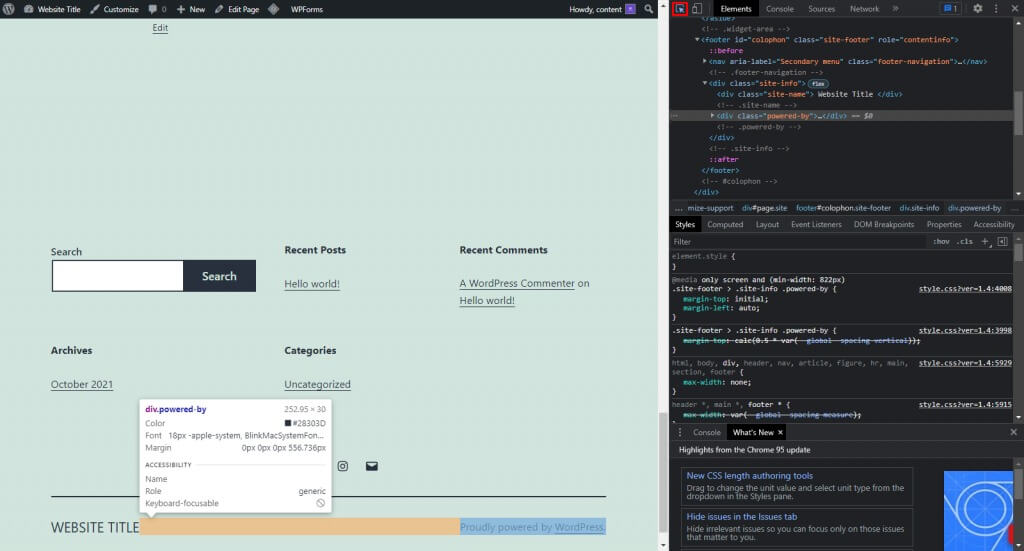
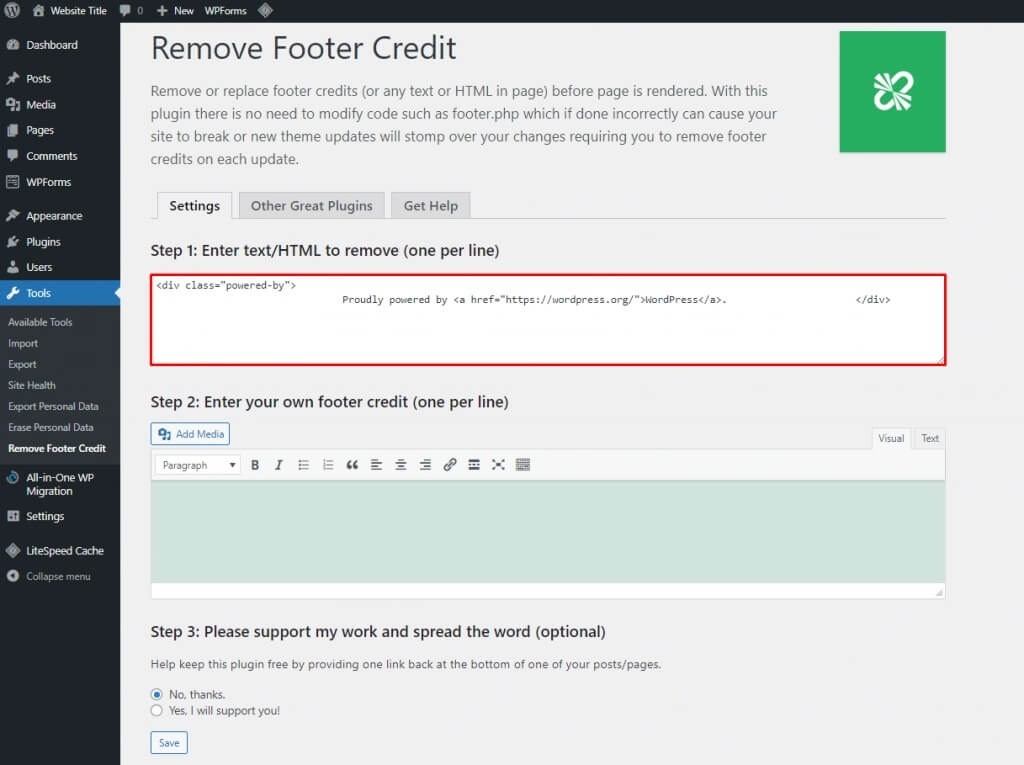
Next, go to WordPress Dashboard -> Tools -> Remove Footer Credit. Paste the copied code snippet into Step 1 to eliminate the credit from your website's footer. Save your changes to apply them.
For default themes, there's also the option of using the Remove "Powered by WordPress" plugin, which simplifies the process even further. After installing the plugin, navigate to the WordPress theme customizer and access Theme Options. Click on the option to Remove Powered by WordPress to complete the removal process.
Wrapping Up
Congratulations! You've now mastered four powerful techniques for customizing the footer area of your WordPress website.
By editing and removing widgets, removing the "Powered by WordPress" text, , you've unlocked the ability to make your site's footer truly your own.
Remember, the footer is often one of the most overlooked areas of a website, but it plays a crucial role in providing important information to your visitors and enhancing the overall user experience. With the skills you've learned in this guide, you can ensure that your site's footer is not only visually appealing but also functional and informative.


