
Price drop notifications alert your customers when the brand reduces the price of a product. These include alerting your customers about discount campaigns, annual sales and much more.

Price drop notifications can be essential to bring back the customers, increase brand loyalty, enhance engagement and increase sales. In this tutorial, we will understand why and how you can notify your consumers about a price drop.
Why Should You Enable Price Drop Notifications
While there are many benefits that one can assess with alerting your customers about anything let alone a price drop, but here I will explain to you that how it can increase your revenue, re-engage lost customers and drive traffic to your store.
1. Increase Your Revenue
Along with the alert, it is necessary for your offer to be captivating enough. When a customers receives an alert and manages to drop by your website, it is your offer that will persuade them to make a purchase.
Create Amazing Websites
With the best free page builder Elementor
Start Now2. Re-Engage Lost Customers
When the customers that might have forgotten about your store receive an alert of a price drop, they will want to get back to your website and might search through some products. It will help you bring them back to your website and hold onto them.
3. Drive More Traffic
Some of the buyers are looking for discounted prices and sales. There must be visitors of your store waiting for price drops and when they receive a notification, they will be quick to head over to your site and make a purchase if it suits them.
How To Enable Price Drop Notifications
Now that you have enough knowledge about why should you Notify your Customers about a Price Drop, let's move ahead and understand how you can do it.
PushEngage
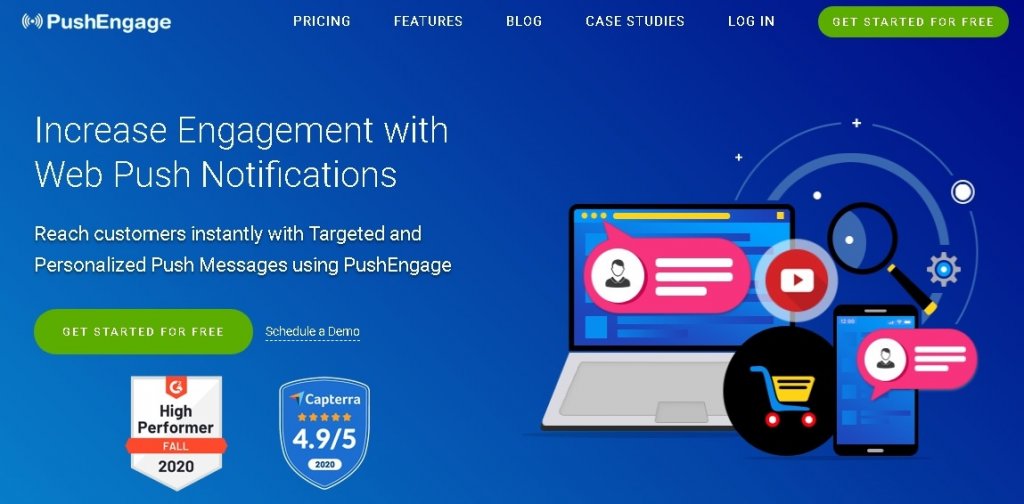
PushEngage is the most popular WordPress plugin for push notifications which offers you to create web push notifications that appear on the user's browser and bring them back to your website.
For this tutorial, you will need the premium version of this plugin to access the Price Drop Alert Feature by signing up for its Enterprise Plan.
First, you will need to create an account on the Push Engage for its premium plan to access the Price Drop Alert Notification.
After you have successfully created your account, you can go ahead and start creating an alert.
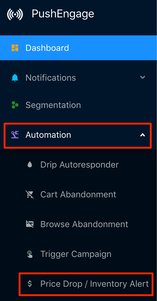
Log in to your Push Engage account and in the Dashboard select Price Drop/Inventory Alert from Automation Drop-down.
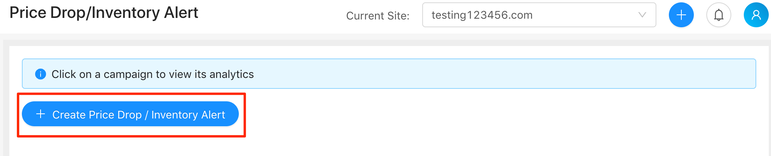
Press the Create Price Drop / Inventory Alert button on the page.
Next, you need to add the details of your push notification.
Campaign Expiry will be set to 30 days by default. While you can change it to the number of days you want the price drop to hold.
Trigger Daily Limit refers to the number of notifications your users will receive in a day.
Trigger Weekly Limit refers to the number of notifications your users will receive in a week.
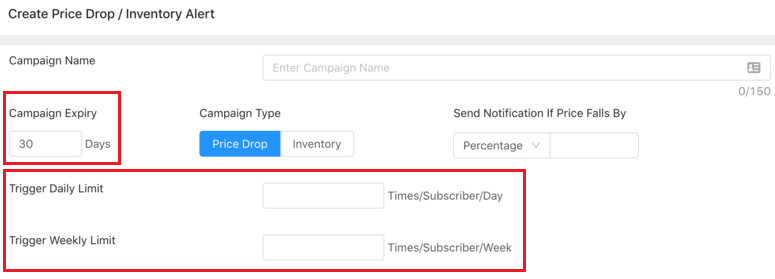
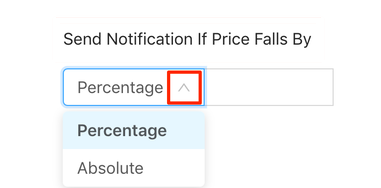
Send Notification if Price Falls By refers to the Percentage or the Absolute value at which the users will be notified.
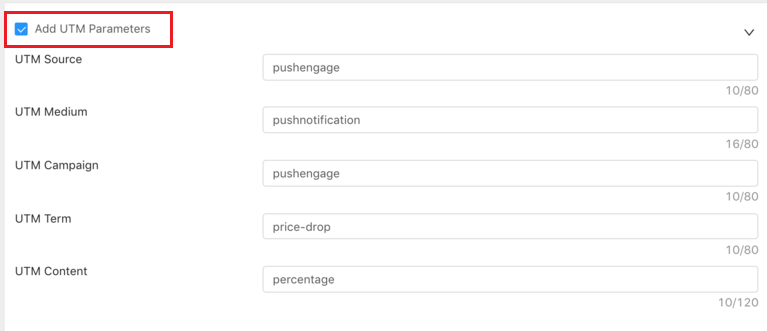
Next, you will set up the UTM Parameter that is essential in tracking your Price Drop Campaign's performance. These tags are added to your URL.
These tags integrate with Google Analytics to assess the performance when the user clicks on the URL. This feature can also be disabled if you uncheck the Add UTM Parameters box.
Next, you will be able to add the display details for your web push notifications such as Notification Title, Message, URL, Image and Campaign expiry.
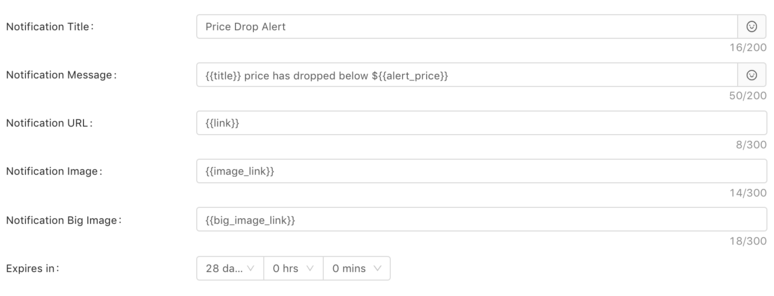
You can also choose whether you want to display the push notification immediately when the user opts-in or after a specific time.
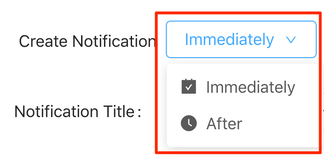
If you choose After, you will be directed to set up the time for your web push notifications.

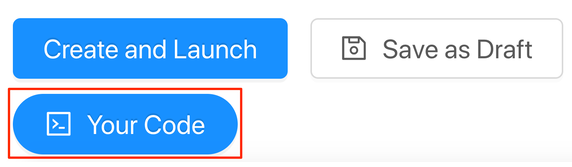
Once you are done with all the settings, you need to press the Your Code button at the bottom to add the code to your website.
It will display a popup with a code that you will use to activate the notification on your website. Press the Copy button on the top right corner.
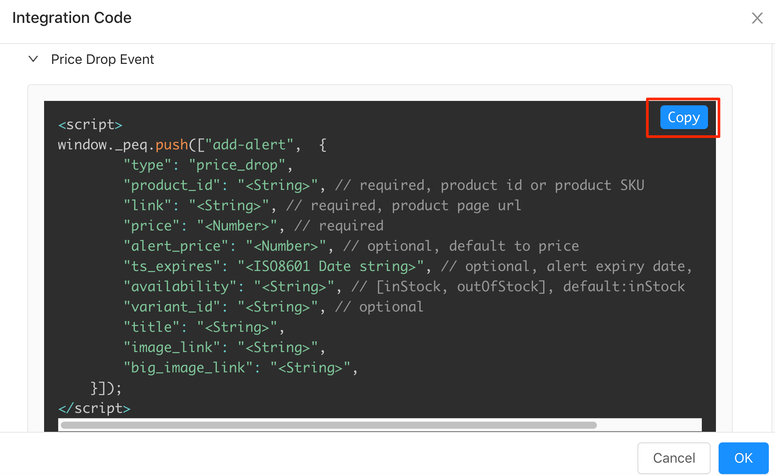
Press the Create And Launch button to launch your campaign.

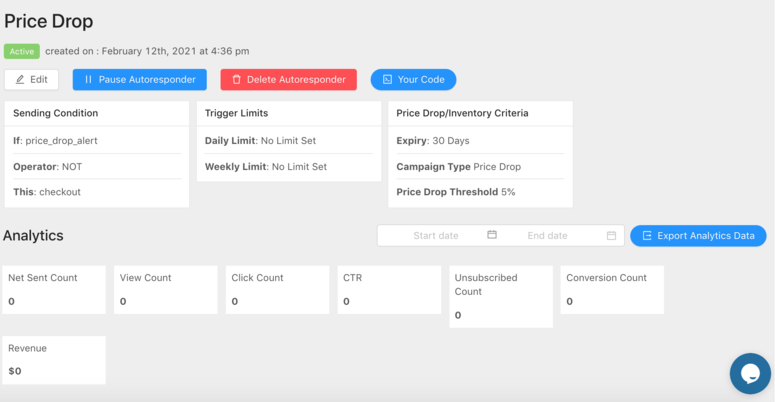
Your campaign is now live and it necessary that you monitor it every now and then to see if everything is working smoothly.
You can monitor your campaign by simply clicking the name of the campaign and view its analytics.

You can read the analytics such as view count, clicked count, revenue and more.
And that is pretty much all you have to do in order to successfully launch a Price Drop Notification Campaign.
That's it for this tutorial. We hope you enjoyed this tutorial and will be glad to read more. Join us on Facebook and Twitter to never miss out on our posts.


