
More than just translating your content, adding a language switcher to your website and making it multilingual enables an entire scale of opportunities in terms of audience, SEO, and accessibility.

When dealing with a multilingual WordPress website, having a well-functioning language switcher is critical. In this tutorial, we will understand how to make your website multilingual in WordPress.
Language Switcher
A language switcher is a clickable selector that allows your website users to pick between two or more languages and navigate your site in that language. This is very useful for foreign websites since it allows users to have a lot more enjoyable experience on the site.
Language switchers are usually found in the corner of a webpage, in a menu, or as part of a widget. They can also be in the shape of dropdown menus, with complete language names, language codes, or flags shown.
Create Amazing Websites
With the best free page builder Elementor
Start NowThe following are your best choices for quickly and easily installing a functioning and accessible language switcher:
Polylang
Polylang is a popular multilingual WordPress plugin that interacts easily with the platform. It has a back-end translation mechanism, as well as multiple display choices and language switcher customization features.
Polylang also includes a menu switcher and a widget switcher, as well as the ability to place them anywhere on the site through a PHP template element.
WPML
The WPML plugin is a back-end-based multilingual translator that works with just about all themes or plugins that utilize the WordPress API.
The WPML plugin is a back-end-based multilingual translator that works with just about all themes or plugins that utilize the WordPress API.
Translate Press
TranslatePress is a visual translation plugin with an intuitive front-end translation editor and the ability to properly translate a website's content.
The plugin includes three types of language switchers to show on your site and adjust to your needs: a floating language selection that follows the user through all pages, a menu item switcher, and a shortcode switcher that can be placed almost.
How To Integrate A Language Switcher With Your WordPress Website
Now that you've learned about your options, we'll teach you how to put them into action on your own WordPress site. To do so, we'll take on the task of installing a language switcher using TranslatePress.
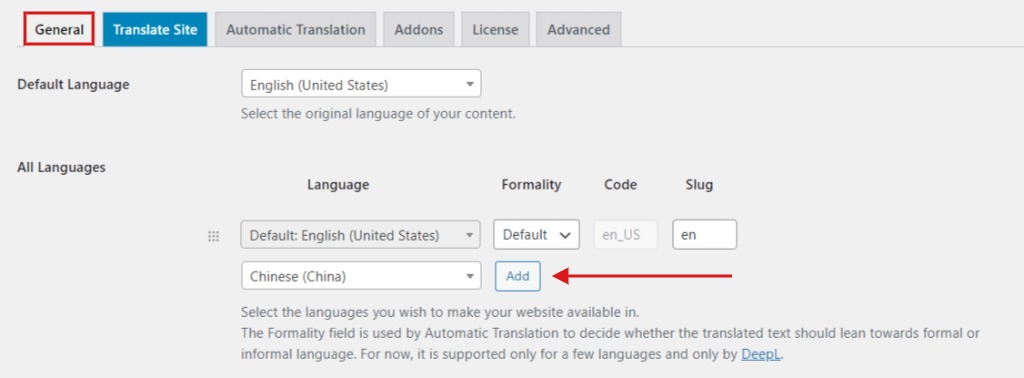
To get started, you'll need to first install TranslatePress on your WordPress site. Once your plugin has been installed and activated, you should select and add languages to your website.
To do so, go to Settings, then TranslatePress, and look for the All Languages section under the General tab. Here you may open the dropdown menu and select the language you want to use on your website. Remember to click the Add button after each language you choose.
Save all the changes once you are done.
There are three methods to display your Language Switcher when using TranslatePress. Depending on your preferences, you can utilize all of them at once, any combination of two, or just one.
Go to Settings, then TranslatePress, then scroll down to the General tab to find your favorite language switcher. You can enable or deactivate the three types of language switchers by checking or unchecking the checkboxes to their left.
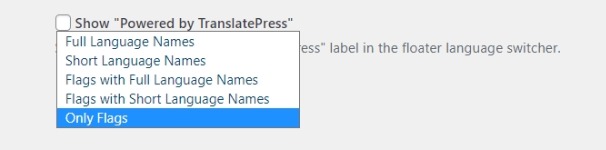
You can show complete language names, language codes, flags, or a mix of these three options with of these three options. You have five possibilities for displaying your switchers in TranslatePress:
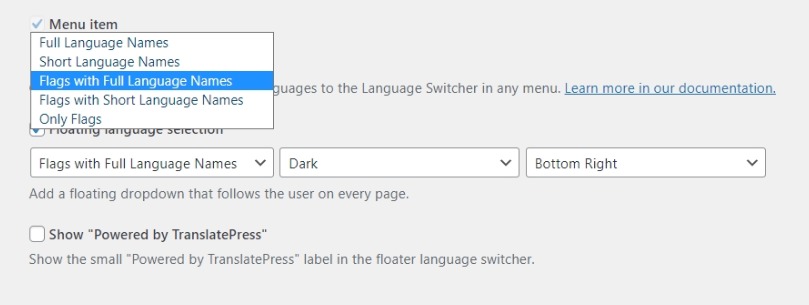
Let's look at how we may make each of these appear on the website.
1. Shortcode
The simplest approach to show your language switcher as a widget in the footer or sidebar of your website is to use a shortcode. You may also utilize the shortcode to insert your switcher in different places on your website, depending on your WordPress theme.
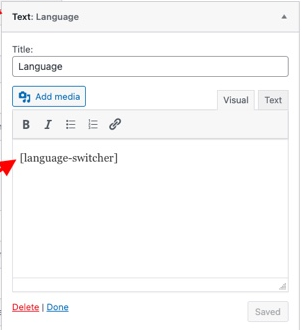
For applying the shortcode method to add the language switcher to your website, go to Appearance then Widgets and drag the text widget from the Available Widgets list to the desired position, whether it's the sidebar, footer, or anywhere else. You must use the Language Switcher Shortcode, i.e. [language-switcher], in the text widget. You may optionally give your switcher a descriptive title, such as "Language Switcher," so that people can quickly recognize it on the page.
Make sure to save all the changes. You may change the appearance of your switcher by selecting one of the five display choices accessible in the General tab of the TranslatePress Settings, as demonstrated earlier.
The language switcher will now be displayed at your desired position on the website.
2. Menu Item
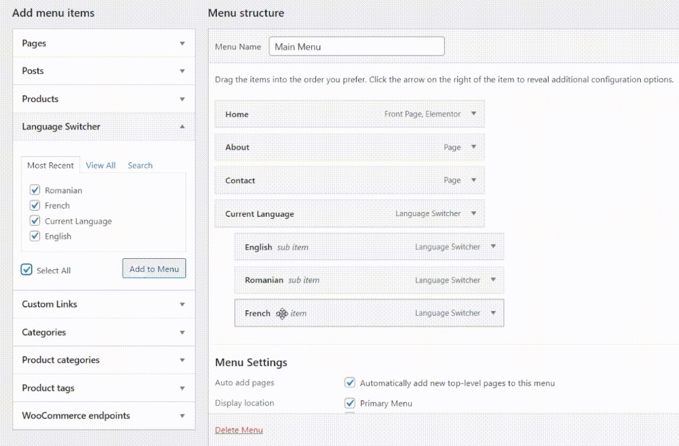
The language switcher, along with all of your other menu items, may be shown on your main navigation menu. To create this sort of switcher, go to Appearance, then Menus, then choose the menu to which you want to add your switcher. Extend the Language Switcher from the left-hand list of things. You'll find a list of languages you've added to your website here and under the section Current Language.
You'll need to integrate all of these things into your menu in order for your switcher to appear while assuring you to position all of your Language elements beneath the Current Language item as sub-items to create a dropdown-type switcher in your menu.
Save all the changes, once you are done with adding a language switcher menu to your website.
3. Floating Switcher
Because it is visible at all times on all of the website's pages, this form of the switcher is very useful if you want your website users to be able to translate the content at any moment. First, check that the Floating Language Selection option under the TranslatePress Settings, then the General tab, is active.
You may pick between a Dark or a Light theme for your floating switcher, as well as its position on your website, from this page. Bottom right, Bottom left, Top right, and Top left are the display possibilities for this type of switcher.
Save all the changes when you are done with the changes. These are some of the ways to add a language switcher to your WordPress website.
Making your website multilingual opens a lot of opportunities in terms of increasing the audience and taking your website to the global level. That's all from us for this tutorial. Make sure to join us on Facebook and Twitter to stay updated about our posts.


