
Having access to a table-based database is a handy feature for many WordPress sites. They let you display data in a way that is easy to understand for site visitors, and they can be used to organize, compare, and break down information. Knowing how to make a table in WordPress is, therefore, a very valuable skill.

Traditional methods of making HTML tables by hand are time-consuming and inefficient. Also, WordPress didn't have this kind of built-in support until the new Gutenberg editor came out, which has a table block. Luckily, the CMS has a lot of plug-ins that make it easy to add tables to your site.
TablePress is the most widely used. Create tables with a visual editor and seamlessly integrate them into your writing. The fact that it has over 700,000 installations and an average review score of 4.5 stars suggests that it performs admirably.
Learn how to use Elementor and TablePress to make beautiful tables on your WordPress site. In this article, we'll introduce you to the plugin and its capabilities, walk you through the steps of making new tables and importing and exporting them, and cover the relevant extensions.
Create Amazing Websites
With the best free page builder Elementor
Start NowAdd Tables to WordPress
Let's talk about the plugin we'll be using before getting into the actual how-to of this post.
As has been established, TablePress enjoys the highest level of adoption among its contemporaries. The most likely explanation for this is its user-friendliness, especially for newcomers. You'll be able to verify that assertion down below. But the plugin has other features that set it apart:
- Import data from many formats –In addition to making it easy to make tables, TablePress also lets you import data from a variety of sources (Excel, CSV, HTML, and JSON). Your spreadsheet data will be ready for use without the need for manual entry.
- Exportability – And in reverse, you can export your tables from TablePress to a number of different file types. This gives you the freedom to copy and paste the data into an Excel spreadsheet or use it in any other way you see fit.
- Extendability – TablePress's developer has created a number of extensions in addition to the core plugin. You can add column filters, a PDF export option, and more to your tables with their help. In the article's conclusion, we'll discuss this further.
Create Tables in WordPress With TablePress & Elementor
We'll start with the basics of using the TablePress plugin to make new tables in WordPress.
Install TablePress
Naturally, setting up the TablePress add-on is the first order of business. That's possible in the same way you'd install any other WordPress plugin. All you have to do is navigate to Plugins > Add New, type in the plugin's name in the search bar, and then click Install.
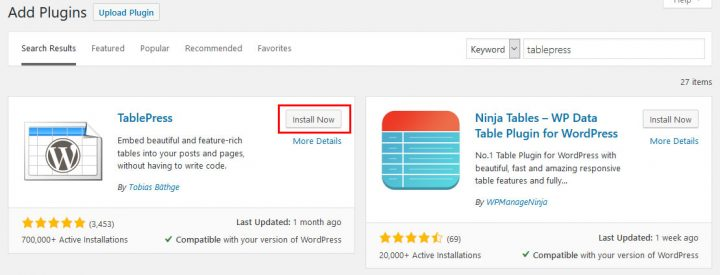
Be sure to turn on the plugin after you've uploaded it to your site.
Add a New Table
When TablePress is enabled, a new option will appear in the WordPress administration menu. When you select it, you'll be brought here.
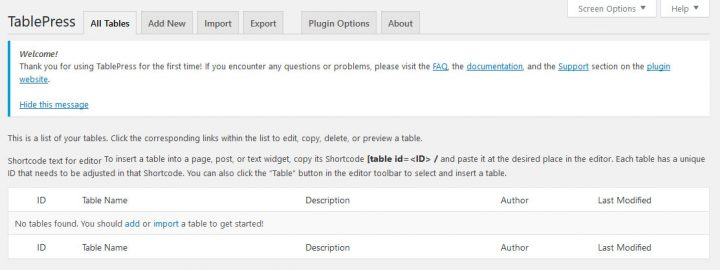
Any and all table-related tasks for your WordPress site can be handled in this section. If you need assistance, you can find some links to other resources up top.
Select the Add New button to make a new table. When you do, you'll arrive at the following location:
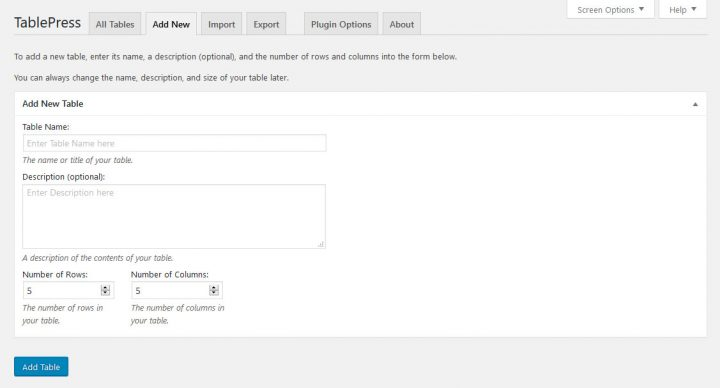
To create a table, all you have to do is give it a name, give it an optional description, and then decide how many rows and columns it will need. When you're ready, select Add Table from the menu.
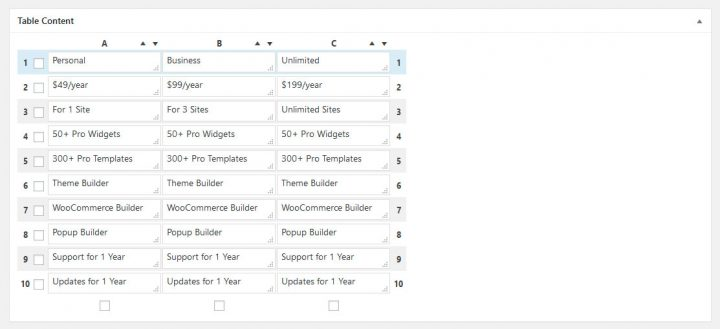
Fill the Table With Content
Following this, you can begin entering data into your table's cells. You should have no trouble with this if you have experience using a spreadsheet.
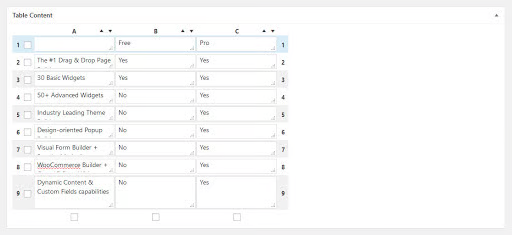
You can use the little arrow icons to sort the rows and columns, and you can drag and drop rows and columns to reorder them. If you're looking for convincing reasons in support of using Elementor Pro, you can find them here.
Configure Advanced Options
Additional options for working with and formatting tables are provided below.
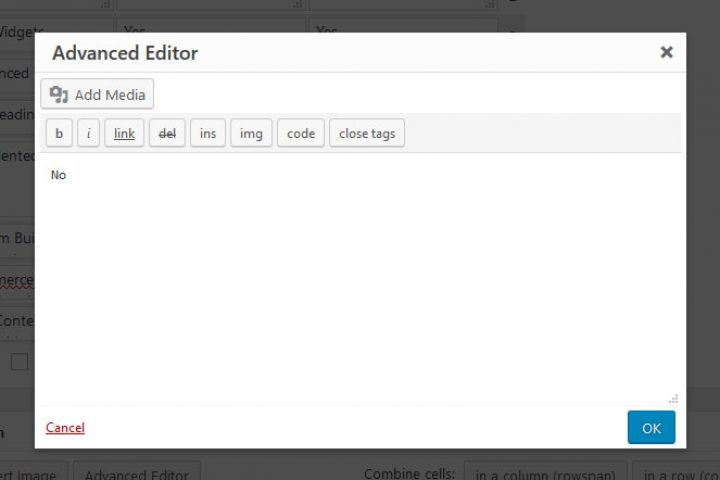
Using the sophisticated editor located at the top, you can add media like links and images as well as text. To add content to a cell using any of the three methods, select the button you need first, and then the cell. When you activate the plugin, you'll see a standard settings menu for all three choices.
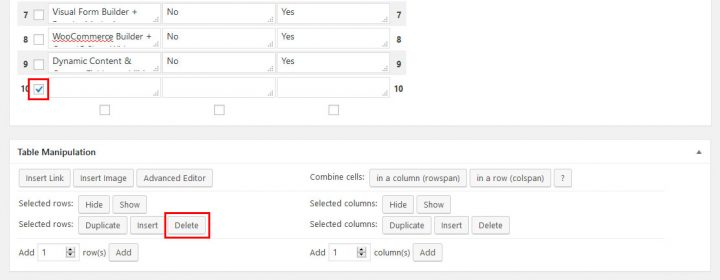
You can also hide rows or columns, make copies of existing cells, add new ones, delete existing ones, and add new ones. Indicate what you want to change by clicking the corresponding radio buttons on the side.
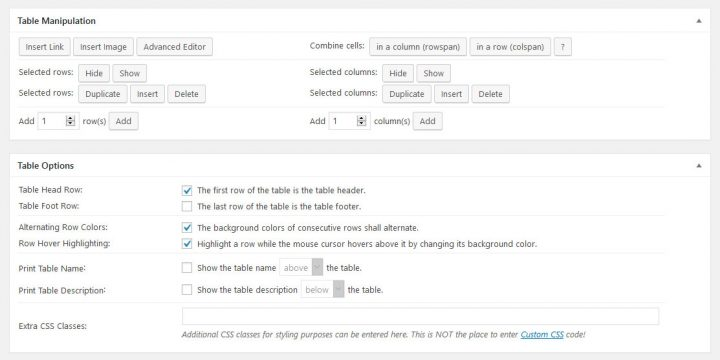
On the Table Options menu, you can change how the table looks, such as by adding a header or footer. You can change the colors of the rows, how they look when you hover over them, and how the table title and description are shown. In addition, you can use CSS classes to apply your own unique style.
At the very end, you'll find a set of buttons for adjusting various aspects of the tables' JavaScript library.
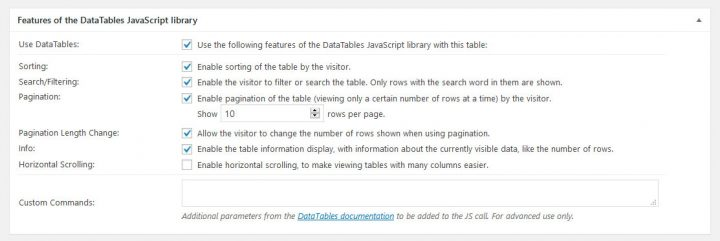
There is a horizontal scroll bar, a search bar, and a page number bar, and the table can be sorted. A spot for user-specified parameters is also provided.
Display the Table on Your Site
Using the buttons at the bottom of the page, you can look at the finished table or save it. Checking the shortcode in the top right corner is the most vital step after saving.
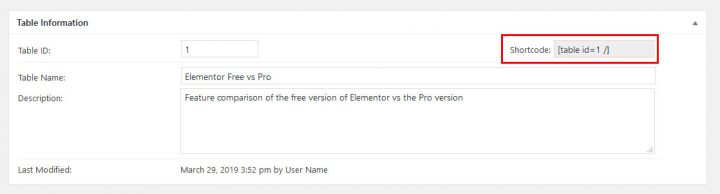
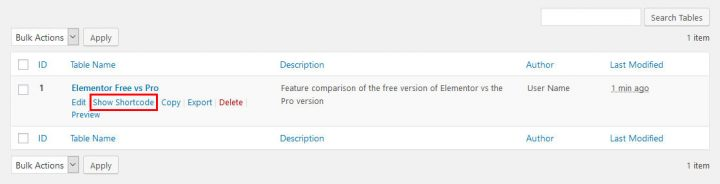
Use that to add the table to your WordPress site. You can always go back to the list of tables and click on Show Shortcode to check how it looks.
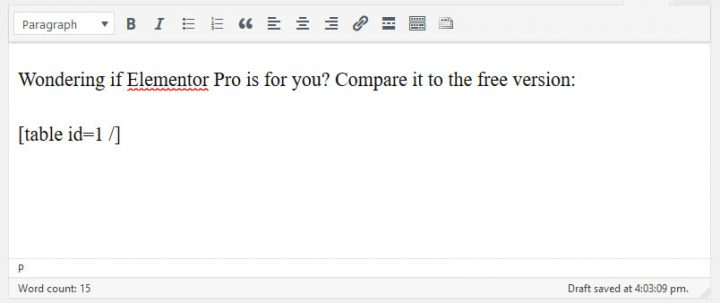
You can paste the shortcode into a text widget, a post, or a page to make a table appear there.
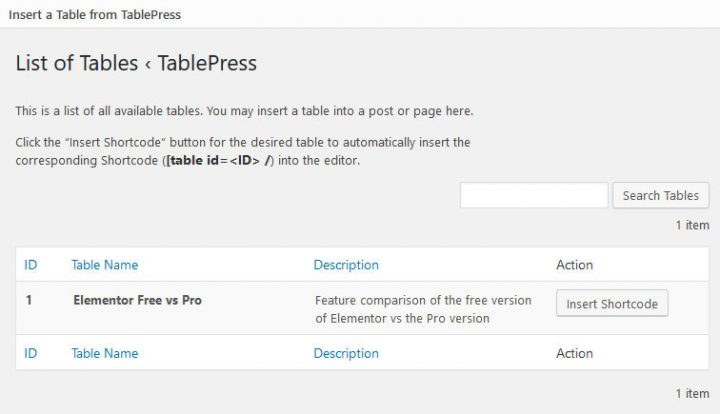
TablePress also adds a button for inserting tables into the standard WordPress editor.

When you click this, it will show you the table shortcodes and buttons to add them to your content.
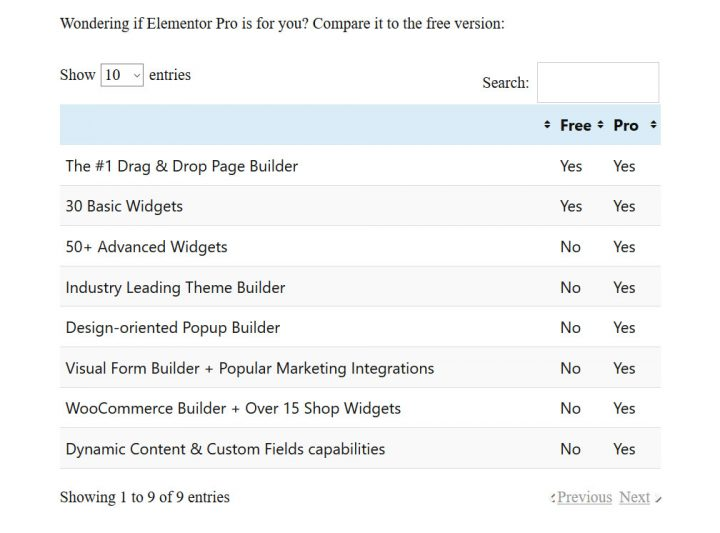
In any case, this is how it will appear on the page. Be aware of the search function and page numbers.
Use TablePress Tables in Elementor
Elementor also allows you to include tables in your templates for things like single posts. This is easy to do. Just open the template you want to use, look for the Shortcode widget on the left (the search bar can help), and drop it where you want the table to show up.
The table's shortcode should then be pasted into the left-hand field. Be aware that the preview window in TablePress only shows the shortcode and not your actual table.
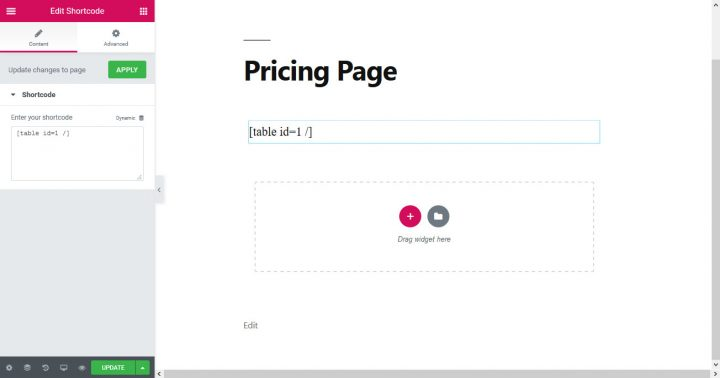
Don't let that bother you, though. The table will appear correctly in the preview or final version of the template.
Re-editing Tables
You can return to TablePress's primary menu at any time to make modifications to one of your tables. Table names in your list will become editable when you hover over them.
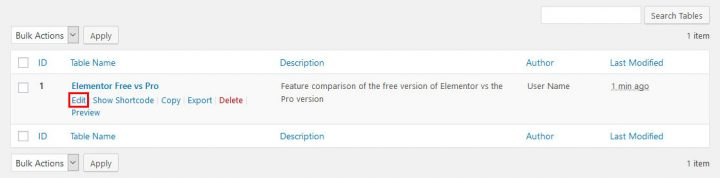
If you click this, you'll be brought to the standard editing screen, where you can make the necessary adjustments. When you update the table, it will reflect those changes everywhere it is used.
Importing a Table With TablePress
As was already said, information can be brought in from a file instead of being typed in by hand. If you're familiar with TablePress, you'll find that doing so is as easy as making a new table.
Import Your Table
TablePress > Import a Table (also accessible via the navigation bar) contains all the relevant settings for this purpose.
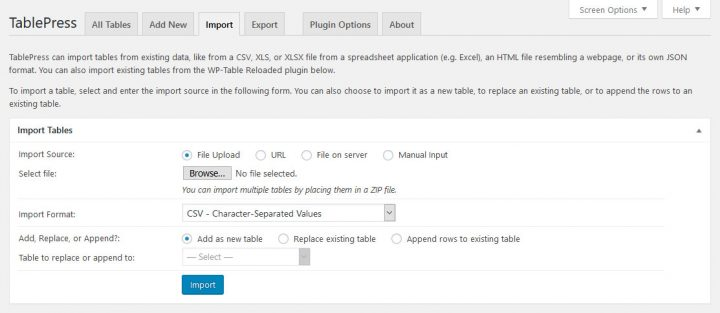
Find a suitable data feed to use as input first. You can do this in a number of different ways, including by uploading a file, using a URL, accessing a file on your server, or typing (copying and pasting).
For this purpose, we need to use a file. To do that, select the Browse button and then locate the spreadsheet you want to add. When you're done, tell TablePress what format it is via the drop-down menu (CSV, HTML, JSON, or Excel).
It's cool because you can use the information to make a brand-new table, update an existing one, or add to an existing one. When using the latter three methods, you'll need to manually select the appropriate table.
Alter settings as required, then click the "Done" button.
Check and Format
Importing your table will take you to the same page you were on before.
All of your information should be entered correctly at this point. So, now you just have to set up the visual and functional preferences.
Display It on Your Site
Then, you can use the same shortcode to put the imported table anywhere on your site you want.
TablePress – Exporting a Table
Finally, we'll talk about the plugin's export features. TablePress > Export a Table is obviously where you'll find this function, but you can also access it via the tab at the top of the main menu. This screen can be reached via both of these options.
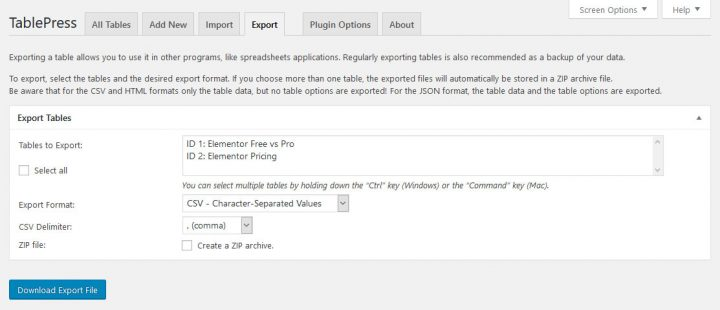
First, pick which table you want to export. You can export all the tables on your WordPress site by selecting them one by one and then clicking the Export to CSV or Excel button. Select the desired export format (Comma Separated Values (CSV), HTML, or JSON) and the delimiter between values for CSV exports below (comma, semicolon, or tab). You can also choose to generate a zipped archive. When exporting multiple tables at once, this option is required.
After you finish making your choices, you can download your file by clicking the Download Export File button.
Available Plugin Options
TablePress has a very minimal options menu.
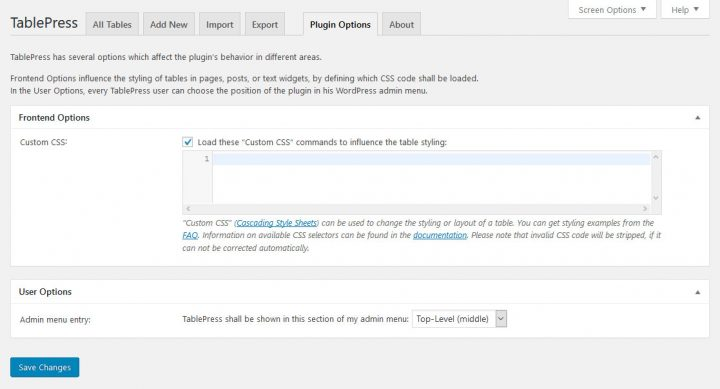
Table formatting via cascading style sheets (CSS) is the primary focus of these options. The developer has included a ton of documentation to assist you if you need it or if you are unfamiliar with it. Below that, you'll find a slider that lets you rearrange the order of the main menu items. A link to remove the plugin and some helpful hints are provided at the bottom of the page. Some of the plugin's additional features are listed in the add-ons that follow if that isn't enough.
Useful TablePress Add-ons
As was said at the beginning, TablePress has several plugins that can be added to it. The most helpful add-ons are summarized below.
However, some have been labeled as "premium," even though they are all free to use.

These are the ones that have been laboriously crafted, and the author requests a monetary contribution in exchange for their distribution.
- Responsive Tables –The default TablePress tables aren't mobile-friendly. That can be fixed with this add-on. There are three methods for making tables compatible with mobile devices, each with its own set of instructions and examples.
- Automatic URL Conversion –This add-on is useful if you plan on creating a table with a large number of URLs. Any pasted URL will be made clickable without the need for a button.
- DataTables Sorting Plugins – Currency, numbers with text, and date ranges can now be sorted individually.
- DataTables Buttons – With this add-on, you can easily insert multiple radio buttons into your tables. Features the ability to copy to the clipboard as well as PDF and Excel file formats.
- DataTables FixedColumns –Sets columns in a table so that they remain stationary while the rest of the table is scrolled horizontally.
- DataTables FixedHeader –The same applies to the header as with the columns solution.
- Change the [table] Shortcode –Allows you to alter the TablePress shortcode's name to avoid incompatibilities with other add-ons and design choices (or just for the hell of it).
- Automatic Periodic Table Import –Make it so that data is automatically imported from a source table at predetermined intervals.
Final Thoughts
There's a good reason why TablePress is the most downloaded plugin for WordPress users who want to create and include tables. The process is simplified and made more pleasant as a result. This plugin is highly recommended if you need to structure information on your website.
You now know how to use TablePress, how to display tables on an Elementor site, how to import data from external tables, and how to export tables from your site. Also, we discussed the various plugins and extensions that can be used. The procedure is simple.
By now, you should be confident in your ability to create tables on your own WordPress site.


