
The Elementor page builder comes with a built-in method for adding an age verification popup. Adding an age verification popup to your website is a simple and effective way to prevent minors from accessing content or products you are offering.

Elementor makes it simple to include an age verification popup. However, Elementor Pro is the only one that has a popup option. Hence, you must upgrade your Elementor to the Pro edition.
Make An Age Verification Popup In Elementor
Go to the Templates > Popup option and click on the Add New button to create a new pop-up. Add a name and then select the Create Template option to create a new popup.

To create a new popup, simply click the Insert button on the template you want to use. Alternatively, if you don't want to utilize a pre-made template, you may just click on the "X" icon and begin creating your own popup.
Create Amazing Websites
With the best free page builder Elementor
Start Now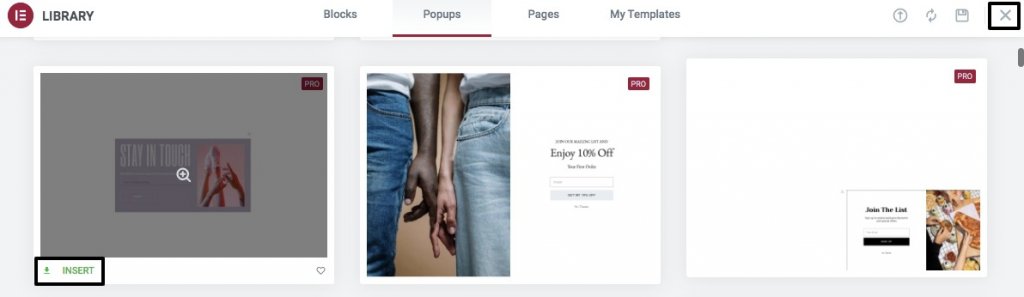
From the Elementor edit panel, select the popup settings icon and make the necessary alterations to the popup via the layout tab. You can change the size, location, overlay, and close button from here. Your popup's entrance and leave animations are also customizable.
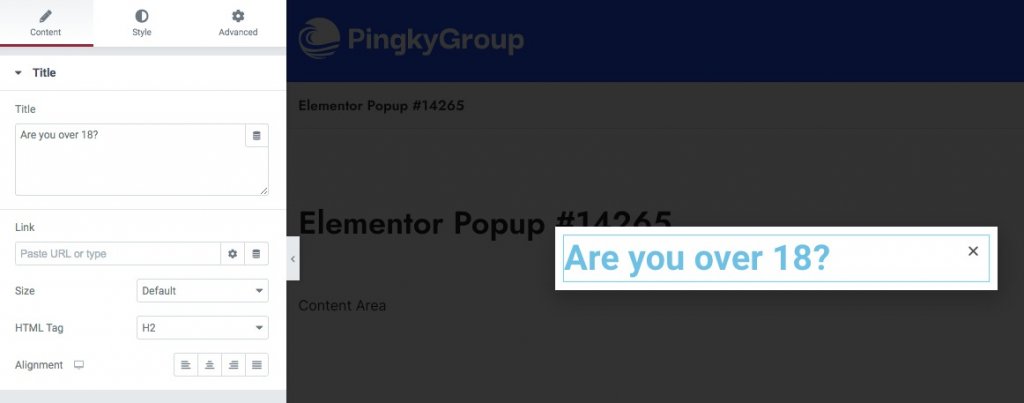
The next step is to select the background type, border type, border radius, and box-shadow from the style tab. It's time to fill out your popup with information. You are able to display your own stuff. To begin, drag a Heading widget into the section and fill it with text. Use the style tab to apply a style to the text.
In order to add more text, simply drag & drop it into the editor. The first button in the popup will appear after you have finished writing your content. The button widget can be dragged and dropped into the header text. Add a checkmark icon, set the alignment to center, and select the button type from the button configuration.
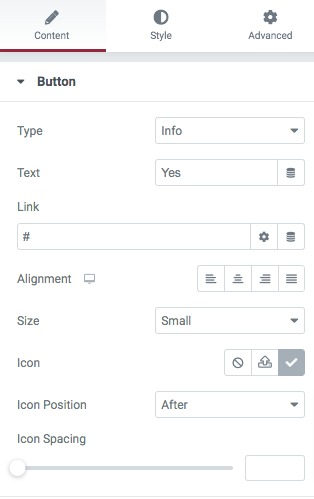
In the style tab, you may now change the font, the text-shadow hover effect, and more. The next step is to include a second button. Add the text "No" to the second button by dragging it and dropping it on top of the first one. Add a related icon and place it after the others with the orientation set to center.
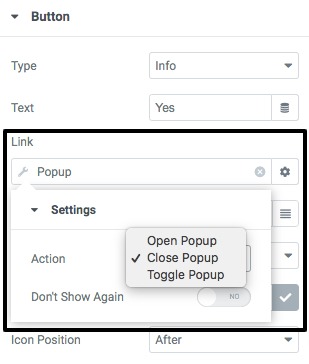
The icon is where you need to aim now. To use the YES, simply click it, and the popup will be closed, allowing the user to continue their web search. Select popup from the link field by clicking on the first icon and then clicking on the dynamic tags option in the link field.
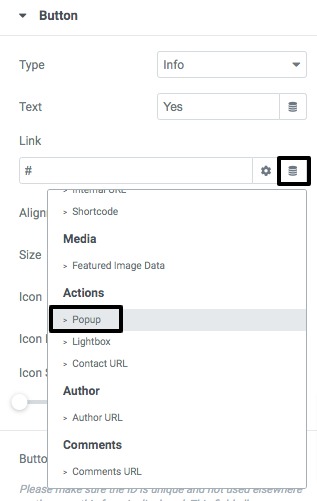
To close the popup window, pick Action > Close Popup after choosing the window.
Add a connecting link to the "No" button so that when users click on it, they can go to the link you offer. Return to the popup options pane and turn on the features that prevent you from clicking on the overlay and ESC.

Once everything is ok, hit publish.
Apply The Popup On A Page
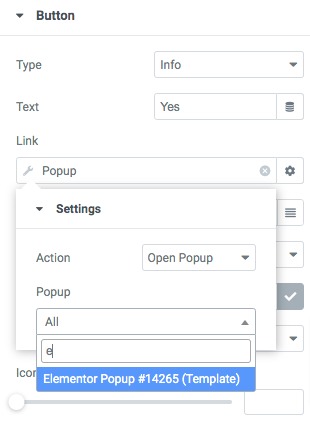
Now that you've finished creating your popup, you need to put it into action on your website. You can set the popup to the Buy Now button if you wish to add it before purchasing an item. To do this, click the button and then the link to take you to the Dynamic Tags page, where you may select popup as your display mode. To open the popup you just created, click the Action button and select Open Popup.
When someone clicks the Buy Now button, the popup will appear. The product will be downloaded if the customer selects Yes from the Yes menu.
Final Thoughts
Using Elementor's page builder, you may construct an age verification popup on your WordPress site. You can use Elementor to create a responsive website. Check out other elementor tutorials and share this one if you think it's worth the effort!


