
Creating a WooCommerce Checkout Page typically entails substantial customization to the PHP template file in the backend and a significant amount of custom CSS. However, this procedure has become entertaining and straightforward because of Divi's Woo Modules! When you use Divi to update a WC Checkout Page, the WC shortcode transforms into a structured layout of dynamic Woo Checkout Modules that are ready to be visually styled utilizing sophisticated built-in design options. This provides you complete control over the checkout page's design.
This guide will teach you how to use Divi to create a completely unique WooCommerce Checkout Page. First, we'll create the WooCommerce Checkout Page by utilizing the dynamic Woo Modules accessible for the checkout page. Then, when you're finished, we'll show you how to apply the checkout page design to a checkout page template in Theme Builder. So, whether you want to modify the Checkout Page itself or develop a Checkout Page Template, Divi has you covered. You'll be well on your way to creating visually appealing checkout pages in no time.
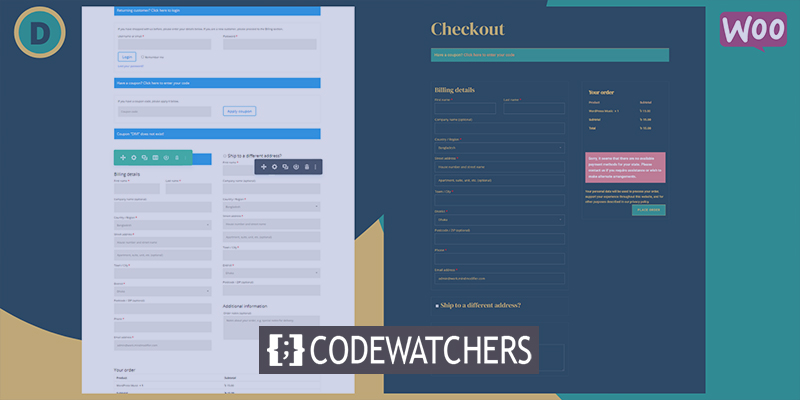
Design Preview
This is how our design will be.
WooCommerce Chceck Out Page & Divi
When you install WooCommerce on your Divi site, it will build primary WC pages such as a shopping cart page, a cart page, a checkout process, and an account page. Then, the page's content is deployed using a shortcode in the backend WordPress block editor.
Create Amazing Websites
With the best free page builder Elementor
Start Now
If you enable the Divi Builder on this Checkout page, each of the WooCommerce Checkout page's content components will be loaded as Divi Woo Modules that may be utilized to customize the page.
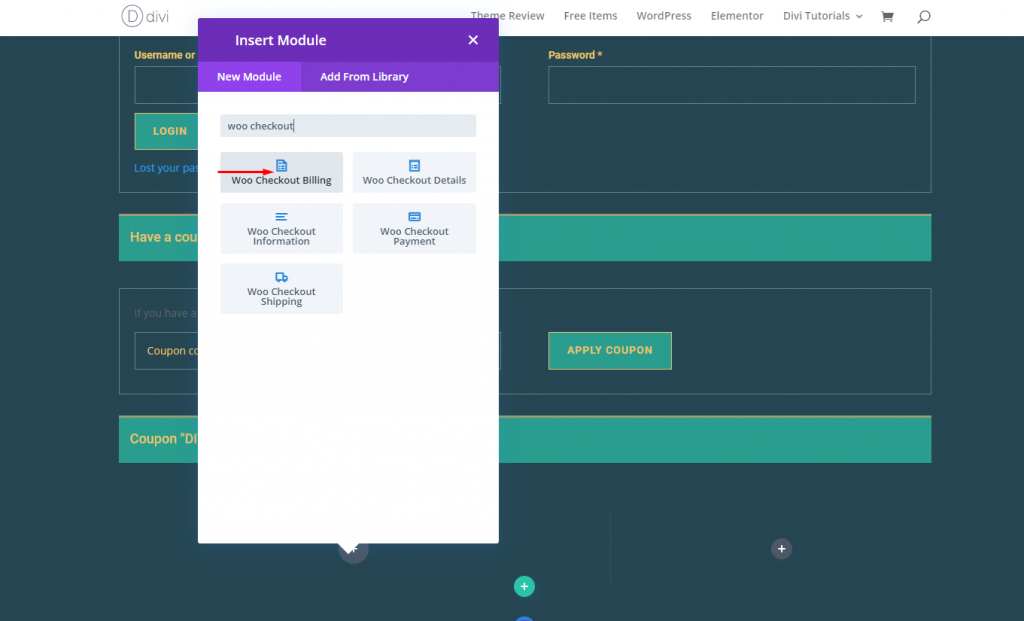
Woo Modules For Designing A Checkout Page In Divi
Divi has several essential modules for adding interactive content to a page template. Some of these contain Woo Modules tailored to the Checkout page.
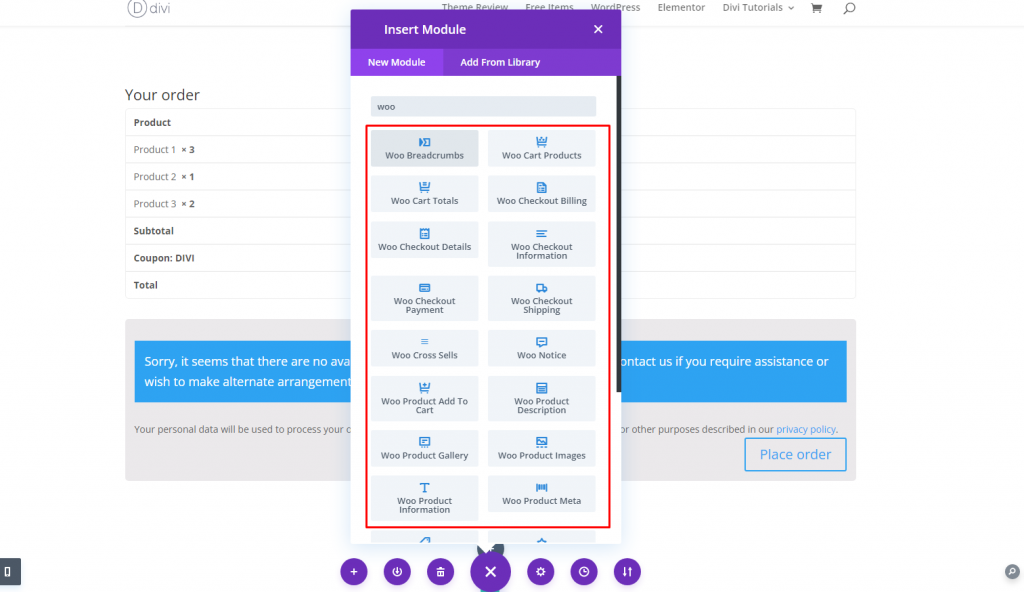
The following modules are essential for creating the Checkout page or template:
Post Title: When creating a Checkout page template, this will dynamically display the title of the Checkout page.
Woo Notification: This module can be assigned to many page kinds (cart, product, and checkout). It will dynamically display important notifications to the user as needed.
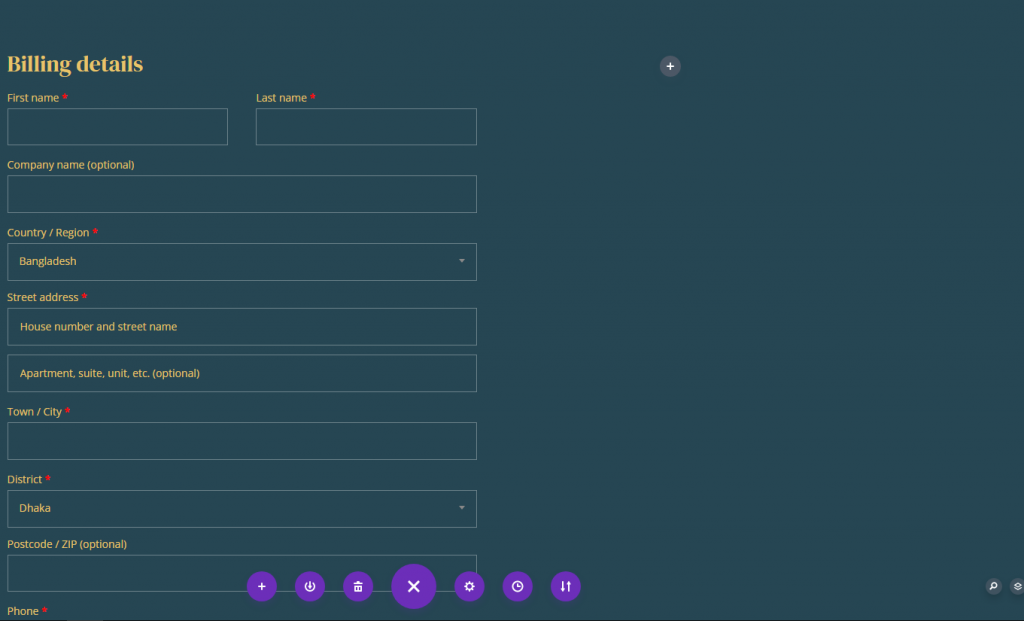
Woo Checkout Billing: This module displays the billing details form that is utilized during the checkout process.
Woo Checkout Shipping: This module displays the shipping details form that appears during the checkout process.
Woo Checkout Information: This module shows the additional information form that is utilized throughout the checkout process.
Woo Checkout Details: This module displays order details during checkout, including the products being purchased and their prices.
Woo Checkout Payment: This module displays the payment type choices and payment form details during checkout.
Another woo module option:
Woo Breadcrumbs: The WooCommerce Breadcrumb navigation bar will be displayed.
Create a Checkout Page or a Template
As previously said, we can easily create a custom WooCommerce Checkout page using the Divi Woo Modules. You can, however, use the same design process to create a custom Checkout template. This tutorial will create a custom Checkout page layout for the checkout page. Then, using the Divi Theme Builder, we'll show you how to leverage the custom checkout page layout to create a Checkout Page Template.
Using Divi to Create a WooCommerce Checkout Page Layout
The purpose of this WooCommerce Checkout Page tutorial is to develop a custom page layout for the WooCommerce Checkout Page, which is named WooCommerce Checkout Page in WooCommerce. At the end of the lesson, we'll show you how to effortlessly save and import this checkout page layout into the Theme Builder to build a new Checkout Page Template.
WooCommerce Checkout Page Editing
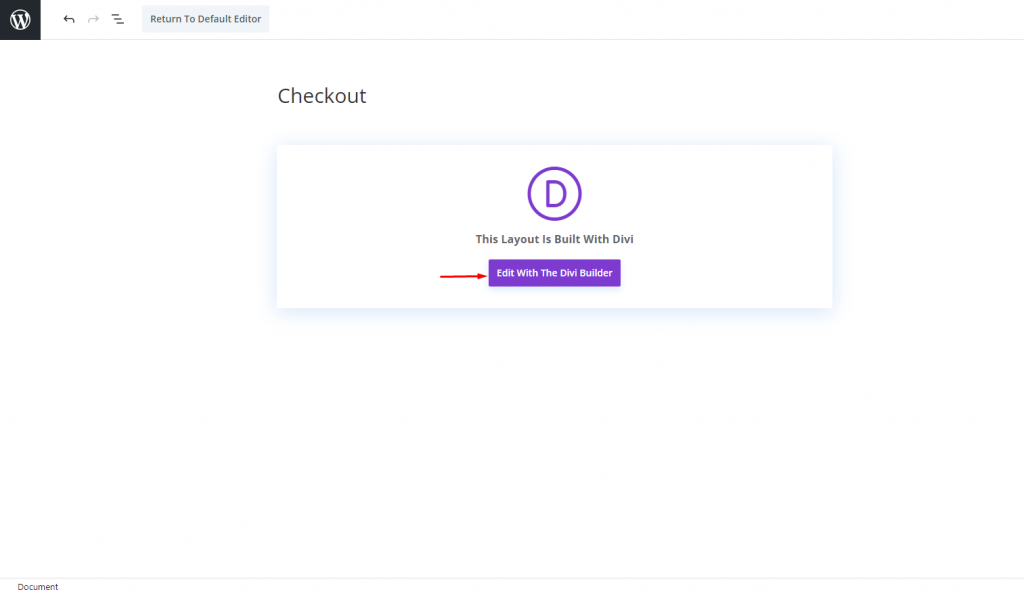
Click to edit the WooCommerce Checkout Page from the WordPress Dashboard. The page will contain the shortcode used to produce the checkout page content by default.
Click the Use Divi Builder option at the top of the page editor.
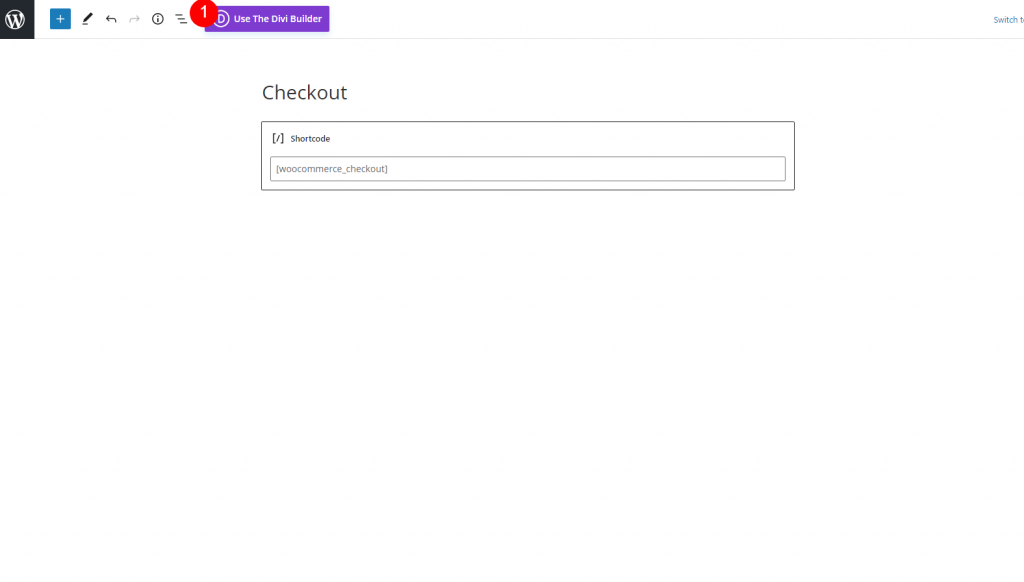
Select edit with the Divi builder.
Start From Scratch
As previously stated, the page will load with all of the customizable Divi Modules (including the crucial Woo Modules) that comprise the Checkout Page's content. Of course, if you like, you can use the existing layout and begin changing the modules already there. But for this guide, we'll start from scratch.
Enter the options menu at the bottom of the page and select YES for the Clear Layout button (the trash box icon) to clear the layout.
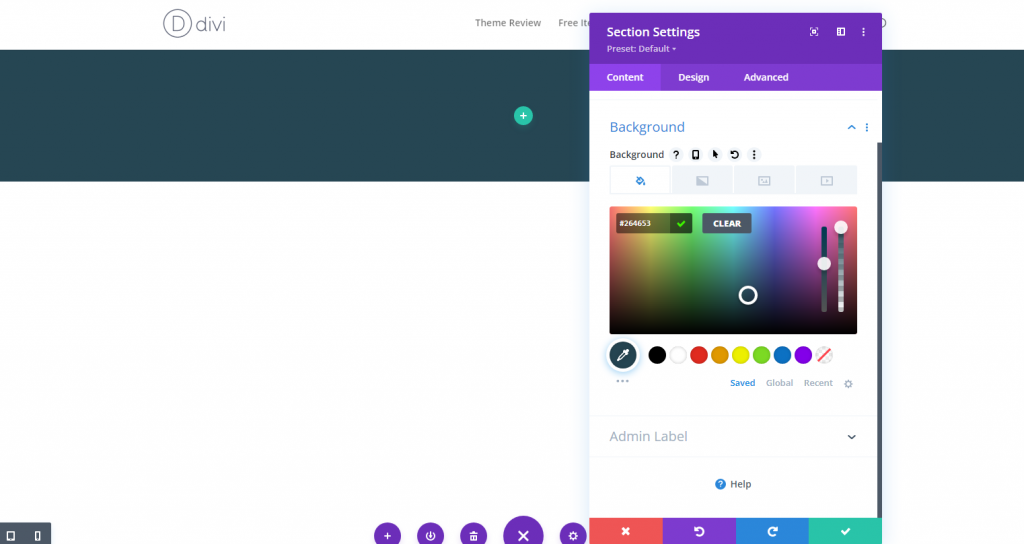
Section Background
To get started, add a background color to a new regular section as follows:
- Background Color: #264653
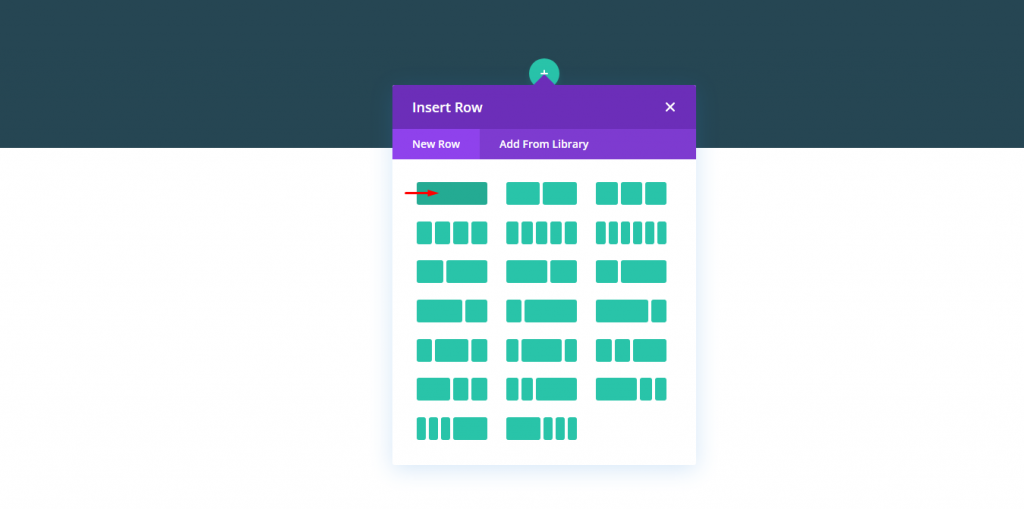
Row & Column
The next step will be adding a one-column row to this section.
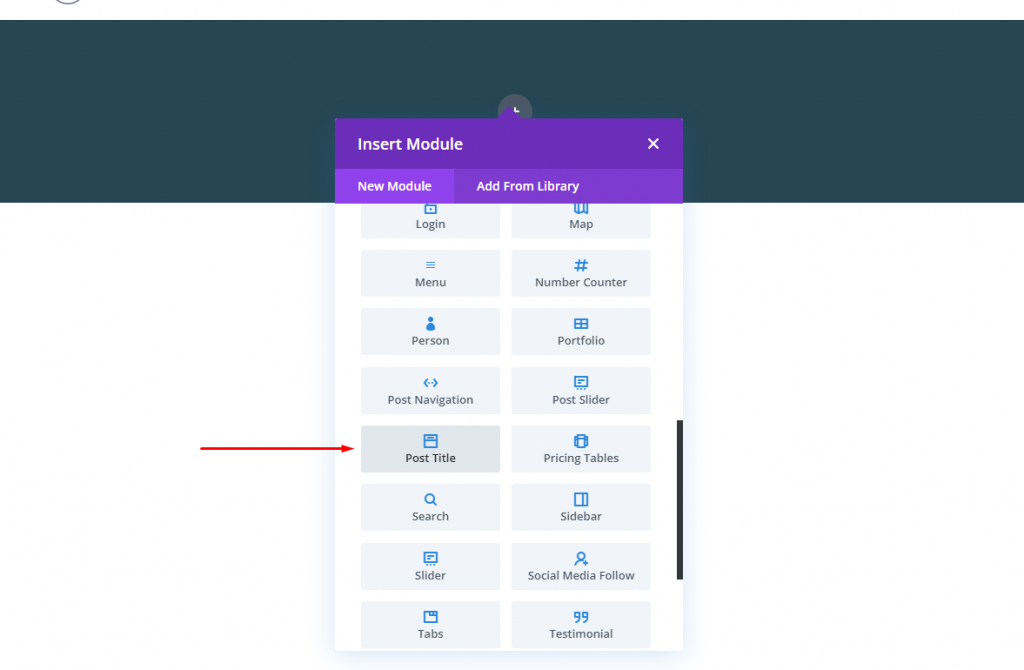
Creating the Dynamic Checkout Page Title
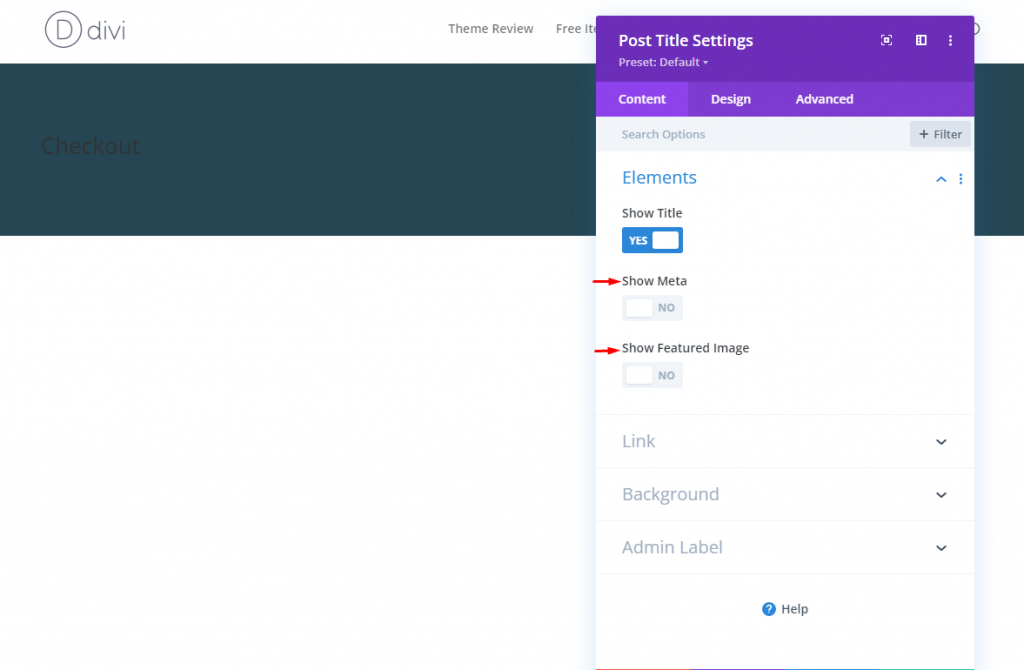
To make the page title dynamic for the checkout page, add a post title module to the column.
Post Title Content
In the post title settings, update the elements to show only the title as follows:
- Show Title: YES
- Show Meta: NO
- Show Featured Image: NO
Post Title Text
To style the post title text, update the following under the design tab:
- Title Font: DM Serif Display
- Title Text Color: #e9c46a
- Title Text Size: 80px (desktop), 60px (tablet), 42px (phone)
- Title Line Height: 1.2em

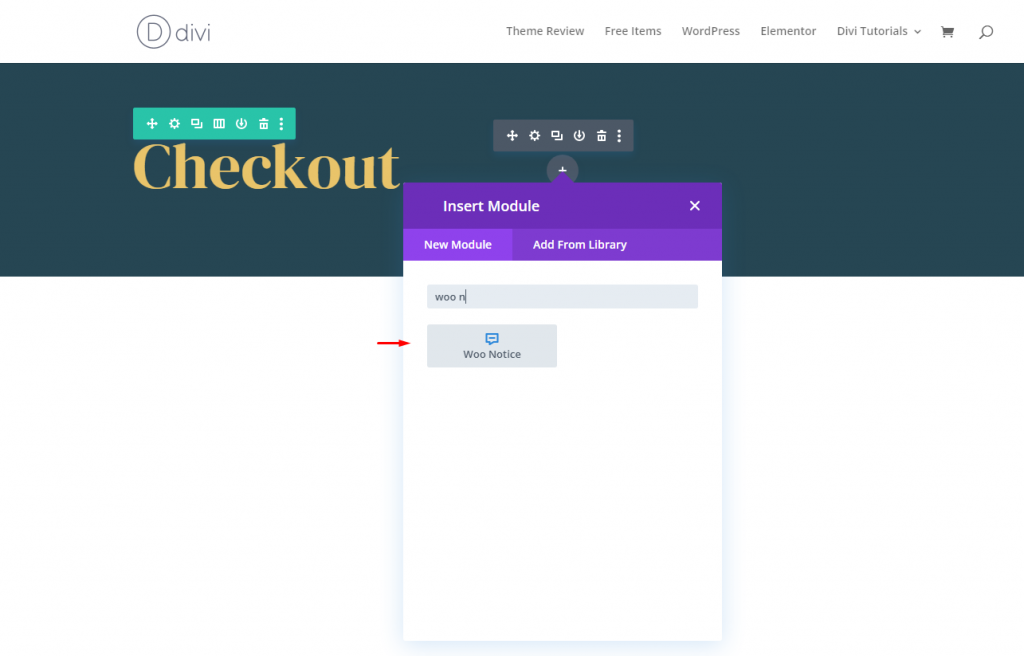
Dynamic Woo Notice Module
It is always a good idea to place the Woo Notice module at the top of the page to see the notices when engaging with the checkout page. Keep in mind that we are creating notices that will only be displayed when required.
To add the Woo Notice Module, go to the post title module and click to add a new Woo Notice module.
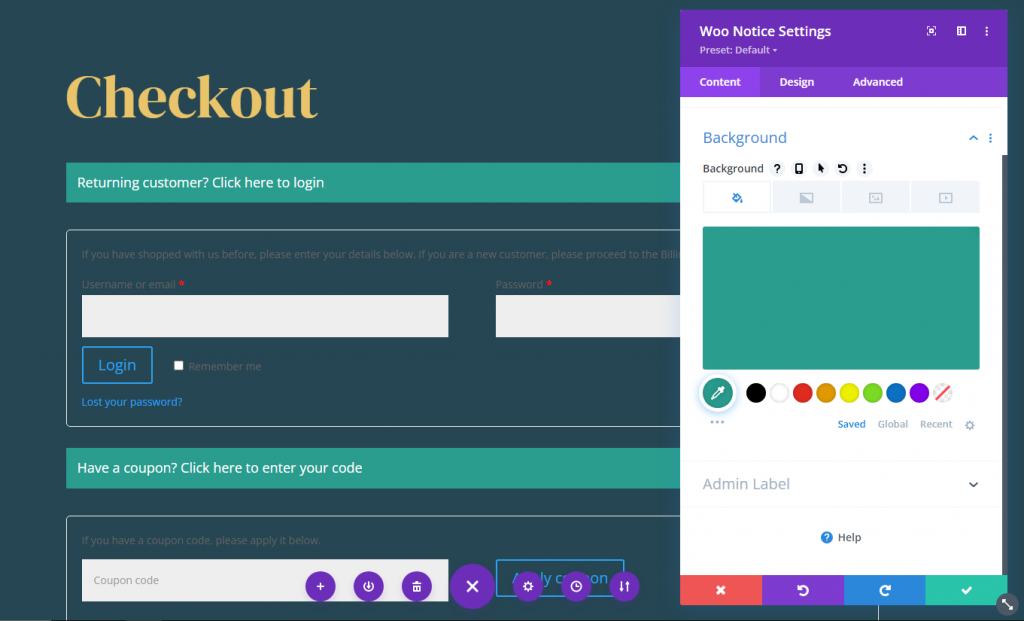
Woo Notice Page Type and Background
Next, update the Page Type and Background color of the Woo Notice as follows:
- Page Type: Checkout Page
- Background Color: #2a9d8f
Title Text
From the design tab, update the following settings.
- Title Font: Roboto
- Title Font Weight: Medium
- Title Text Color: #e9c46a
- Title Text Size: 14px
- Title Line Height: 1.8em
- Link Text Color: #f4a261

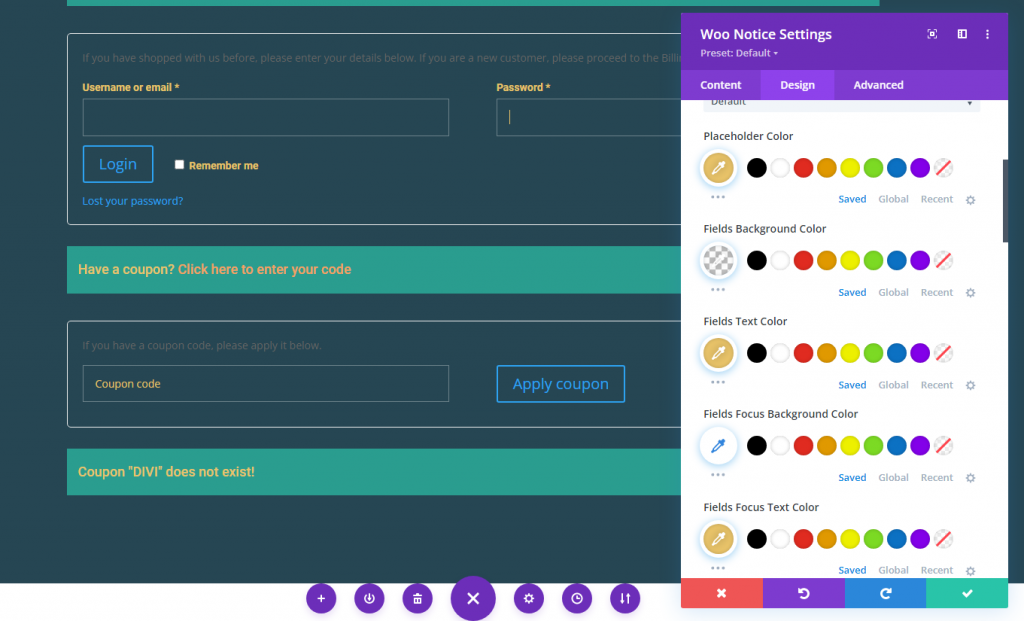
Woo Notice Fields
Fields and field names for items like a login form and a coupon code are included in the Checkout Page Notices. To change the style of the field labels for these fields, make the following changes:
- Required Field Indicator Color: #e9c46a
- Field Label Font: Roboto
- Field Label Font Weight: Bold
- Placeholder Color: #e9c46a
- Fields Background Color: transparent
- Fields Text Color: #e9c46a
- Fields Focus Text Color: #e9c46a
- Fields Padding: 12px top, 12px bottom
- Fields Border Width: 1px
- Fields Border Color: rgba(255,255,255,0.32)
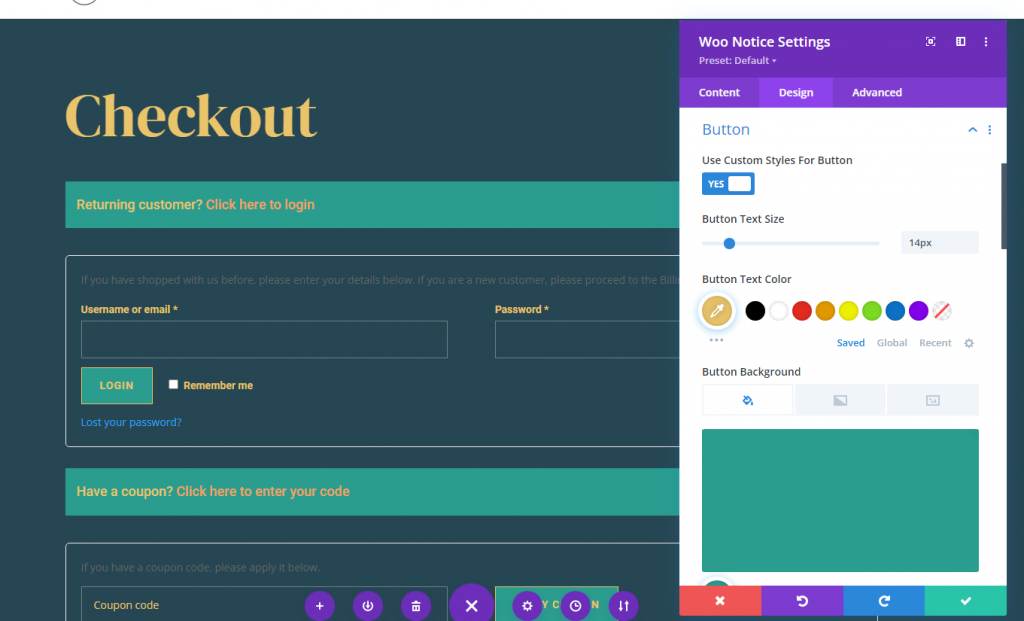
Woo Notice Button
Its time to customize the buttons.
- Use Custom Styles for Button: YES
- Button Text Size: 14px
- Button Text Color: #e9c46a
- Button Background Color: #2a9d8f
- Button Border Width: 1px
- Button Border Color: #e9c46a
- Button Border Radius: 0px
- Button Letter Spacing: 1px
- Button Font: Roboto
- Button Font Weight: Bold
- Button Font Style: TT
- Button Padding: 12px top, 12px bottom, 24px left, 24px right
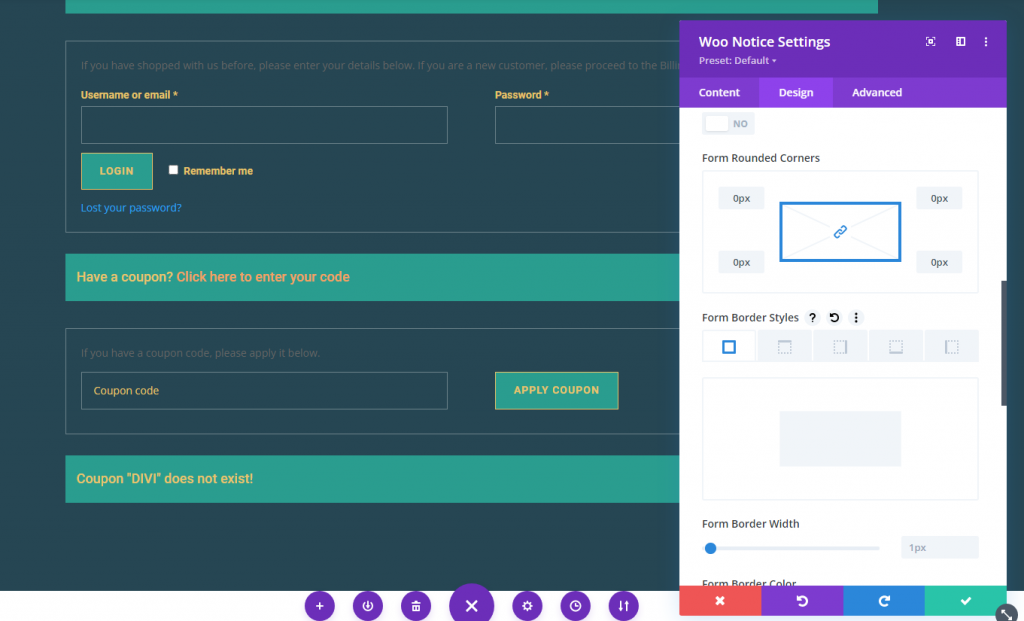
Woo Notice Form
Under the Form option group, each of the notice forms can be styled. Update the following to give the forms a light border:
- Form Rounded Corners: 0px
- Form Border Width: 1px
- Form Border Color: rgba(255,255,255,0.32)
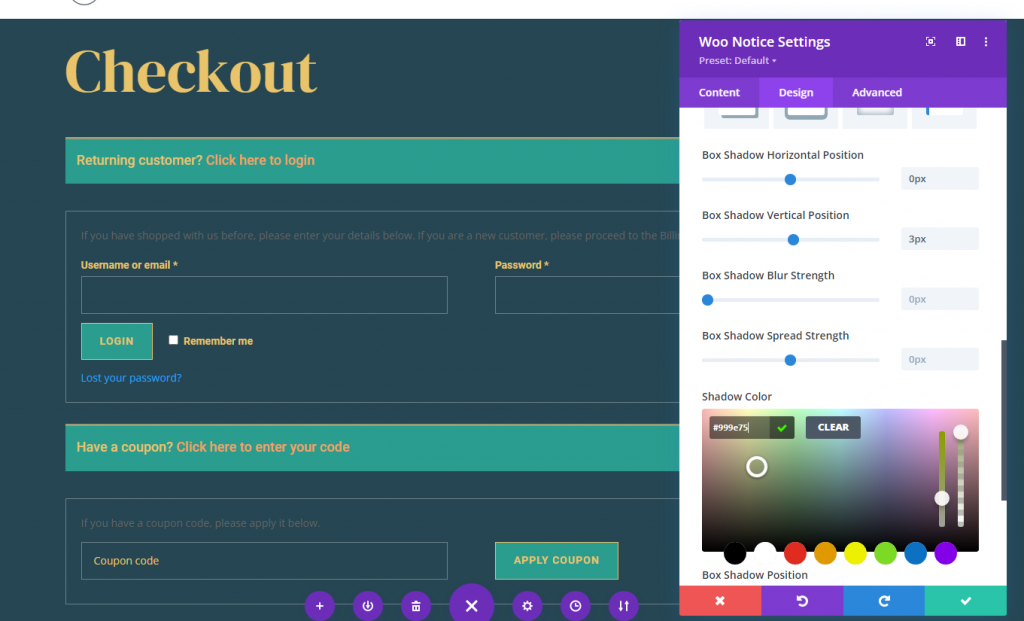
Woo Notice Box Shadow
To add a top border-like design in the woo notice bar, update the box-shadow options as follows:
- Box Shadow: see screenshot
- Box Shadow Horizontal Position: 0px
- Box Shadow Vertical Position: 3px
- Shadow Color: #999e75
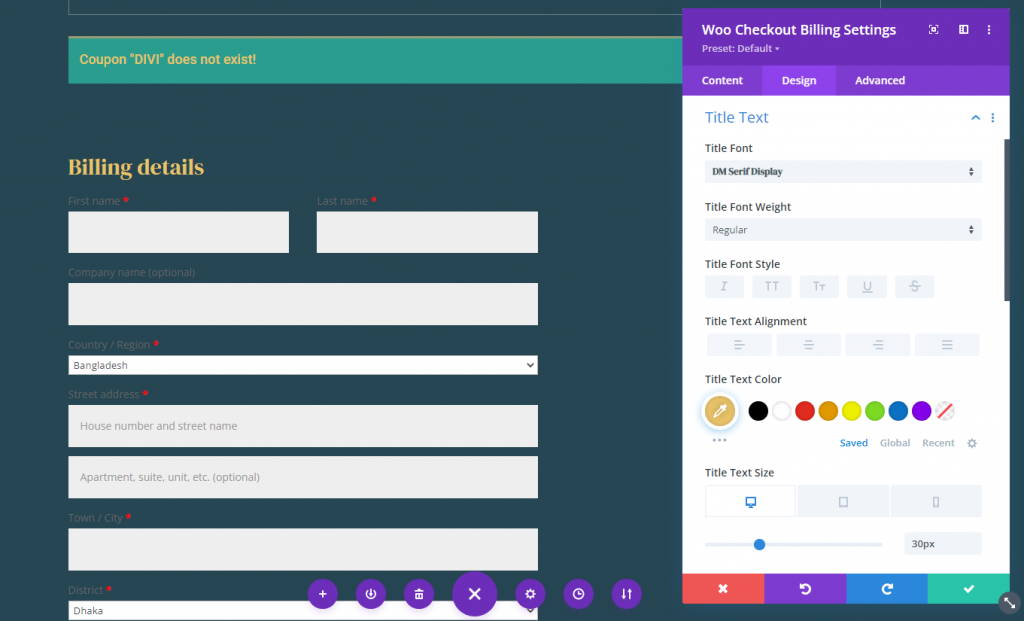
Woo Checkout Billing Module
Now that we have our page header and notices in place, we can add the Woo Checkout Billing content, which is another essential component of the checkout page.
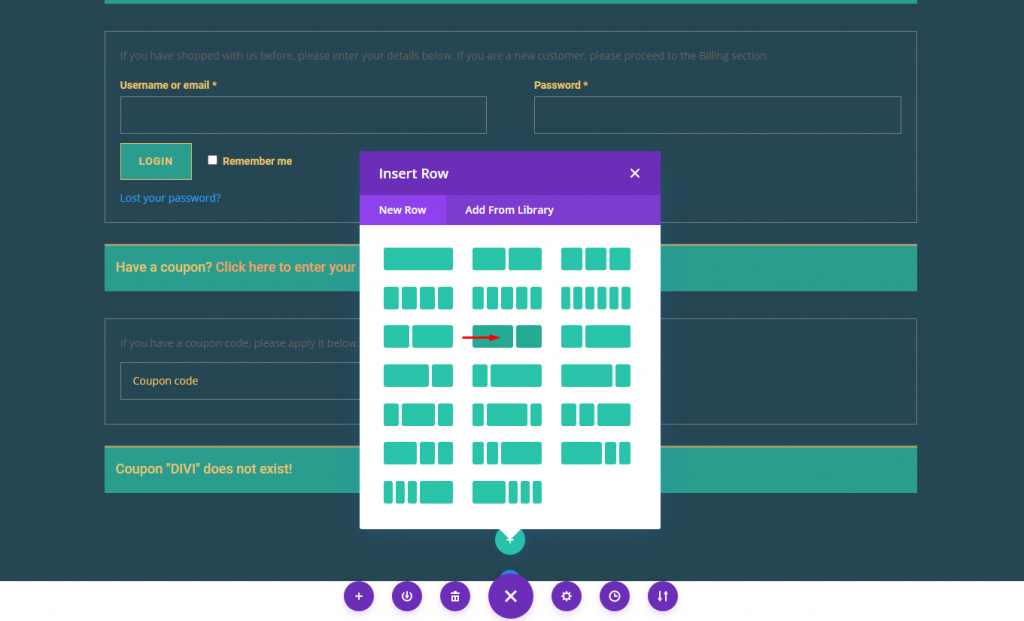
Create a new row with a three-fifths-two-fifths column arrangement before adding the billing material.
Add a Woo Checkout bIlling module in column 1.
Woo Checkout Billing Title Text
From Woo Checkout Billing module, open setting and adjust the folowing under the design tab.
- Title Font: DM Serif Display
- Title Text Color: #fff
- Title Text Size: 30px (desktop), 24px (tablet), 18px (phone)
- Title Line Height: 1.4em
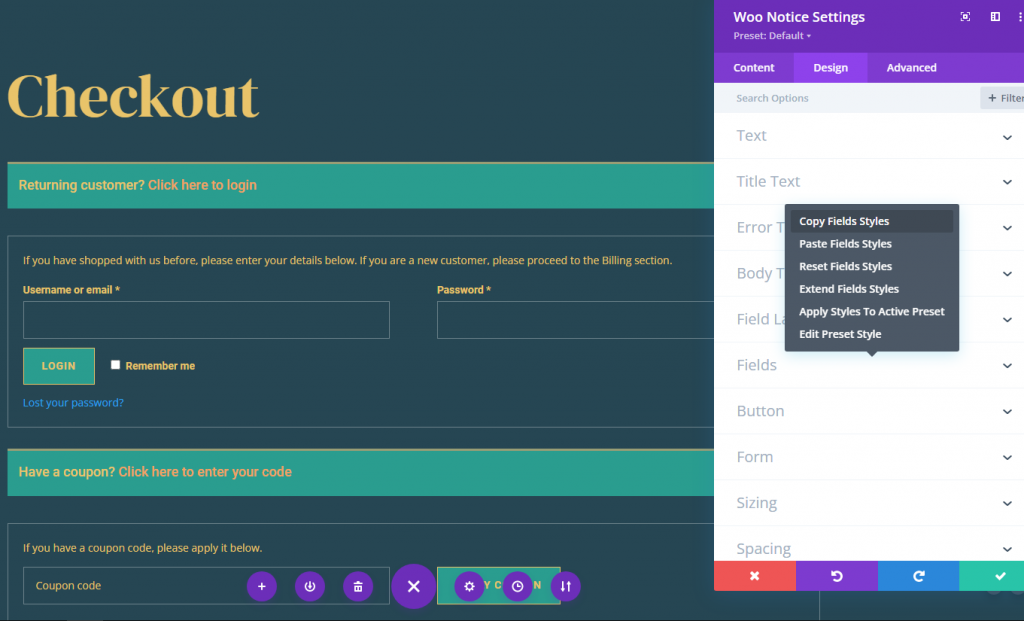
Woo Checkout Billing Field and Field Labels
Like the Notice Module, this module includes options for styling the field and field labels. Because we want all of our fields and field labels to be consistent throughout the page, we can copy the field and field label styles from the Notice module and paste them into the Woo Checkout Billing module.
Here's how to go about it:
- Open the Notice Module settings at the top of the page.
- Under the design tab, right-click on the Field Labels option group.
- From the right-click menu, select "Copy Field Labels Styles."
Paste the copied style in newly added module.
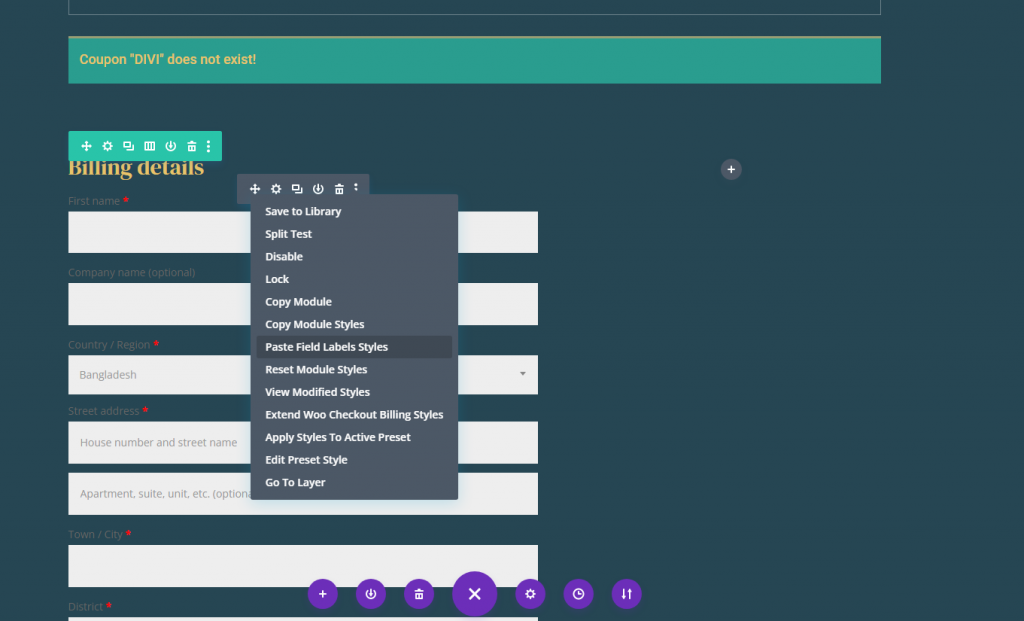
And it will look something like this.
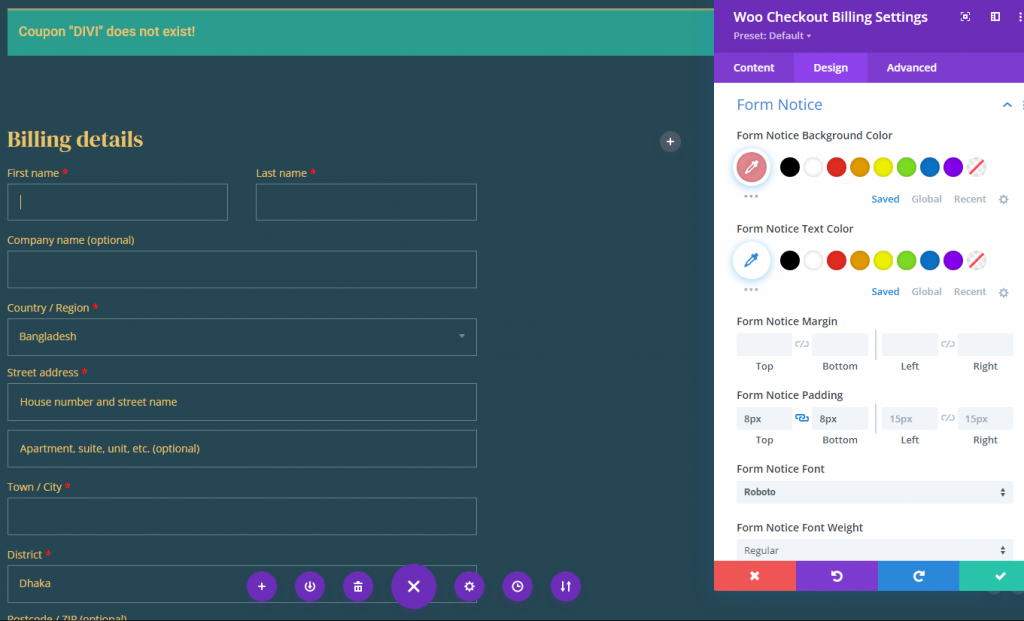
Woo Checkout Billing Form Notice
The form notice is responsible for dynamically displaying any notifications or errors when filling out the form. To style the form notice, navigate to the Woo Checkout Billing settings and make the following changes:
- Form Notice Background Color: #e58991
- Form Notice Padding: 8px top, 8px bottom
- Form Notice Font: Roboto
- Form Notice Text Size: 14px
Woo Checkout Billing Spacing and Border
To finish off the design, let’s add a little padding and a light border the module as follows:
- Padding: 16px top, 16px bottom, 16px left, 16px right
- Border Width: 1px
- Border Color: rgba(255,255,255,0.1)

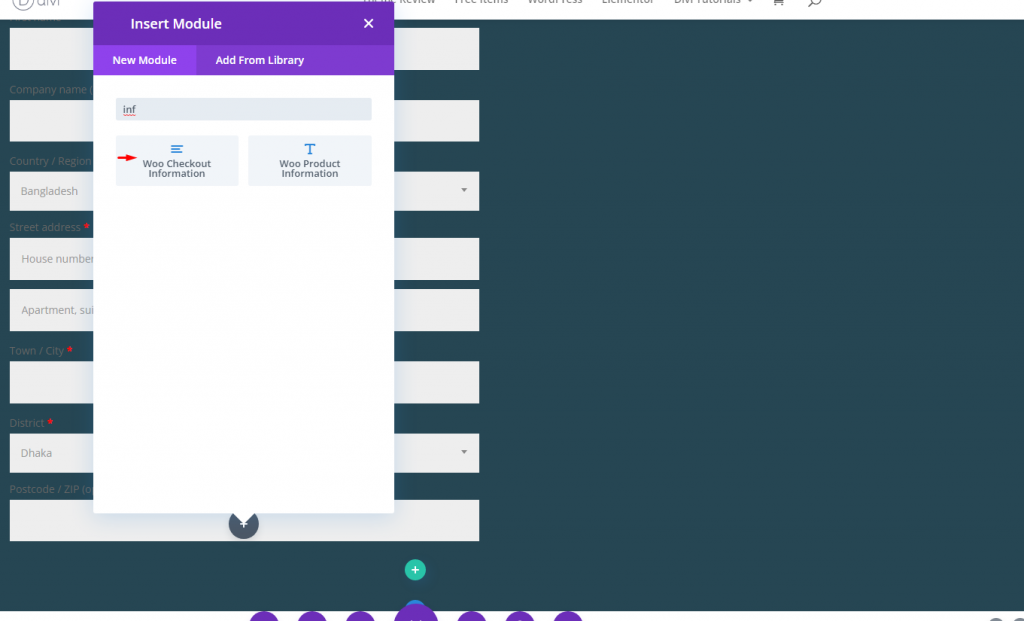
Woo Checkout Shipping and Woo Checkout Information
The Woo Checkout Shipping module and the Woo Checkout Information module are essential components for creating the checkout page template. Before finishing checkout, the Woo Checkout Shipping module displays the form required for entering shipping details. Furthermore, the Woo Checkout Information module displays an entry form that allows users to provide additional information before checkout.
Adding Modules
Now, go ahed and add a Woo checkout shipping module.
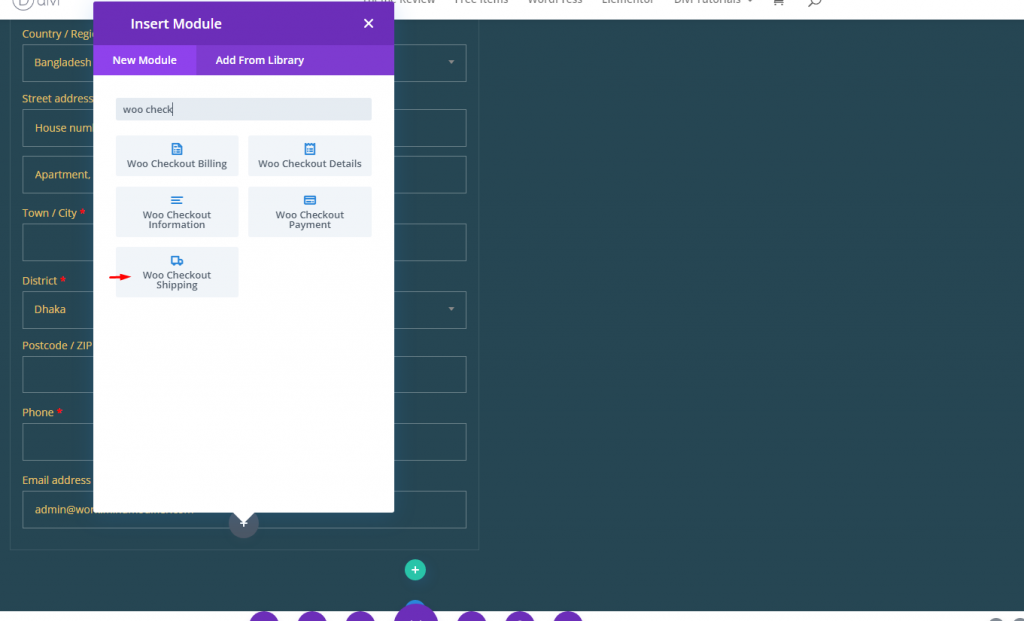
Also add a Woo Checkout information module.
Each woo module (Checkout Shipping and Checkout Information) must look like the Woo Checkout Billing module. We can copy the styles we need for each one to each one. Let's copy and paste the design here.

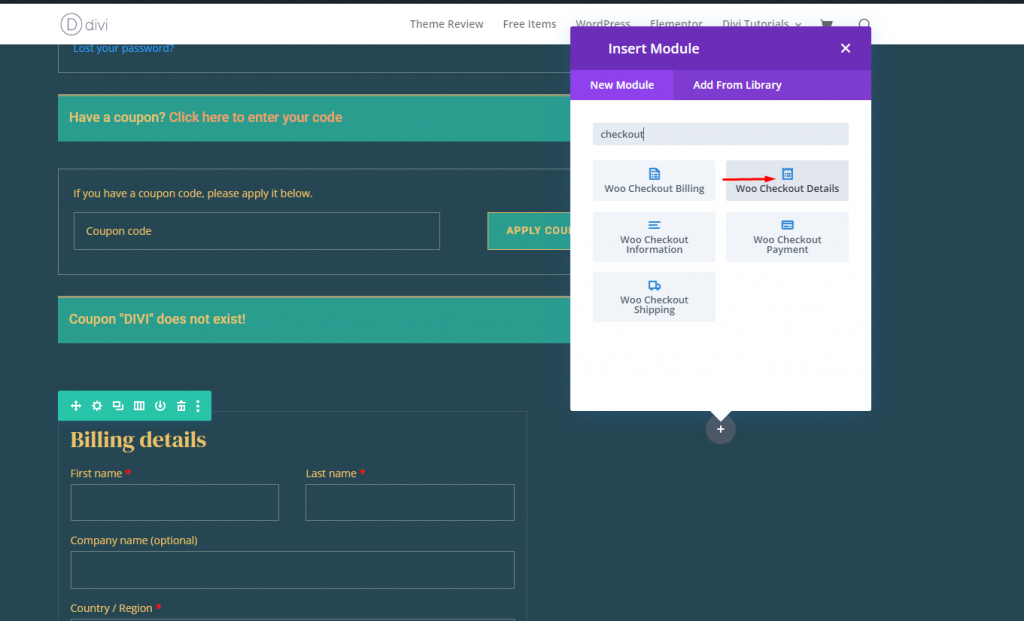
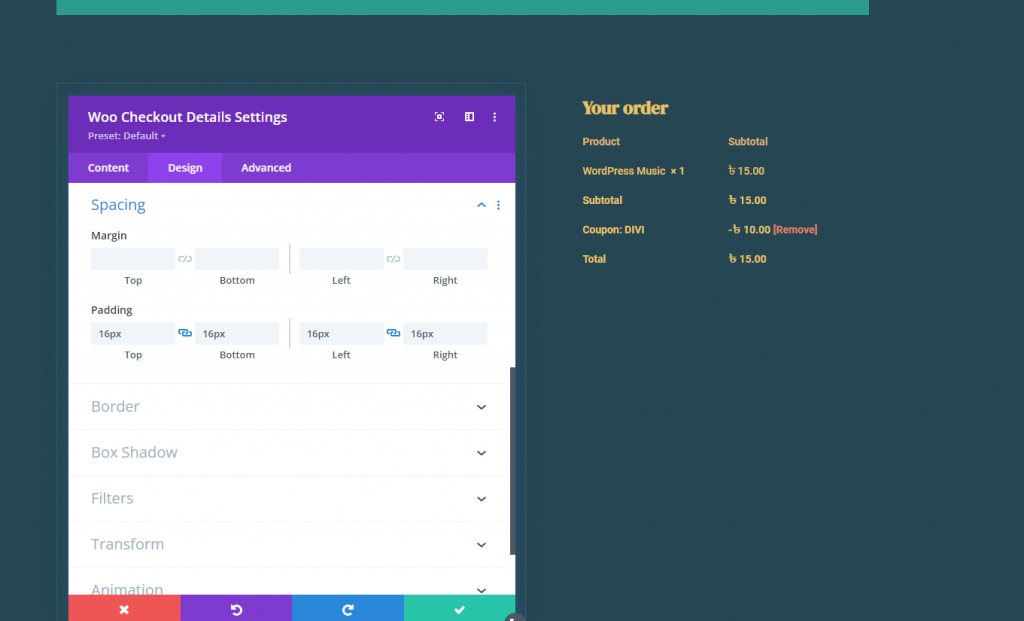
Woo Checkout Details Module
Now that we've designed our shipping and extra information content, we're ready to add the Woo Checkout Details content. This is another important component of the checkout page that displays the purchase order details. It contains a product list, subtotals, and the total price of the purchase. It also shows any coupon savings that have been applied and can be withdrawn via a link.
Add a new Woo Checkout Details module to the checkout details in column 2 of the same row.
Woo Checkout Details Title Text
Update the Title text settings as follows:
- Title Font: DM Serif Display
- Title Font Weight: Bold
- Title Text Color: #e9c46a
- Title Text Size: 24px (desktop), 22px (tablet), 18px (phone)
- Title Line Height: 1.4em

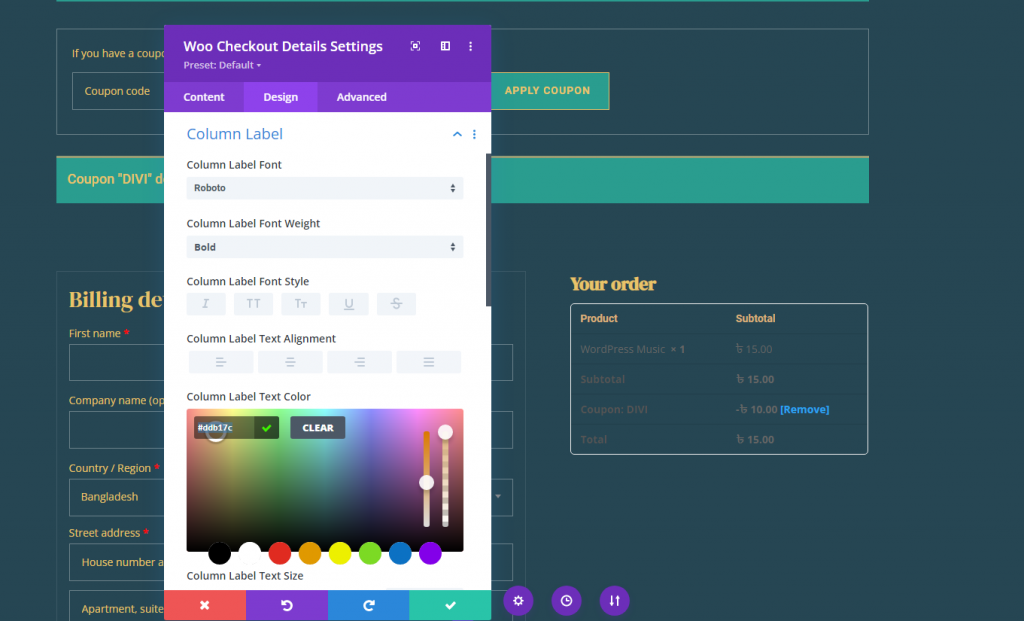
Woo Checkout Details Column Label
Let's style the column labels:
- Column Label Font: Roboto
- Column Label Font Weight: Bold
- Column Label Text Color: #ddb17c
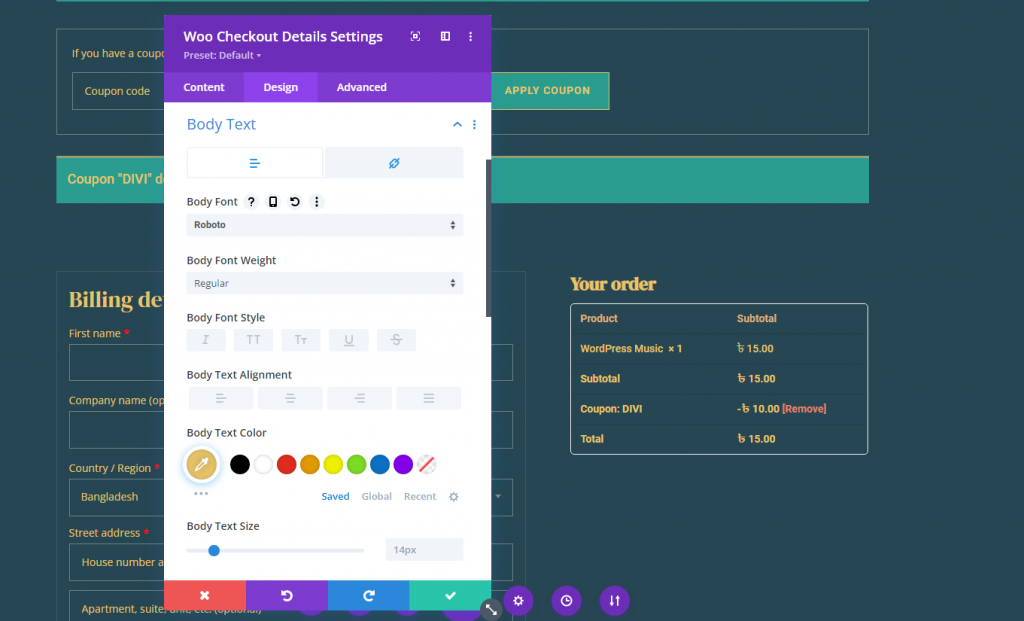
Woo Checkout Details Body Text
To style the body text that targets the items under each column in the list, update the following:
- Body Font: Roboto
- Body Text Color: #fff
Under the link tab, update the link text color:
- Link Text Color: #e0816b
Woo Checkout Details Table Border
For this design, we are going to take out the table border altogether. To do this, update the following:
- Table Border Width: 0px
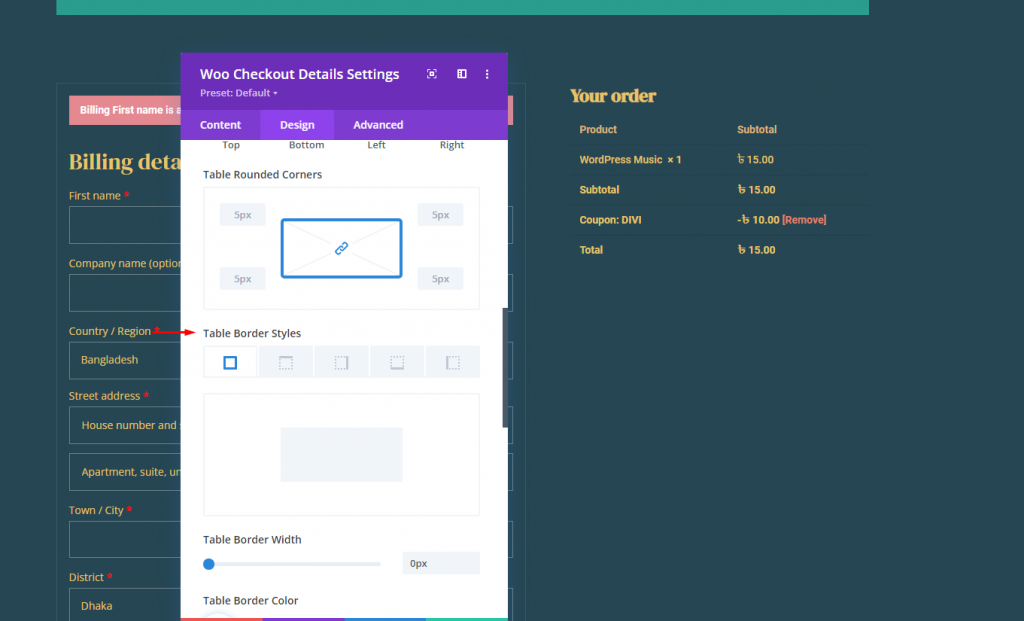
Woo Checkout Details Table Cell
To style the table cells within the table, update the following:
- Table Cell Padding: 0px left
- Table Cell Border Style: none

Woo Checkout Details Padding and Border
To keep the module’s design consistent with the other modules, update the padding and border as follows:
- Padding: 16px top, 16px bottom, 16px left, 16px right
- Border Width: 1px
- Border Color: rgba(255,255,255,0.1)
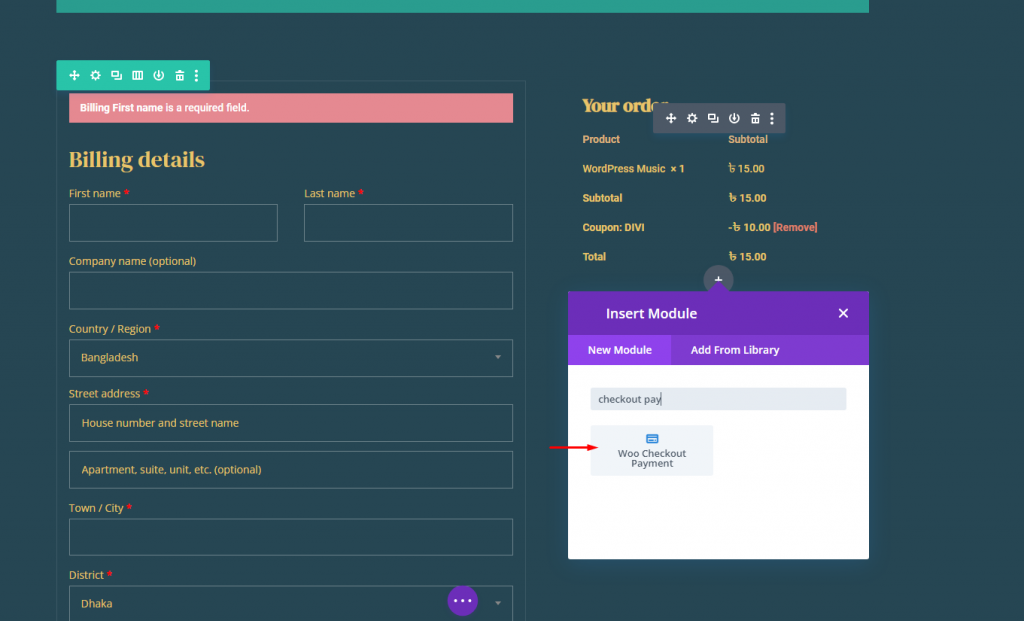
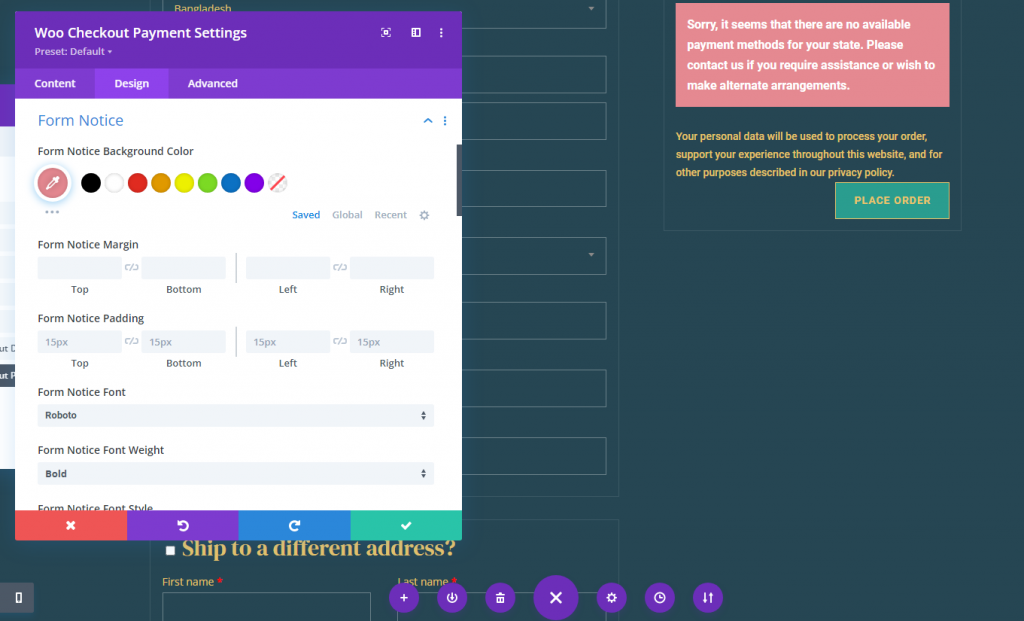
Woo Checkout Payment Module
We're ready to add the Woo Checkout Details content now that we've built our shipping and extra information content. This is another crucial part of the checkout page that displays the purchase order details. It includes a product list, subtotals, and the final purchase price. It also displays any coupon savings that have been applied and can be withdrawn by clicking on a link.
Add a new Woo Checkout Details module to the checkout details in the same row's column 2.
Make the following adjustments.
- Form notice background color: #E58991
- Form notice font: Roboto
- Form notice font weight: Bold
- Form notice font size: 16px
- Button Setting: As previous
- Spacing: 0px (Top, Bottom, Left, Right)
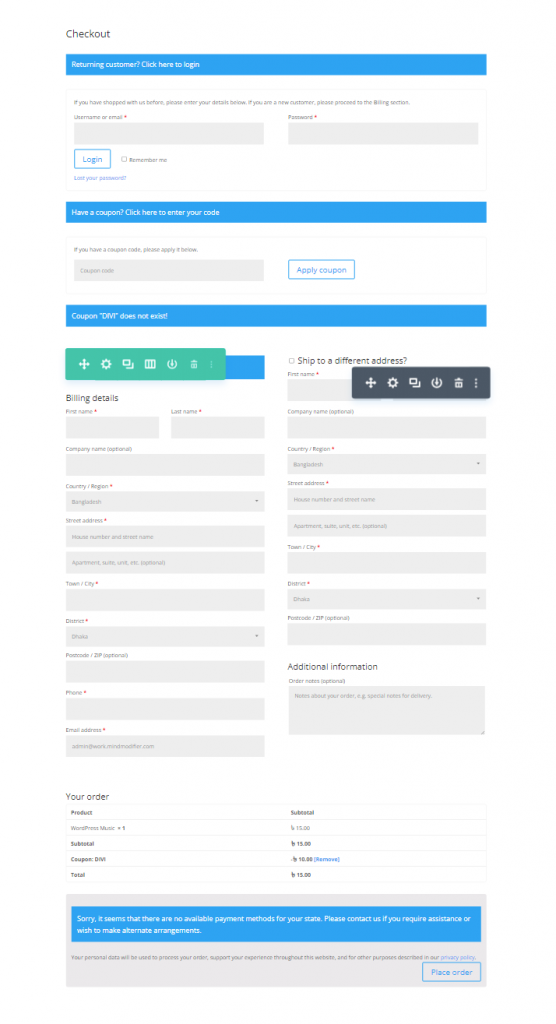
Final Result
Here is how our final checkout page looks like.
Wrapping Up
With Divi's robust page builder and intuitive Woo Modules, creating a custom WooCommerce Checkout Page template is greatly simplified and amplified. This tutorial focused on incorporating the essential parts that comprise a checkout page. However, keep in mind that all of the other unique Divi modules and features are available to you to take your checkout pages to the next level. This should assist improve your Divi design skills and, more importantly, lead to more conversions.


