
Enabling a sticky add to cart button is a useful way to allow customers to easily add a product to the cart from any part of a WooCommerce product page.

This button also guides unsure visitors toward making a purchase.
Because WooCommerce doesn't have a built-in sticky add to cart feature, you'll need to use a plugin or theme to add this function to your store.
In this guide, I will demonstrate how to incorporate sticky add to cart buttons into your WooCommerce website using either the Merchant Pro plugin.
Create Amazing Websites
With the best free page builder Elementor
Start NowBefore we begin, it's important to note that the Merchant Pro plugin is compatible with all WooCommerce themes and is the recommended method.
Let's start.
Creating A Sticky "Add To Cart" Button
To show sticky add to cart buttons in your WooCommerce store with Merchant Pro, follow these steps:
Free Merchant Plugin
To enable the add to cart feature, you must have both the free and premium Merchant plugins.
The free Merchant plugin is a robust tool for WooCommerce, providing various features for your store, such as a Buy Now button, an animated add to cart button, quick view modals, payment logos, trust badges, and more.
However, for sticky add to cart buttons on your WooCommerce pages, you'll need the Merchant Pro plugin. Since it builds upon the free plugin, ensure you have the free Merchant plugin installed before activating the Pro version.
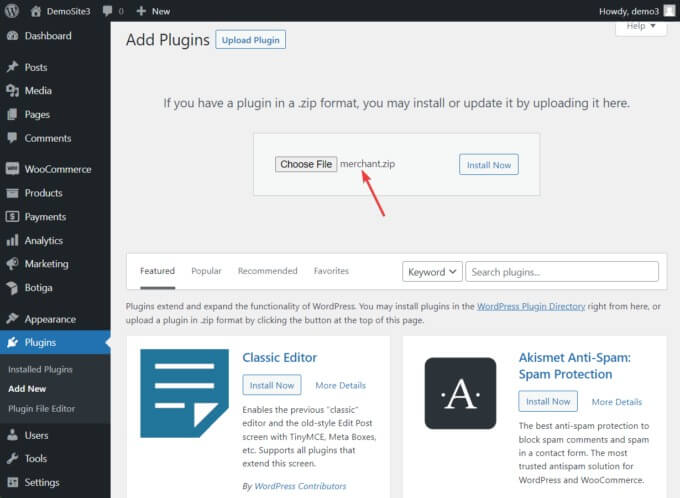
To obtain the free Merchant plugin, click on the Free Download option. The plugin will be saved to your local computer.
Install and activate the plugin by navigating to your WordPress dashboard, selecting Plugins → Add New → Upload Plugin:
Merchant Pro Plugin
The Merchant Pro plugin is priced at $79 per year for a single license. To acquire the plugin, download it to your local computer, and install and activate it just like you did with the free plugin in the previous section.
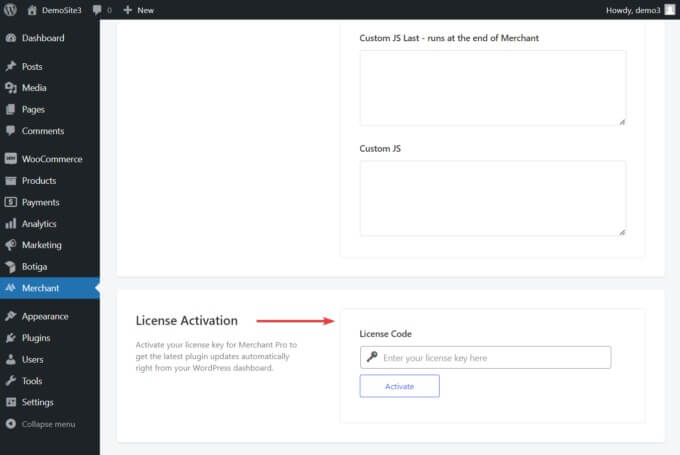
Once installed, you should see a Merchant option in the sidebar of your WordPress admin area. Click on it, then navigate to Merchant Settings → License Activation. Enter your license code to activate the premium plugin.
Find the license code in your aThemes account or in the welcome email sent by aThemes to your registered email address:
Enable Sticky Add To Cart
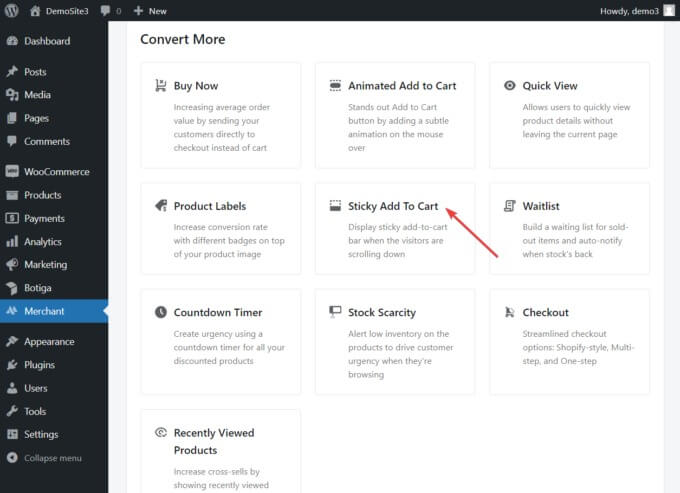
To activate the Sticky Add to Cart module, navigate to Merchant → Convert More → Sticky Add to Cart:
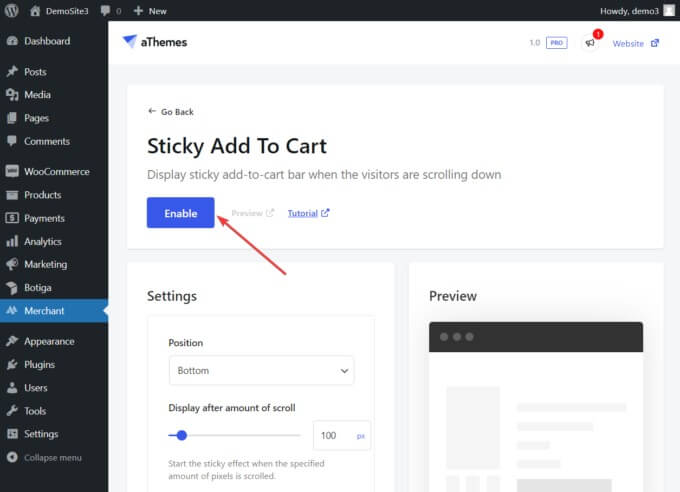
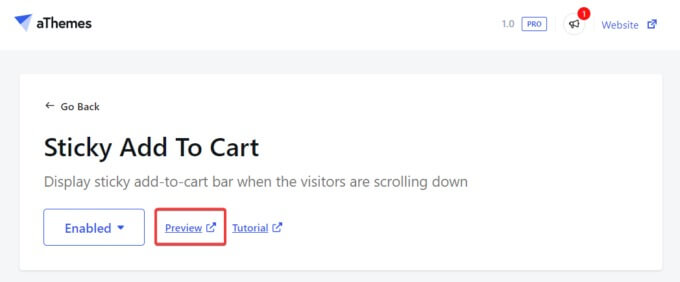
Within the Sticky Add to Cart module, you'll find a blue Enable button at the top of the page. Click on it to enable the module:
Preview and Configure
Once the module is enabled, you can preview the appearance of the sticky add to cart button on your product pages by clicking the Preview option next to the Enabled button:
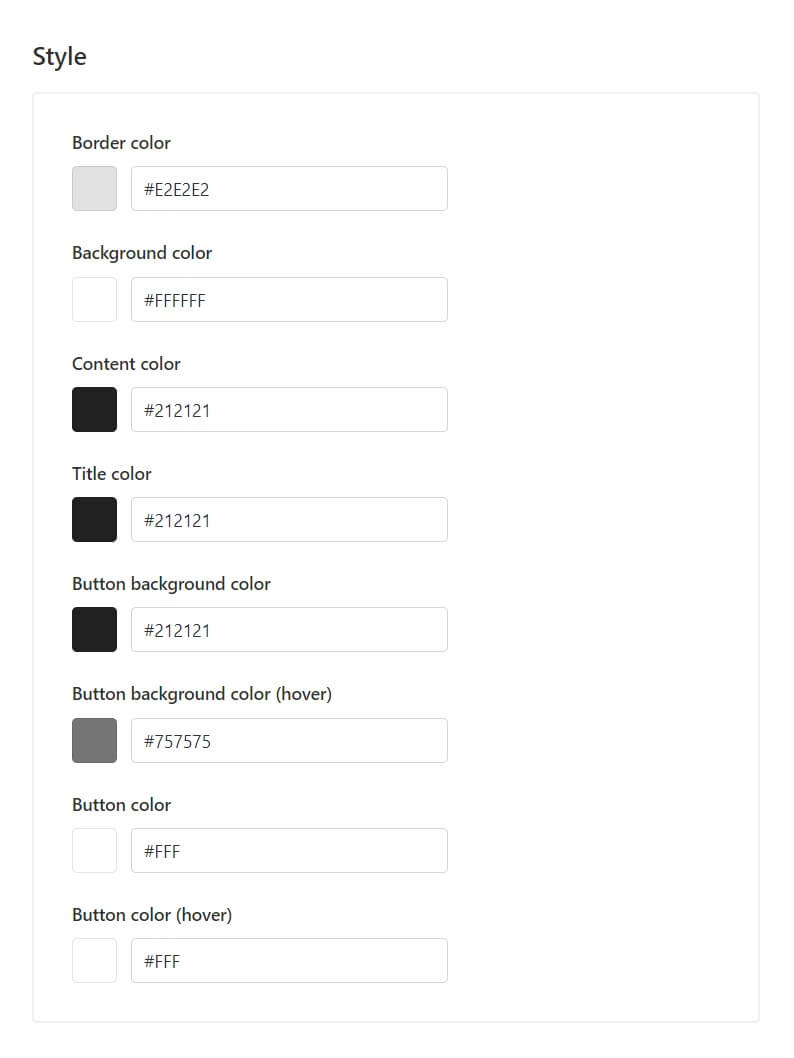
If you're not satisfied with the button's appearance, customize its style and settings on the module's page.
In the Settings section, you can adjust the button's position, set display rules, choose to show the button only on desktop, mobile, or tablet, and hide product images, titles, and prices, among other options:

In the Style section, you can modify the colors (such as border, background, content, and title colors) of the sticky add to cart buttons:
Make sure to save your configurations by using the Save button at the top of the page before exiting the module.
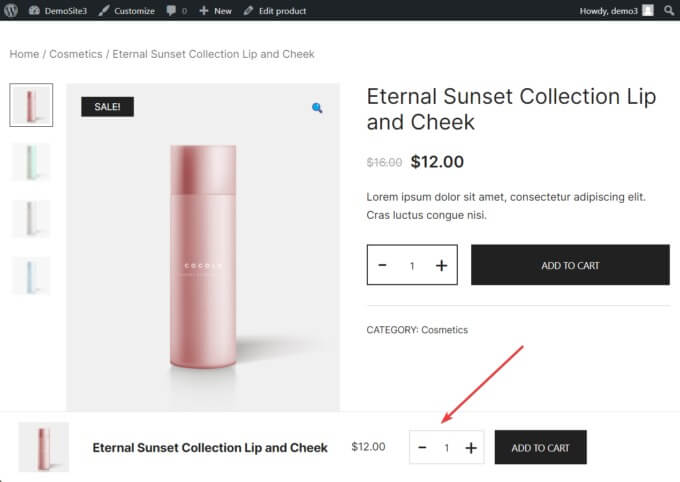
And there you have it. You've successfully added sticky add to cart buttons to your WooCommerce product pages using the Merchant Pro plugin:
Wrapping Up
Incorporating a sticky add to cart button into your WooCommerce store is a straightforward process when you have access to the appropriate tools.
The Merchant Pro is a robust tools capable of adding various features, including stylish sticky add to cart buttons, to your product pages.
These tools are user-friendly and provide numerous customization options, allowing you to tailor the features to align with your site's design.
Moreover, these tools are designed with the aim of enhancing website speed.


