
Pop-up opt-in forms are both a valuable and bothersome part of web design. Without them, it isn't easy to build a list of loyal consumers, and first-time visitors are doubtful to notice them at all. That is why we want to walk you through the process of using Divi's conditional logic to automatically trigger an opt-in form when a visitor views specific pages. They aren't ready to convert yet since they've seen your site a little bit, but also because you're not irritating them with a pop-up that has nothing to do with them. Let's delve in and see what we can do to improve your site!

How to Use Conditional Options to Trigger an Optin Form
In this post, we'll demonstrate how to utilize Divi's conditional logic to display an opt-in form for a discount code once a visitor views two certain pages on your site. It will appear only if those conditions are met, indicating that the discount is only available to specific users.
We'll be using the Divi Theme Builder to add the opt-in form module to the layout of the pages for this tutorial. If you what to have it on a specific page or post that you want to have an opt-in appear after a certain number of page or post visits, you can use the same procedure for the condition options.
Divi Theme Builder is located in the left-hand sidebar of your WordPress admin panel under Divi – Theme Builder.
Create Amazing Websites
With the best free page builder Elementor
Start Now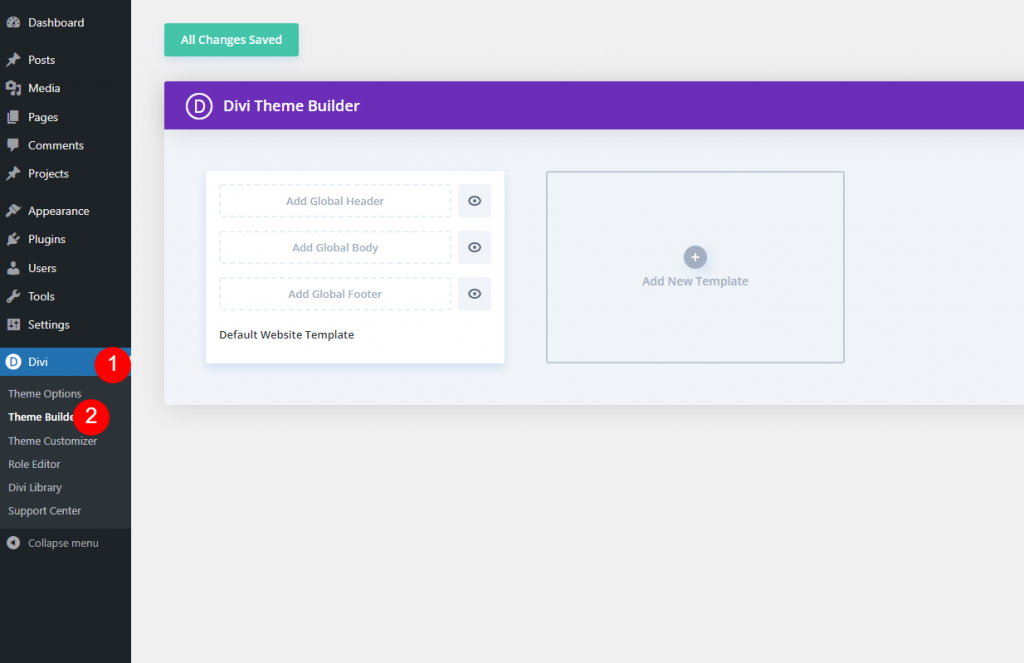
New Template
Now add a new template inside the theme builder.
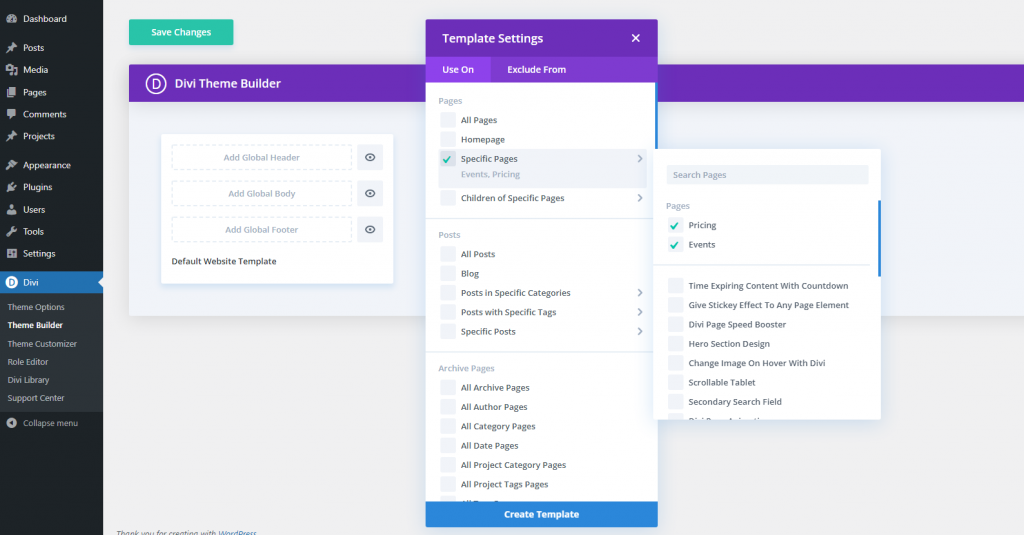
Then, specify the pages on which you'd like the opt-in form to display. Given that we're going to distribute a discount coupon via the opt-in form module, we will restrict the layout to the Events and Pricing sections.
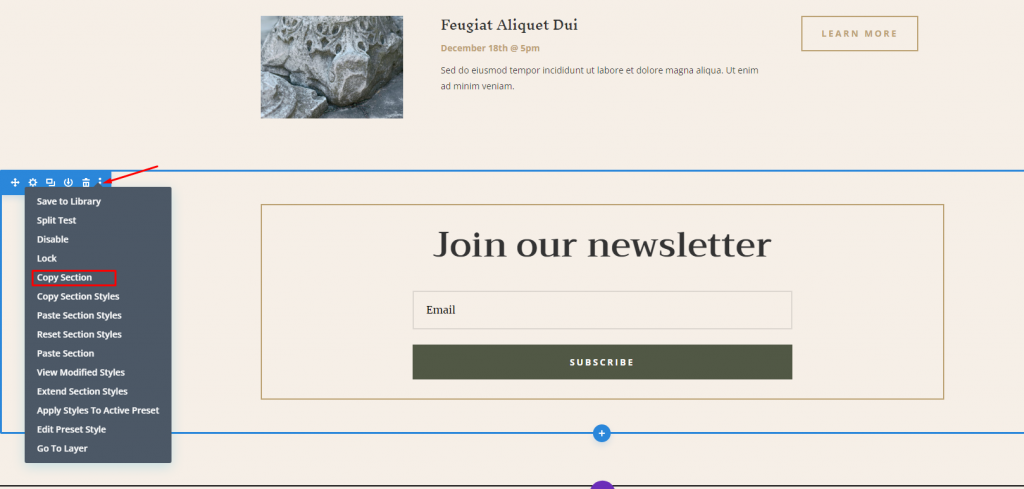
Copy The Module For SignUp
Because we're leveraging preset for this, browse to the layout page that already contains the email opt-in form built and implemented. Select the Copy Section from the context menu when right-clicking the contained section.
Now you can delete the page because this action will make it save on Theme builder.
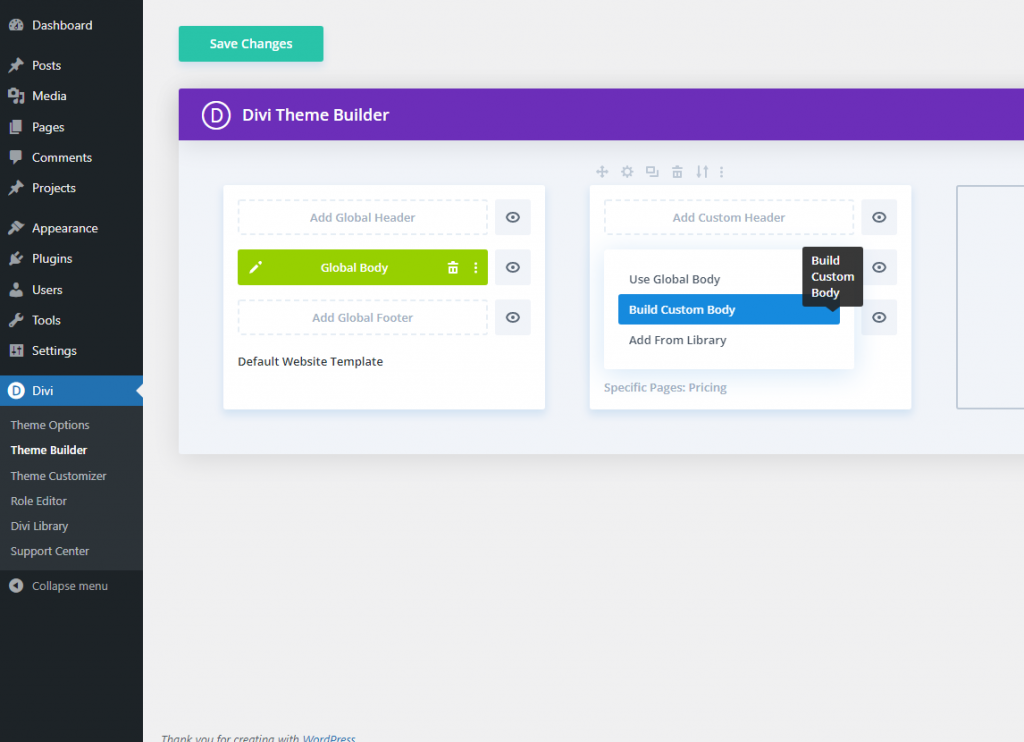
Custom Body Layout
Then, return to the Theme Builder to design the theme's overall layout. In that template, click Add Custom Body and then pick Build Custom Body.
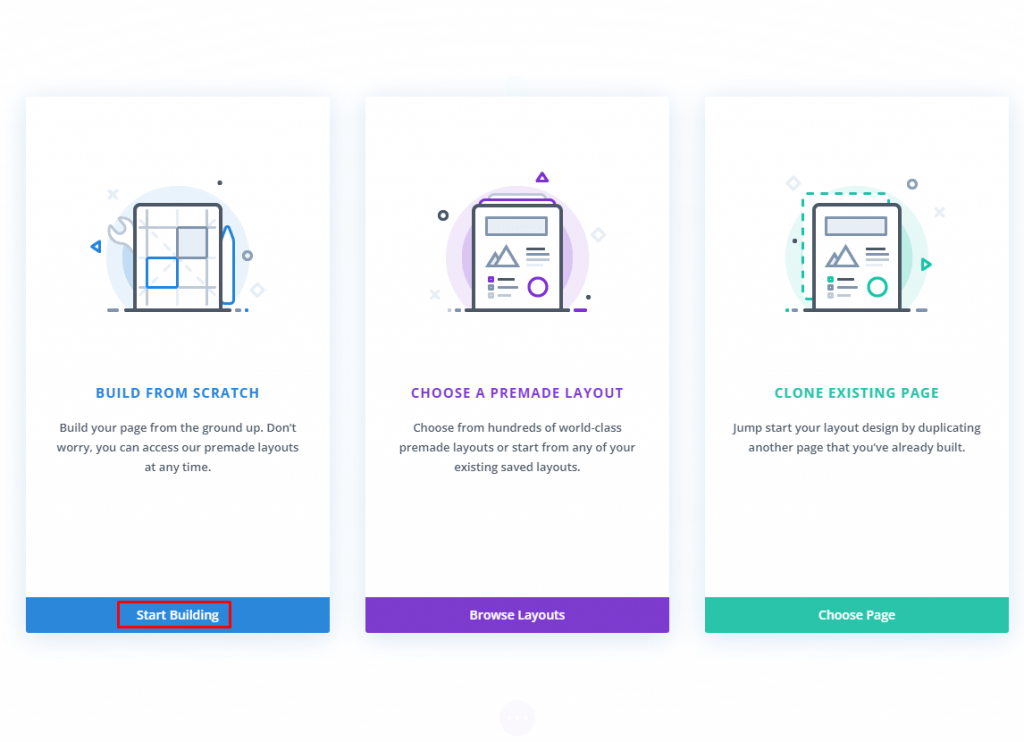
Now select "Build from scratch" and start building.
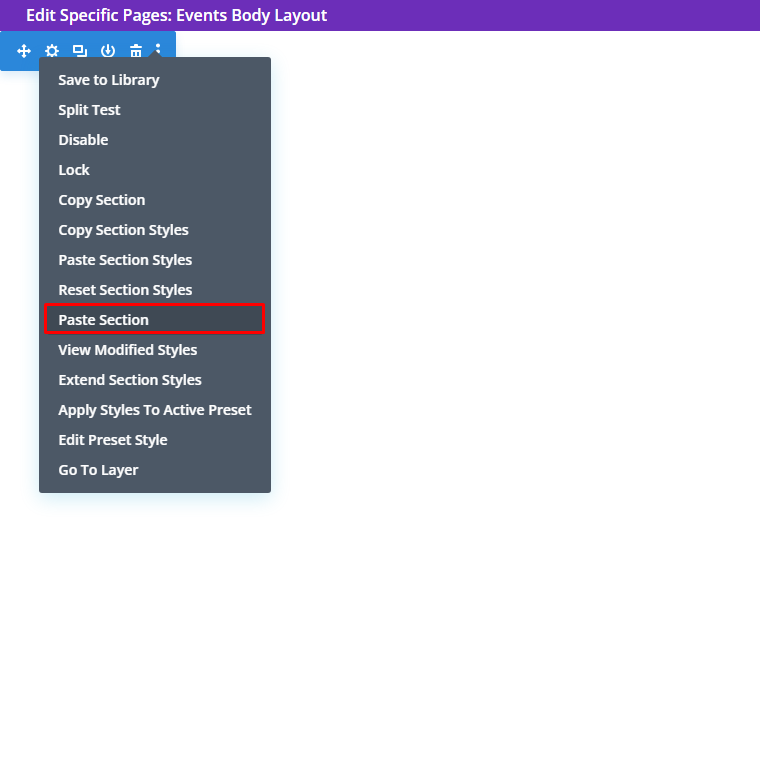
Paste Opt-in Form
After you are on the editor mode, paste the section via the context menu.
And here we have the copied section.
Add Conditional Discount
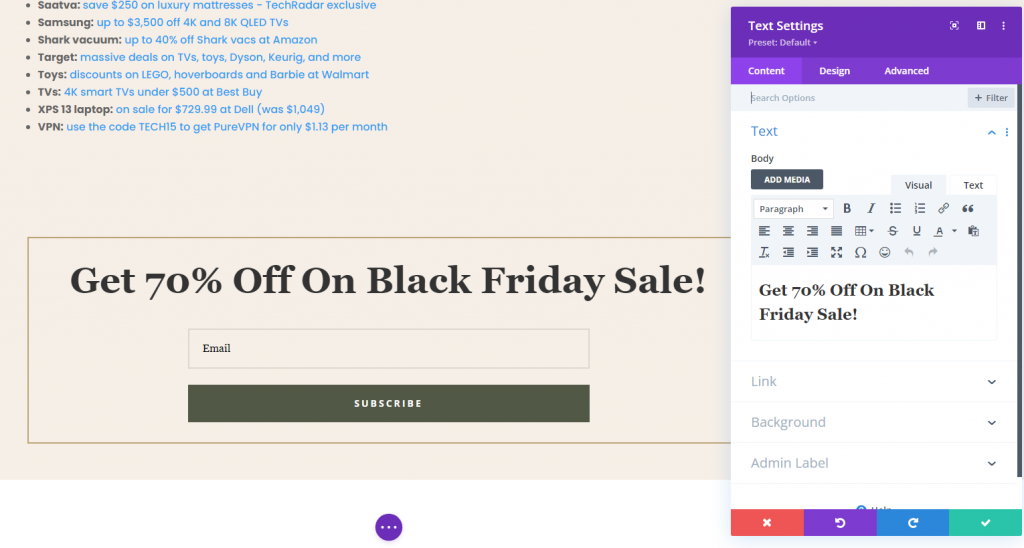
Following that, we will highlight the discount offer. We're going to update the heading in a Text module for this module, but you could also edit the title text in the Optin Form's Settings.
Now it's time to display the content on the page.
Dynamic Content
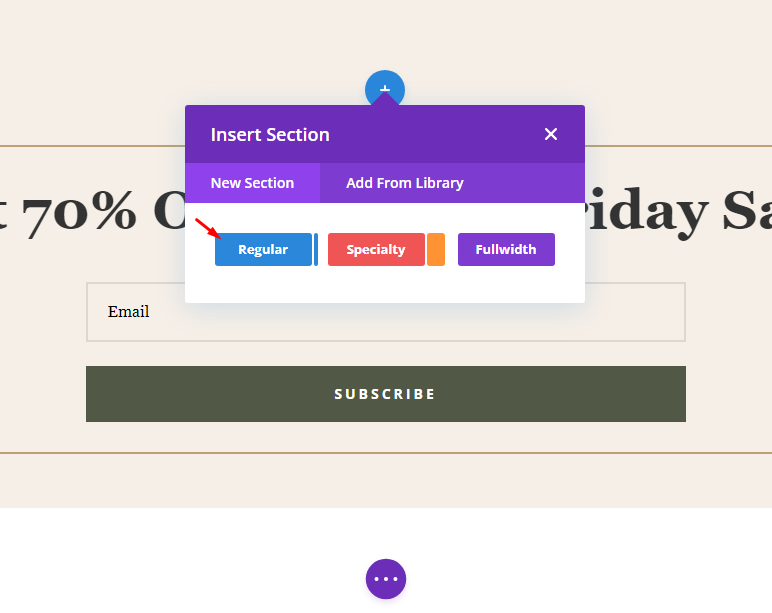
Now add a regular section below.
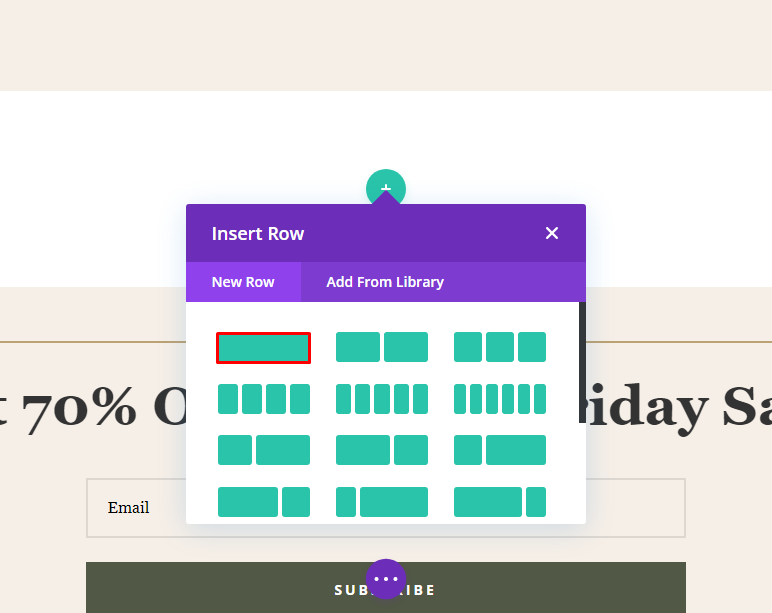
Now add a single column row to the section.
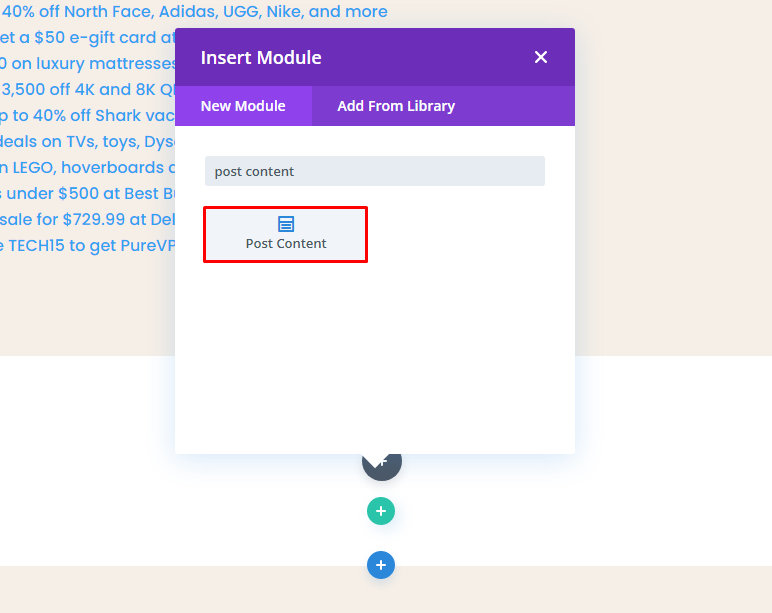
From the Insert Module selection, choose the Post Content module. This is a dynamic module that will display any design you have already created. In this scenario, the front end will display the pre-built Museum Events and Pricing layouts.
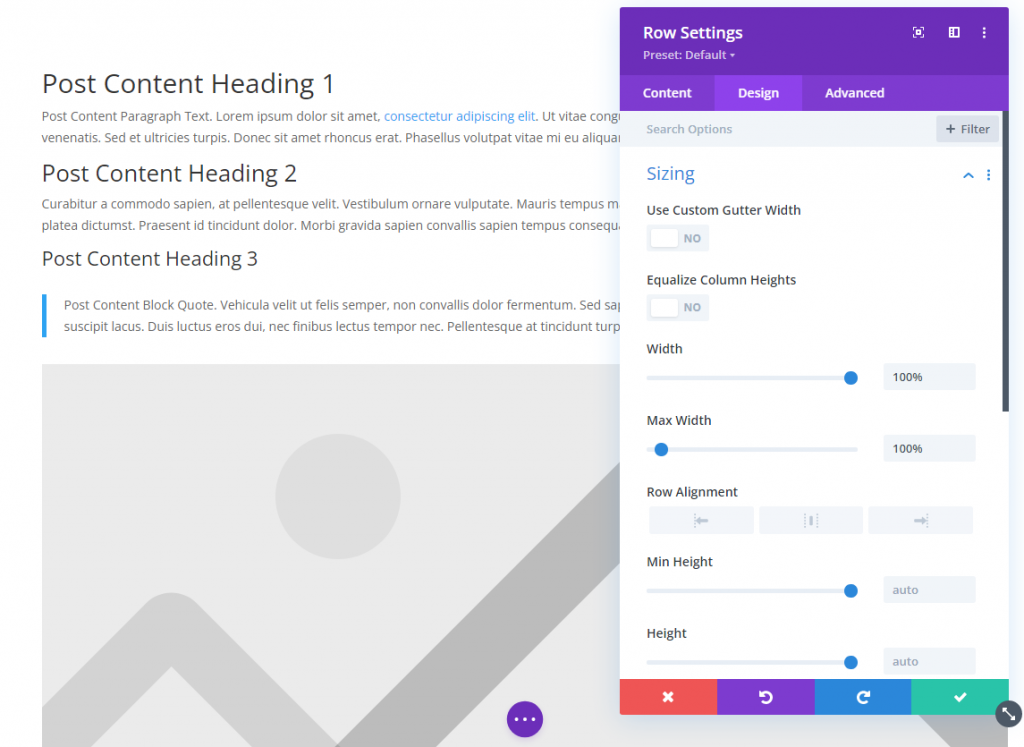
Post Content’s Sizing
From the Row Setting, adjust the content width.
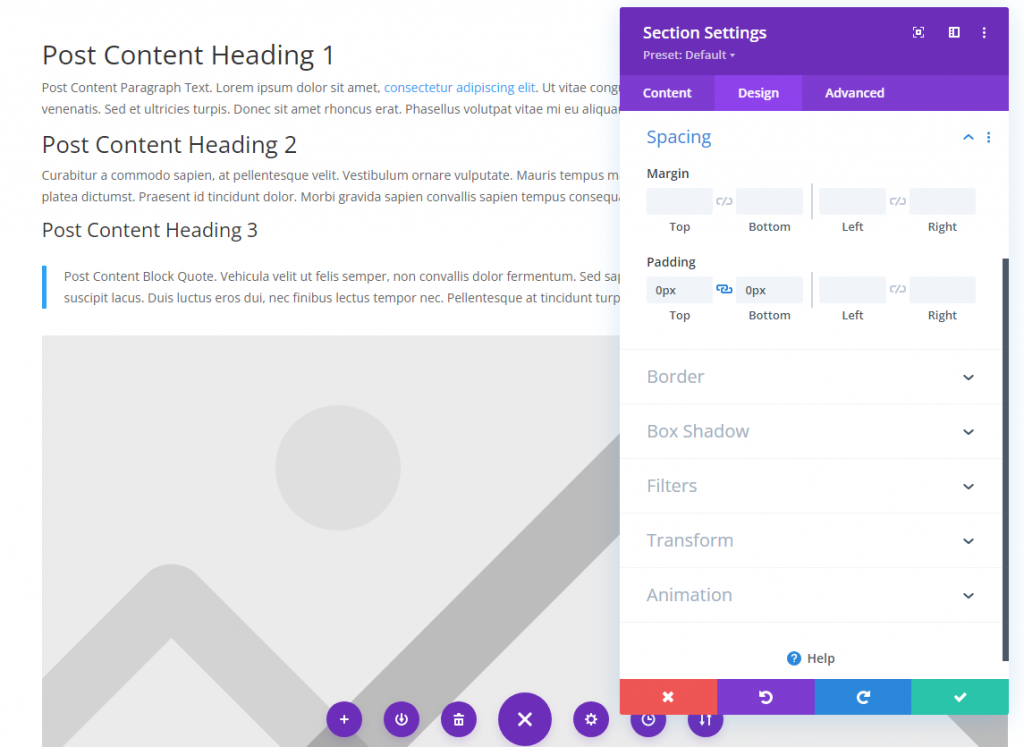
Section Padding
We want to keep the process as fluid as possible because we're adding dynamic data to already-designed pages. Therefore, navigate to the Design tab for each section and row and ensure that the Top and Bottom Padding are set to 0 px under the Spacing header. Do not leave it blank, as Divi includes default spacing for them.
Section Animation
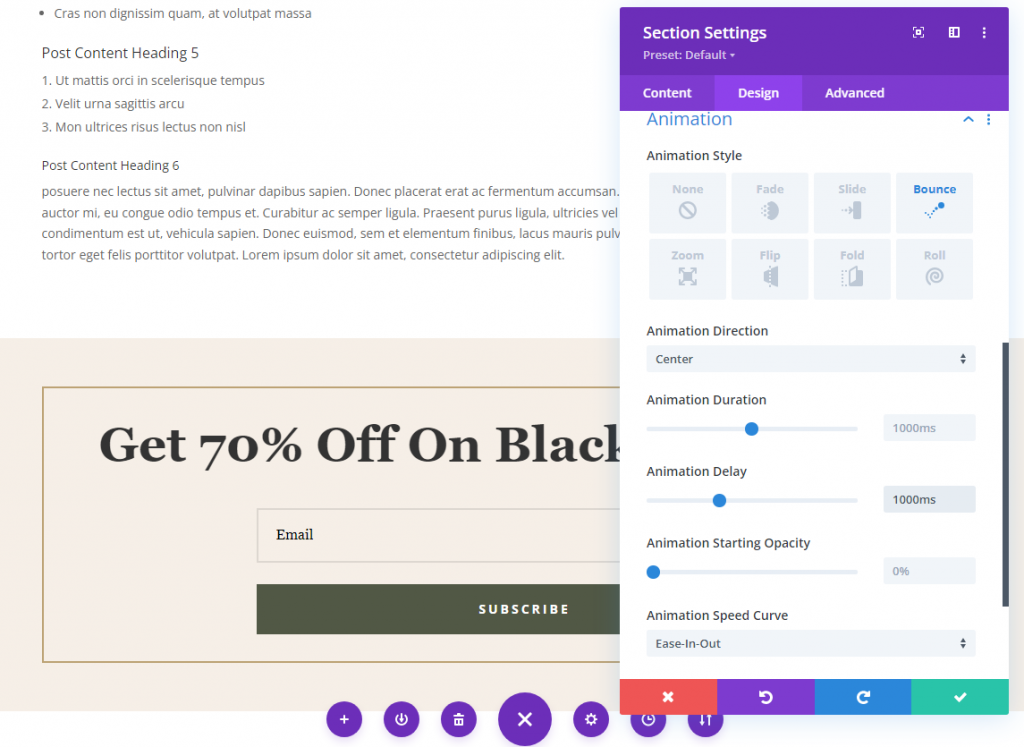
Following that, navigate to the section settings for the section that contains the email opt-in form. We're planning to add an animation to the section's Design tab. We want to bring their attention to this part since it will be visible only to visitors who match certain criteria. We want to ensure they don't mistake it for another section of the site. This will be accomplished by animating the full area to appear after a predetermined amount of time.
We'll use the Bounce animation style with a delay of 1000ms (1 second) for the animation. This part will now appear exactly one second after the visitor arrives. You can adjust the delay to your liking, with each 1000ms equaling one second.
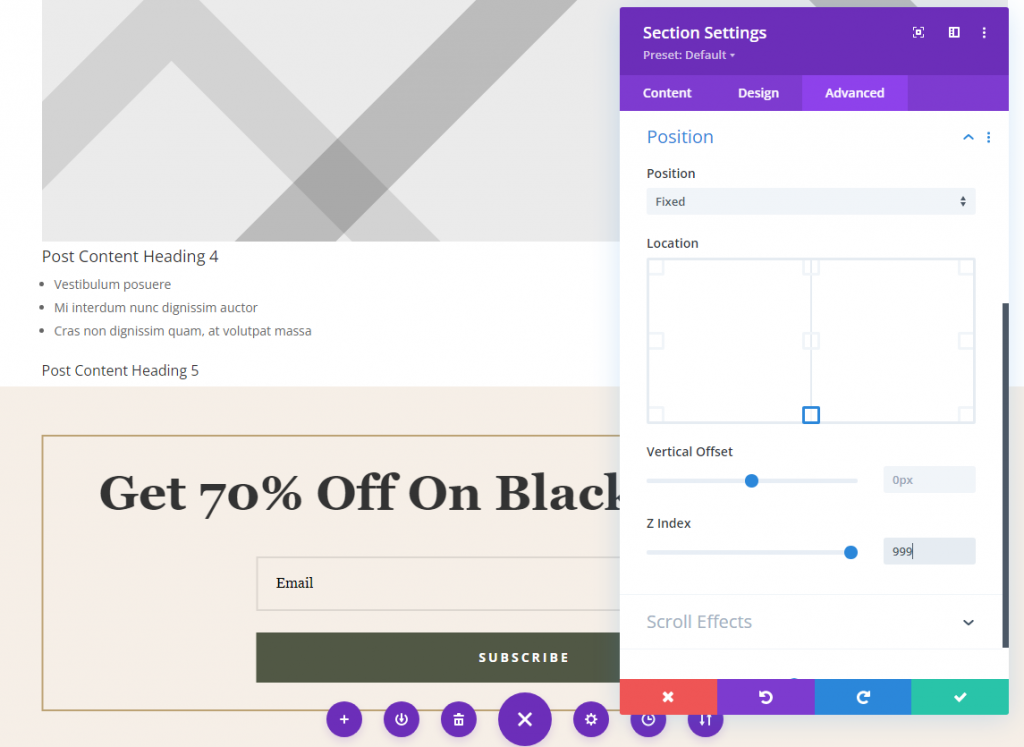
You can adhere the opt-in to the bottom of the screen if you want the user to see it right away rather than having to scroll to the bottom of the page. Navigate to the section's Advanced tab and locate the Position settings. Select Fixed from the dropdown menu, and then drag the section to the bottom center square. Then, set the Z Index to 999 to ensure that it is always higher than the rest of the page's content.
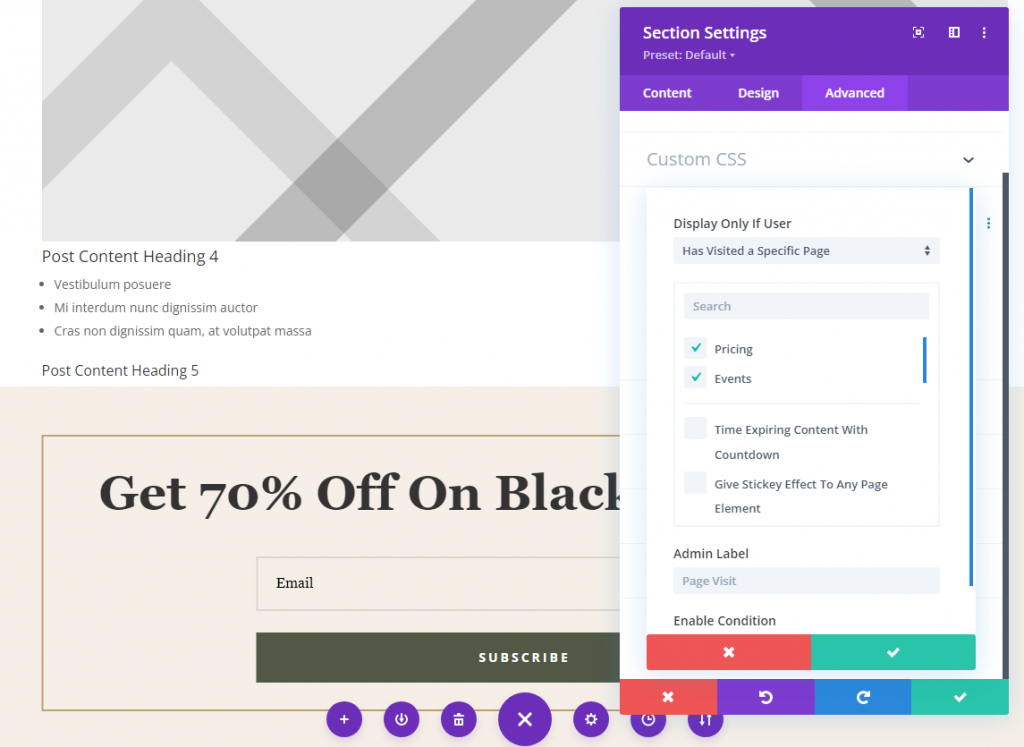
Section Conditional Logic
While remaining in the containing section's settings, navigate to the Advanced tab and locate the Conditions choices. This is how you will specify which pages on your site a visitor must view prior to seeing this opt-in form. To begin, click the grey + symbol labelled Add Condition. And choose Page Visit under the Interaction subheading.
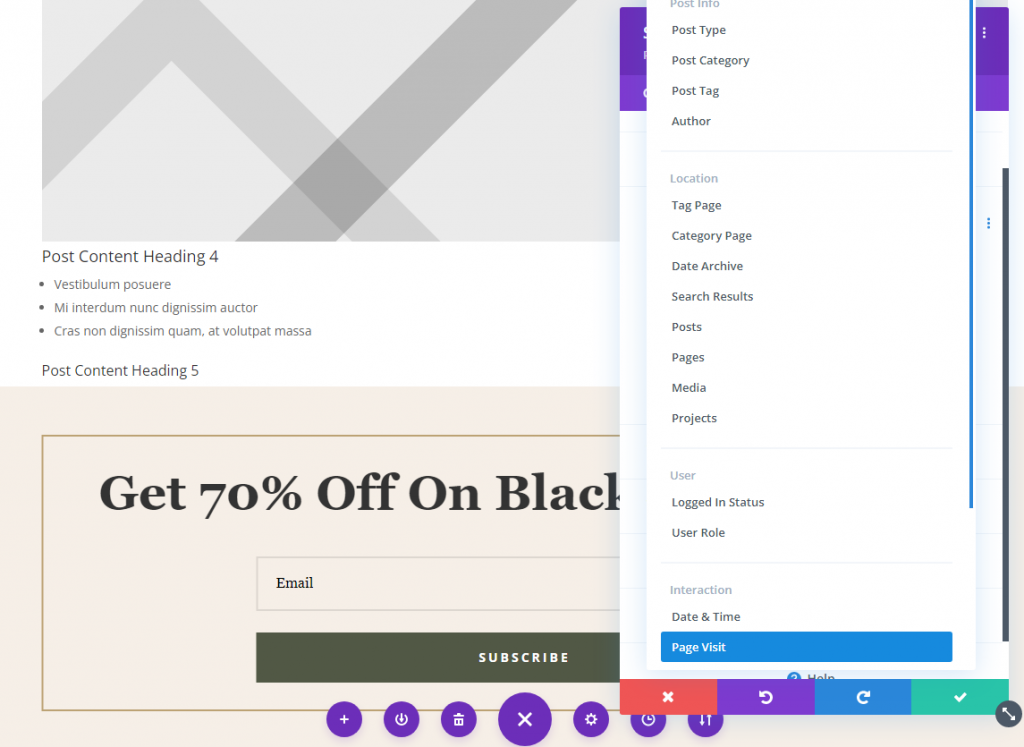
Then, all you have to do is specify which pages the visitor must view in order to activate the opt-in form with the discount. Here, you may access the Pricing and Events pages via the drop-down menus. Because both pages have been selected and assigned to the Theme Builder template, the opt-in will appear on either page regardless of the sequence in which they are accessed. However, both of these pages must be seen in order for the opt-in form to appear.
Note that, you can also do the same setting for posts.
Final Words
Your conditional opt-in form will go live once all of that data has been saved. Visitors to select pages or articles on your site can now receive personalized content. These options allow you to tailor your site's content to the needs of your visitors, resulting in an exceptional user experience. Conversions are one of the most important aspects of the process. As a result, you'll be able to display an opt-in form as part of the user's experience.


