
Not every visitor to your website is there for the same purpose. You most likely provide a variety of items or services to customers and clients, rather than simply one. That is why having various targeted contact forms can assist smooth out your site's UX so that your clients (and future customers) can contact you with as little friction as possible regarding exactly what they need. We'll walk you through constructing the optimal pipeline between you and your users using the Divi contact form module and our conditional logic functionality.

A Sneak Peek at the Conditional Contact Form
When all is said and done, you'll have something similar to this on your website, ready for your visitors to utilize.
What exactly is Conditional Logic?
To begin, we'd like to define conditional logic succinctly. In this lesson, we'll set up a succession of contact forms that appear dependent on the choices the user makes or does not make.
For example, you could have a single contact form that changes depending on what service or product the visitor need. That way, instead of them having to write it out, you can have the information you need in the format you require. Contact form conditional logic helps improve communication and speed up your ability to give for your users.
Create Amazing Websites
With the best free page builder Elementor
Start NowWith that in mind, let's get started on developing the targeted contact forms.
How to Use Conditional Logic to Create Contact Forms
Open the Divi Builder.
We'll need to enter the Divi Builder because we're using the Divi Contact Form module. In this tutorial, we'll use the Landscape Maintenance layout pack as an example. You can use whatever layout or design you like, but you must be able to use and style the Divi Contact Form Module.
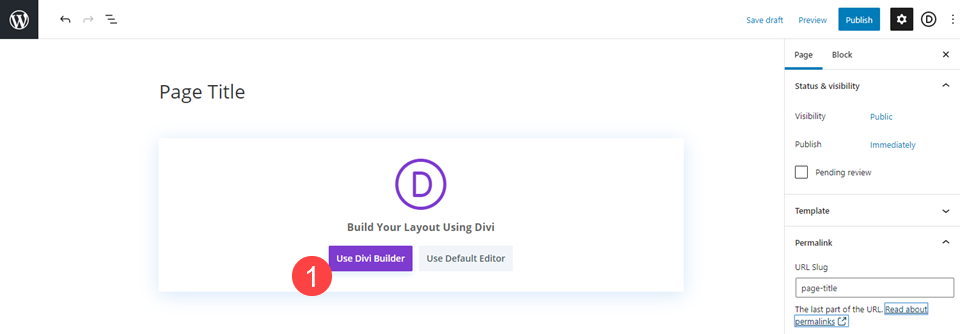
To begin, navigate to the Divi Builder in the backend of your WordPress website. Inside the Page Editor, you'll notice a purple button labeled "Use Divi Builder" (or Edit with Divi Builder if you have already created the Page).
Insert or locate the Contact Form Module.
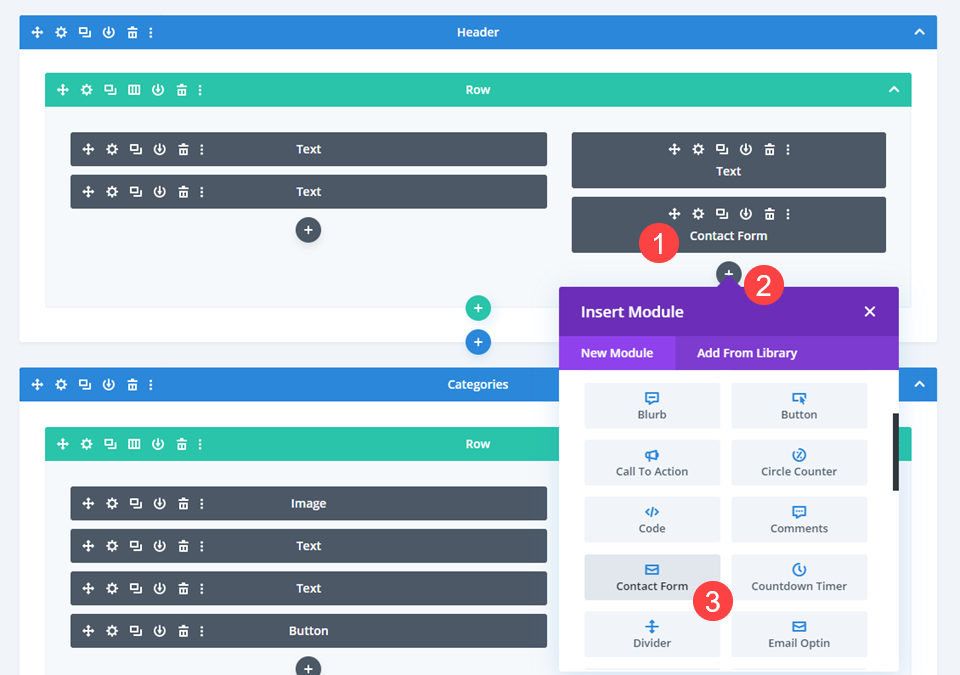
Then, either identify an existing Contact Form Module on the page or click the Black + Circle icon and select Contact Form from the dropdown menu.
Fill out the Contact Form Settings
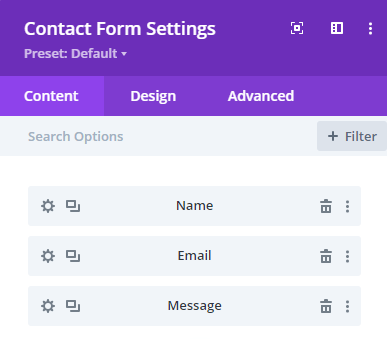
By default, the Divi Contact Form module includes three fields: Name, Email, and Message. We'll make a contact form so those options don't appear until the visitor has provided us with enough information to direct their inquiry.
Adding the first Conditional Question
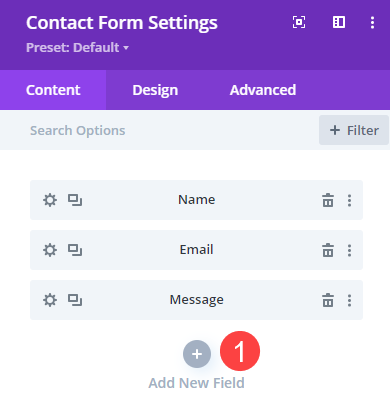
Fill in the blanks with the first conditional question. The "Add New Field" button may be found under the Content tab, beneath any existing fields in the form. Simply click on that.
This brings up the Field Settings box, where you should see fields for Field ID and Title. The Field ID is intended for you. That is what appears in the module settings for you to monitor. The Title is the text that your visitors will see on the form's front end. (The title will also display in the email you receive after submitting the form.)

The Field ID is tagged "Conditional" since this is the first question the visitor will see on the form. What they see next will be determined by their reaction to it. This is a simple way to keep track of the flow of the form's questions and answers.
Add Field Options
Scroll down to the Field Options section beneath the Content Tab. This is where you'll put the options for the user to choose from. Each of these will serve as a prompt for additional questioning. Checkboxes are used as the input type in this example. This means that the consumer has the option of selecting as many as they wish.
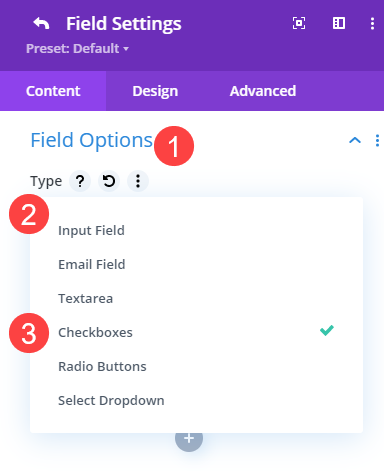
In addition to Checkboxes, Divi supports the following additional features: Input Field and Textarea for the user's own typed responses, Select Dropdown and Radio Buttons for individual choices you supply, and Email Field for email address entry. The default Name field is an Input Field, while the default Message field is a Textarea.
With Checkboxes checked, we will enter the options that we wish to trigger afterwards. Then, to prevent the user from submitting the form prematurely, we want to make this a Required Field.

It's worth noting that we don't use Conditional Logic in this stage. Because this is the trigger, it will appear to the user regardless.
Create New Conditional Response Fields
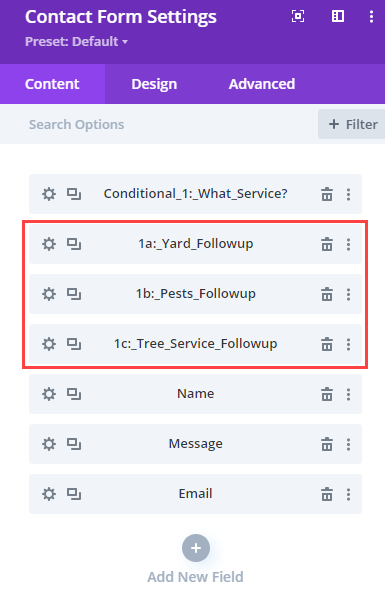
However, for the new Fields we add as follow-up responses, we will add Conditional Logic next. Because we included three options for the first question, we'll add three new equivalent fields to the form. You will need to repeat the steps below for each one.
Name the conditional responses on the new fields
We've utilized the naming practice of Conditional 1 (to denote the first conditional trigger) followed by 1a, 1b, and 1c for follow-up responses. We've also labeled them appropriately so we know what they are.
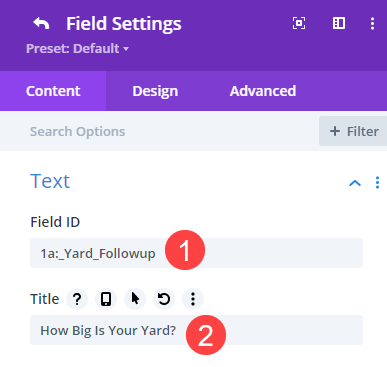
Similarly to the first question, we will input the Title as the question that the visitor will see.
Adding Conditional Logic to the Response Fields.
After that, go down to the Conditional Logic section of that field's Content tab. Turn on the Conditional Logic toggle. Then, for this one, select the Relationship, which means you may set it to any (any number of responses can cause this choice to show) or all (only the specific combination of responses make this field appear).
If you're only using a single trigger rule, like we are, any or all will work.
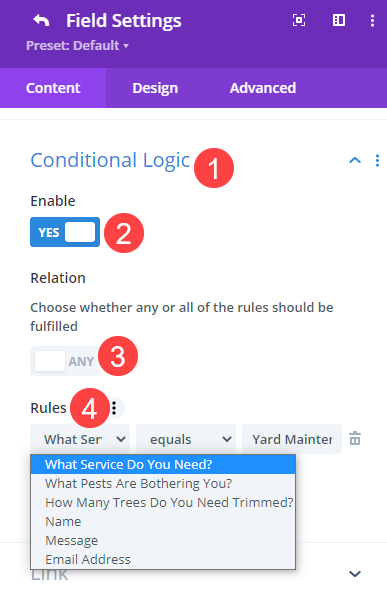
You'll notice the field that activates this one under Rules, and on the right, you may choose which option will trigger it. The qualifier, such as equals, does not equal, is less than, is more than, and so on, is located in the center. For this field, we are picking the Conditional 1 question and then the choice within it that explicitly causes this field to appear.
Repeat that step for all Conditional Responses.
Because we introduced three possible responses to our single conditional question, we'll do the same for the other fields. Only the proper correlative replies for that selection are created.
Set the ‘Name/Email/Message' of Contact Form Fields to Appear
Once you've configured the responses for the conditional logic, we want the visitor to be able to submit the form. To accomplish this, we will modify the Conditional logic in the Name, Email, and Message fields. Because the preparation for each of these is the same, you will repeat this three times.
Go to Conditional Logic under the Name, Email, and Message fields settings. Enable it and enter as many final responses to your conditional follow-up questions as you have. In this example, we have three follow-up inquiries, therefore we apply three rules.
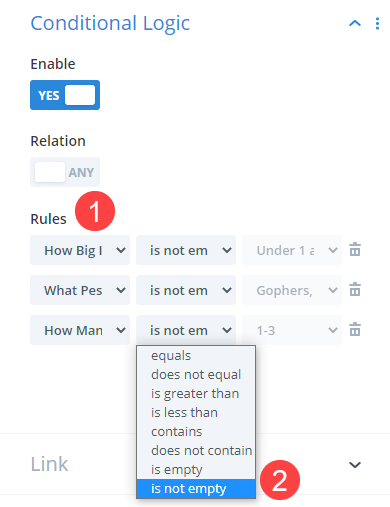
Select the follow-up question as the trigger for each rule. Set the qualifier to is not empty, which means that the condition is met as long as the visitor answered the question. The final box will be greyed out, suggesting that any answer is adequate.
Save your changes, and then repeat for any other fields that you want to appear to allow form submission. That's all there is to it! Your form will automatically adapt to the needs of your consumers.
The End Results
You can see how conditional logic works in practice in the video below.
Final Thoughts
One of the most common parts of a website is the contact form. Almost every website has one, and almost every website need one. However, not every person visits your website for the same reason. You may transform your contact forms into a dynamic tool for your users to communicate with by using Divi's conditional logic function.


