
Want to develop a free WPForm contact form in Elementor? Even if a visitor does not have your email address, a contact form will allow them to get in touch with you.

The ideal technique to incorporate a contact form into your Elementor page is demonstrated in this article. If you're looking for a 'no code' solution, this is the one for you!
Elementor Contact Form Setup
The WPForms plugin makes it incredibly simple to create an Elementor contact form. The best WordPress form builder is WPForms. If you're using the Elementor page builder, this plugin is a great fit. This means that you only need a few clicks to construct an Elementor "contact us" page.
For your kind information - WPForm has a pro version that comes with a lot of extra but important features like -
Create Amazing Websites
With the best free page builder Elementor
Start Now- Install Stripe, Square, and PayPal payment add-ons.
- Forms that dynamically alter can be created using conditional logic.
- Create forms with multiple steps.
- Form landing pages should be devoid of distractions.
- Form notification emails can be set up for numerous forms.
- Get text messages when a contact form submission is made.
- Mailchimp forms can be set up to collect email addresses.
- Entries should be sent to a CRM.
- With our anti-spam feature, secret form tokens, you can stop contact form spam.
- And that's not all!
Build Free Contact Form In Elementor by WPForms
Let's move ahead and build a contact form with WP form and Elementor.
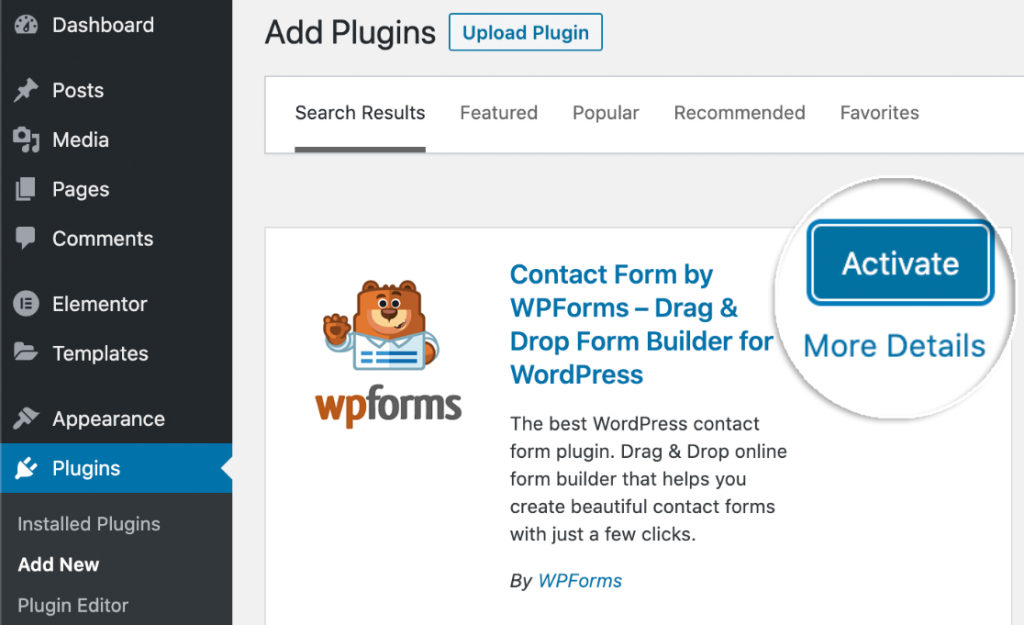
Install the WPForms Plugin
Installing the WPForms plugin should be your first order of business. Activate WPForms now that it has been installed. In order to get started with WPForms Lite, simply click Activate on the plugins page.
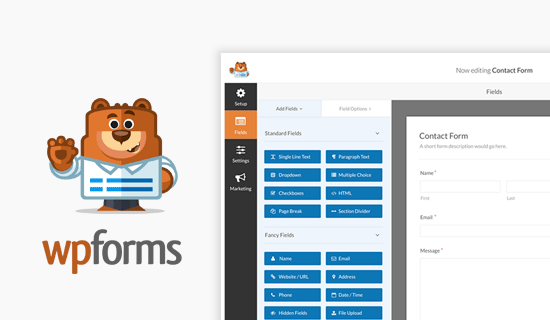
Make Your Contact Form
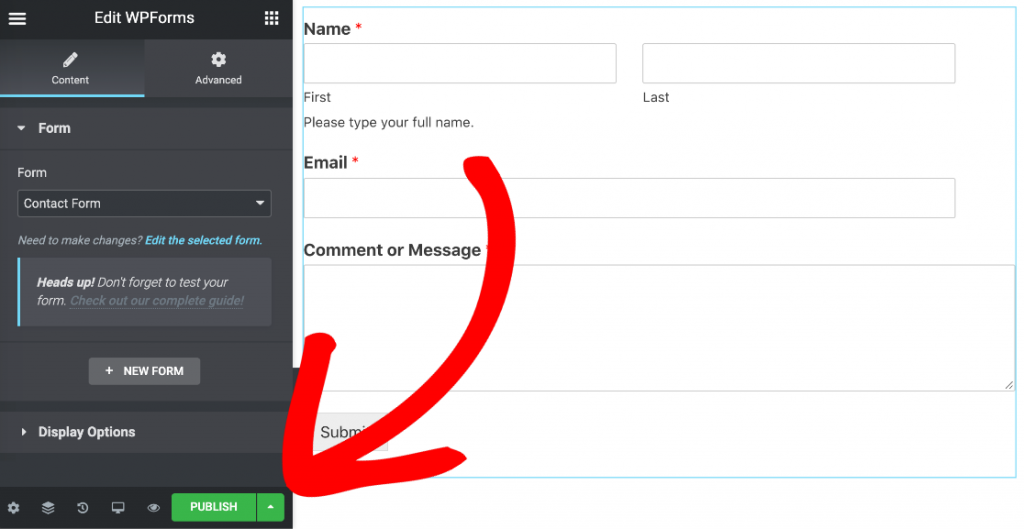
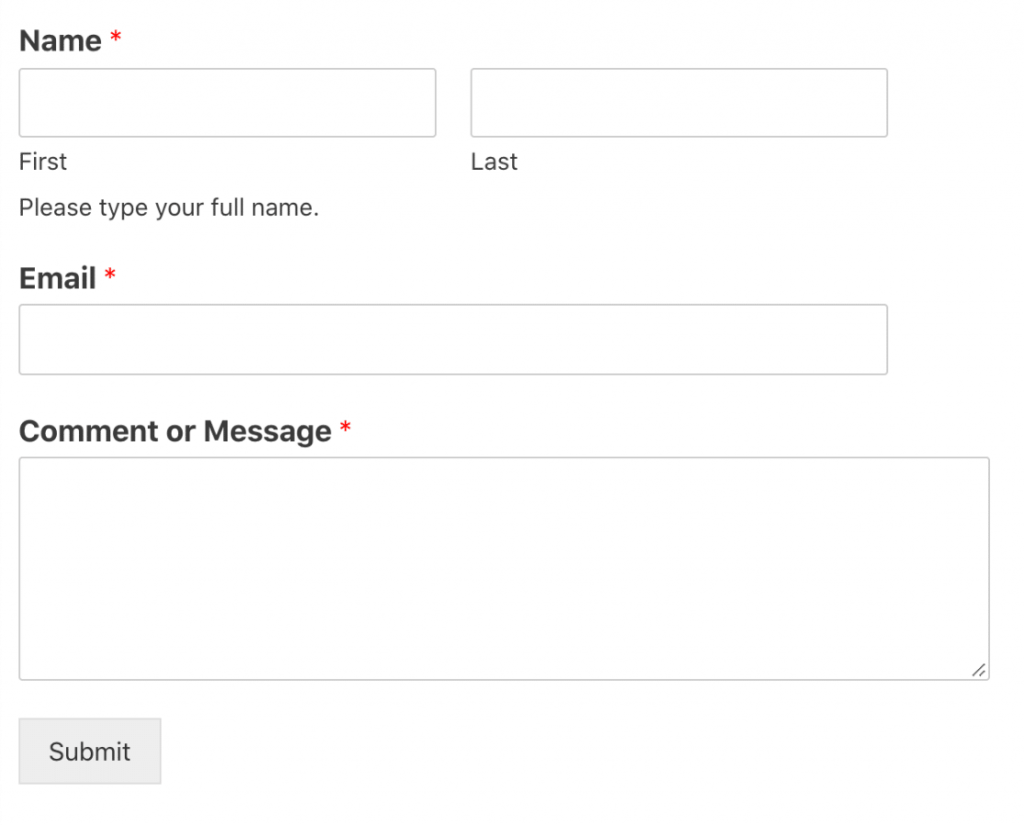
There are all of the fields you need to receive messages from your website in the Simple Contact Form. The user-friendly form builder allows you to add additional features like dropdowns and checkboxes if you so desire.
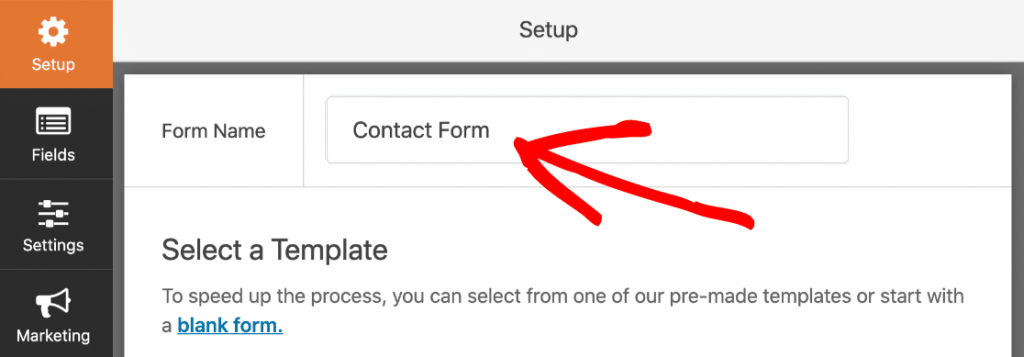
Type a name for your form in the WPForms setup screen at the top.
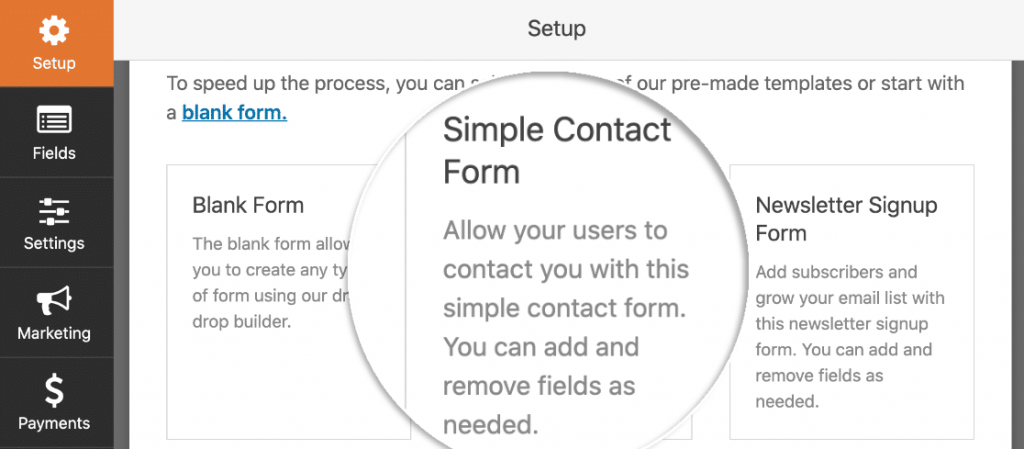
Form templates can be found by scrolling down a bit.
Using WPForms Lite, you'll be presented with a handful of pre-made forms. Add more than 100 form templates by upgrading to the Pro version!
For the time being, we'll stick with the Simple Contact Form design. Open it in your browser by clicking on it.
The WPForms builder will open once you've selected a template.
Using WPForms couldn't be any easier than it is with its user-friendly interface. All the fields you can add to your contact form are shown on the left. You may see a live preview of your form on the right-hand side.
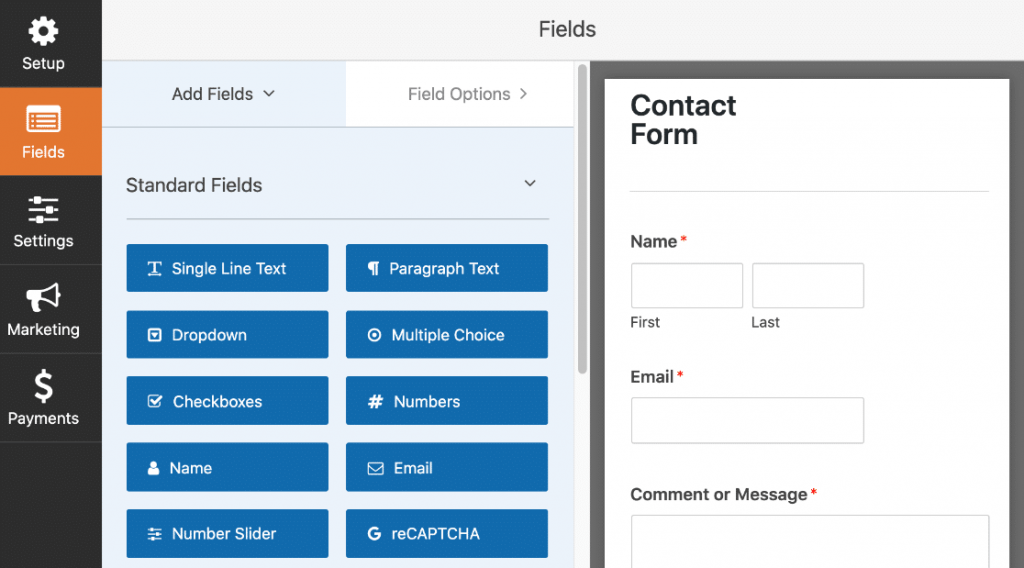
Drag and drop any form field from the left panel to the right form to make changes to the template. It's possible to include drop-down menus, multiple-choice questions, and more.
Fields can also be dragged up and down to reorder them on the form.
Clicking once on a field will bring up its settings menu. Setting options may be found on the left-hand panel adjacent to the form preview in the form builder.

To customize it to your liking, simply click on each field to make your selections. At the top of the page, click Save.
Notification Setup
Let's now look at the notifications that will be sent when the form is completed. Click Settings in the form builder, then the Notifications menu option on the left.
Right, you can see the notification email that will be sent to you after your form has been filled out and submitted. If you'd like, you may personalize the email here.
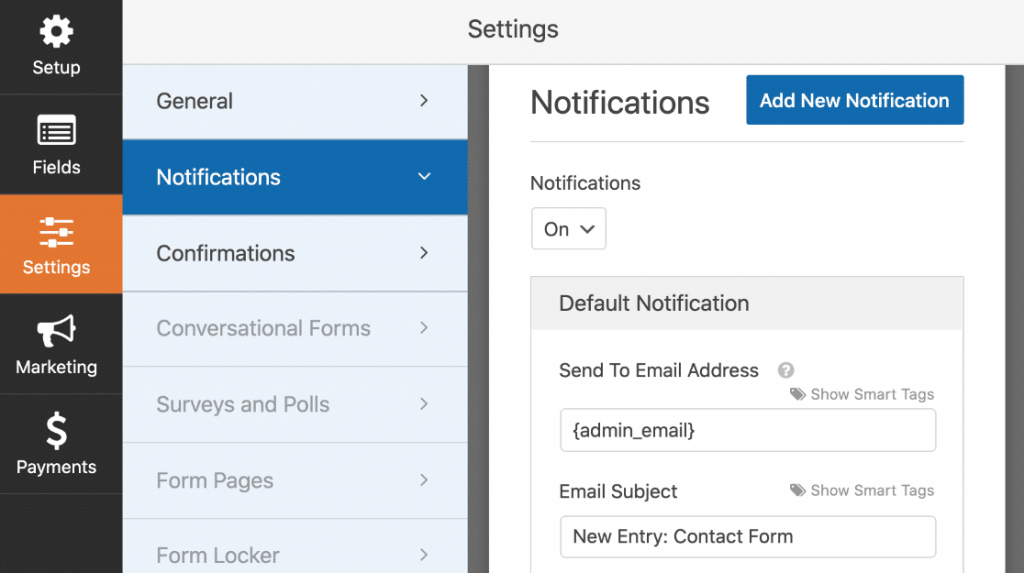
Did you notice that the email will be sent to {admin_email}? The Administrator's e-mail address is a placeholder in the WordPress system.
You can delete {admin_email} and type in your business email address here, or modify the admin email address in WordPress if it’s wrong.
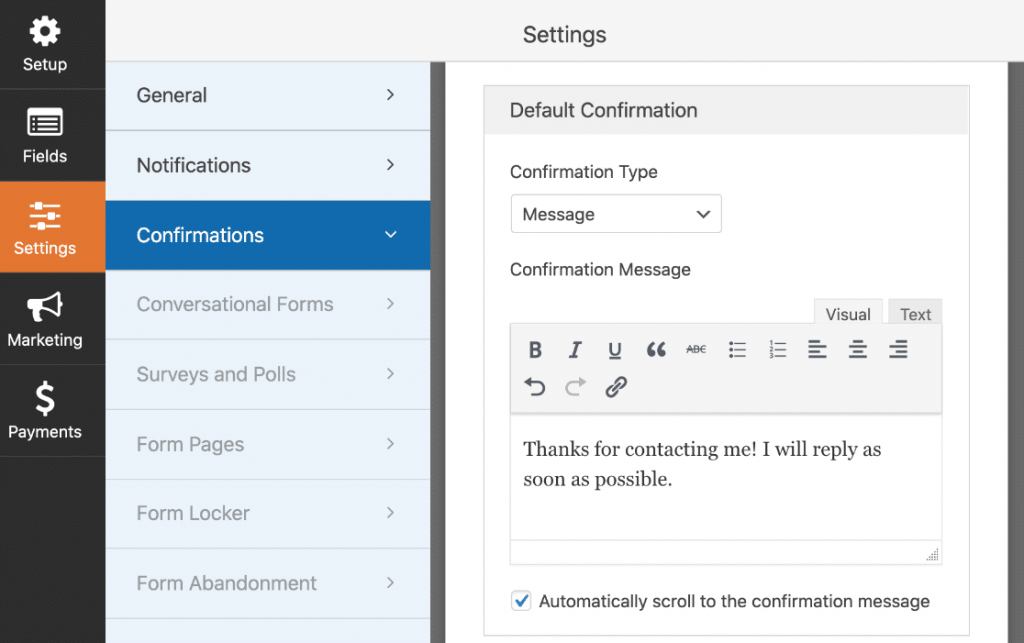
Confirmation Message Setup
A confirmation window will pop up. When a user submits a form, the message that appears on the front end can be customized here.
If you're content with the default message, you don't need to change it; it's completely up to you.
It's done! This is the last step before you may save your work. To close the form builder, click the X in the form builder window's upper right corner.
Your work is fantastic! We just need a location to store your Elementor form.
Create Contact Us Page With Elementor
Now, we will build a custom contact us page in Elementor. Go to your dashboard and navigate to pages and click on add new.
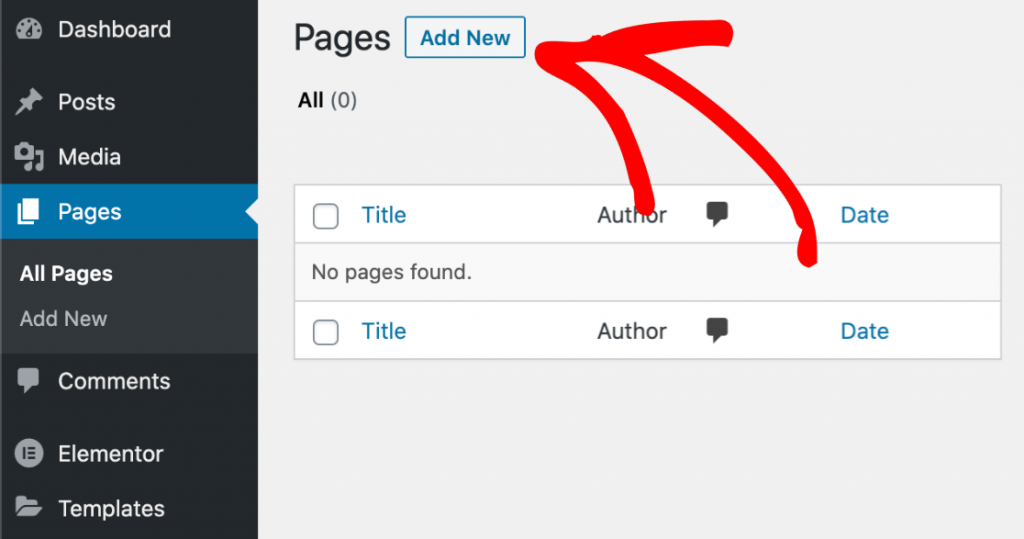
Now, give a title to this page.

Now click on Edit with Elementor.
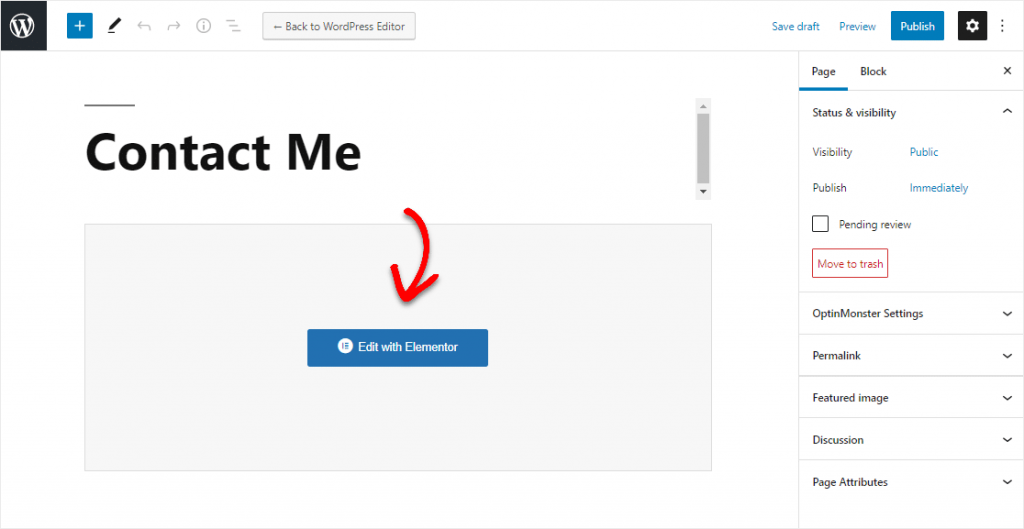
Elementor will begin loading in your browser after a brief delay.
You'll find a variety of page-building tools on the left side of the screen. The WPForms icon can be found in the Basic section.
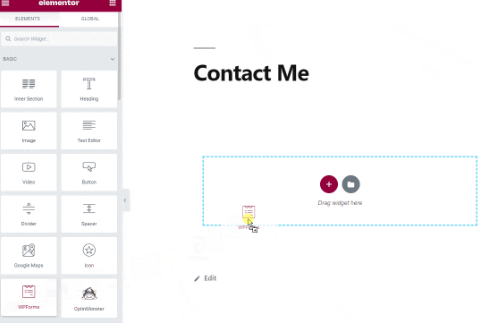
Drag it onto your page, then choose the form you just made from the drop-down menu.

And we are done with the Elementor builder. Now we just need to publish the page.
Publish the Page
Do you want to know how to use Elementor to create a contact form? It's as simple as publishing a regular page in Elementor and then adding a Contact page.
Simple as clicking the green Publish button at the bottom.
Now visit your website's contact page.
Final Words
The WPForms plugin has a great Elementor widget, but there are many additional features you can use to improve your site's forms. WPForms allows you to simply alter the text color, typeface, and background color with CSS for your form. It's done! You've just learned how to quickly and easily create contact forms with Elementor.


