
Nothing is better than the WordPress Multisite network for running multiple websites. It lets you make many websites with the same backend, so you don't have to worry about keeping and updating a lot of websites. In this section, we'll go over the steps for installing WordPress multisite on the Cloudways platform quickly.
Cloudways Multisite WordPress Setup
Install Multisite WordPress
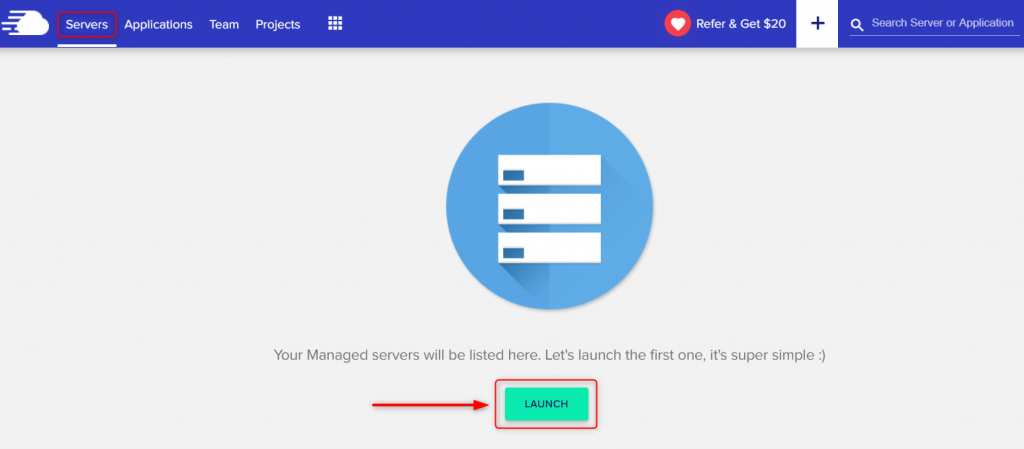
Use your login information to get into the Cloudways Platform, and then use the top menu bar to go to the Servers tab. If you haven't started any servers yet, a screen similar to the one below will appear; click the Launch button to start your first server.
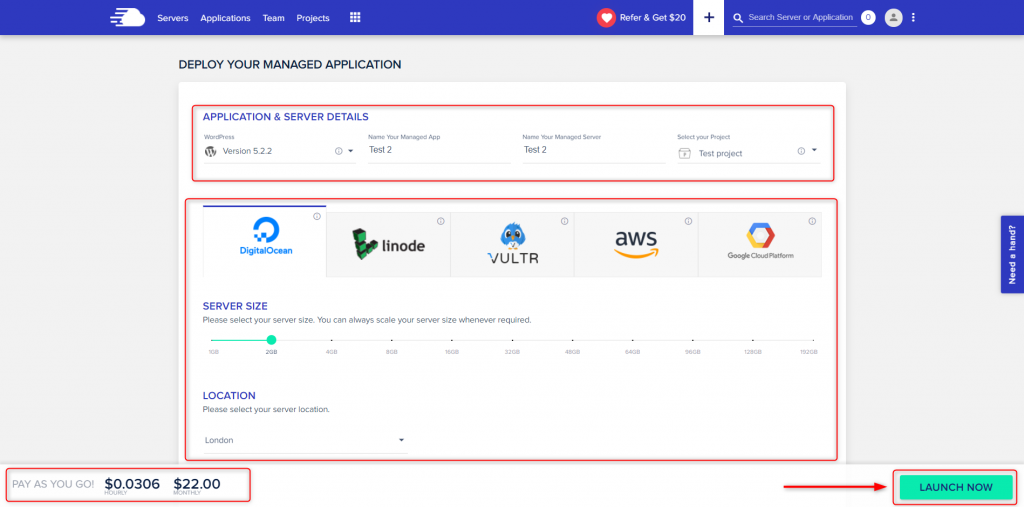
Then add your desired application, cloud provider, and server size based on your requirements.
By hitting the www button on the target server after the installation is complete, you may view your new application.
Create Amazing Websites
With the best free page builder Elementor
Start Now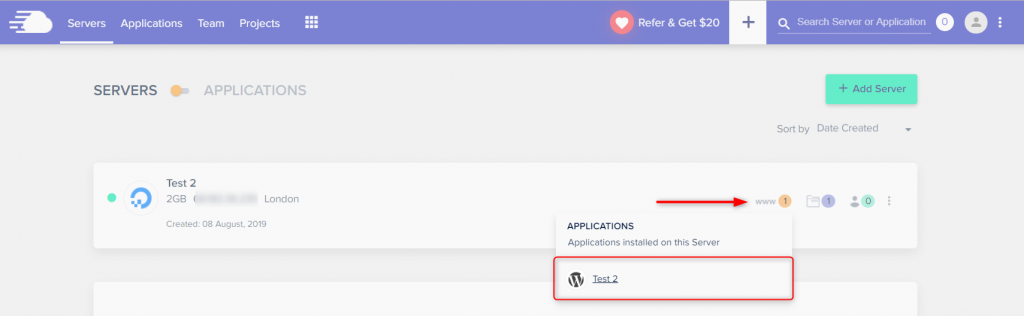
WordPress Login
Type in your login information and click the login button. On the Cloudways Platform, you can find your application's login information and other information.

Network Settings
Select Network Setup from the Tool menu. Click "turn off your plugins" (in the warning message as seen below).

Disabling All the Plugins
Choose "Plugins," then "Deactivate," and click "Apply."

Now, all of the plugins have been deactivated.

Deactivate all installed plugins when setting up a WordPress Multisite network, which is also what WordPress recommends. Once you've made sure that the WordPress Multisite network is up and running, you can start activating the plugins you want to use with the multisite network.
Creating Sub-domains
Choose the option that best fits your needs. For us, that is sub-domains.
Wp-config and .htaccess Settings
Click on Network Setup under Tools. Change the.htaccess and wp-config.php files as shown in the next picture.

Adding Sub-domain (WordPress Dashboard)
Click on Network Admin in My Sites. Click on Sites and then add a new site like site1.mydomain.com, which is what we did.
You can add as many sub-domains as you need. In our case, we added two sub-domains, called site1 and site2.


Insert the Primary Domains (Cloudways Platform)
Go to the part of Cloudways Platform called "Application Management" and click on "Domain Management":
Add the Domain Name you want, like cloudways.icu in our case, and click Save Changes. Add all of your subdomains to the Additional Domains option. In our case, this is support. Click the Save Changes button. Then, go to your domain registrar and add an A Record for each of your subdomains.

Wrapping Up
WordPress Multisite can be installed on any hosting platform and is a fantastic solution for managing several WordPress sites from a single dashboard. Again, with Cloudways, you will be able to deliver a top-tier server experience to your visitors. I hope this tutorial will come to your aid, and keep following codewatchers for more tutorials like this.


