
Thinking about using DigitalOcean to host your WordPress site? Well, you've got a decision to make – do you want to handle everything on your own or let someone else take care of it? Don't worry if this sounds confusing; we're here to explain!
DigitalOcean is a really popular company for hosting things on the internet. They've got these virtual private servers they call 'droplets,' which are like tiny chunks of a computer that you can use to put your website on the web. And then there's WordPress, a fancy tool for making all sorts of websites, whether they're big or small.
Now, here's the big question: What's the difference between doing everything yourself and having someone help you out?
When you go with the DIY route, you're the boss. You control everything about your website, but that also means you're in charge of making sure it's safe, works well, and all that techie stuff. On the other hand, if you choose to have some help, DigitalOcean takes care of those tricky things for you. This way, you can spend more time doing other important stuff.
Create Amazing Websites
With the best free page builder Elementor
Start NowReady to begin? Let's roll!
What Is DigitalOcean Cloud Hosting?
DigitalOcean serves as a cloud hosting provider headquartered in New York City. It boasts 15 data center locations spread across 9 regions globally, giving you the advantage of placing your server in proximity to your target audience for top-notch performance.
Their service ensures smooth connectivity, enabling effortless deployment and expansion of multiple web applications, all while avoiding any slowdowns. They provide virtual private servers named 'droplets,' which operate on the Linux system. The best part is the affordability factor – you can initiate a basic droplet for just $4.00.
If you're an individual or a business with critical hosting requirements, opting for a cheap and unreliable web hosting provider isn't a viable solution. What you truly need is the dependability offered by DigitalOcean. This ensures that your dedicated efforts don't go down the drain and offers you room for limitless growth.
For added convenience, consider trying out Cloudways. It takes care of your DigitalOcean servers and simplifies the process of deploying, managing, and expanding web applications. Cloudways provides a user-friendly interface that streamlines the setup and management of your server.
When you combine the capabilities of DigitalOcean with the user-friendly nature of Cloudways, you can create an exceptional WordPress experience. Your website's performance will excel, and its growth potential will be unhindered. Now, let's proceed to swiftly compare the distinctions between unmanaged and managed hosting!
Why Use DigitalOcean With Cloudways?
DigitalOcean cloud hosting provides excellent services, but it requires you to set up, handle, and secure your own cloud servers. It's perfect if you're skilled in this area, but if you lack the necessary technical know-how, you might need to hire a managed service provider to take care of these tasks for you.
On the other hand, Cloudways offers a managed cloud hosting solution that takes care of server management and ensures top-notch speed for hosting WordPress on a cloud server. There are several reasons why you might consider combining DigitalOcean with Cloudways:
- Simple Launch: You can easily initiate a DigitalOcean droplet, set up your preferred PHP stack, and deploy your application with just a few simple steps.
- Cost-Effective: Cloudways provides an affordable option for hosting your PHP applications using DigitalOcean.
- Scalable Infrastructure: Experience a managed hosting solution that's easily scalable, allowing you to concentrate on business growth rather than the complexities of server scaling.
- Optimized Performance: Within minutes, you can have a DigitalOcean server up and running with a pre-installed stack that includes Nginx, Apache, and Memcached, as well as application-level caching such as Varnish and Redis.
- Round-the-Clock Support: Cloudways offers 24/7 chat and ticket support, along with an extensive knowledge base of frequently asked questions, ensuring assistance whenever you require it.
Step by Step To Install WordPress on DigitalOcean
Installing WordPress on DigitalOcean is the best option because it is far less expensive to run.
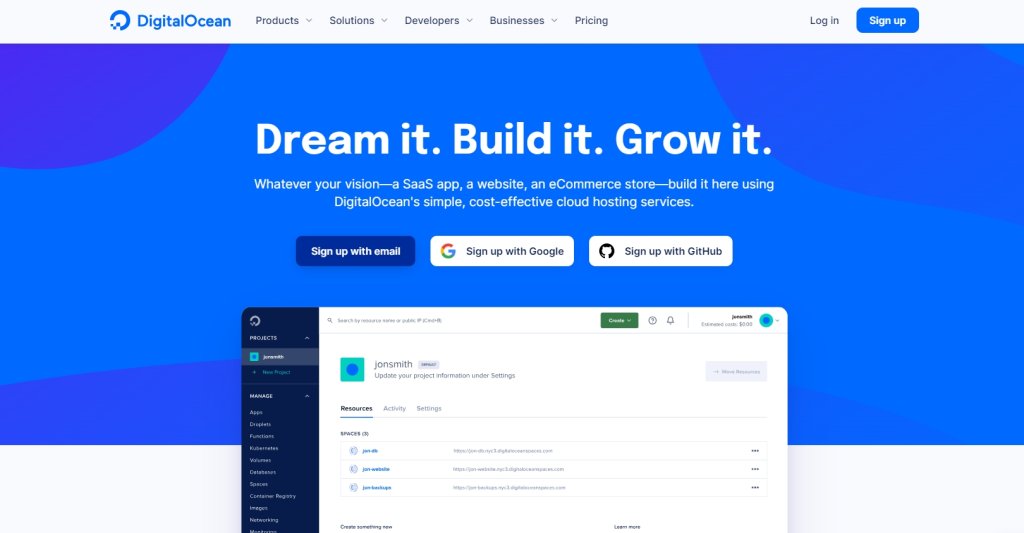
Sign in to Digital Ocean
Go to the official website of Digital Ocean and sign in.
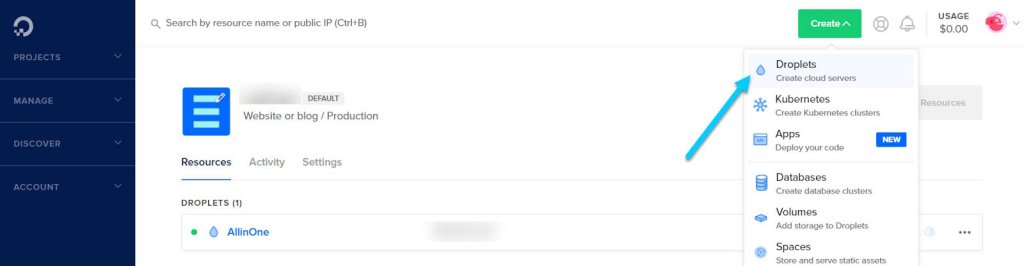
Create a Droplet
The next step is to make a droplet. A droplet is a fresh Linux-based virtual machine, similar to renting a server or purchasing a plan from a hosting provider.
A droplet is easy to create. Move your mouse pointer to the Create > menu and select Droplets.
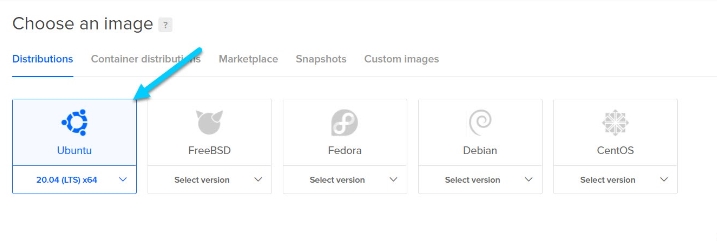
Select Image
The following step is to select an image suggested by the developer. aaPanel endorses CentOS, but Red Hat killed it after IBM bought Red Hat for $34 billion. Choose Ubuntu 20.04 LTS, which offers five years of maintenance updates until April 2025.
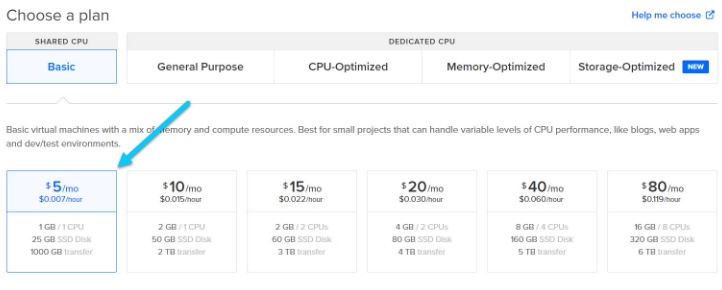
Choose a plan
You must now select a strategy.
It depends on the website you're hosting because each website has its own theme, plugins, and widgets.
In general, you can easily host 5 WordPress websites on DigitalOcean's $5 droplet if the websites receive consistent traffic.
For the purposes of this tutorial, I'll use the $5 plan.
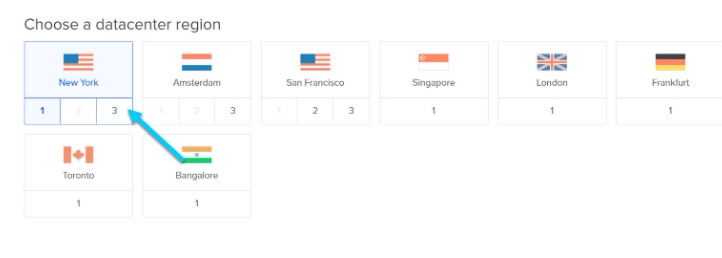
Choosing a Data Center
It is best to select the data center that is closest to your users. For example, if the majority of your users are from New York, you should host your website on a New York-based server.
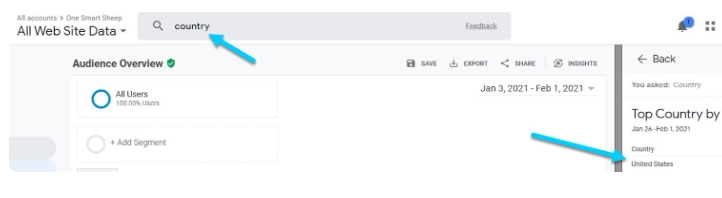
Please investigate the origins of your users. Utilize Google Analytics data about your users' locations, as well as Google Maps, to determine the distance between your city and the Digital Ocean data facility.

How can you locate it in Google Analytics? Simply type the term country into the search bar, and it will appear in the Analytics Intelligence window.
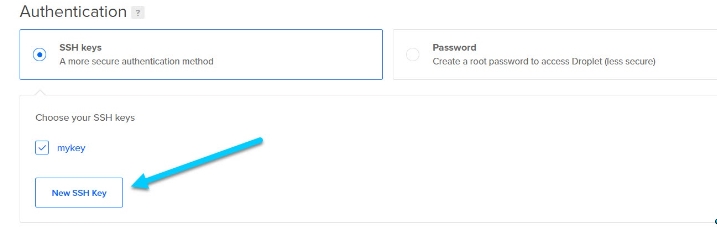
Authentication
For beginners, this could be the most difficult stage. First, enable Monitoring (optional), which will notify you if anything goes wrong.
Second, choose the SSH keys. If you want to skip this step, create a password and proceed to the next.
If you wish to improve the security of your server, you can do so by leveraging SSH keys.

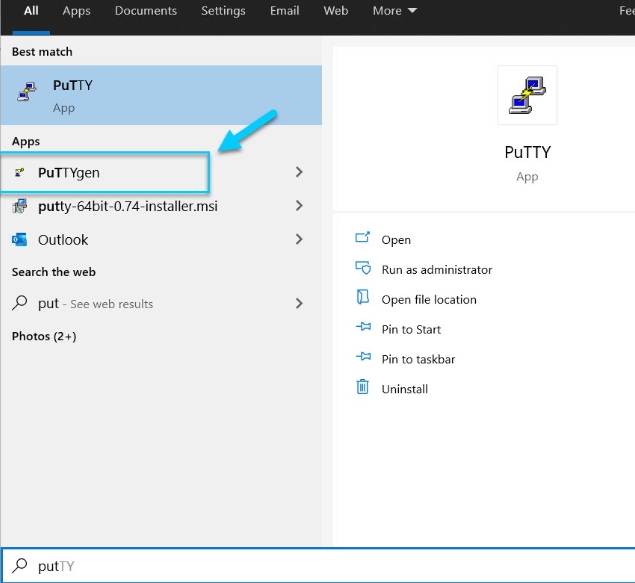
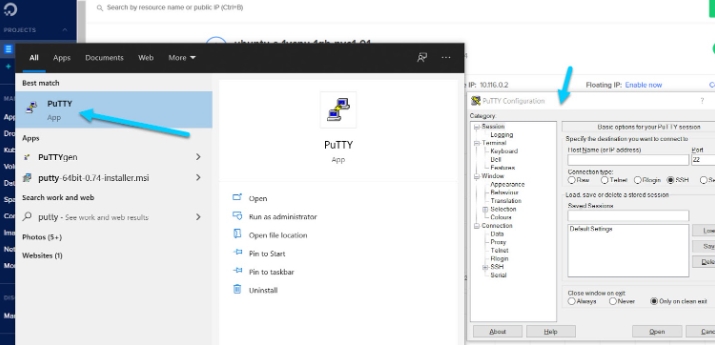
Download PuTTY – a basic freeware for Windows users — to generate an SSH key.
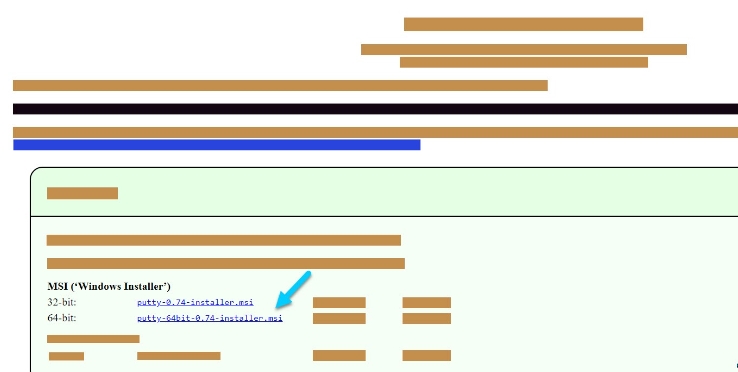
Download it now. Set it up. Open it up. Remember to use PuTTYgen rather than PuTTY.
It will display a simple interface.
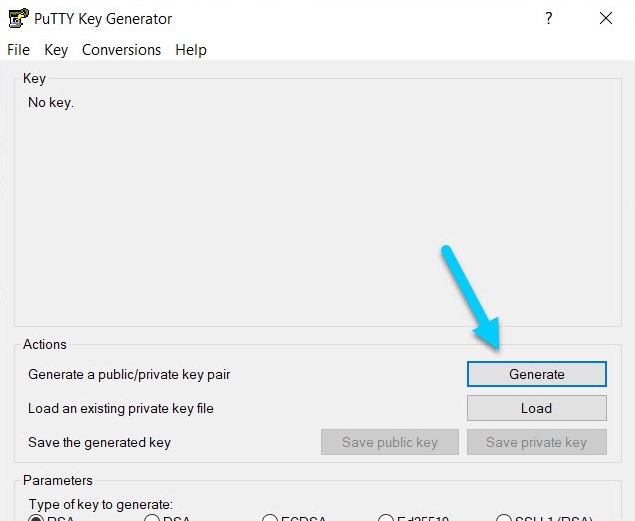
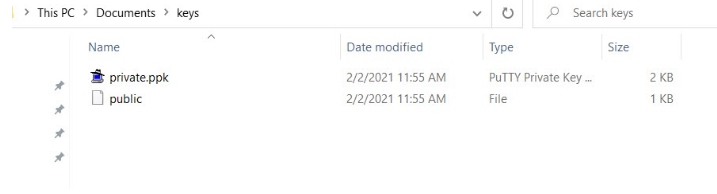
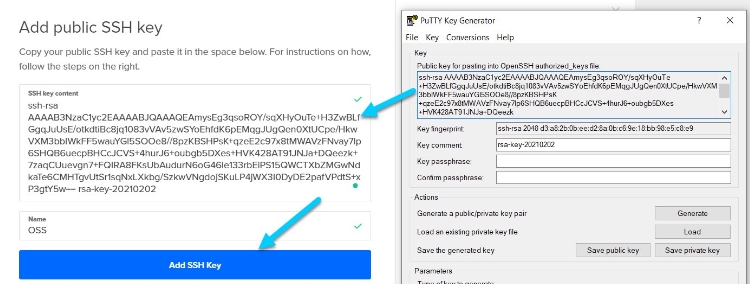
When you press the create button, move your mouse courses to create the key faster. When finished, save both the public and private keys to your local system.
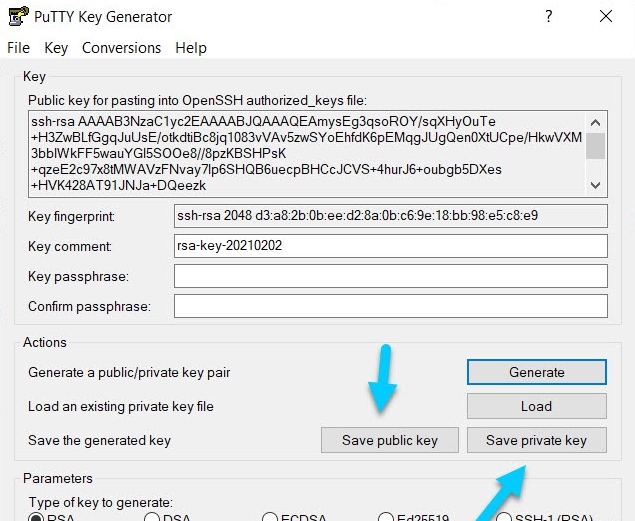
Both saved keys will be displayed as shown in the screenshot below:
Return to Digital Ocean and select New SSH Key.
Copy and paste the entire code from PuTTY Key Generator into the public SSH key box. Now, select Add SSH Key.
Add Backups
You can select a hostname and a VPS name in this step. You can also include a tag. Both of these steps are optional.
You may also backup your VPS once a week and keep it for a month with Digital Ocean, but it comes at a cost of 20% of your total plan price.
If you are on a tight budget, you can skip taking backups because we will utilize the Google Drive Backup tool later in this post for free.

Installing aaPanel
You will need some patience to install aaPanel.
The droplet will be available in a few seconds.

If you're using Windows, launch PuTTY. You can use your default terminal if you're a Mac or Linux user.
So copy the IPv4 address and put it into PuTTY's HostName.
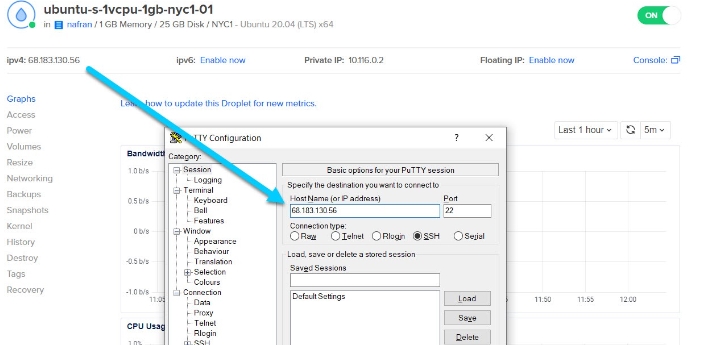
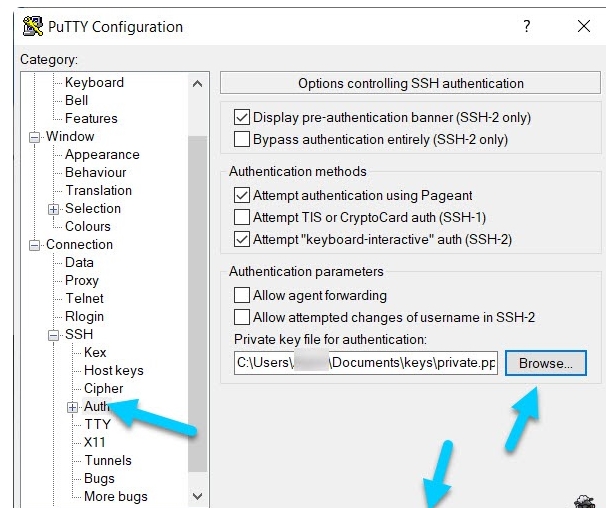
We must enter the SSH key that we generated.
Navigate to Auth and look for the private key. Click the Open button.
It displays an alarm message.
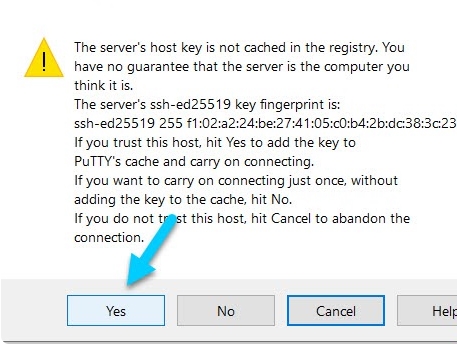
Now type root, and it will successfully enter the terminal, as shown below:

Now copy the following line:
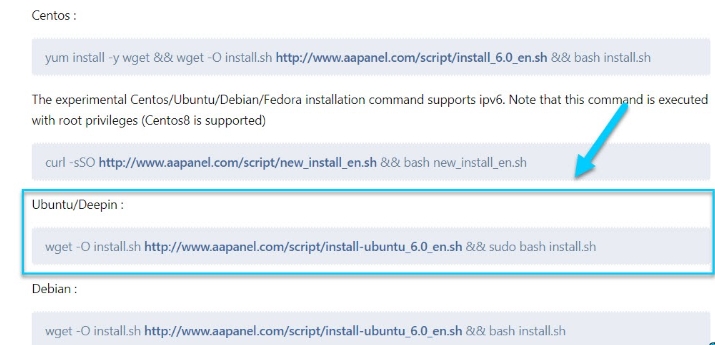
Now copy and paste the Ubuntu line into Putty.
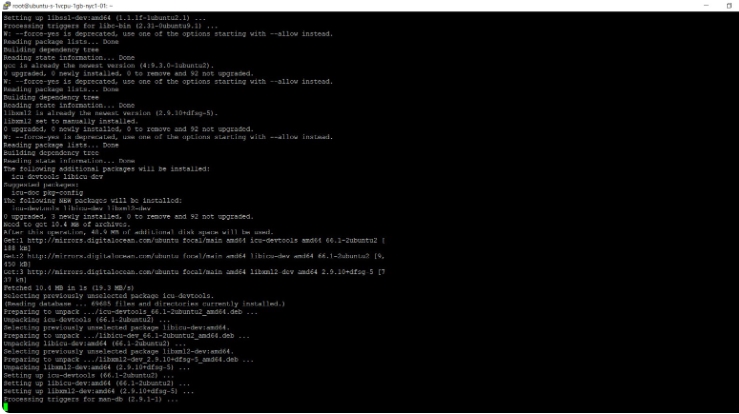
Now it will ask your permission to install aaPanel to the /www directory and enable the SSL. Response with "yes".
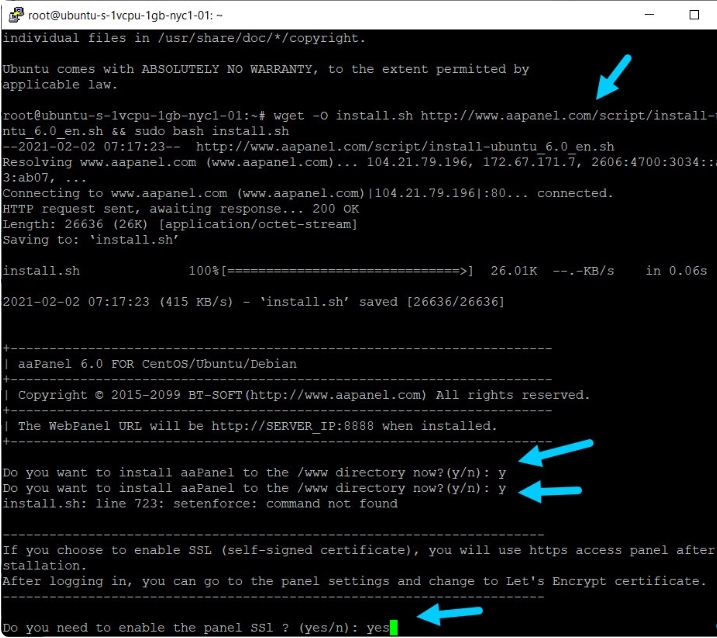
It begins to download the panel. It could take anything from 5 to 10 minutes. Have some patience.
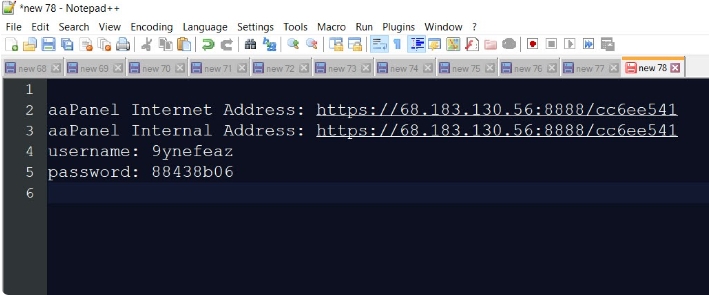
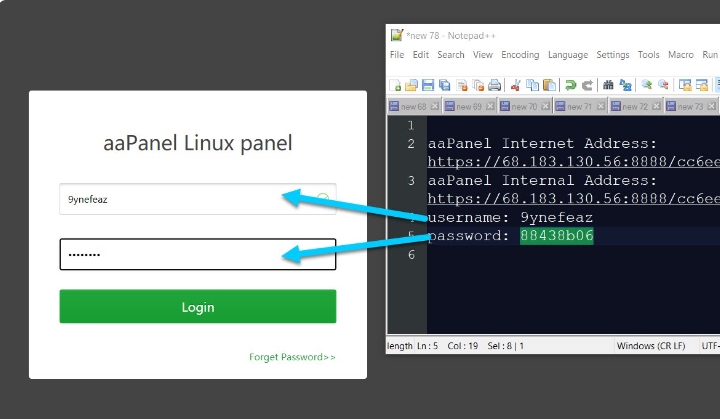
After installation, you will be given the aaPanel Internet Address, login, and password. Copy and paste these into a notepad.
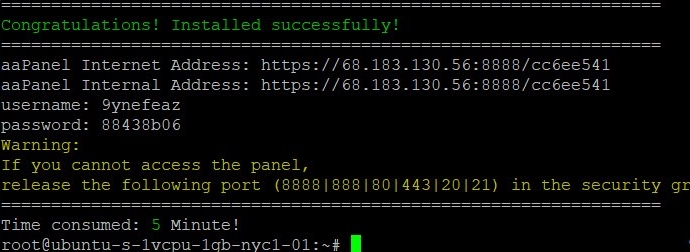
After installation, you will be given the aaPanel Internet Address, login, and password. Copy and paste these into a notepad.
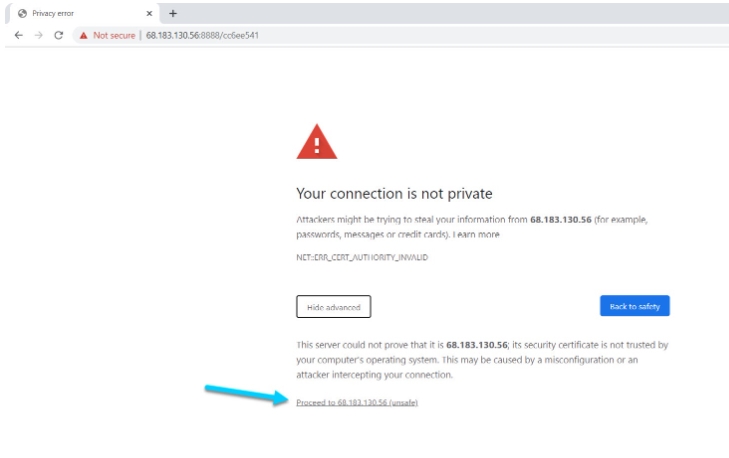
Enter the internet address into the browser, then go to Chrome's Advanced menu and select Proceed to IP (unsafe). It occurred after we implemented SSL on our server.
In the terminal, enter the username and password provided by aaPanel.
Installing Web Server and Apps
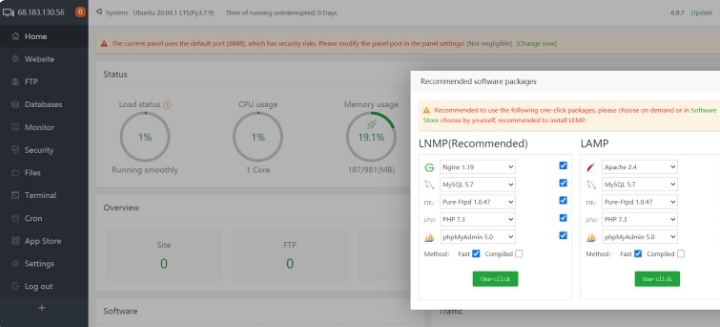
You are prompted to install the appropriate software packages as soon as you enter your username and password.
I don't install Apache or Nginx; instead, I prefer Litespeed for a variety of reasons, the most important of which is that it is faster and better than all other web servers. It handles requests and users more efficiently than Apache and Nginx.
That is why, with the exception of the Nginx web server, I install all of the software packages. Later, I'll install the OpenLiteSpeed webserver.
You have the option of selecting one of the following software packages:
- MySQL 5.7
- Pure-Ftpd version 1.0.047
- PHP 7.4
- PHPMyAdmin 5.0
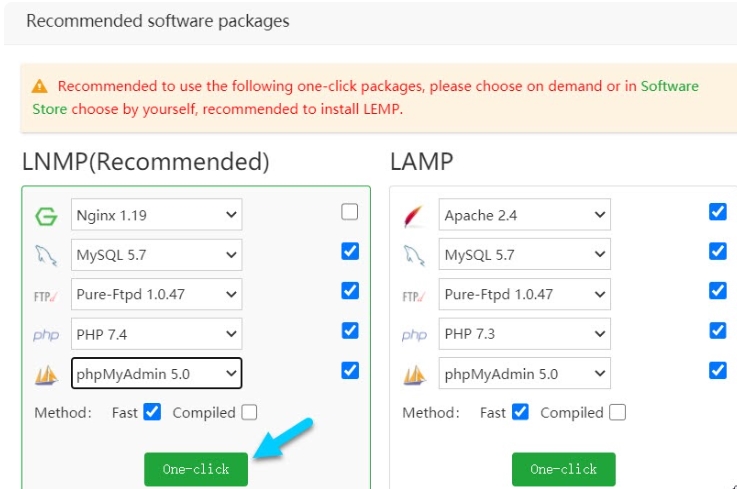
You can install any software; you can trust me and follow my instructions. Once you've made your decision, click One-click. You'll have to wait a few moments.
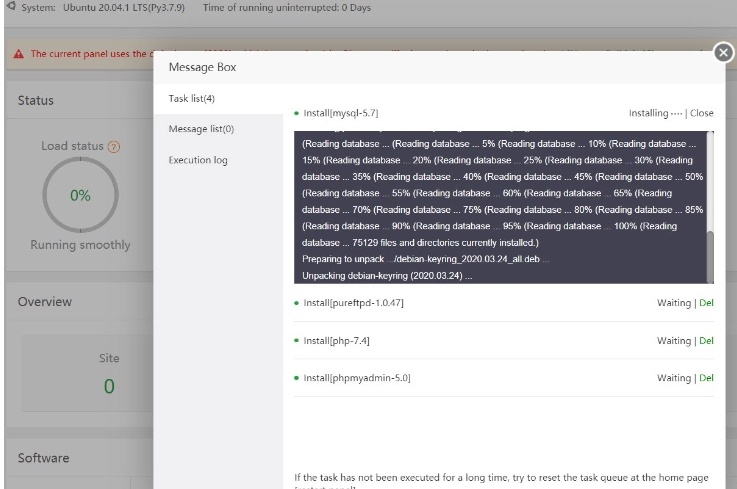
The notice will appear once all of the software packages have been installed.
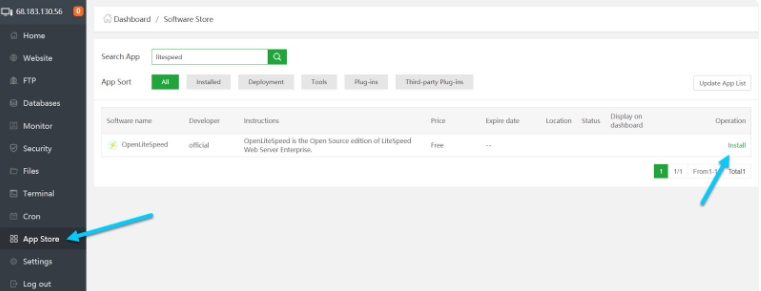
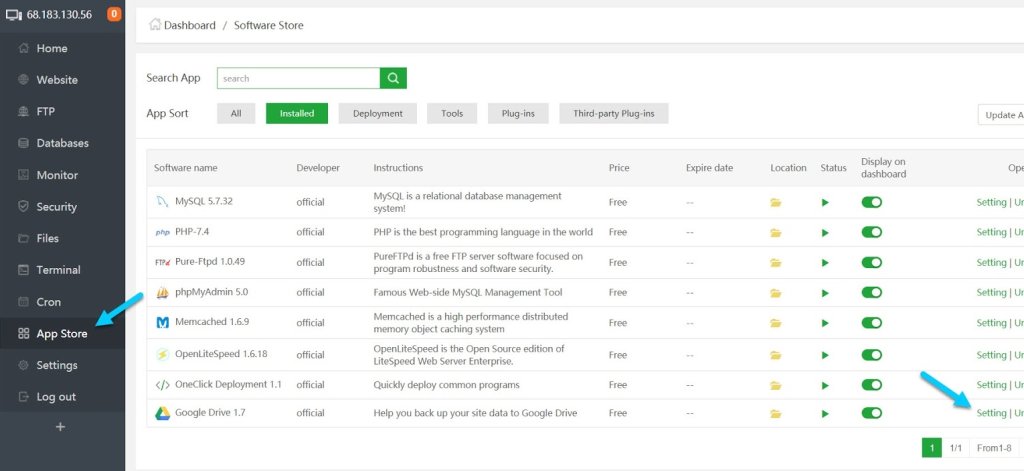
It's now time to set up the OpenLiteSpeed web server. To install it, go to the App Store, search for OpenLiteSpeed, and then install it.
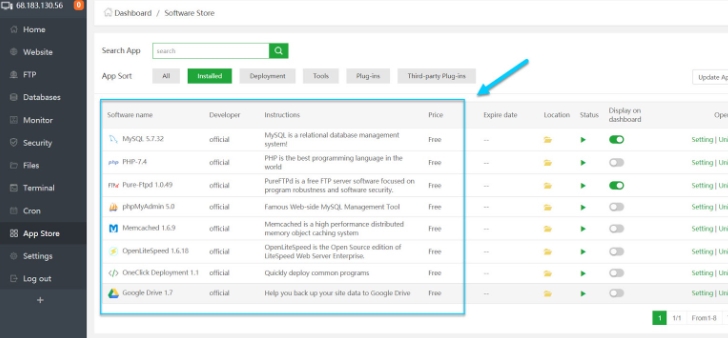
I recommend installing the following software packages:
- MySQL
- Pure-Ftp
- PHP
- PHPMyAdmin
- Memcached
- OneClick Deployment
- Google Drive
Installing WordPress
Let's get to the most interesting part of the tutorial: installing WordPress on a lightning-fast web server.
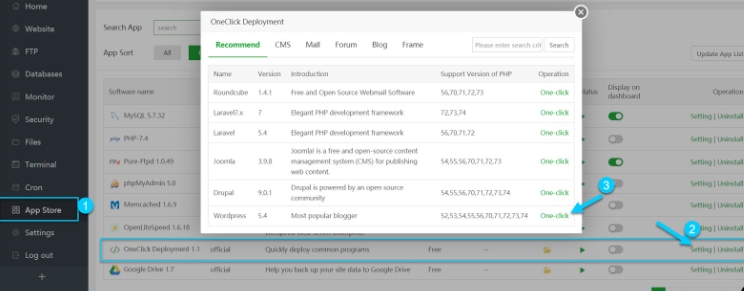
To install WordPress, go to the App Store, select OneClick Deployment, and then click Settings. Locate WordPress and select One-click.
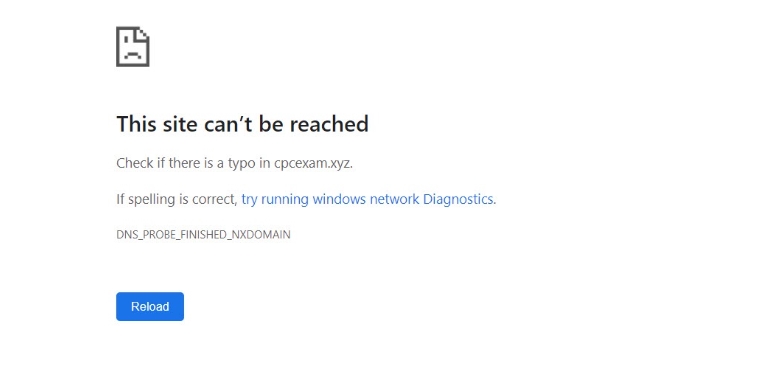
You must enter the domain name where you wish to install WordPress. As an example, consider the domain cpcexam.xyz.
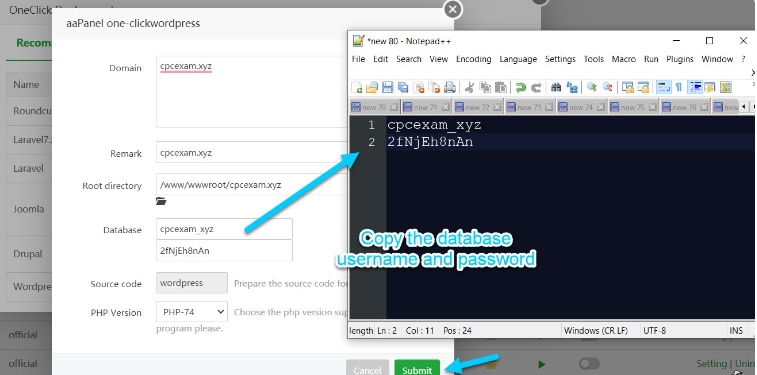
Remember to copy the Database login and password into a notepad.
When finished, click Submit.
It's not finished yet:D If you try to access your website, you will receive an error notice. Check that you've added the DigitalOcean nameservers to your domain registrar.
I recommend installing Cloudflare because it protects your server from prospective hackers by masking your server's IP address and preventing DDOS attacks.
Let's go ahead and add a website to Cloudflare.
After you've made your account, go ahead and select Add a site.
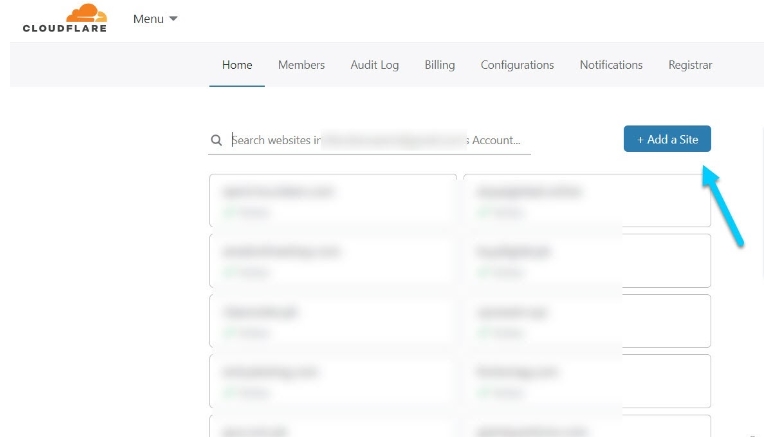
Enter your website address to join the Cloudflare network.
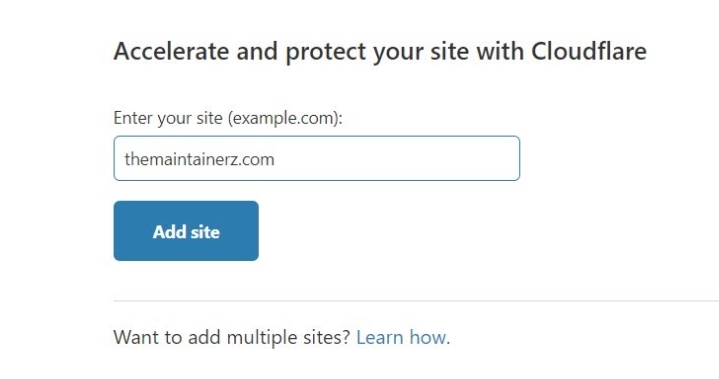
Choose the free plan.
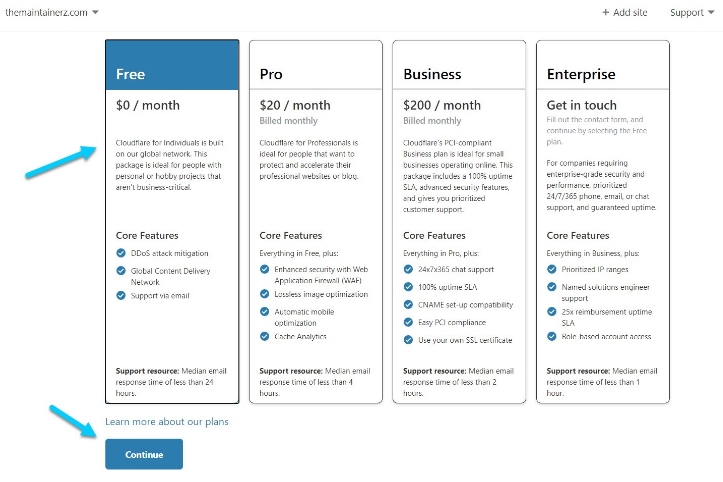
Continue by clicking the button.
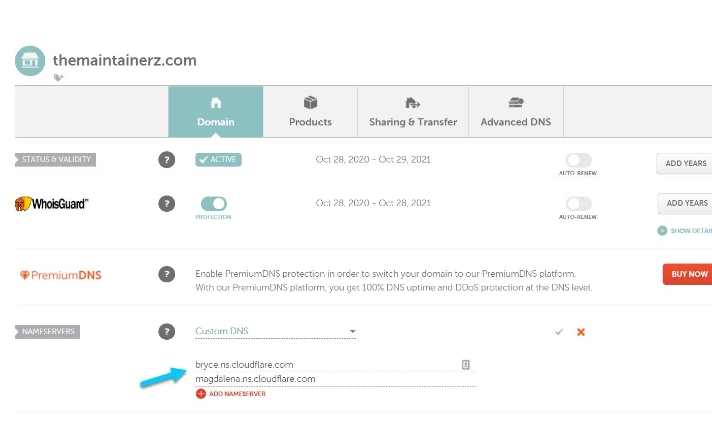
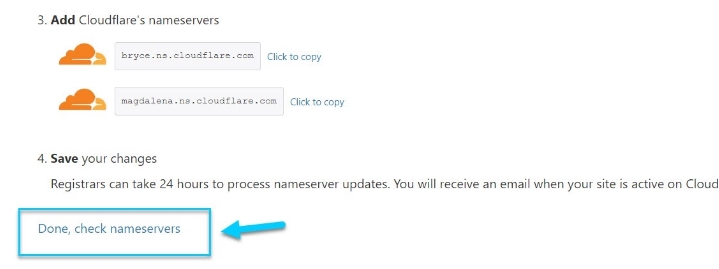
Copy the nameservers from Cloudflare.
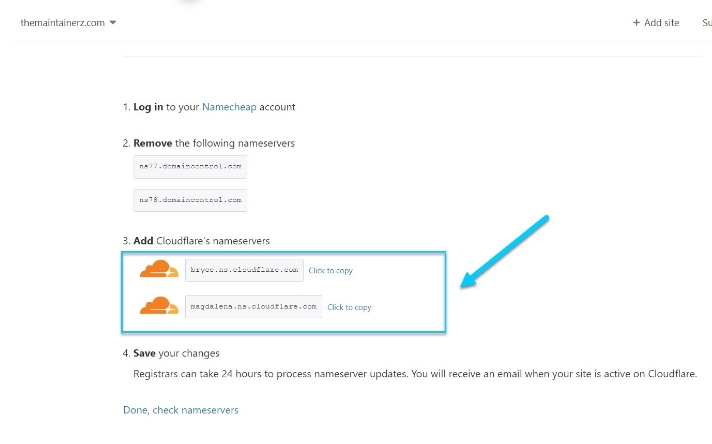
And then copy and paste into your domain registrar.
Return to Cloudflare and click Done, then check nameservers.
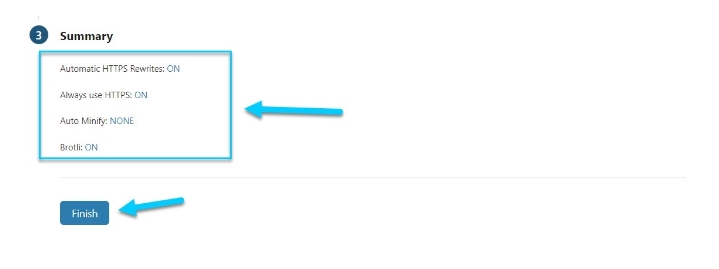
Finally, click Finish.
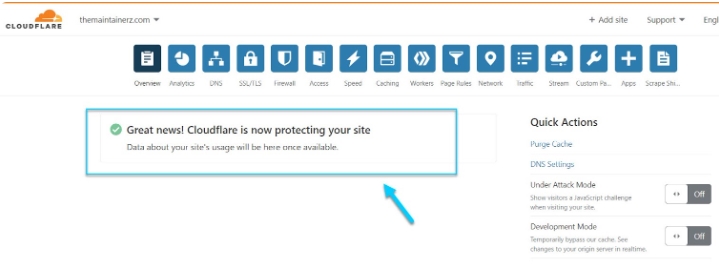
DNS propagation takes a few minutes to complete. It may also take an hour at times.
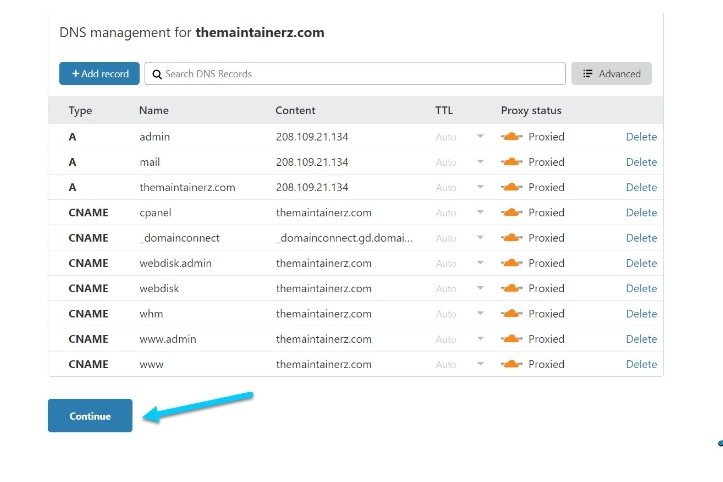
Once that is complete, navigate to the DNS section and export all of your records in case something goes wrong.
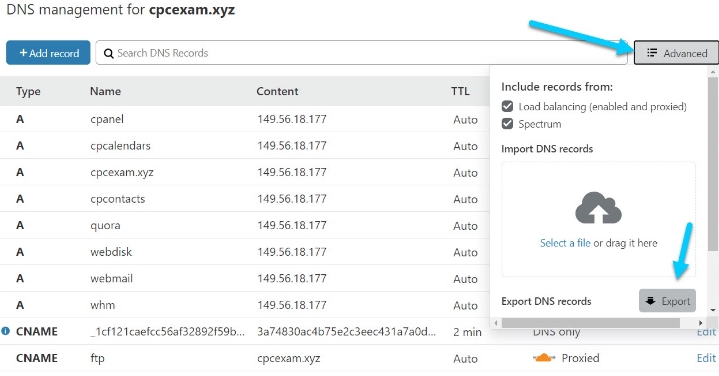
I'm going to clear up all of the DNS records.
I need to add the Digital Ocean's name servers now that I've added the website to Cloudflare.
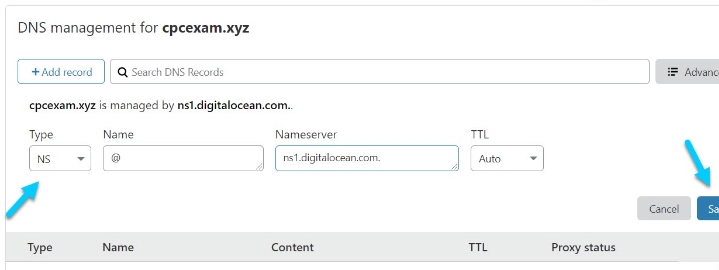
You must add three name servers in the following order:
The A Record must now be included.
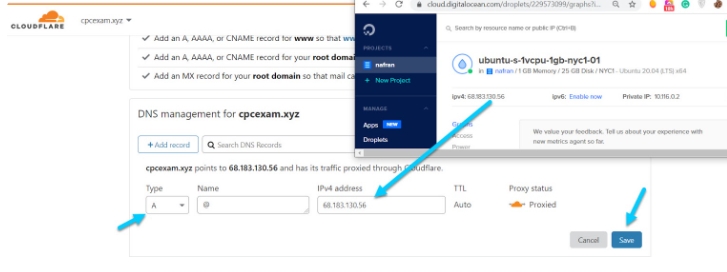
To summarize, you must add four records: There are three nameservers and one A Record.
It's time to set up the SSL. Return to aaPanel > Website and select the website for which you want to install SSL. WordPress will not function without SSL. You can, of course, install an SSL.
The email and API must be added to the SSL area of aaPanel.
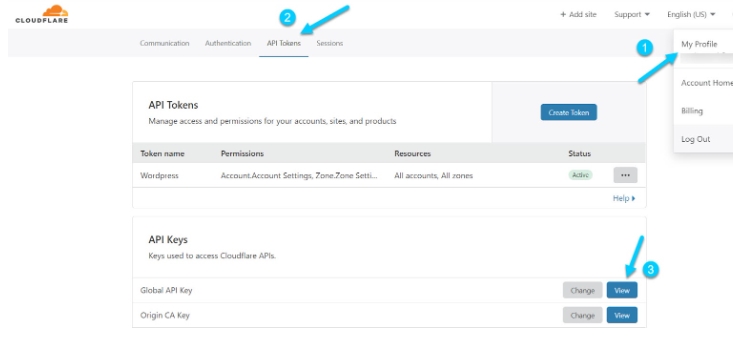
Enter the email address and the Global API Key in SSL > Let's Encrypt > DNS Verification > Cloudflare API.
Click My Profile > API Tokens > View of Global API Key to acquire the Global API.
As you can see, I configured the API.
The free SSL is being setup, and it will be automatically renewed for the rest of your life.
Your website may occasionally display an error message similar to this:
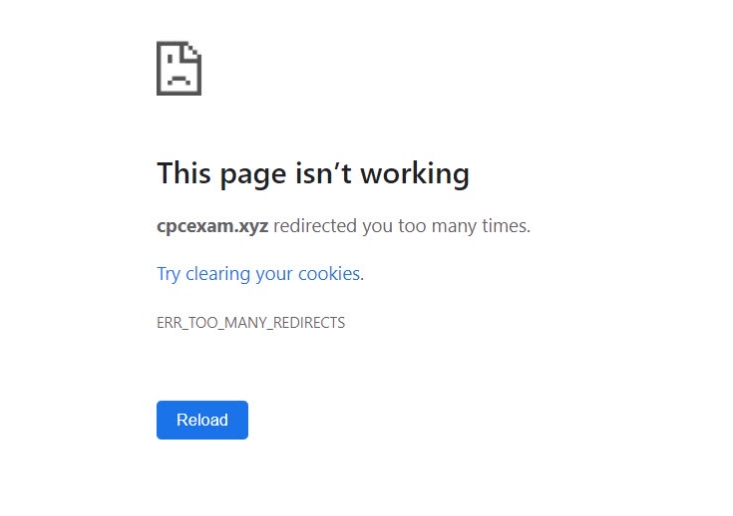
It occurs when the SSL is not set to full.
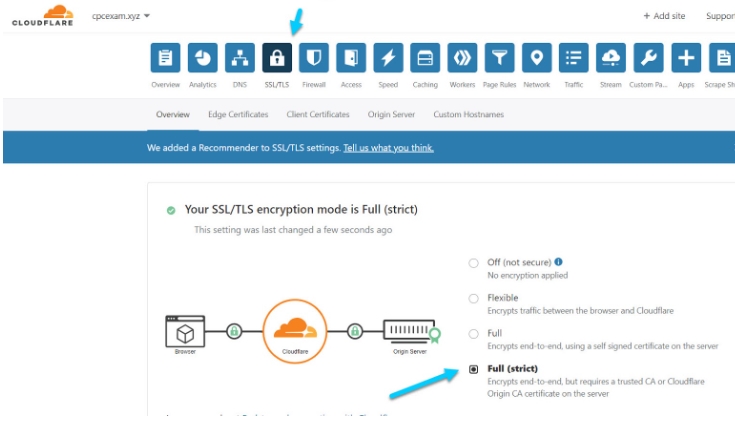
Refresh your website; you are now ready to install WordPress. Insert the Database name, Username, and Password from the One-Click Deployment WordPress installation.
Furthermore, when installing WordPress, choose a strong login and password. Congratulations! WordPress has been successfully installed.
Google Drive Daily Backups
You can use aaPanel's premium features for free. Regular backups of your website can be created on Google disk without taking up any space on your server storage disk.
If your server is hacked or your website exhibits unexpected behavior, having regular backups is beneficial.
Ascertain that Google Drive is installed on your host. Install Google Drive from the App Store.
Once installed and authenticated with Google Drive, go to Cron and select Backup site from Type of Task, then choose any website from the list or generate backups for all websites.

Make backups of your database; otherwise, your backups will be useless.
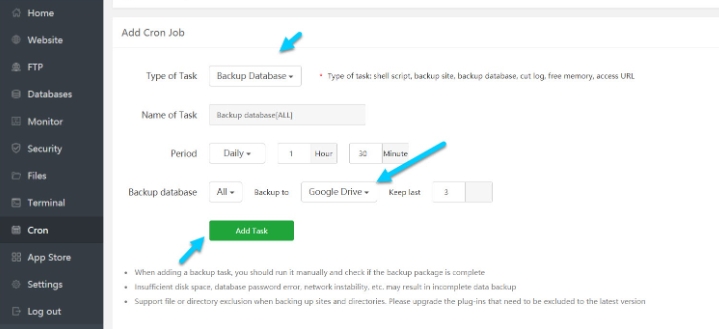
These backups are kept on Google Drive in the bt_backup folder.
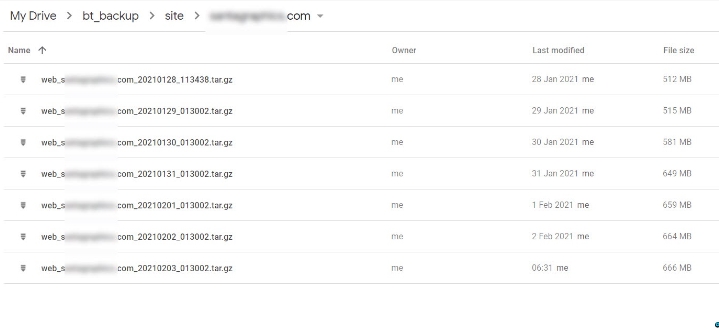
And that's all!
Final Thought
DigitalOcean has simplified and streamlined the process of installing WordPress, making it effortless and clear. It provides impressive speed, adaptability, and authority, along with convenient utilities.
An excellent substitute for cPanel, aaPanel, boasts remarkable attributes that elevate the security of your server and simplify and budget-friendly maintenance. You have the capacity to host numerous websites that could potentially incur significant expenses with other hosting providers.


