
Let's Encrypt is a certificate authority (CA) that is free, automated, and open. It is a project of the Internet Security Research Group (ISRG). It is intended to provide free SSL/TLS certificates in an easy manner in order to create a more secure and privacy-protecting web.
If you have Cloudflare Enterprise built into your app, you don't need to install a separate SSL certificate. You can add an extra level of security by installing the Let's Encrypt SSL certificate on your Cloudways origin server, but this is not necessary.
This article describes how to install the Let's Encrypt SSL certificate on your application. We also have an article that describes SSL and why you need one.
Why Let’s Encrypt SSL?
The following are the reasons why you should select the Let's Encrypt SSL Certificate.
Create Amazing Websites
With the best free page builder Elementor
Start Now- Let's Encrypt SSL Certificate is completely free.
- Because of its current security architecture and procedures, it is as secure as purchased certificates.
- It is simple and straightforward to install. There is no need to create additional accounts, no email validations, and no charges.
- SSL certificates are made, installed, and renewed automatically.
Let's Encrypt, on the other hand, imposes various constraints for its SSL/TLS certificates in order to avoid abuse. It only provides Domain Validation (DV) certificates, not Organization Validation (OV).
Install Let’s Encrypt SSL Certificate
Deploying a Let's Encrypt SSL Certificate using Cloudways Platform is a simple process, and the methods below will walk you through it step by step.
If you already have an SSL certificate configured on your website, installing another one will replace it because each application can only have one certificate.
Prerequisites: Do you utilize any Web Application Firewall (WAF) services for website security, such as Cloudflare, Sucuri, or others? If so, click on the service name you use, since there are a few procedures you must take.
Cloudflare: If you utilize Cloudflare, you must temporarily disable their security until the SSL certificate is installed, so proceed with caution if you are vulnerable to attacks. If you use WordPress, you can also install Bot Protection to defend your site from malicious and unwanted visits. Cloudflare is a popular reverse-proxy service. When you use their services, you replace your default nameservers with their nameservers, point DNS records to them, and then traffic is directed to your website via Cloudflare.
Please remember to clear the Cloudflare cache after the certificate has been successfully deployed.
Sucuri: If you use Sucuri, you must temporarily disable their protection by returning the DNS records to the server until the SSL certificate is installed. Please use caution if your website is vulnerable to attacks. If you use WordPress, you can also install Bot Protection to defend your site from malicious and unwanted visits. Sucuri is a popular reverse-proxy service. When you use their services, you alter your default nameservers, point DNS records to them, and then traffic is routed to your website via Sucuri.
You must additionally enable the "Forward Certificate Validation" setting in order for HTTPS provisioning to be successful. Contact Sucuri's help to accomplish this, and then apply the SSL Certificate.
Additional WAF Services: You must temporarily stop the WAF protection until the SSL certificate is installed, so proceed with caution if you are vulnerable to attacks. If you use WordPress, you can also install Bot Protection to defend your site from malicious and unwanted visits.
Step 1: Navigate to SSL Management
Enter your email address and password to access the Cloudways Platform. Select Servers from the top menu bar. Then, select the target server where your desired application is installed.

Now, click on www. and select your desired application.

Now, you will see the SSL certificate option under Application Management.

Step 2: Deploying SSL Certificate
Select Let's Encrypt from the SSL Management menu.

You now have two options for whether to cover a single domain or several domains with an SSL certificate.
- A single domain is one and only one domain, such as random.com.
- Additional domains and subdomains, such as random.com, www.random.com, support.random.com, and so on, are referred to as multiple domains, or simply wildcards, e.g., *.random.com.
First, provide your email address for Single Domain. Then, input the domain you want to use. After that, click Install Certificate.
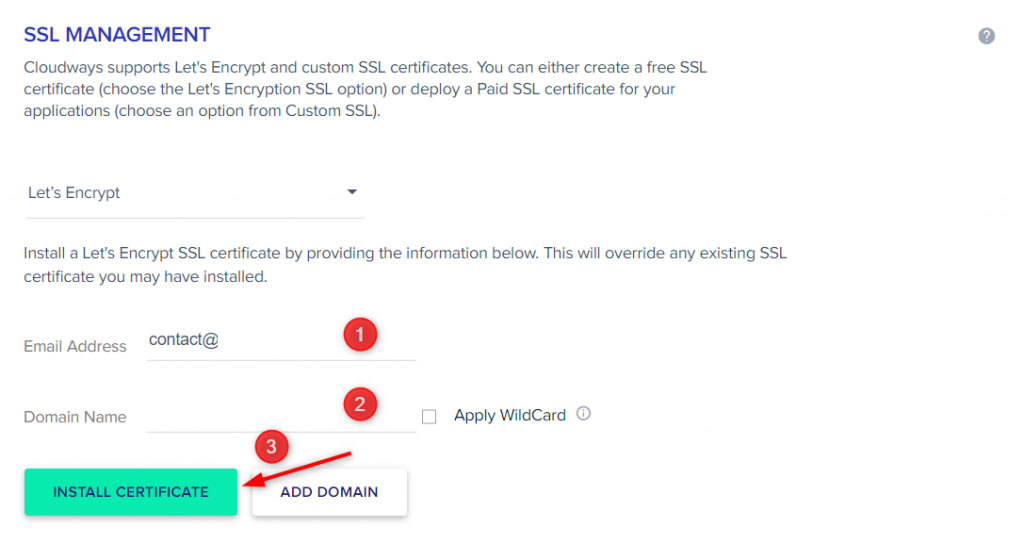
In a matter of minutes, your application will have a Free Let's Encrypt SSL Certificate installed. You may also be asked if you want to force HTTPS redirection.
For Multiple Domains, you have two options: Multi-domain (SAN) Certificate and Wildcard Certificate.
Subject Alternative Name (SAN) refers to the subject alternative name, and a Multi-domain (SAN) Certificate protects the root domain as well as numerous domains (extra domains and subdomains) with a single certificate. When installing the SSL certificate, you must list and disclose all of your domains.
A Wildcard Certificate allows you to secure the base domain as well as several subdomains with a single certificate rather than listing and declaring all of your subdomains. Because it supports infinite subdomains, the Wildcard Certificate is often preferable to the Multi-domain (SAN) Certificate. Furthermore, if you wish to add more subdomains in the future, you do not need to reload the SSL certificate. More information on the Wildcard SSL Certificate may be found here.
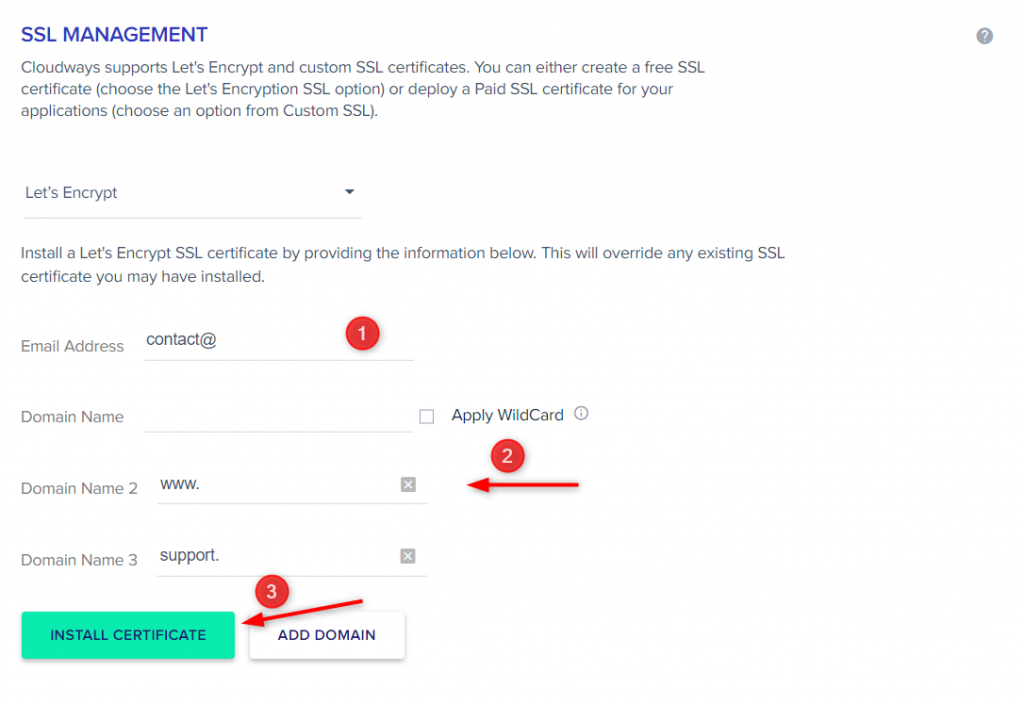
First, input your email address for the Multi-domain (SAN) Certificate. In Domain Name, enter your domain name. By choosing Add Domain, you may add more domains. After that, click Install Certificate.
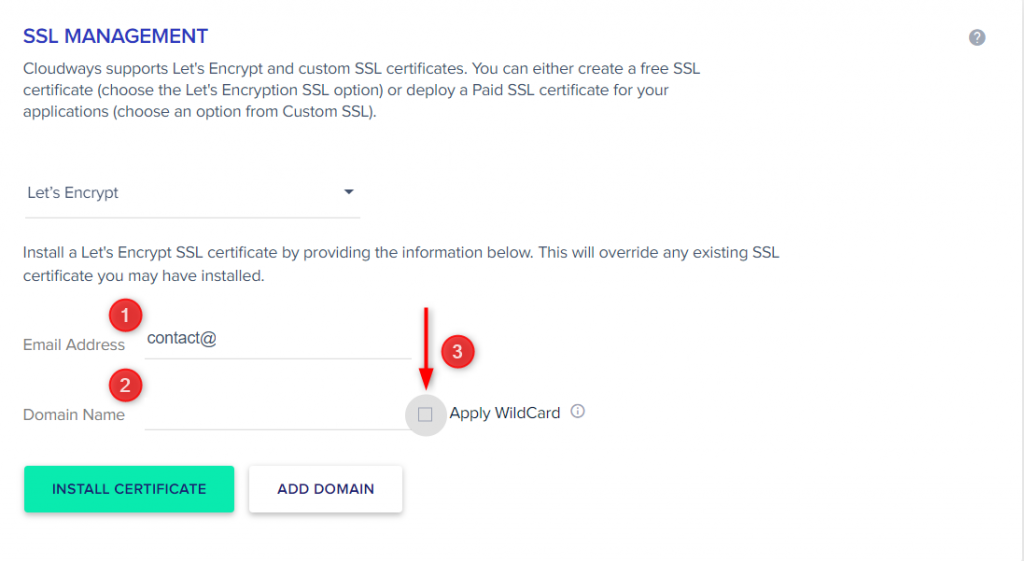
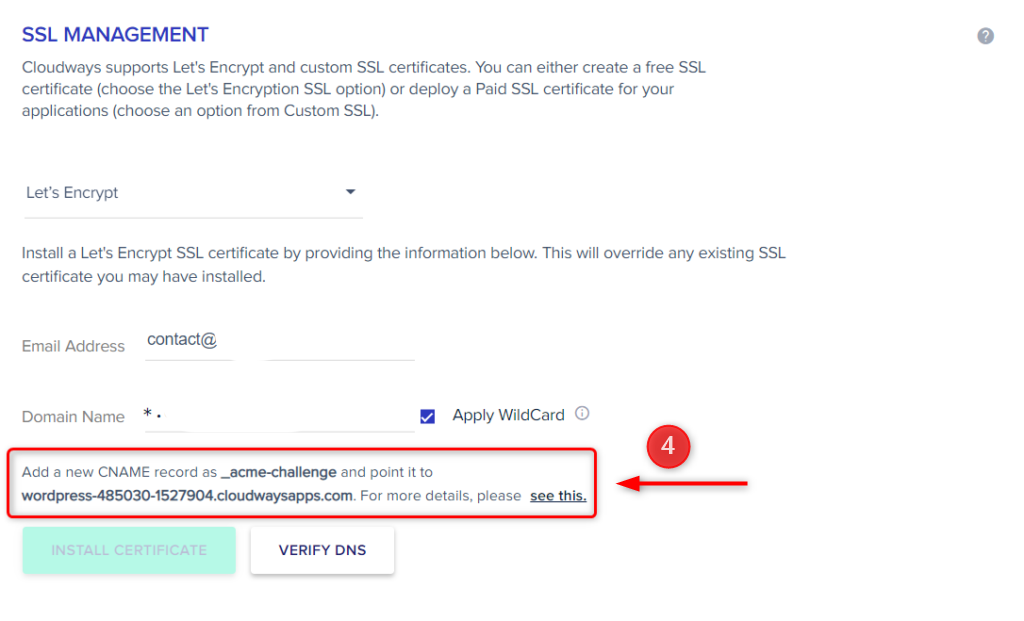
And, in order to receive a Wildcard Certificate, you must first submit your email address. In Domain Name, enter your base domain (without any prefixes, such as "www").
Apply the Wildcard now.
Wildcard Let's Encrypt DNS authentication is required for SSL certificates. Follow the steps below for detailed instructions on how to create a CNAME record for your domain in your DNS/Domain registrar panel.
Then, in your Domain/DNS provider panel, establish a CNAME record with the following information for the DNS authentication process.
- Record Type: CNAME
- Name/Host: _acme-challenge
- Value/Alias: The FQDN of your Cloudways' default Application (Fully Qualified Domain Name). It can be found on the same screen as seen in the image.
- TTL: ‘Time To Live’ is a propagation time. You have the option of using the default number of 600 seconds (or 10 minutes).
Once the CNAME record has been successfully propagated, click Verify DNS. You should receive a mail verifying this.
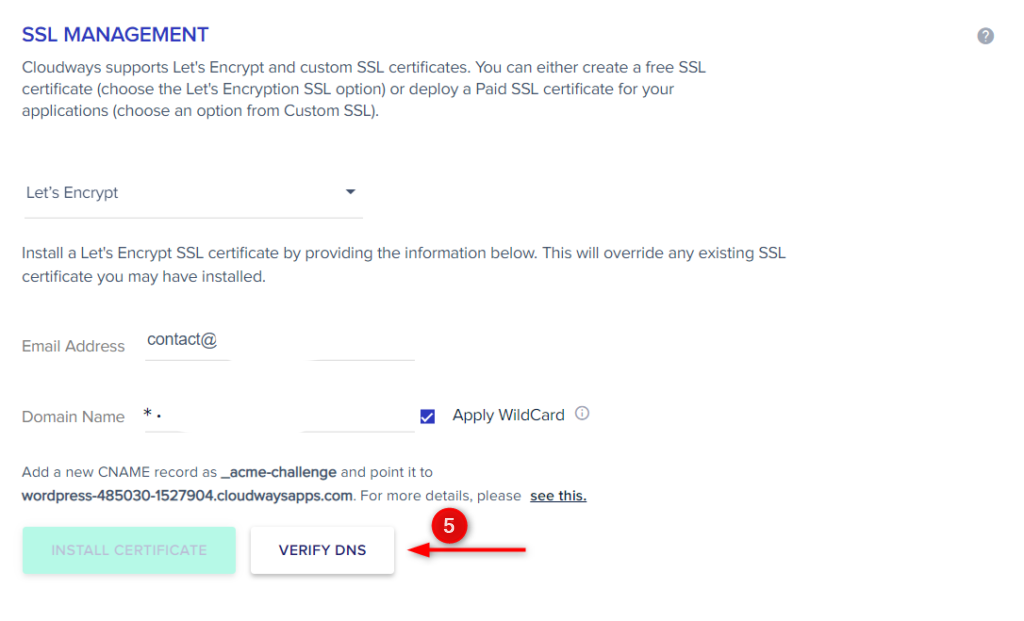
After verifying DNS, the INSTALL CERTIFICATE button will be available, and then click it.
Wrapping Up
Installing a Let's Encrypt SSL certificate on a Cloudways server may appear daunting at first, but it is not difficult to secure your website with an SSL certificate.
You should utilize SSL to improve the security of your website, especially since it is free to set up using Let's Encrypt. It can defend you from a wide range of hacking assaults and keep important information safe.
Aside from improving your website's security, an SSL certificate fosters confidence and increases your site's worth in search engines.
Aside from SSL encryption, remember to maintain your website up to date, protect your login id and password, and make regular backups.


