
Simplifying form completion with auto-populated fields can greatly improve the user experience on your WordPress site. Manually entering repetitive information like names, addresses, and phone numbers can be tedious for users. In this guide, we'll walk through the steps for adding auto-populate functionality to your WordPress forms. This allows fields to pre-fill with data when a user returns to your site, eliminating the need to re-type identical details.

Implementing this feature takes just a few configuration changes but the time savings and convenience for your users make it well worth the small effort. Let's get started on seamlessly integrating auto-populate fields into your WordPress forms along with the popular page builder- Elementor!
What is an Auto-Populate Form?
Auto-populate fields are a great way to simplify form completion for users on your WordPress site. When a field is set to auto-populate, it automatically fills in the content instead of requiring the user to manually enter it each time. For example, an address field might auto-populate with the user's address after they've entered it once, eliminating the need to retype it on subsequent forms.
The data that populates auto-populate fields can come from different sources:
Create Amazing Websites
With the best free page builder Elementor
Start Now- Information the user previously entered in other forms on your site
- Default values you specify
- Data passed through query strings in the URL
- Values from other fields on the same form
The benefit of auto-populating is convenience for your users. It streamlines form completion by removing repetitive tasks. This demonstrates awareness of the user experience and a desire to make their interactions as smooth as possible. Implementing auto-populate fields is relatively simple from a technical perspective too. The reward of happier users is well worth the small upfront effort.
Adding Auto-Populate Field in WordPress Form Using MetForm
MetForm's auto-populate field is a premium feature. It allows you to establish default configurations to properly populate forms. Showcase items in an enabled state for your visitors or customers with ease. By altering the URL, you can easily set default values to fields, speeding your form creation process like never before.
This feature can be used to auto-populate fields such as:
- Switch
- Image Select
- GDP Consent
- Checkbox
Auto-Populate Field for Switch
To make an auto-populate field for Switch, follow these steps:
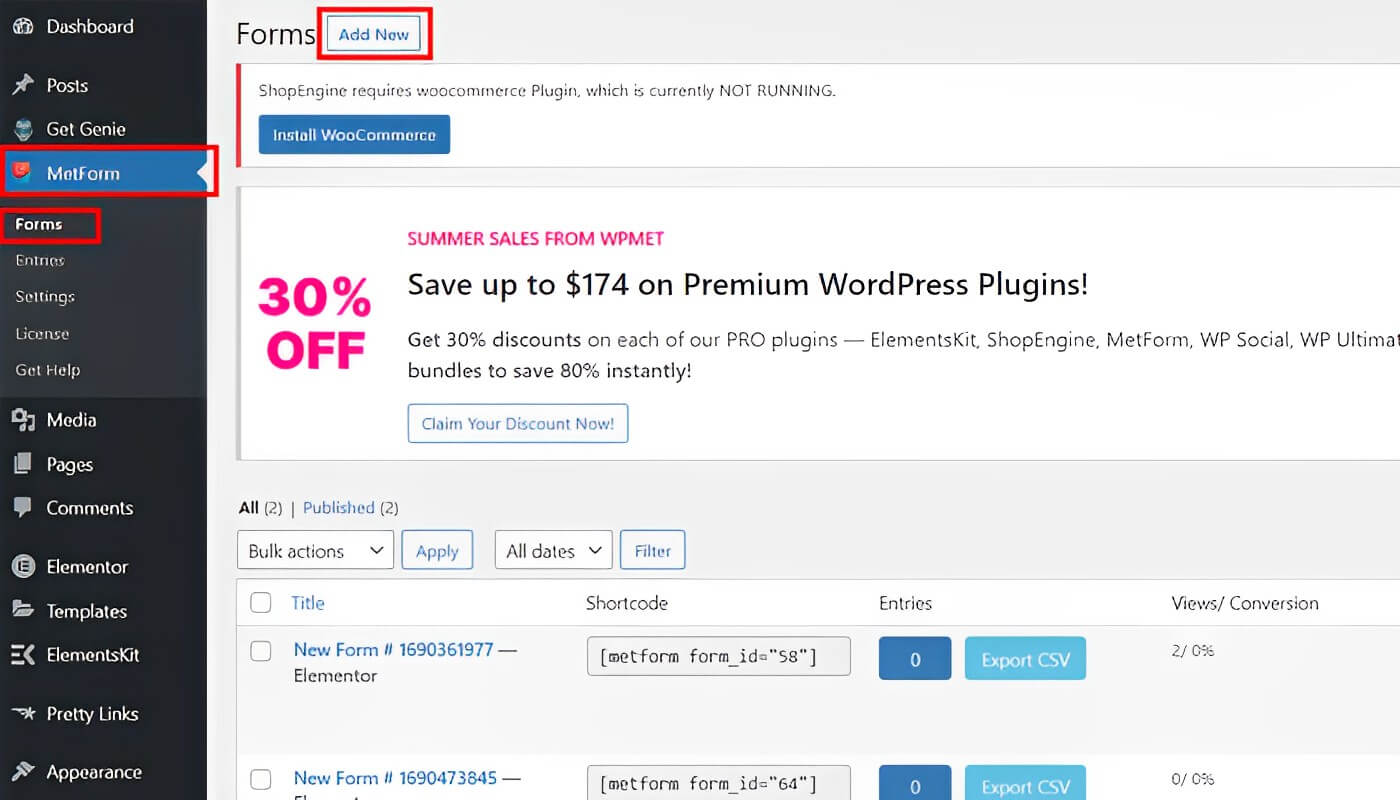
Navigate to your dashboard by opening your website. Select MetForm from the options. Select "Form" and then "Add New". You will be taken to the various forms.
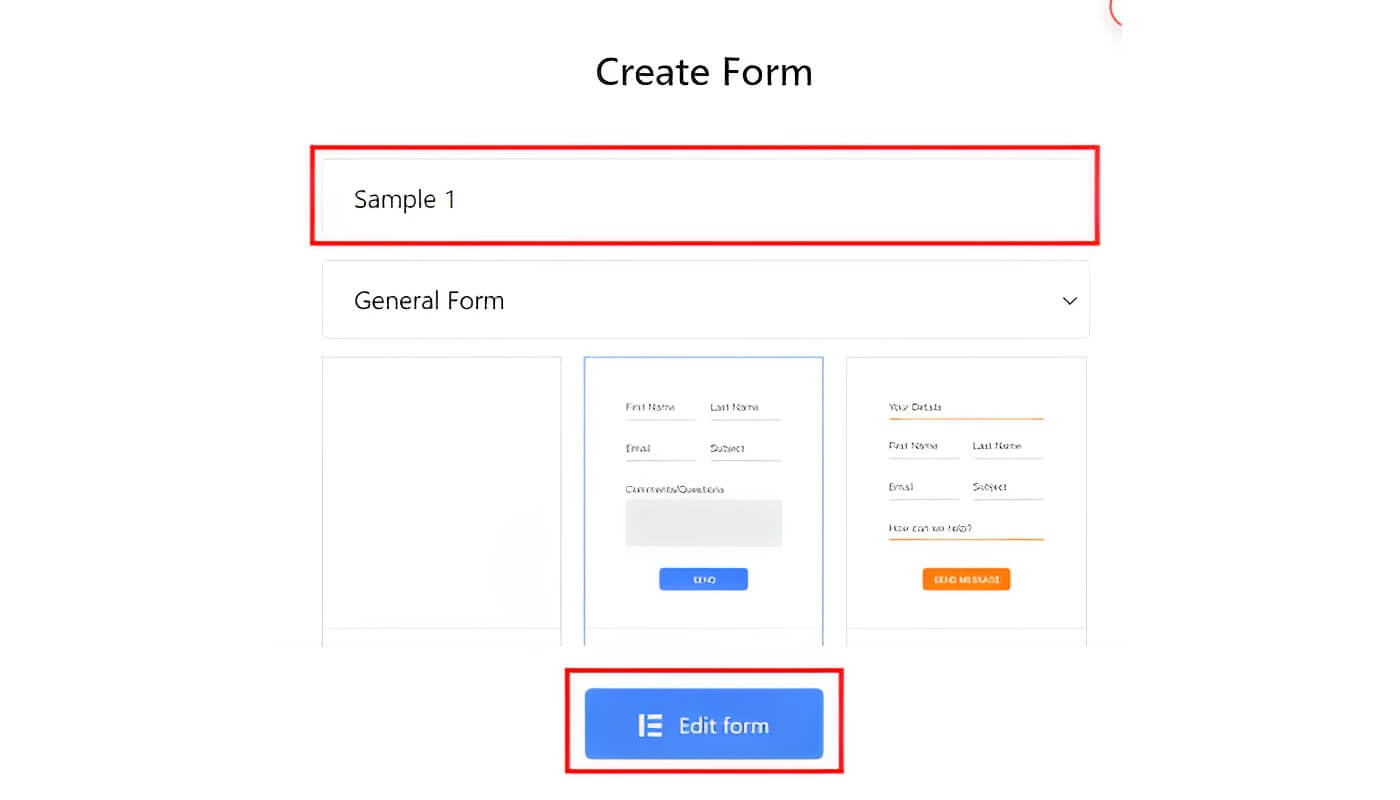
Enter your Form Name and choose your template (Note: if you wish to start from scratch, click the blank form). Click on "Edit Form" to access its settings.
Section (+) should be added. Look for the Switch widget and drag it. Navigate to "Settings" and Select "Get Value from URL?"
Go to "Content" and put the name for your switch field (for example, "switch") and "yes" in the "Active Text" area.
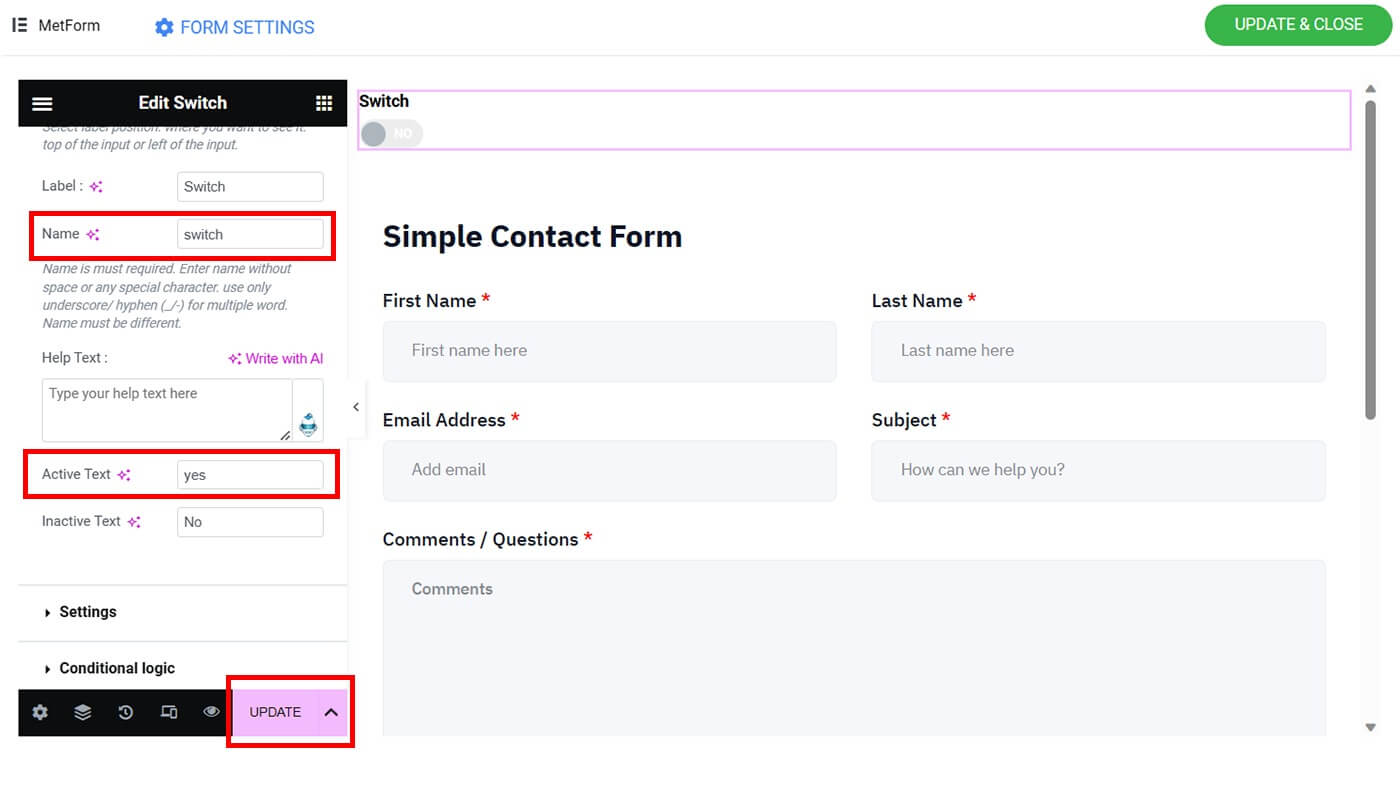
Select the "Update" option.
Auto-Populate Field for Image Select
Follow these steps to include the picture chosen in your auto-populate field:
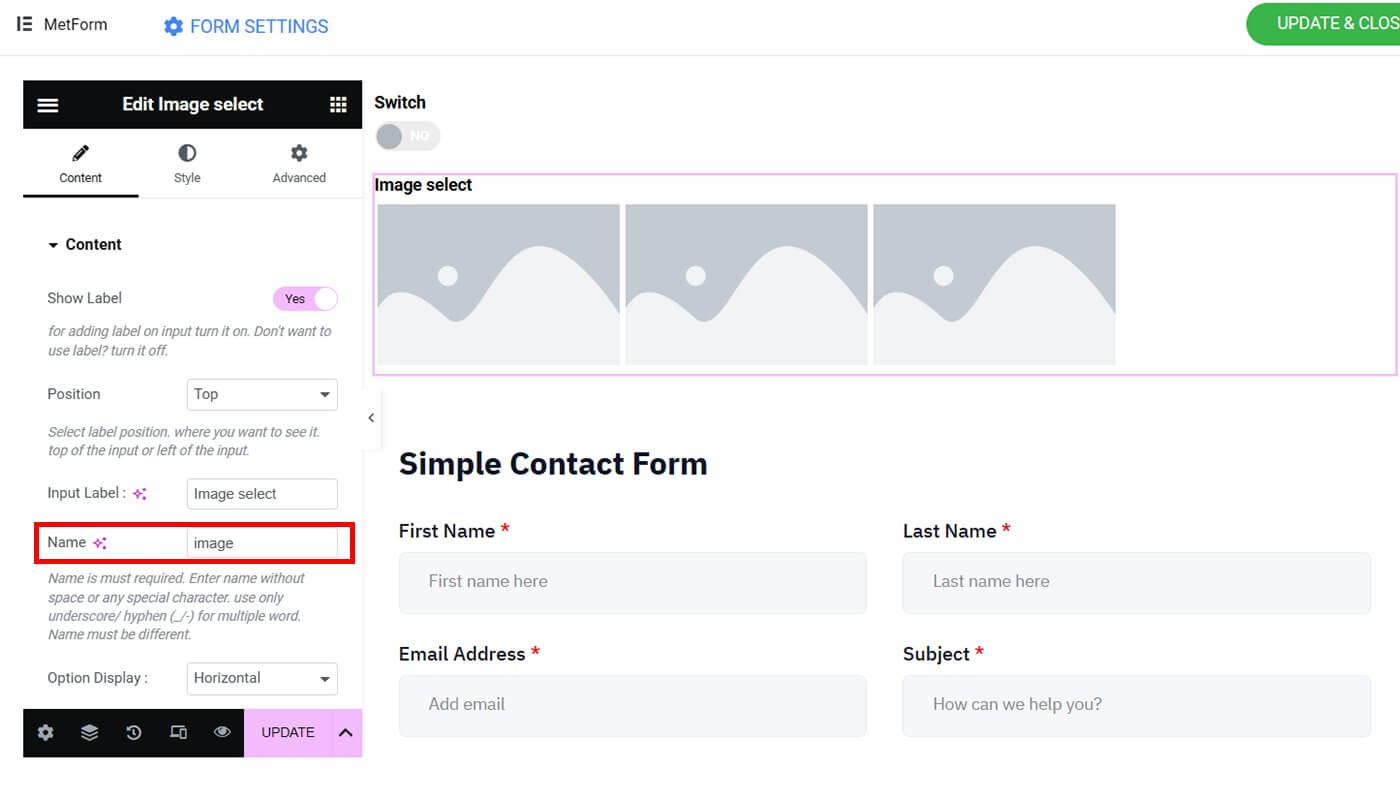
Section (+) should be added. Click on the three lines. Look for Image Select and drag it into place.
Navigate to "Settings" and enable "Get Value from URL?"
Go to "Content" and give your image choose field a name (for example, "image").
Under "Image Select Options," you'll discover several options for your picture selection.
Select the first item. Please upload your thumbnail. Under "Option Value," put the number for your image's sequence (ex. 1).
Step 5 should be repeated until all of your products are set up. Please keep in mind that you can add as many products as you wish.
Select the "Update" option.
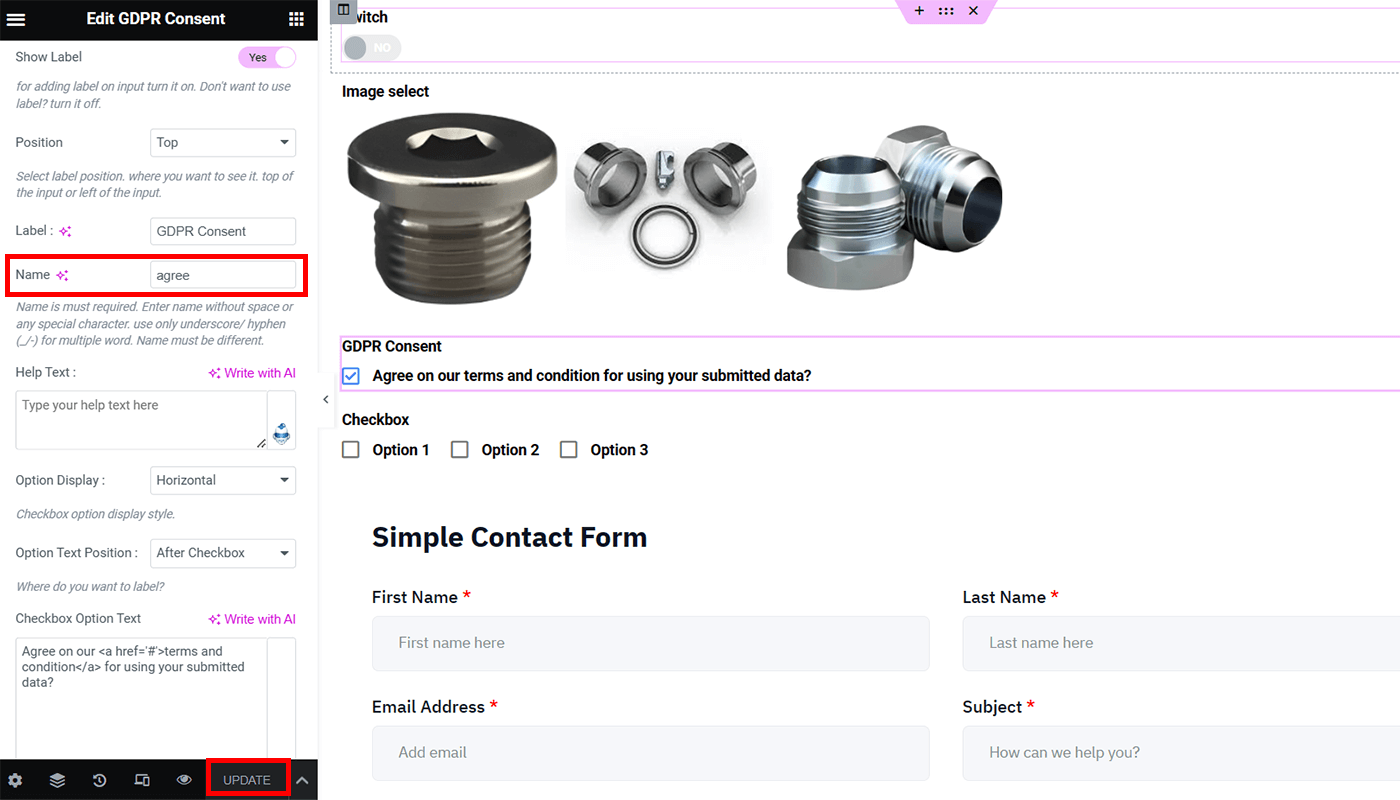
Auto-Populate Field for GDPR Consent
To add GDPR consent to your auto-populate field, follow these steps:
Section (+) should be added. Select the three lines. Locate and drag the "GDPR Consent" widget.
Navigate to "Settings" and enable "Get Value from URL?"
Navigate to "Content". Enter "agree" as the name for your GDPR Consent and then click the "Update" button.
Auto-Populate Field for Checkbox
To add a checkbox to your auto-populate field, follow these steps:
Section (+) should be added. Select the three lines. Look for the "Checkbox" widget and drag it.
Navigate to "Settings" and enable "Get Value from URL?"
Navigate to "Content". Fill in the name "checkbox". Under "Checkbox Options," you'll see a variety of alternatives. You may include as many checkboxes as you wish). Remember the option value you selected because it will be required when you enable your checkbox auto field in your final output.
Press the "Update" button. In the top right corner of your screen, click the "Update & Close" button. Then you'll be sent to your MetForm menu.
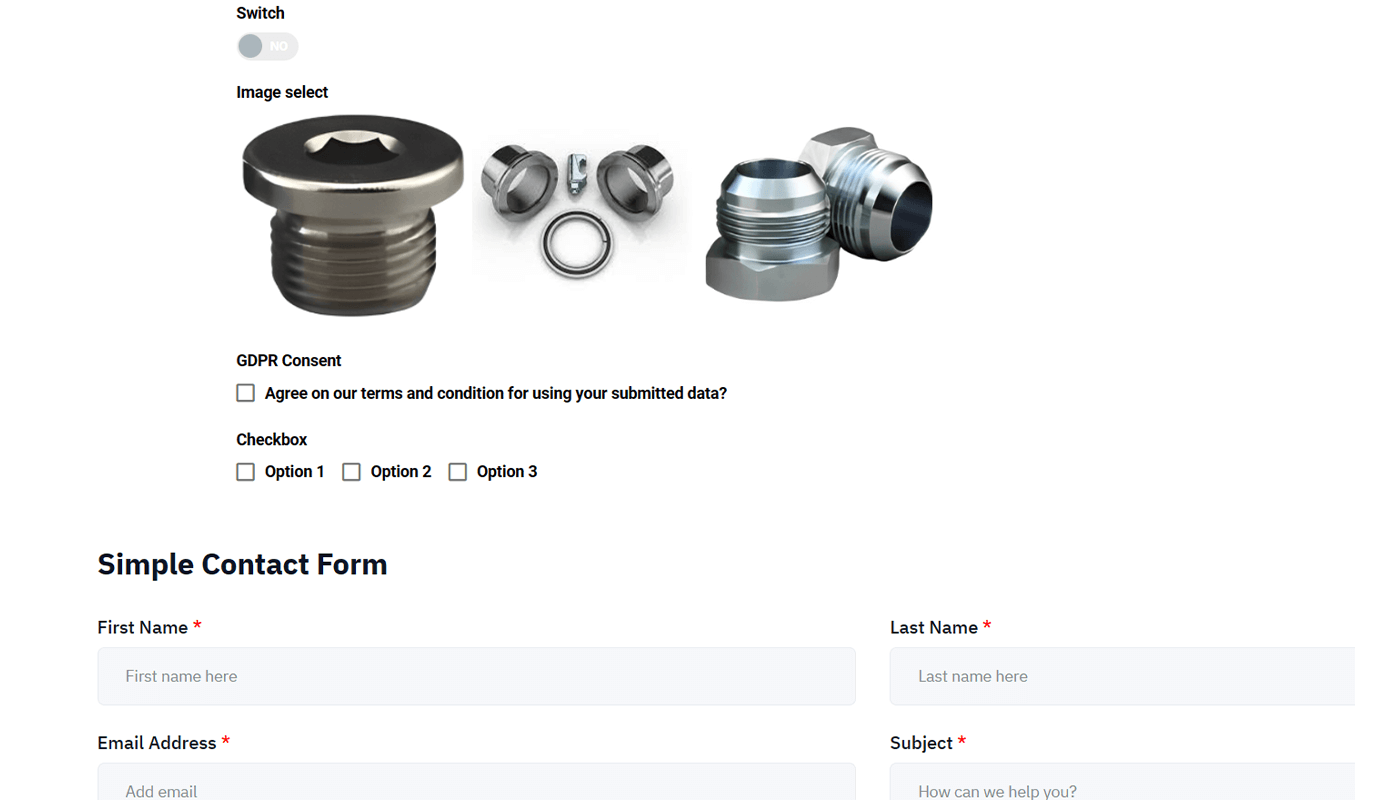
Final Preview
View the final outcome of your form. This is how our auto-populate example appears:
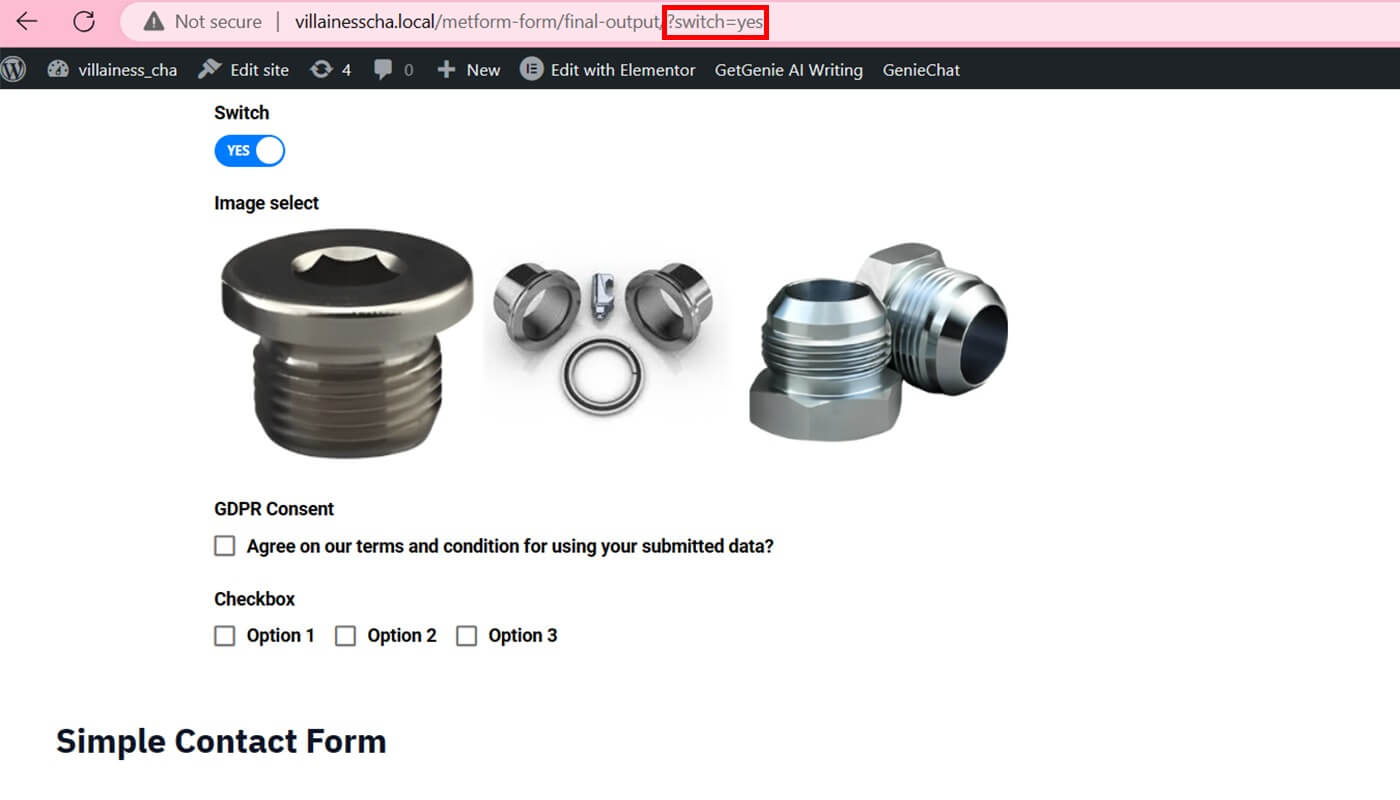
Go to the URLenter "?switch=yes" at the end of your URLHit the "Enter" button to enable your Switch auto-populate form. Please provide the right name and active text. If they were written with the first letter capitalized, you must enter it in the same manner.
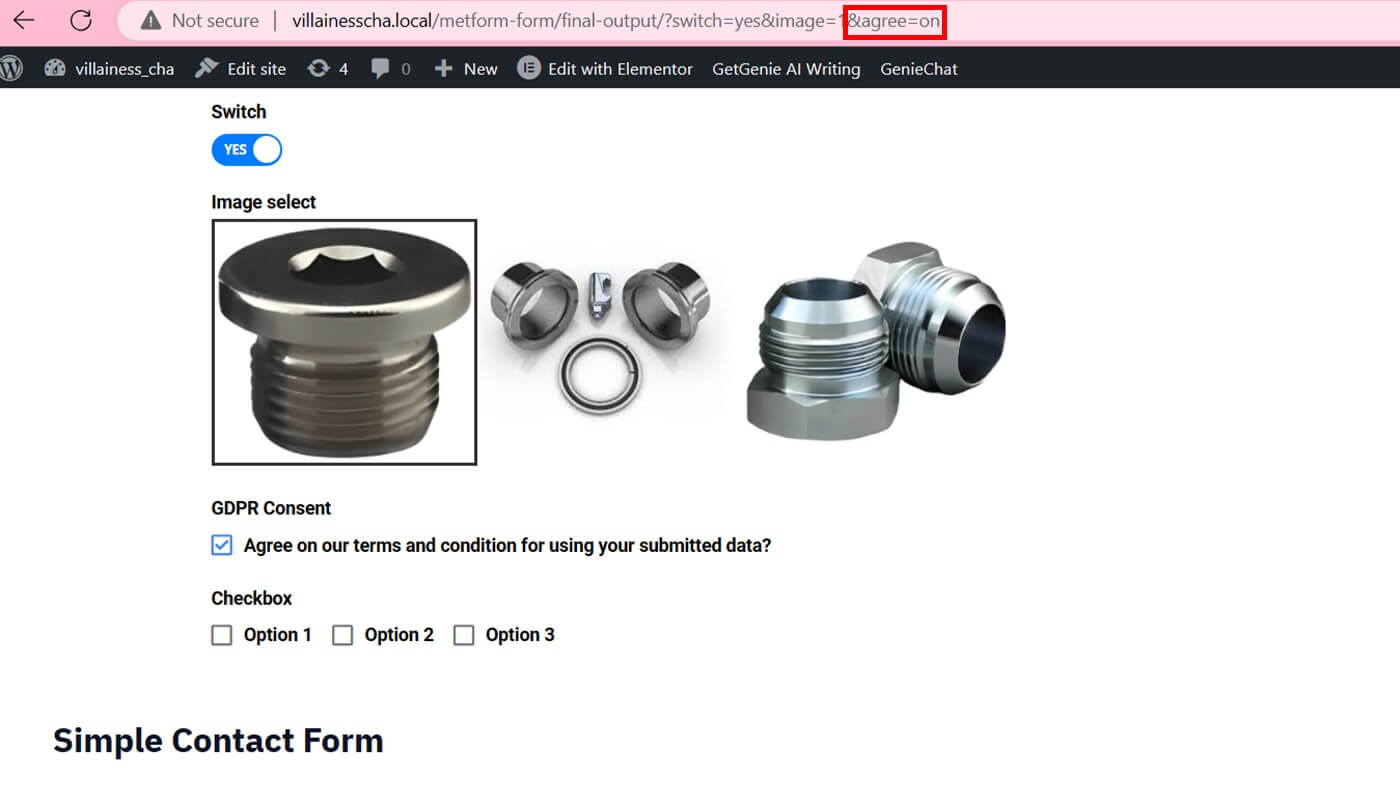
Go to your current URL and insert "&image=1" Hit the "Enter" button to enable your picture to choose and switch fields. The outcome will vary depending on the name and option value you enter.

Go to your URL and type "&agree=on" to add your GDPR consent. Press the "Enter" key.
Go to your current URL and type "&checkbox=value-1" before pressing the "Enter" button. If you want to include more than one option, split the values with a comma (,) ("&checkbox=value-1,value-2").

Wrapping Up
A WordPress form with an auto-populate field can save you time and effort throughout the form design process without having any coding knowledge. MetForm may be integrated into your WP Forms dynamic field population to provide a more user-friendly form-filling experience. Furthermore, purchasing MetForm Pro grants you access to useful tools that maximize form creation.


