
If you're looking to make the most out of your server resources and efficiently manage multiple websites, you've come to the right place. Whether you're a small business owner, a web developer, or just curious about server management, this guide will walk you through the straightforward steps to ensure that all your websites coexist harmoniously on a single server. By the end of this guide, you'll be equipped with the knowledge and confidence to successfully host multiple websites on one server, saving you time, money, and resources.
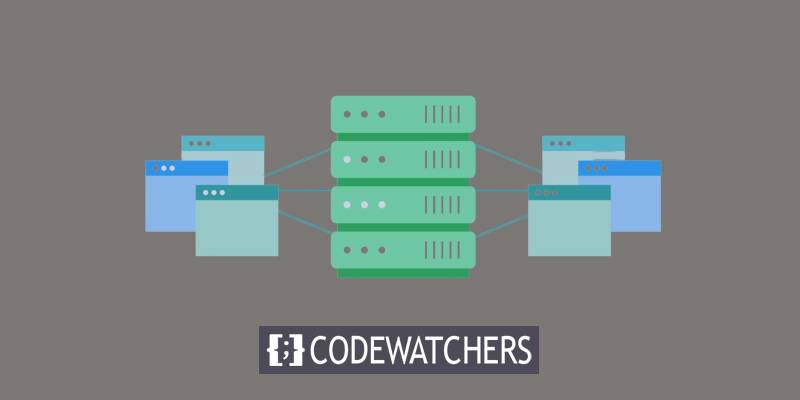
Benefit Of Hosting Multiple Website In One Server
Having multiple websites on one server has two big advantages. First, you can control all your websites from just one place. Having lots of sites is cool, but it can be annoying and take up a lot of time when you have to keep logging in and out to manage them, especially for things like WordPress. Even though some tools help remember your passwords, it's still a hassle.
But if you set things up together, you only need to log in once to handle all your websites on a single screen.
The second advantage is that you save money on hosting. Hosting might not seem like a big deal, but it adds up over time. Imagine you have ten websites, each costing $6 per month. That's $60 every month for all of them. In five years, you'll spend $3,600 just on hosting.
Create Amazing Websites
With the best free page builder Elementor
Start NowWhen you put all your website domains on one server, you can save a lot of money.
Host Multiple Website In One Server
Buy domain names and a shared hosting plan
o begin hosting multiple websites on a single server, you'll need the right hosting plan. Not all plans allow multiple sites, so make sure to choose one that does. If your current plan doesn't support this, consider upgrading to a suitable one - CloudWays, Kinsta, SiteGround, BlueHost, etc.
Remember, even with unlimited storage, there are limits to your server's resources. Hosting too many sites might slow them down. But if you manage it well, hosting multiple sites on one server can be a great idea.
Before you can add domains to your server, you need to own them. So, the next step is to buy all the domain names you want to add.
Not sure where to start? These are some good and affordable domain name registrars:
- Namecheap
- Domain.com
- Bluehost
- Hover
Once you have your hosting plan and domain names ready, you're all set for the next step.
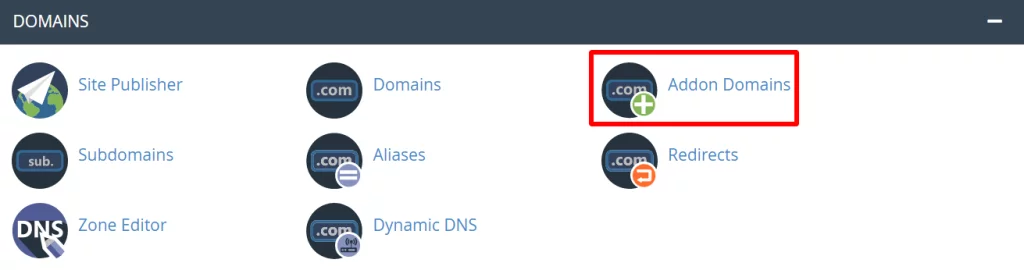
Add a domain to the server/cPanel
The next step is to log into the cPanel of your hosting provider.
Click the Addon Domains icon in the Domains section.
Add your new domain twice on the Addon Domains page that appears:
- Domain
- Subdomain
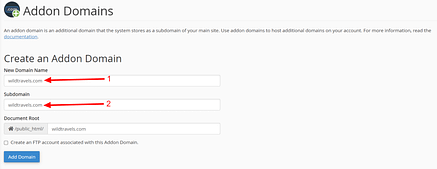
When finished, select Add Domain.
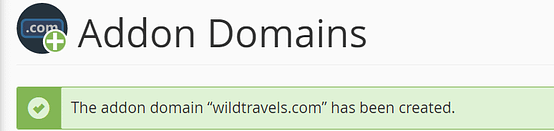
A success notification similar to the one below will appear:
You might need to wait a short period while the new domain is installed, depending on your hosting provider. The domain may take a minute or two to populate. So, if you don't notice the success message right away, don't be upset.
Press the back button to verify that you made the right decision. Certain enough, your new domain will appear in the Addon Domains section:

The same techniques can be used to add as many domains as you want.
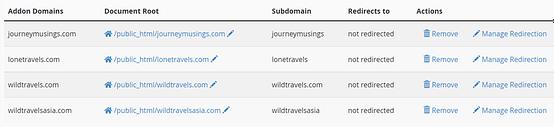
Anytime you want, you can delete a domain from the Actions column.
Update the nameservers
By updating the nameservers, you can instruct your domain registrar where to point the domain. On Bluehost, follow these instructions.
The nameservers for every domain that you want to link up with your new host must be updated, and that is what is vital. For instance, if you have domains registered with various registrars, you will need to go through each one's nameserver settings and direct them to your new server, which will host all of those domains.
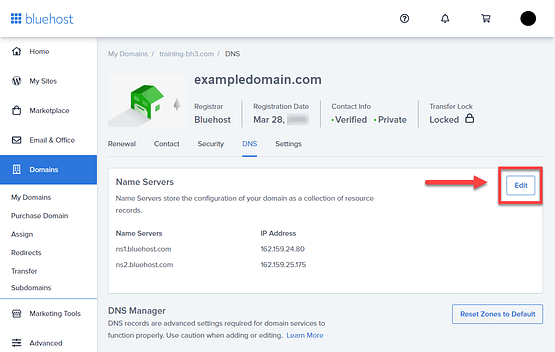
If you registered your domain with Bluehost, follow this example to complete the procedure.
Select the DNS tab from the Domains menu on the left by navigating there:

Next, select Edit under the Name Servers section.
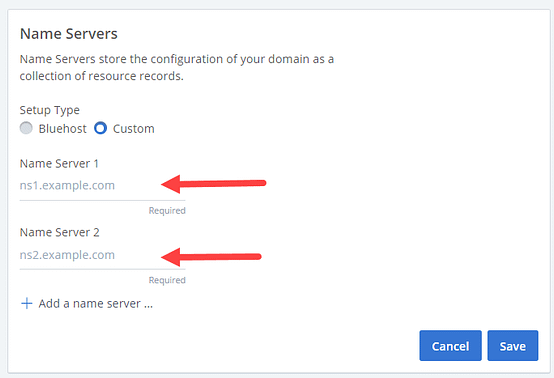
Select Custom Nameservers under Setup Type, and then enter the nameservers for your account:

In order to save the modifications and update the nameservers, click the Save button last:
At this point, you have pointed your domain names to the single server that will now function as the host for all of your websites.
Install WordPress on the server
WordPress installation used to be challenging. WordPress installations are too sensitive for the average person to touch. It belonged to WordPress developers. no longer. With the aid of modern technology, you can do the task with a single click without spending any money on expensive developers.
WordPress can be installed in a variety of ways.
For our purposes, we'll concentrate on using the cPanel auto-installer to install WordPress.
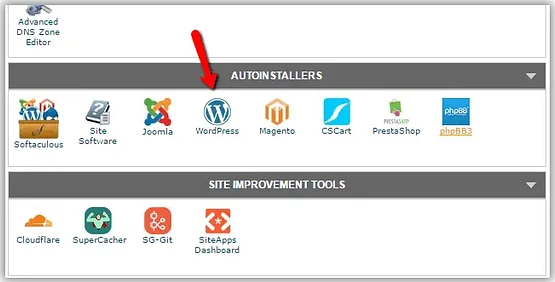
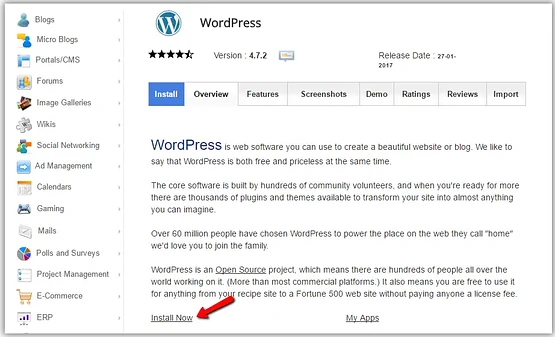
Log into your cPanel dashboard to accomplish that. Find the section under "Autoinstallers." Press the WordPress symbol to begin:
Click Install Now next.
In order to access a secure HTTPS website, click Choose Protocol and then select SSL certificate:
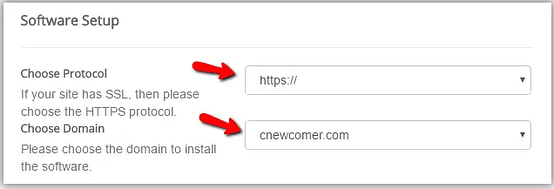
Select HTTP instead if your website lacks an SSL certificate. Then click Choose Domain to choose the domain name for your website.
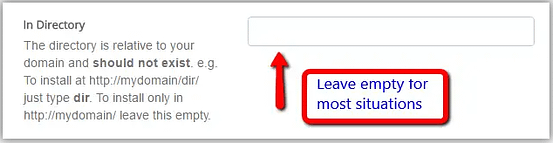
The In Directory section follows. Leave it unfilled:
Insert your site name and site description in the Site Settings section by scrolling down. Jot down the essentials. These specifics can be refined later.
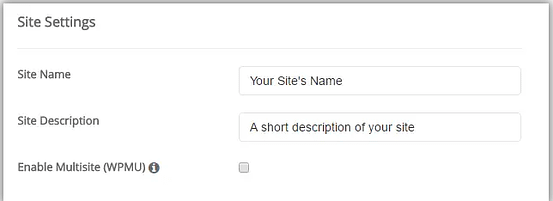
You shouldn't select the Enable Multisite (WPMU) option, despite the fact that this post's theme is how to host numerous websites on a single server. For the sake of what we're doing, WordPress Multisite, a particular version of WordPress, is not necessary.
Last but not least, choose a user for your website and either manually or automatically generate a password:
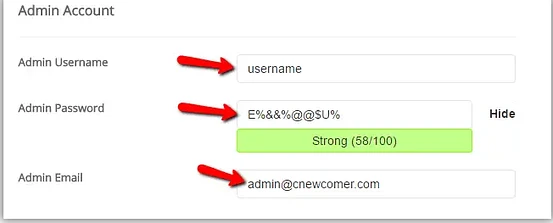
Keep in mind to write down your password and store it safely.
Congratulations! WordPress was successfully installed by you on your own.
Set up the basics settings on your WordPress
Now it's time to tidy things up a bit.
You should adjust some important WordPress settings to match what you like.
These settings include:
- General Settings: These cover things like your site's name, description, web address, email, language, and more.
- Writing Settings: These are about categories and formats for your blog posts, the default editor you use, and even sending posts by email.
- Reading Settings: Here, you decide how your homepage looks, how many blog posts show up on each page, and whether search engines can see your site.
- Discussion Settings: These settings control how people talk to you through comments on your posts and how you manage them.
- Media Settings: Learn how to add pictures and files to your site and posts.
- Permalinks Settings: Change how your website's web addresses (URLs) and archives are organized.
- Privacy Settings: Find out how to create a privacy policy for your website."
Keep exploring and customizing your WordPress site to make it just the way you want it!
Wrapping Up
Congratulations! You've now learned the ins and outs of hosting multiple websites on a single server. By following the steps outlined in this guide, you've gained the ability to optimize your server's performance and resource utilization, allowing you to efficiently manage and maintain multiple websites without unnecessary hassle.


