
Attempting to address the "installation failed: Could not create directory" issue in WordPress?
Absolutely! You've come to the right place.
WordPress serves as an excellent content management system, making website creation a straightforward process. However, dealing with WordPress errors can prove to be a challenging task as there's no one-size-fits-all solution for many of these issues. Consequently, troubleshooting becomes essential to pinpoint the specific cause behind the problem and then resolve it.
Within this article, I'm assuming that you're working on resolving the "could not create directory" error in WordPress independently.
Create Amazing Websites
With the best free page builder Elementor
Start NowTo tackle this, carefully follow my instructions. Yet, before delving into the troubleshooting steps, it's crucial to grasp the potential reasons leading to a "could not create directory" error.
What Does "Installation Failed: Could Not Create Directory" Mean?
The problem arises from file permission settings caused by incorrect configurations within the site. When WordPress encounters this issue, it fails to generate a folder or directory essential for your plugin or theme due to incorrect file permissions.
This problem may manifest during plugin or theme updates, or when uploading image files, displaying an error message: "update failed: could not create directory."
Despite the various scenarios leading to this issue, the fundamental cause remains consistent. Fortunately, resolving this problem involves employing identical troubleshooting methods.
What Causes the "Installation Failed: Could Not Create Directory" Error?
The failure to create a directory can be attributed to two primary reasons.
Firstly, inadequate permissions may be the cause. Hosting configurations often implement strict security measures to safeguard server and site folders, potentially restricting your ability to modify the structure of your server or site.
For instance, during the installation of a new plugin or theme, a directory (bearing the plugin or theme name) is generated in the wp-content folder. Proper permissions are necessary to establish the file structure. Similarly, the plugin or theme requires permission to introduce a new version and eliminate outdated ones during the updating process.
Permissions are typically categorized into three parts: write, read, and execute, each assigned a numerical value to define the user, group, and global permissions.
This article will detail how to configure permissions for your files and folders to circumvent this error. For further insights into recommended practices for WordPress, refer to the provided resource.
The second reason behind this issue could be a lack of disk space. Insufficient memory and limited disk space might result in encountering this error. Therefore, it's advisable to host your websites on a dedicated cloud hosting platform that allows easy scaling of the server size with minimal effort.
Troubleshoot the "Installation Failed: Could Not Create Directory"
To troubleshoot the "Installation Failed: Could Not Create Directory" problem in WordPress, you can employ the integrated health check system. This function offers crucial analysis regarding your website's general condition and can pinpoint the underlying reason behind this error.
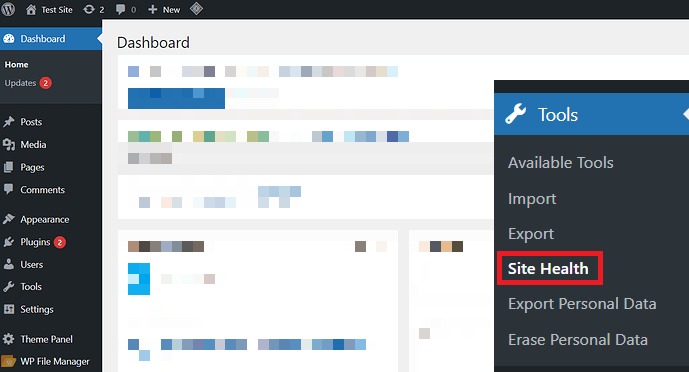
Accessing this tool is straightforward. Just head to your WordPress dashboard and click on Tools, then select Site Health from the menu.
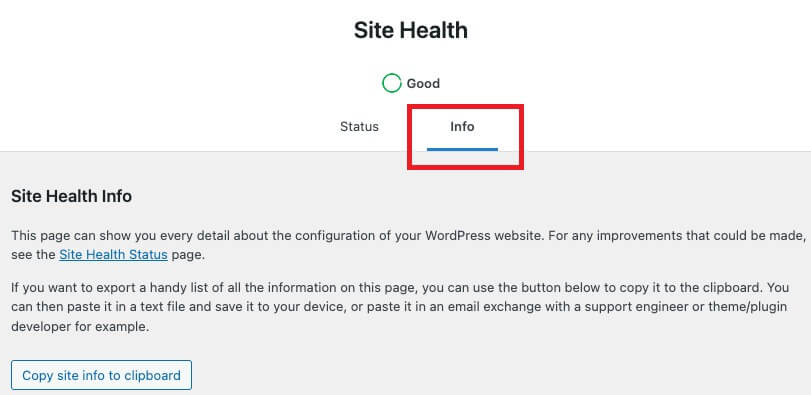
Now, go to the info tab.
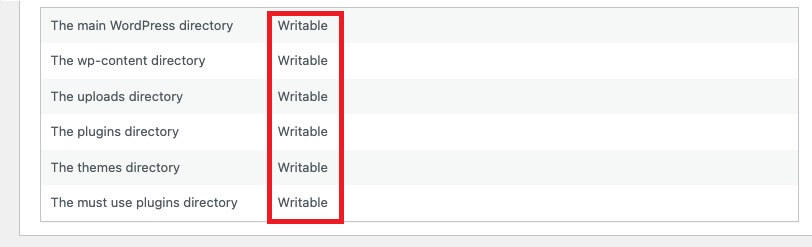
Scroll all the way down to "Filesystem Permissions."
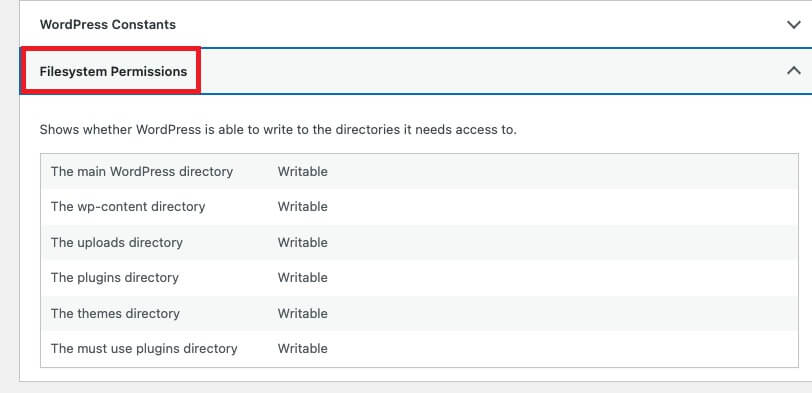
All folders should be listed as writable in this section. If any folders are tagged as "Not writable," it means there is a problem with your file permissions. To overcome such issues, you must modify your file permissions.
Let’s explore some troubleshooting methods and techniques to swiftly rectify and prevent directory errors in WordPress.
Resolving "Installation Failed: Could Not Create Directory" in WordPress
Let’s explore some troubleshooting methods and techniques to swiftly rectify and prevent directory errors in WordPress.
Backing Up
To begin, it's crucial to create a comprehensive backup of your entire website. This precautionary step ensures that if any issues arise during the process, you can effortlessly restore your site to its previous state.
You can back up your WordPress site via multiple methods, including utilizing a hosting backup, employing a WordPress plugin specifically designed for this purpose, or following a manual backup process. Learn the step-by-step procedure for backing up a WordPress site in this comprehensive guide.
Optimizing Disk Usage
As previously mentioned, directory errors might surface due to insufficient disk space. It's essential to monitor your server specifications and inspect the memory allocation.
If your server memory is nearing full capacity, there are two primary remedies: you can either upscale your server size or execute a disk optimization procedure to eliminate redundant files and folders. This action creates additional space for smooth installation of plugins or themes.
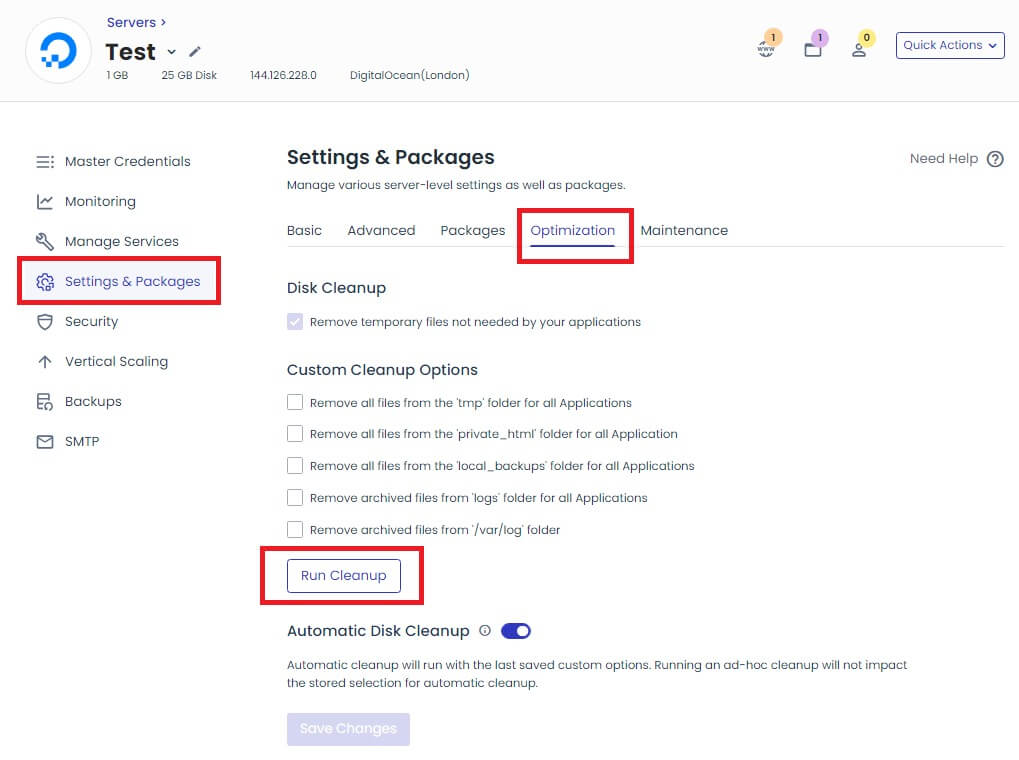
Cloudways facilitates a straightforward disk cleanup through the server management panel, allowing you to swiftly perform this operation with just a few clicks.
If your server has enough memory space but you still get a couldn't create directory issue, you should keep debugging.
Resetting File and Folder Permissions
To re-establish my file and folder permissions, I will initiate the process directly through the Cloudways management panel. If this functionality isn't accessible on your existing hosting service, feel free to skip this method and proceed to the subsequent step, where I've conducted the file permission adjustments using an FTP client such as FileZilla.
The advantage of utilizing a managed cloud hosting platform lies in its provision of all necessary features, tailored to deliver a seamless hosting experience.
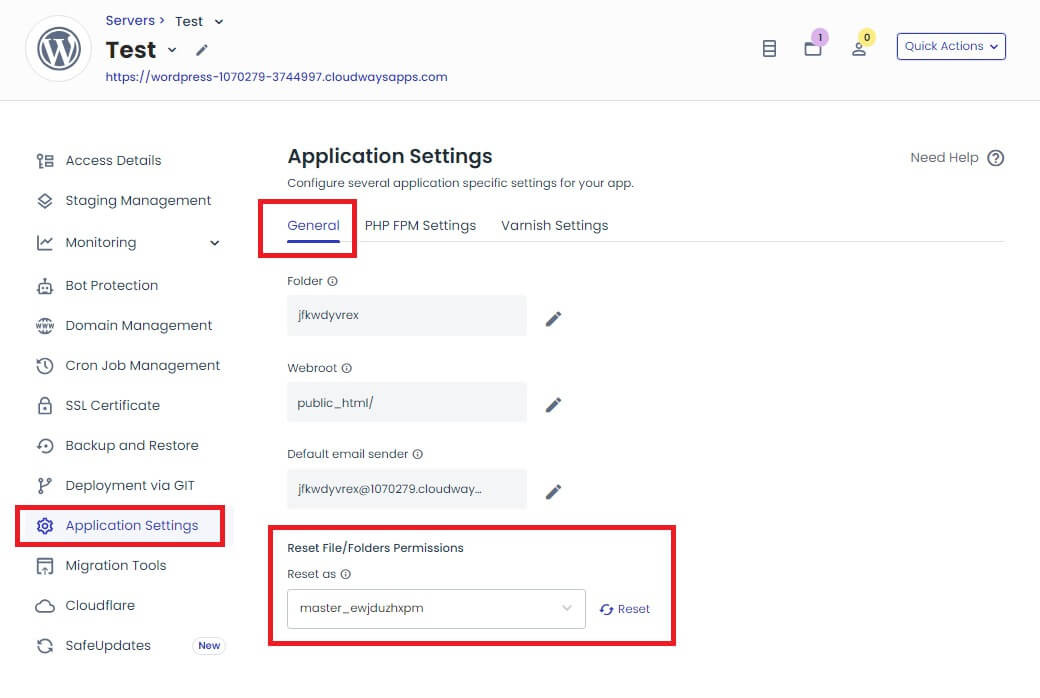
Within Cloudways, navigate to the application management panel > application settings > general. Locate the option to reset file/folder permissions for restoring the file ownership.
Upon selecting the reset button, the permissions for directories will revert to 774, while file permissions will reset to 664. For more comprehensive insights, refer to this resource detailing the resetting of file and folder permissions.
Configuring File Permissions Using an FTP Client
This procedure demonstrates how to modify file and folder permissions utilizing an FTP client such as FileZilla. If FileZilla isn't already installed, you can download it from the following link.
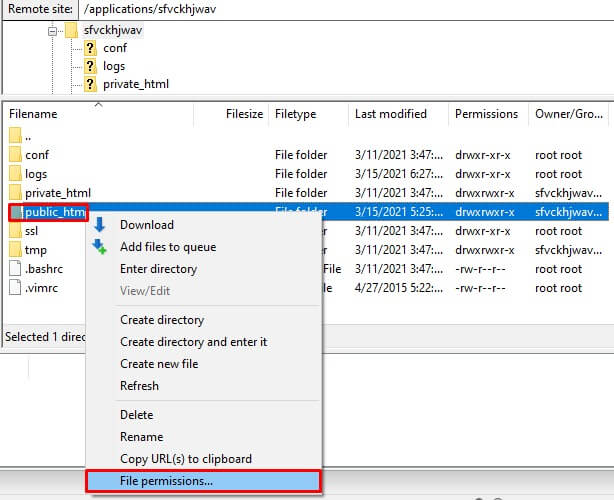
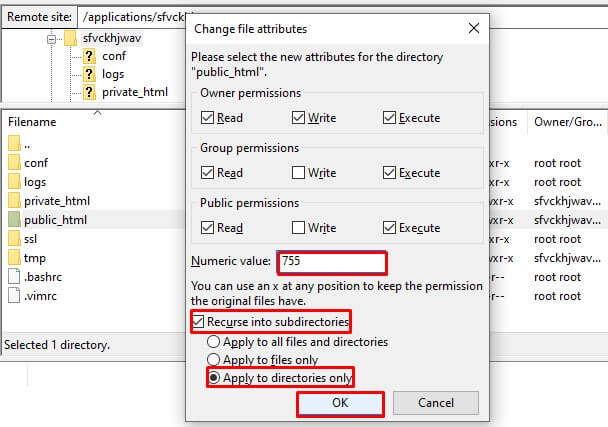
To begin, open the FileZilla application and input your server's access credentials to establish a remote connection. Navigate to the public_html folder, right-click, and select "File Permissions."
Enter '755' in the numeric value field. Choose 'recurse into subdirectories,' select 'apply to directories only,' and then click 'OK.'
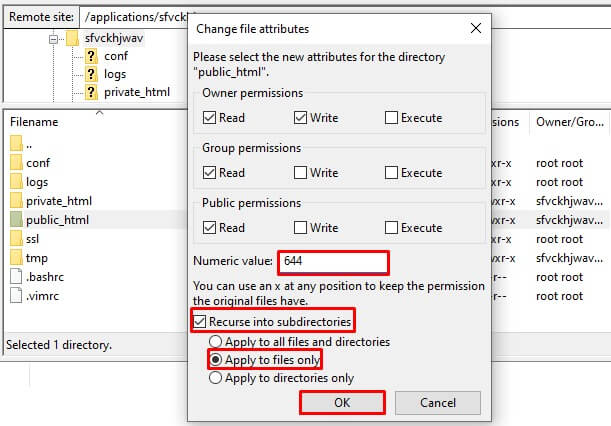
Follow the same process for file permissions: input '644' in the numeric value field, choose 'recurse into subdirectories,' select 'apply to files only,' and click 'OK.'
After adjusting the file and folder permissions, clear your cache and attempt to install or upgrade your plugin/theme once more.
Application Logs
Observing and overseeing the logs of your application is an essential practice. It's highly recommended to consistently review both the access and error logs of your application. These logs provide detailed insights into the ongoing processes, including requests and errors.
The majority of reliable WordPress hosting service providers include log monitoring functionalities within their platform. It's expected that such features are available in your hosting setup as well.

When encountering issues or malfunctions on your website, this log monitoring feature becomes invaluable. It effectively identifies and reports errors that might be impacting the smooth functioning of your site. For instance, on Cloudways, users have access to a search and filter option enabling them to review the 1000 most recent logs. Additionally, specific HTTP status codes such as 403, 404, 501, and more are available for review within the logs.
Wrapping Up
Thank you for exploring these effective solutions to resolve the frustrating "Installation Failed: Could Not Create Directory" error in WordPress. Hopefully, this guide has provided clear insights and practical steps to tackle this issue.
Remember, if you're looking for a reliable hosting solution to streamline your WordPress experience, consider Cloudways. Their robust and user-friendly platform can significantly enhance your website's performance and ease troubleshooting processes.
For more in-depth assistance or further tips on WordPress troubleshooting and optimization, feel free to explore Cloudways' resources or reach out to their support team. Here's to smoother and more efficient WordPress experiences!


