“You need to get on Facebook”. How many times have you heard this about your business? It may get a bit annoying, but Facebook is an essential part of connecting with users and getting content out to the masses. By adding your Facebook updates to your website, you can keep users updated with real-time status and even boost your Facebook following.

In this article, we’ll show you how to easily display your Facebook timeline in WordPress.
Displaying Your Facebook Timeline in WordPress
We’re going to use Smash Balloon’s Custom Facebook Feed Pro to add our Facebook timeline to our WordPress website.
First, you need to go to the Smash Balloon website and download the Custom Facebook Feed Pro plugin. Next, you need to install and activate the plugin on your site.
Create Amazing Websites
With the best free page builder Elementor
Start NowNote: There’s also a free version of the plugin, called Smash Balloon Social Post Feed. This works fine to display text and links from your timeline. However, it will not show photos.
Upon activation, go to Facebook Feed » Settings in your WordPress dashboard. Here, you will need to connect your Facebook account.
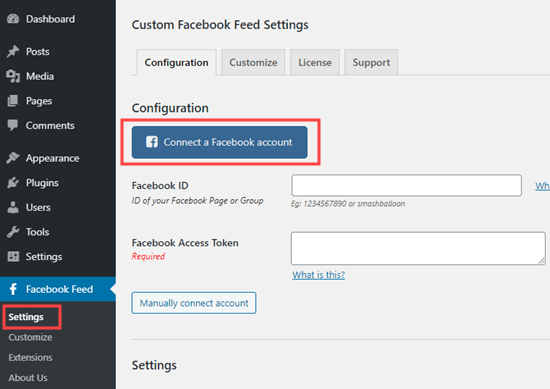
Next, you need to decide whether to display a Facebook page or group timeline. We’re going to use our Facebook page.
Note: You cannot display a timeline from your personal profile. This is due to Facebook’s privacy policy.
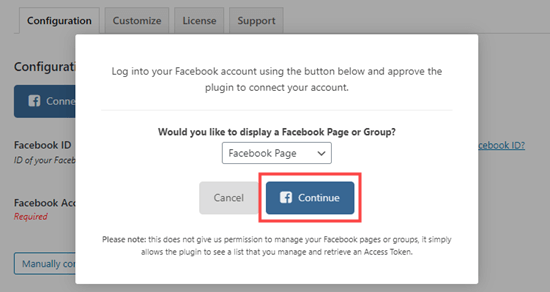
Facebook will then prompt you to agree and give Smash Balloon permission to access your Facebook account. Simply follow the on-screen prompts.
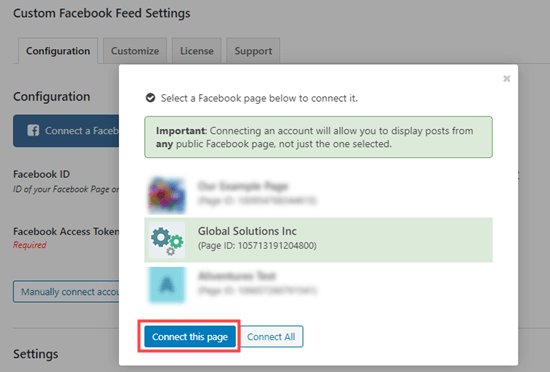
You will then see the Custom Facebook Feed Settings page again, with a popup asking you to select which page to use. Click on the page you want, and then click the ‘Connect this page’ button:
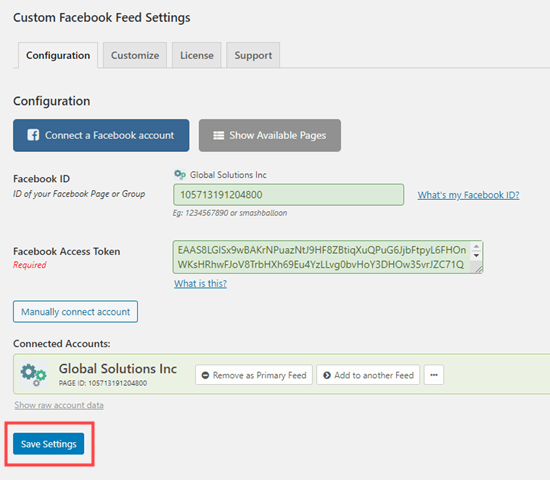
You should now see your page listed in the ‘Connected Accounts’ section of the Custom Facebook Feed configuration settings. Don’t forget to click the ‘Save Settings’ button to save it.
Now, it’s time to go ahead and add the Facebook timeline from your page to your site. Simply open up the post or page where you want to put your timeline, or create a new post or page.
It’s also possible to add your timeline to your WordPress sidebar, which we’ll cover later in this tutorial.
We’re going to create a new page by going to Pages » Add New. On the page edit screen, click on the (+) icon to add the Custom Facebook Feed block in the WordPress block editor:
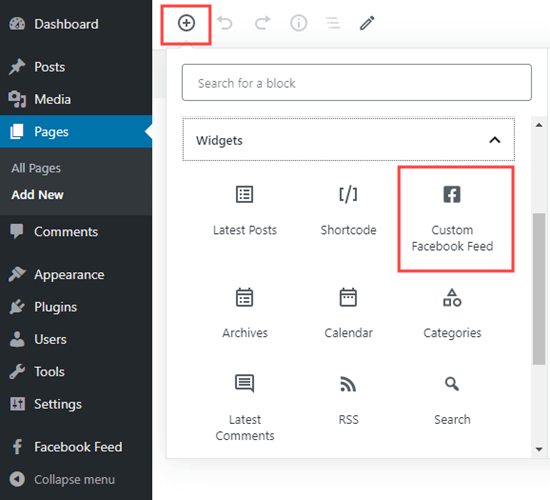
You can see the preview of your Facebook feed straight away in the content editor. Go ahead and preview or publish your page to check it out on your site. Here’s our Facebook timeline:

We’ve added some styling to our timeline to make it look great on our site. Next, we’ll take a look at how to customize your own Facebook timeline using Custom Facebook Feed Pro.
Customizing Your Facebook Timeline with Smash Balloon Facebook Feed Pro
Custom Facebook Feed Pro lets you change all sorts of options about your timeline. Let’s go through some of the key ones.
Simply go to the Facebook Feed » Settings page in your WordPress dashboard.
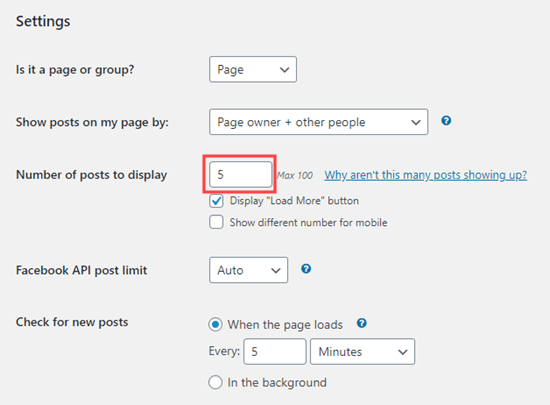
Scroll down to the ‘Settings’ section, and you’ll see a few key options. For instance, you might decide you only want to display 5 posts:
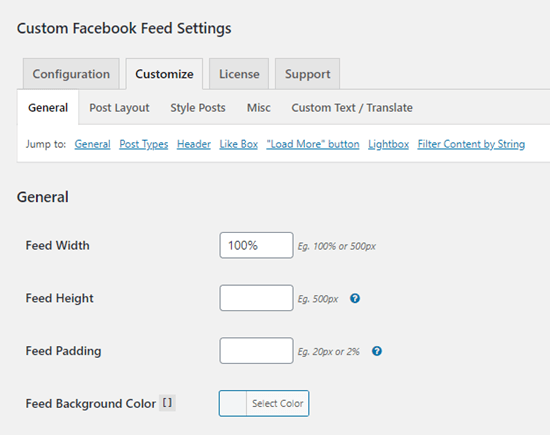
There are also lots of settings under the Facebook Feed » Customize page that you may want to try out. This page gives you lots of different options to choose from in different tabs.
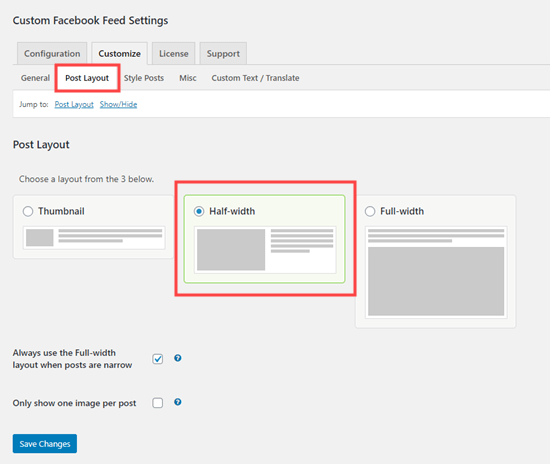
To change how your timeline is laid out, simply click the ‘Post Layout’ tab. We’ve selected the ‘Half-width’ style for our posts at the top here. Don’t forget to click the ‘Save Changes’ button after making any changes:
Next, go to the ‘Style Posts’ tab to change how your posts are styled. We think the ‘Boxed’ style here looks great. We’ve given our posts rounded corners plus a shadow:
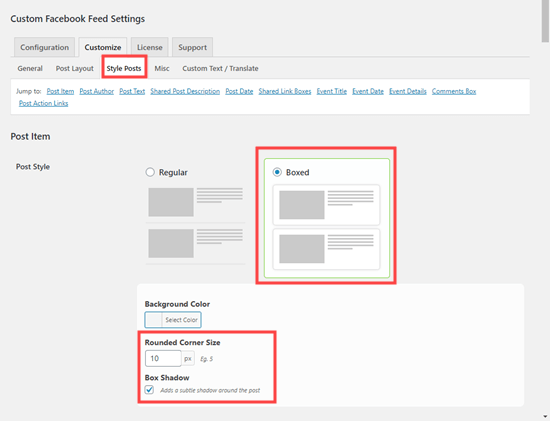
Again, make sure you save your changes before leaving the page.
Adding Your Custom Facebook Timeline in WordPress Sidebar
What if you want to display your Facebook timeline in your sidebar instead of in a post or page? You can easily do that with Custom Facebook Feeds.
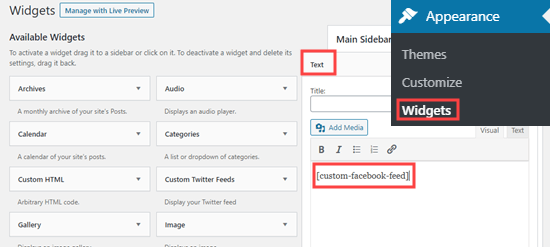
First, go to the Appearance » Widgets page in your WordPress admin area. Then, drag a ‘Text’ widget to wherever you want your timeline within your sidebar. Now, simply enter the shortcode [custom-facebook-feed] in the widget and save it.
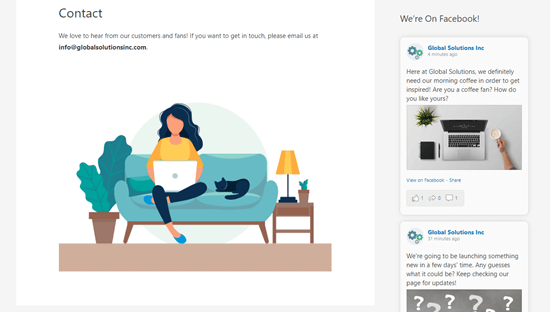
Your Facebook timeline will now appear in the sidebar on your website:
We hope this article helped you learn how to display your Facebook timeline in WordPress.
If you liked this article, we recommend that you follow us on Facebook and Twitter to be informed in real-time of our publications.


