
Related posts are an excellent method to gain traffic to your blog. Users who visit your blog will see posts in which they are already interested. This keeps people on your website for a longer period of time and boosts their contact with you and your website. Fortunately, adding related topics to your Divi blog post templates in the Divi Theme Builder is simple. We'll teach you how in this article.
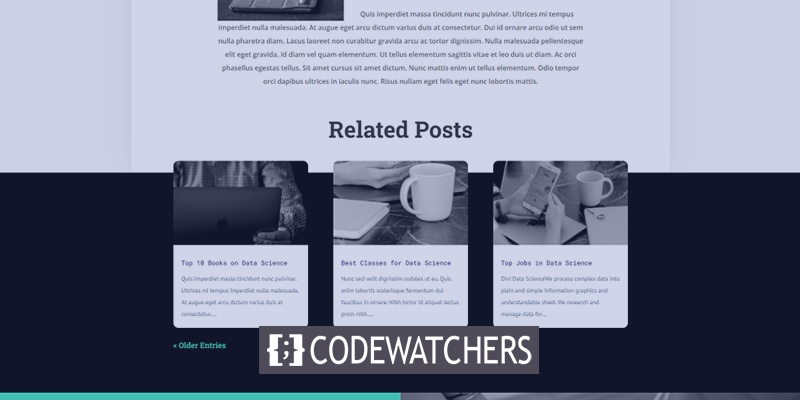
Design Preview
Here’s a look at what design we’re going to create in this tutorial. So this is how the related posts will display on a desktop computer. The area above it is overlapping by the title and top of the posts. The post navigation fits the layout's design.
Getting The Right Blog Post Template
You can create your own blog post template or choose one from the Divi layout store as they have a lot of options available.
If you're starting from scratch, make sure to include the things we outlined earlier. Insert Divi components like a post title, featured picture, metadata, and post content. Next, think about any extras you'd like to incorporate, such as comments and email optin modules.
Create Amazing Websites
With the best free page builder Elementor
Start NowFor this tutorial, we are using a blog post layout from The Data science layout.
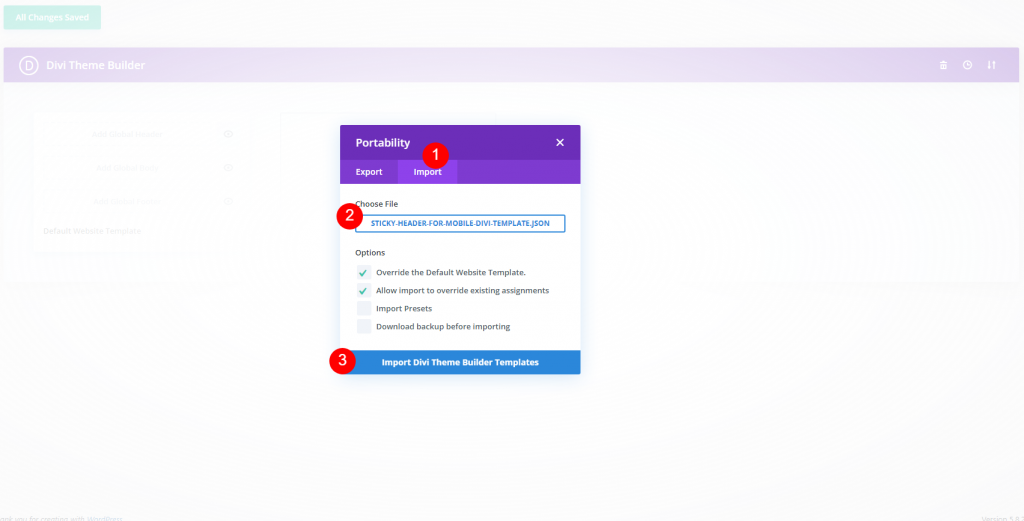
Now extract the downloaded file in order to upload the JSON file. In the WordPress dashboard, navigate to Divi > Theme Builder to upload it. In the window that appears, select Portability and then Import. Click Choose File, then navigate to and choose your JSON file. Wait for the import to finish before clicking Import Divi Theme Builder Templates. Changes should be saved.
Designing To Add Related Posts To Your Blog Posts
Click the edit icon of the newly added template.
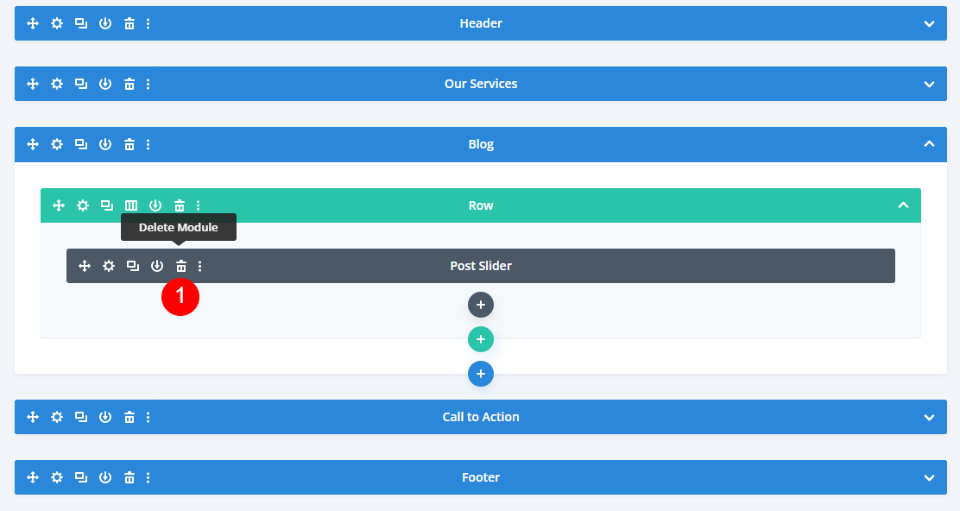
For our new blog module, we'll need to add a new Section and a single-column Row. Looking at the template in wireframe mode, we can see that it has a Post Slider module at the bottom. We'll remove this slider and replace it with this Row, but first, move the Section above the Call to Action.
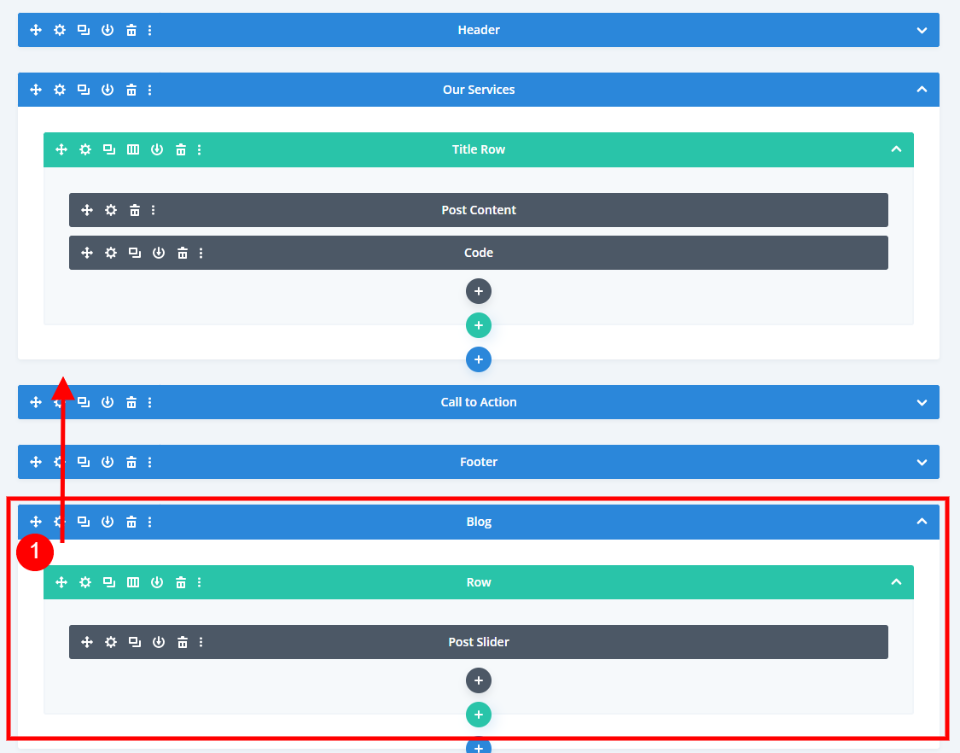
Delete the slider once you moved it.
Now open the section’s settings and set a new background color.
- Background Color: #000000
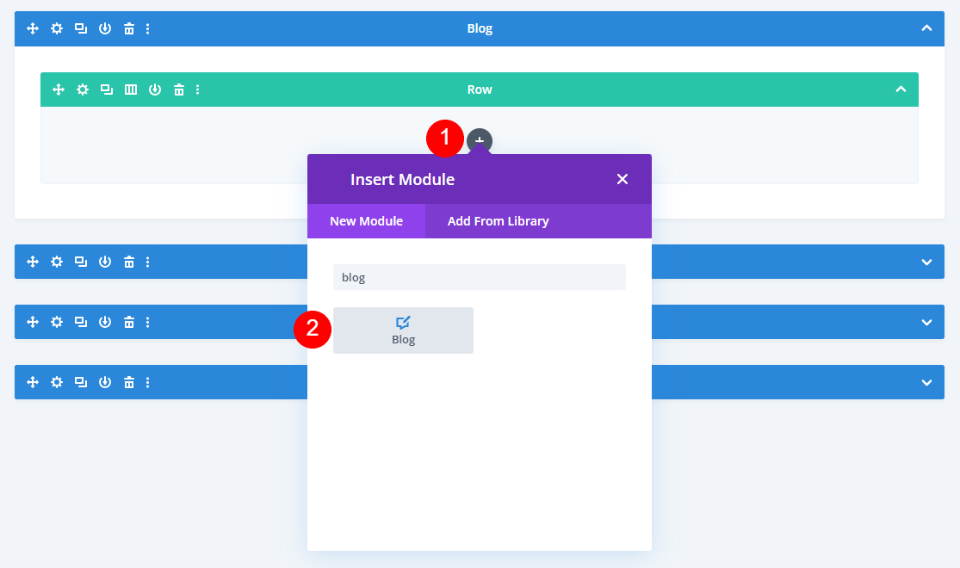
Now add a blog module to this row.

Related Blog Module Settings
The settings window will automatically open, allowing you to make your options. I've toggled to the live desktop view to examine how the module appears in the layout.
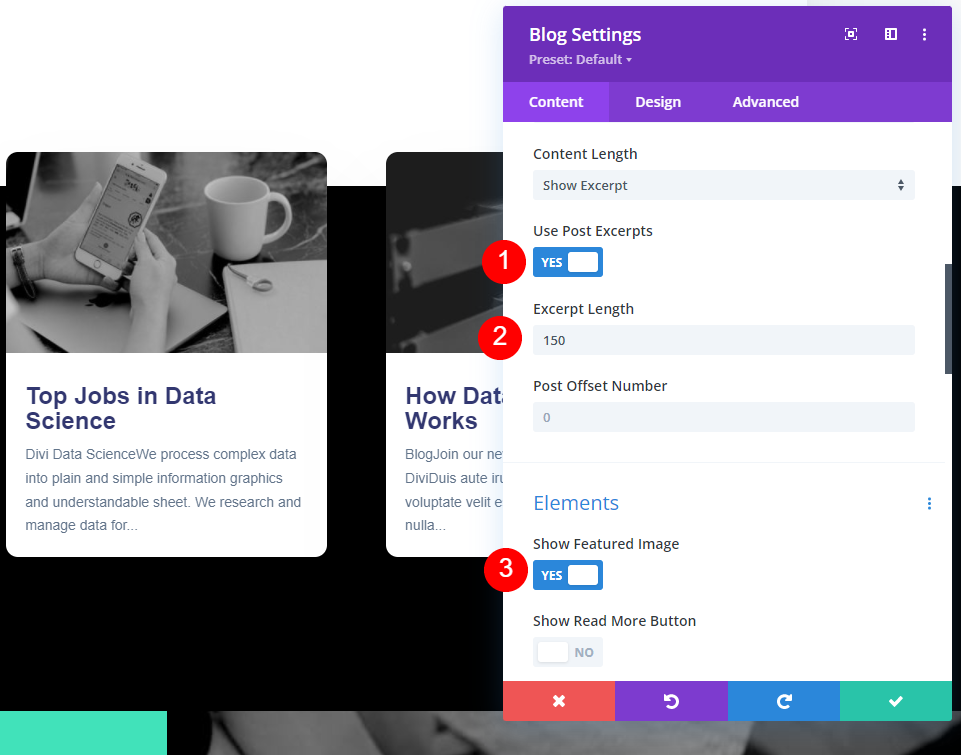
Set the Post Type to Posts. Set the Post Count to three. Select Current Category from the Included Categories drop-down menu. If you're making a blog post template for a certain category, pick it here.
- Post Type: Posts
- Post Count: 3
- Included Categories: Current Category

Change the Use Post Excerpts settings and following.
- Use Post Excerpts: Yes
- Excerpt Length: 150
- Show Featured Image: Yes
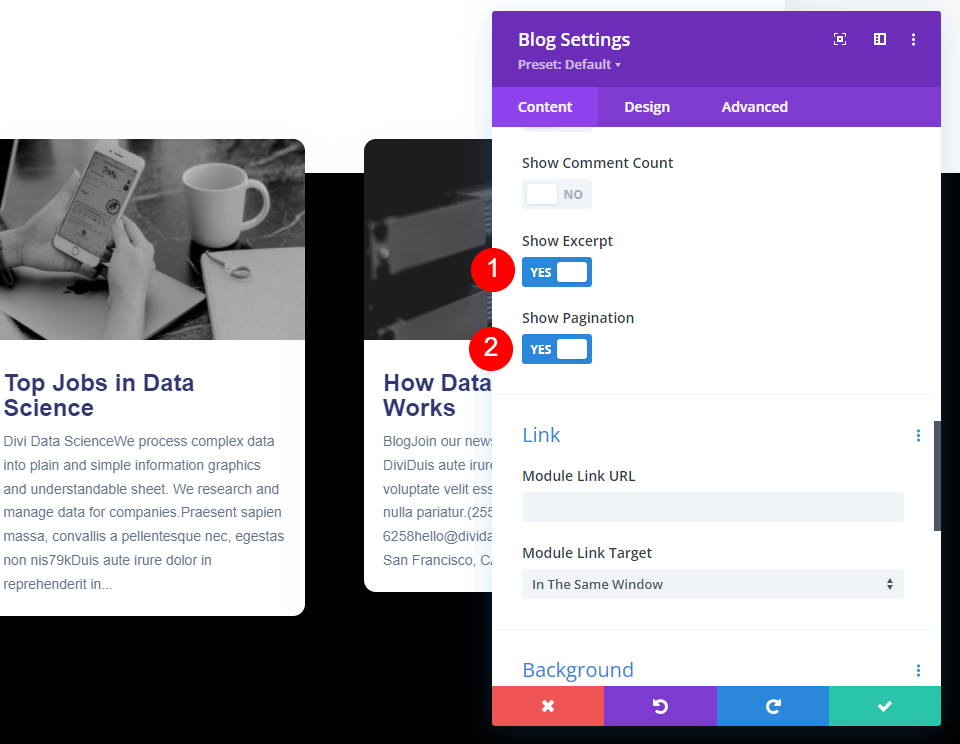
Also, make some changes under Elements.
- Show Excerpt: Yes
- Show Pagination: Yes
Styling Related Blog Module
Move to the Design tab. Make sure the Featured Image Overlay is enabled.
- Featured Image Overlay: On
- Overlay Icon Color: #ffffff
- Overlay Background Color: rgba(65,226,186,0.62)

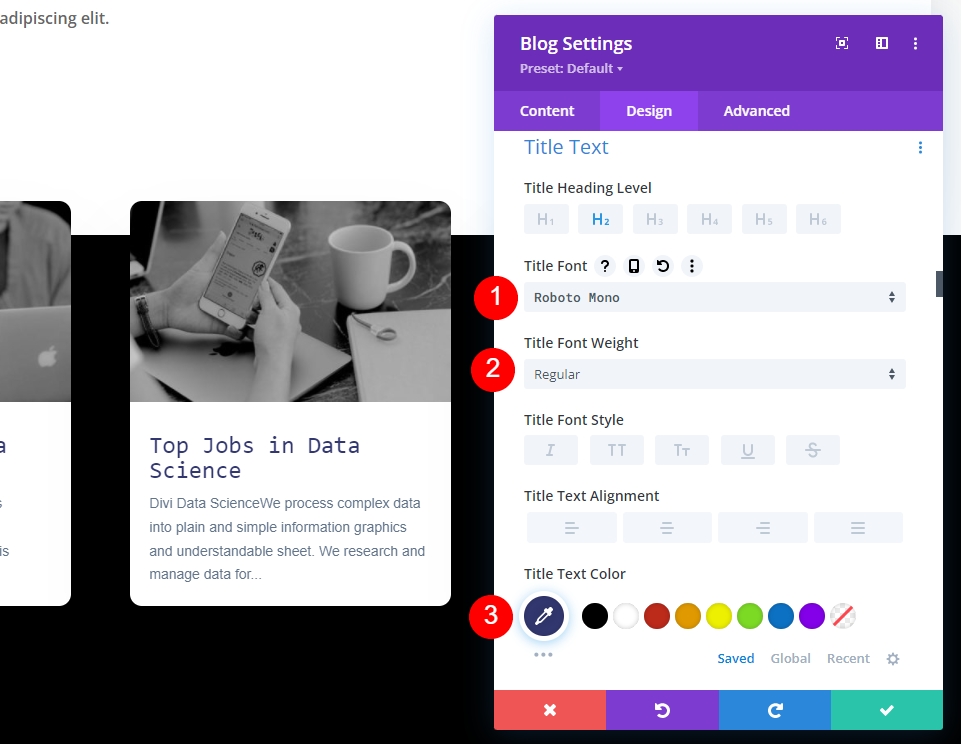
Make some changes to the Font, it's color and the Weight.
- Title Text: Roboto Mono
- Text Color: #323770
- Font Weight: Regular
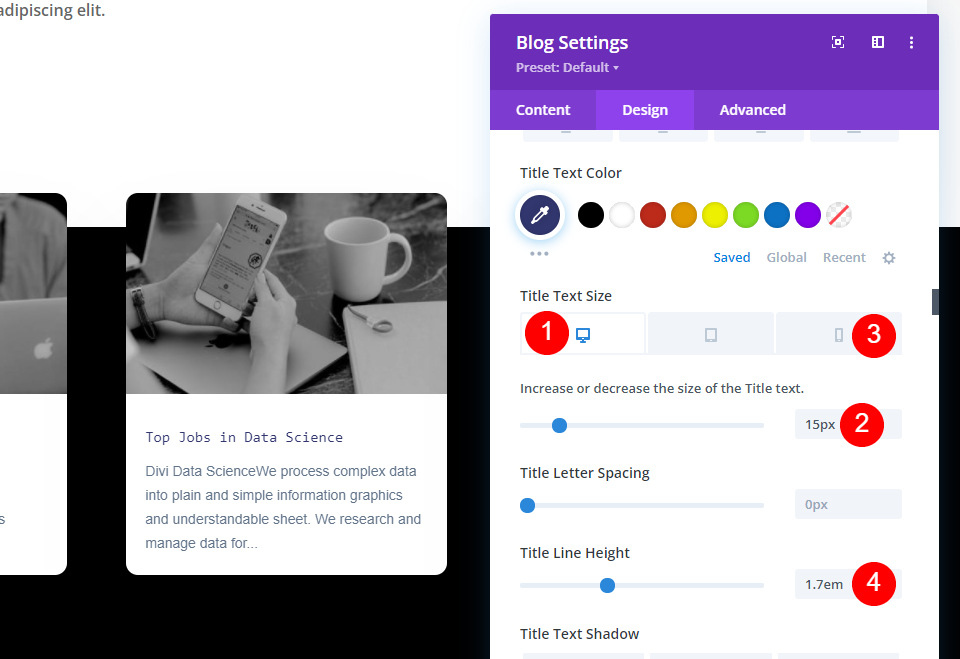
Also, bring changes to the font sizing and height.
- Title Text Size (desktop): 15px
- Text Size (phone): 14px
- Line Height: 1.7em
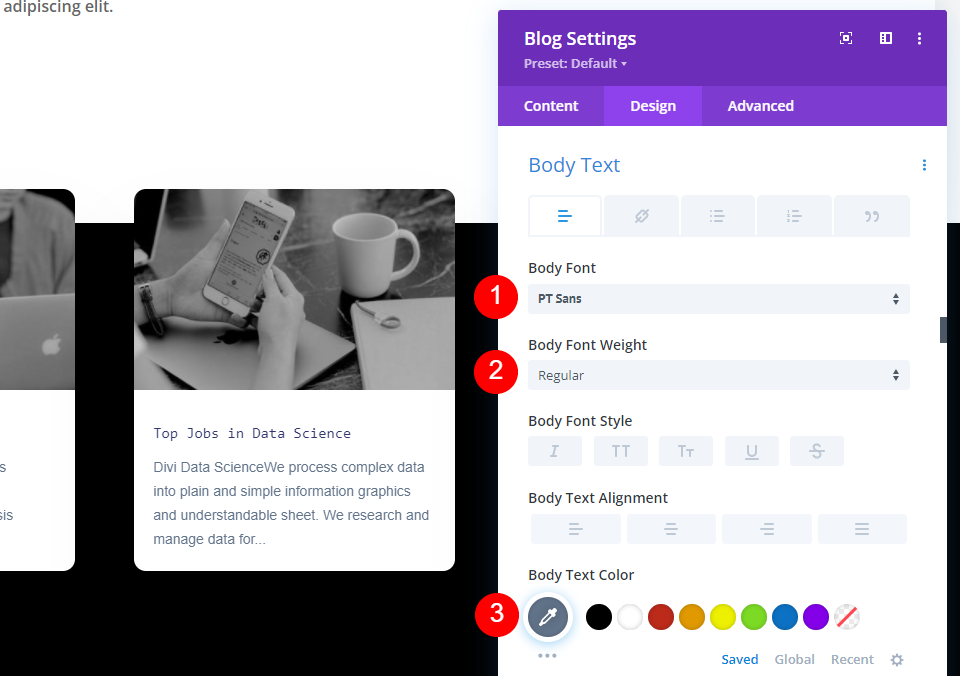
Also, bring some changes to the body font.
- Body Text Font: PT Sans
- Text Weight: Regular
- Text Color: #62748a
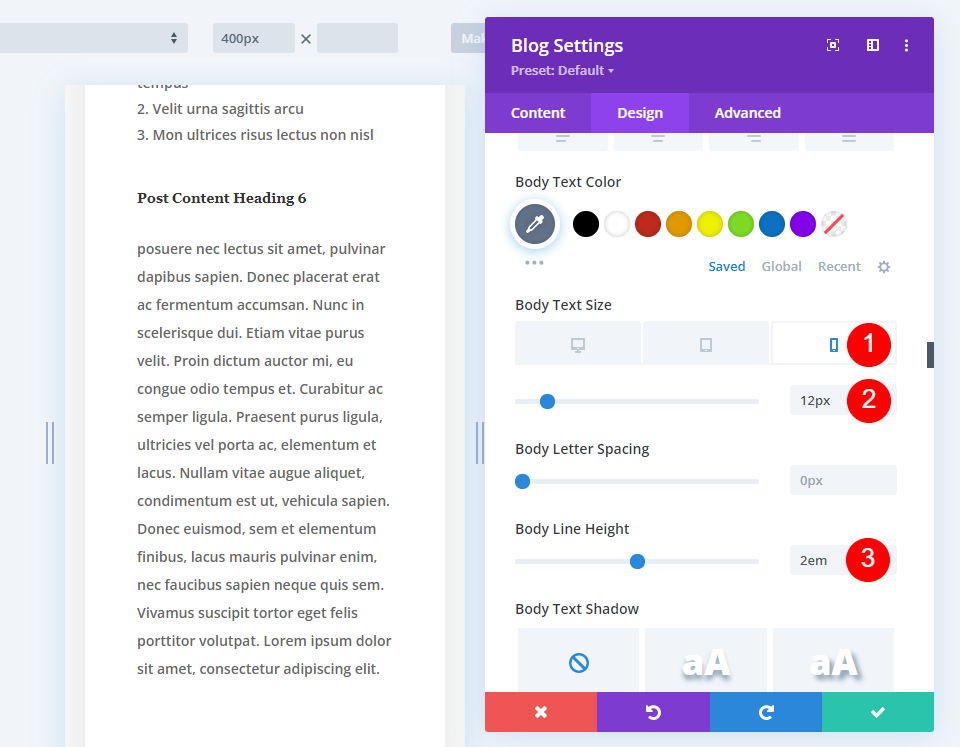
Do some size and height changing for body text too.
- Body Text Size (desktop): 14px
- Text Size (phone): 12px
- Text Line Height: 2em
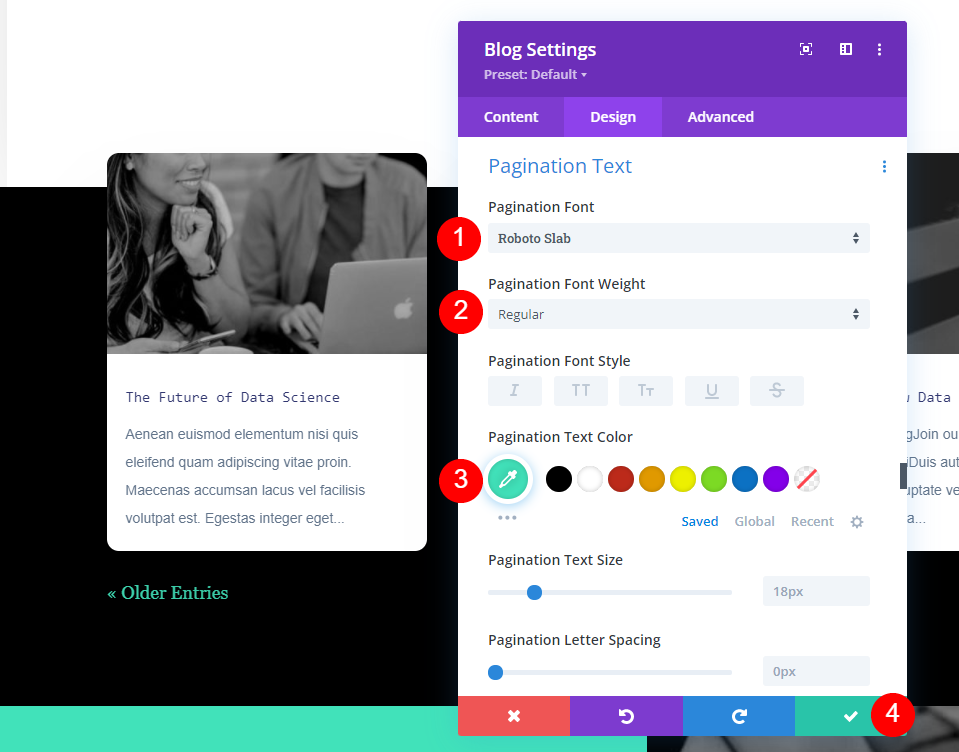
Pagination text should be also be changed.
- Pagination Font: Roboto Slab
- Font Weight: Regular
- Color: #41e2ba
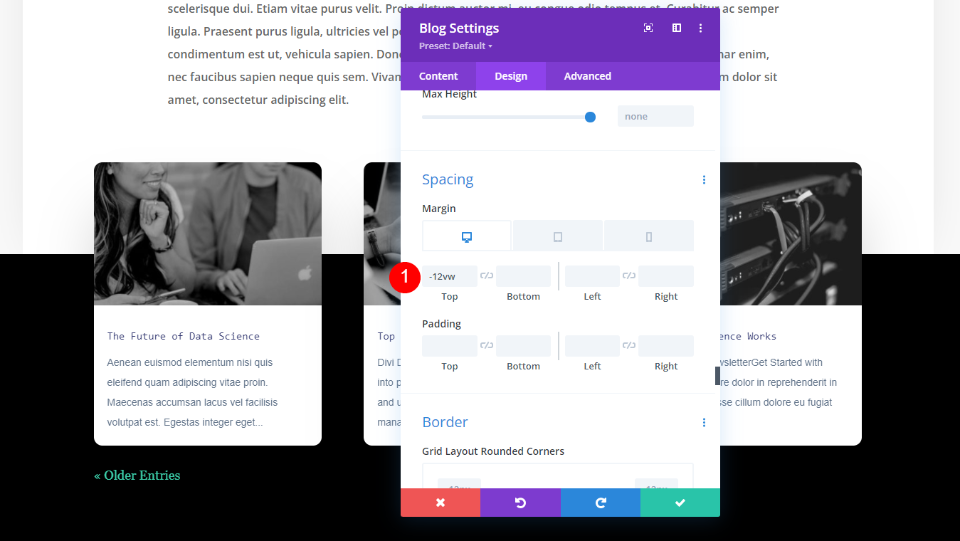
Now, go to the spacing section and add some top margin.
- Top Margin: -7vw
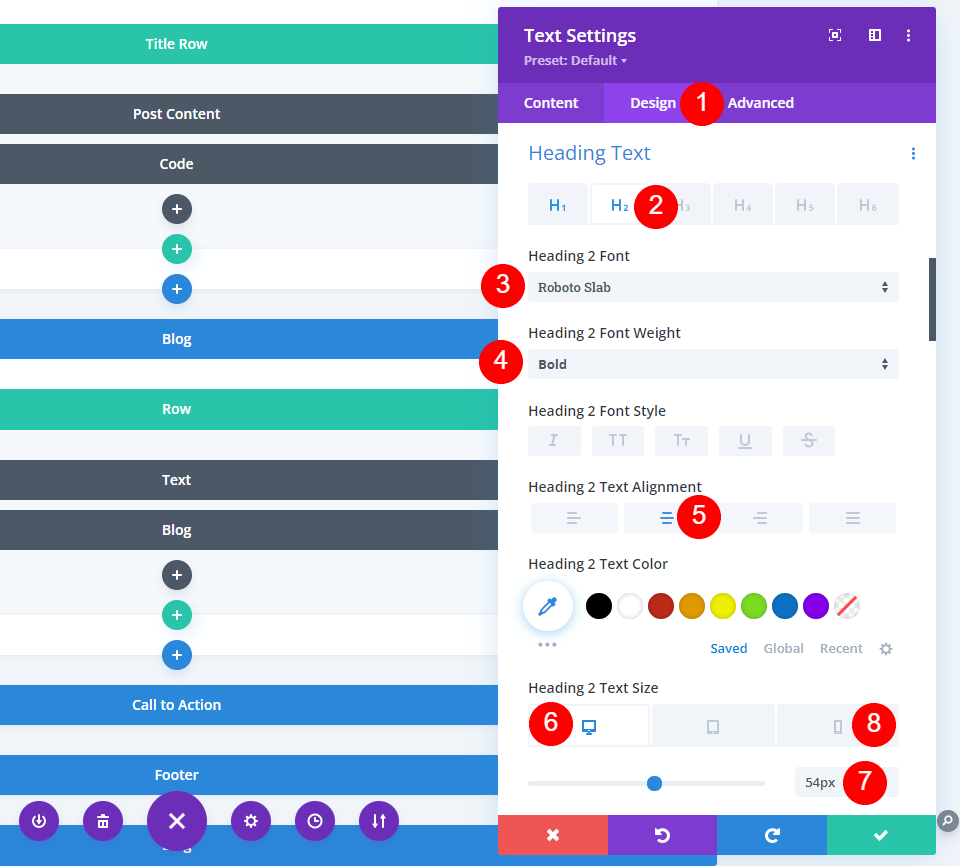
Section Title
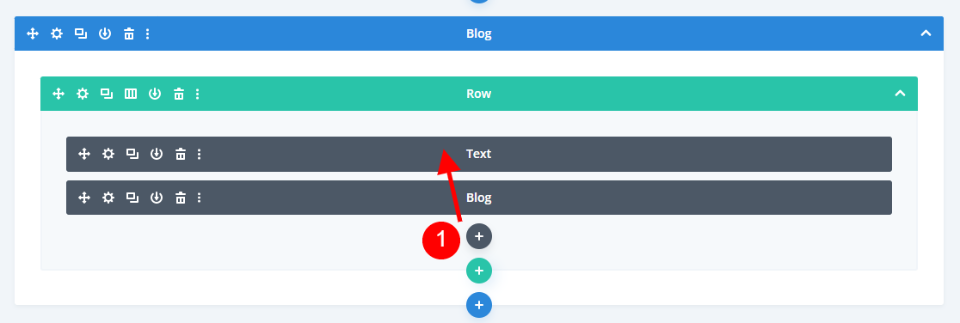
Finally, we'll give a title to the part so users can see right away that these are related posts. We might also omit the section title because it is obvious to users that the posts are linked to what they are reading. By clicking the gray addition symbol and dragging it over the Blog module in the same row, you can add a new Text module. I'm looking at it in wireframe mode because our current settings make it display beneath the Blog module.
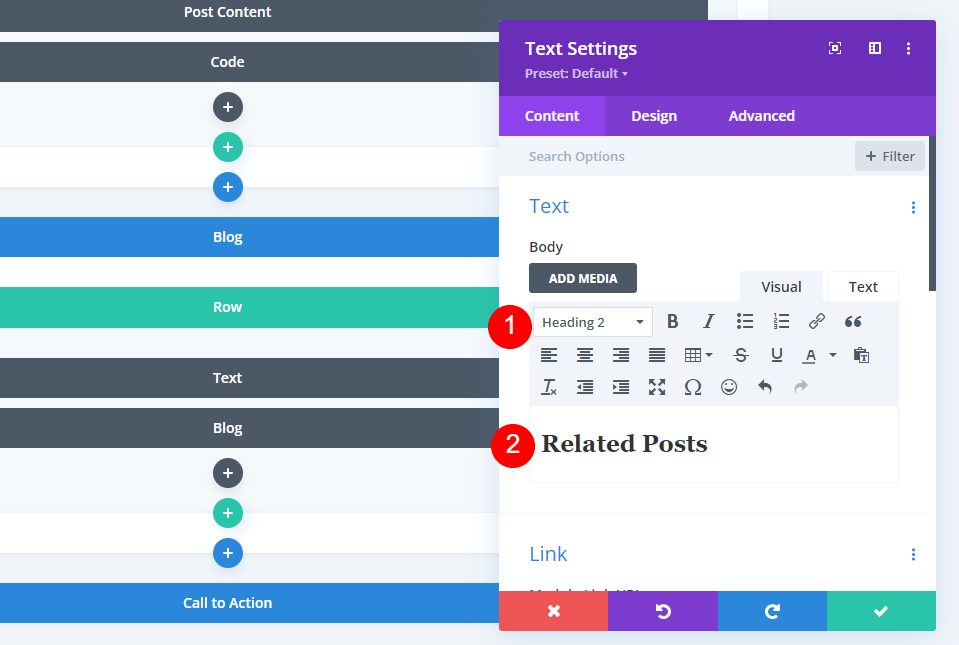
Make the following changes for the module.
- Text: Heading 2
- Content: Related Posts
On the Design tab, make the adjustments.
- Heading 2 Font: Robo Slab
- Font Weight: Bold
- Desktop Font Size: 54px
- Phone Font Size: 26px
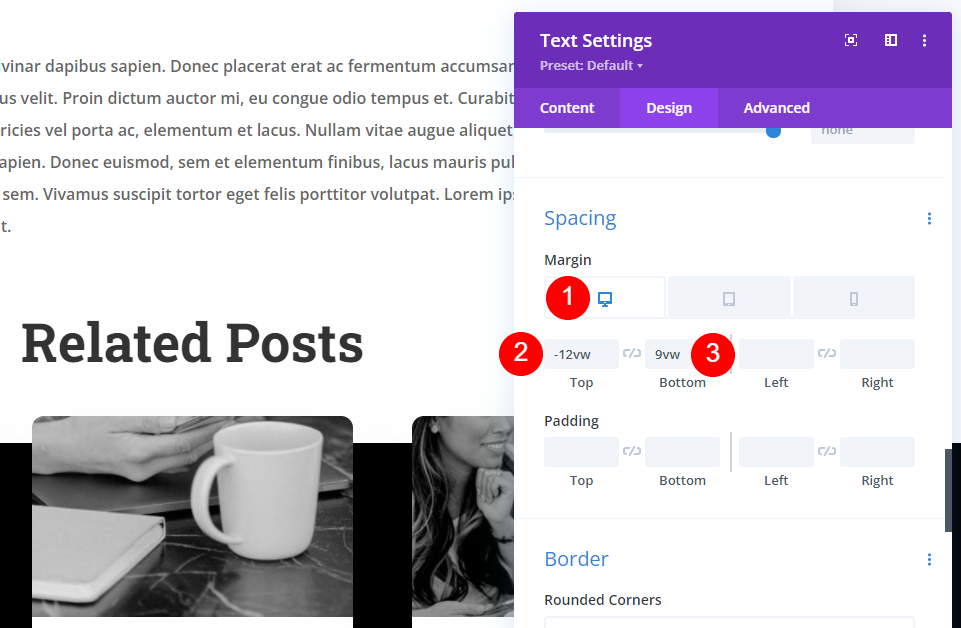
From the spacing settings, the following changes should be done.
- Top Margin: -12vw for desktop, -50vw for phone.
- Bottom Margin: 9vw
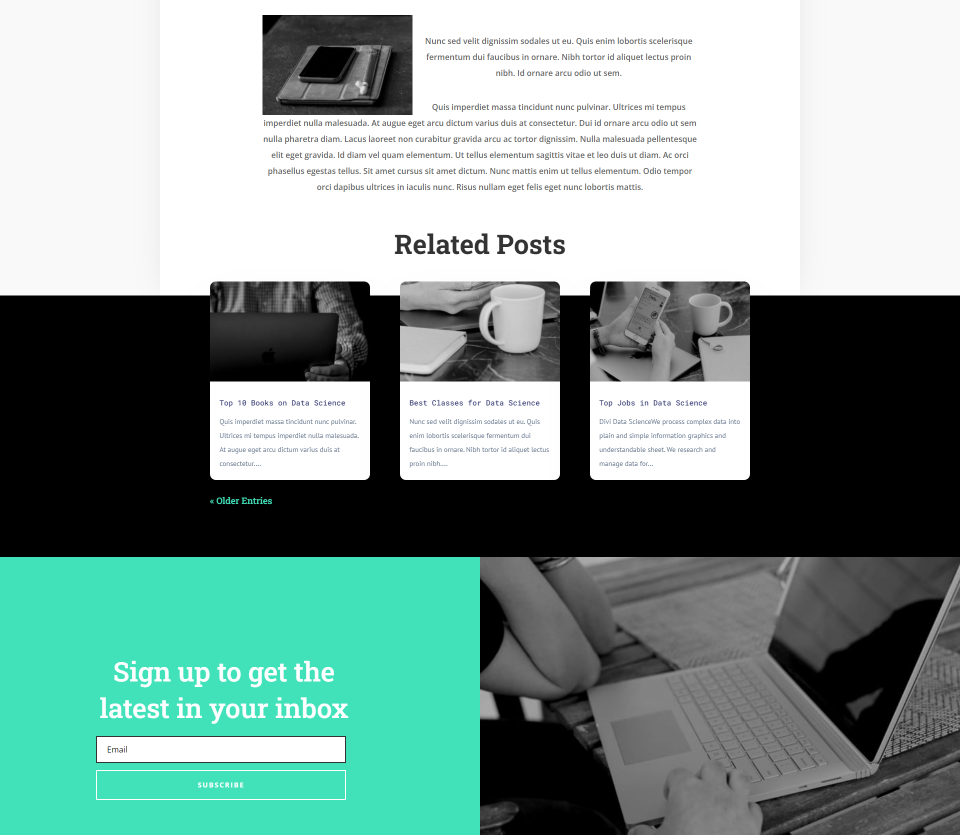
Final Output
So this is our design. It will enhance the beauty of your blog site.
Final Thoughts
That concludes our discussion on how to display the related posts section to your blog in Divi. You can configure it to display the current category or any other category you like. This is simple to accomplish with a Blog module and can be simply matched to your blog post design.


