
Custom content boxes are quite handy tools to deliver tips, information, and warnings on a web page. It is also very useful to highlight important sections of an article. Divi permits you to create this page element with built-in tools and showcase essential parts of a blog post in the most effective and convenient way. In today's tutorial, we will see how to design custom content boxes in Divi. Also, we will alter them in different styles with various colors and icons. All these actions will be done by built-in Divi options. So let's not waste more time and start today's tutorial.
Preview
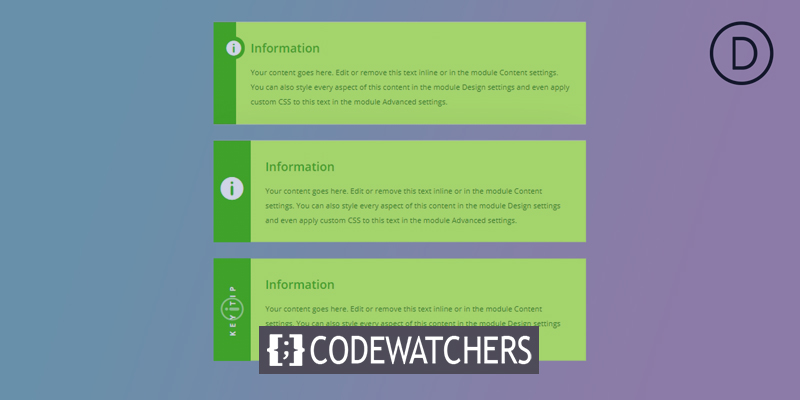
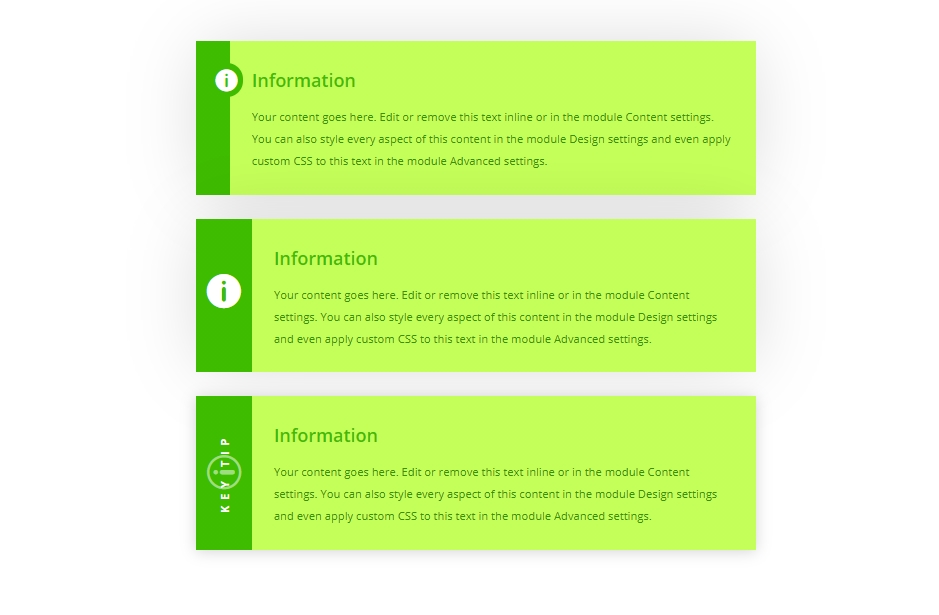
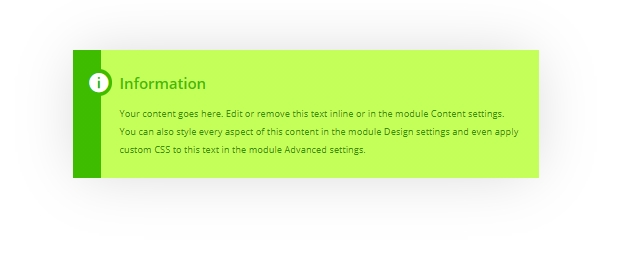
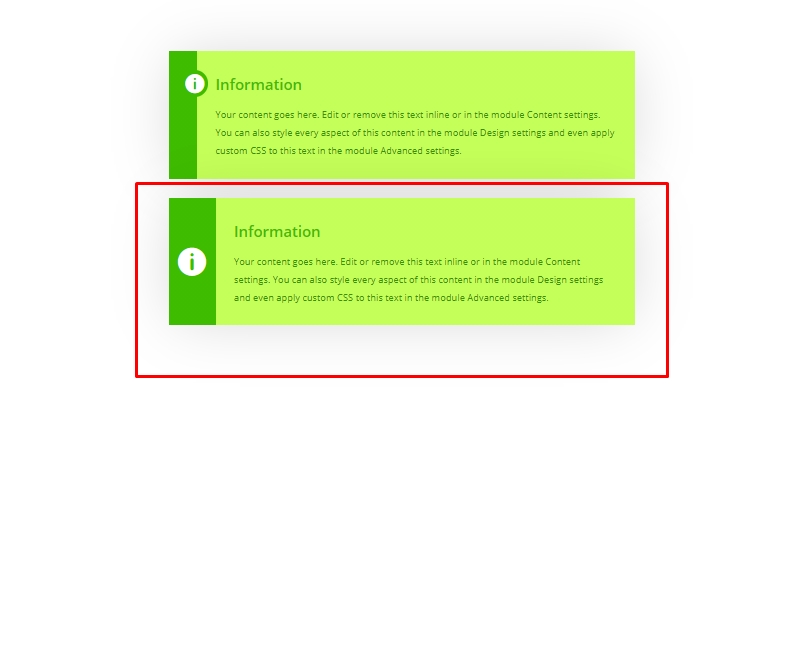
Here are the content boxes that we will create today. Later, we will see how these can be further customized.
Content Box Creation
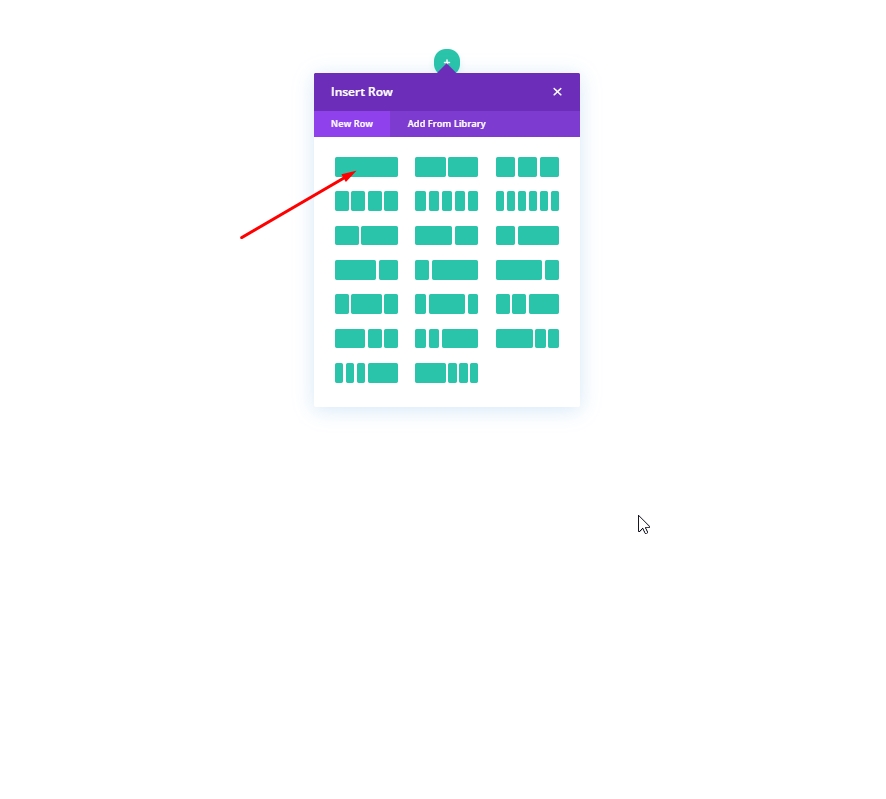
We will start with adding an one column row to our initial section.
Design: 1st Content Box
Add a blurb module to create our first content box.
Create Amazing Websites
With the best free page builder Elementor
Start Now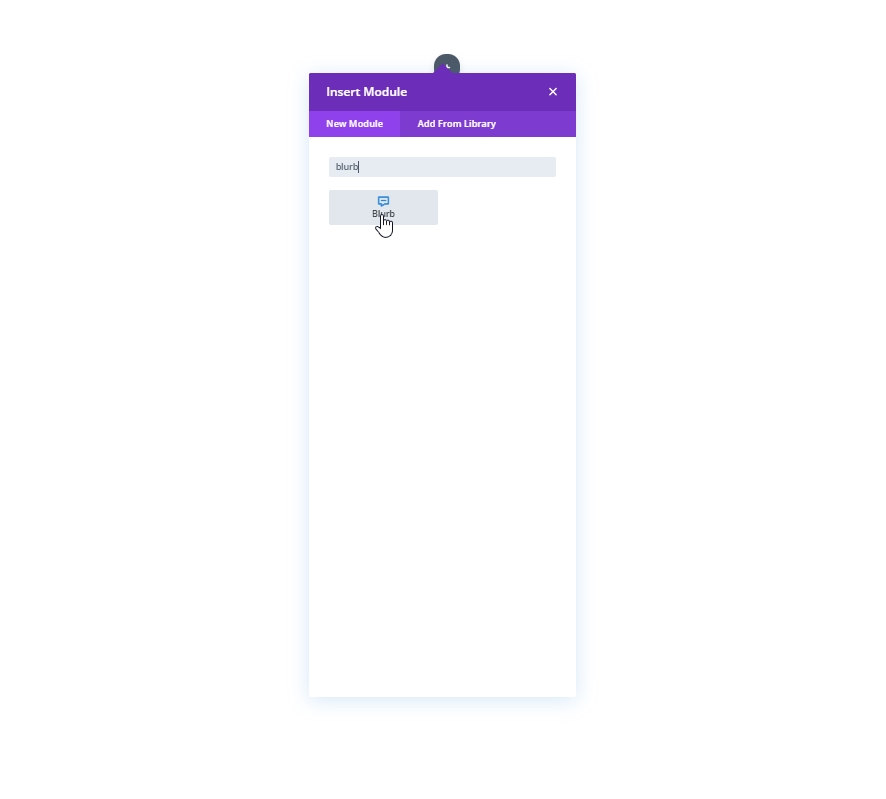
From the content section, make the following changes:
- Use Icon: YES
- Icon: Information symbol
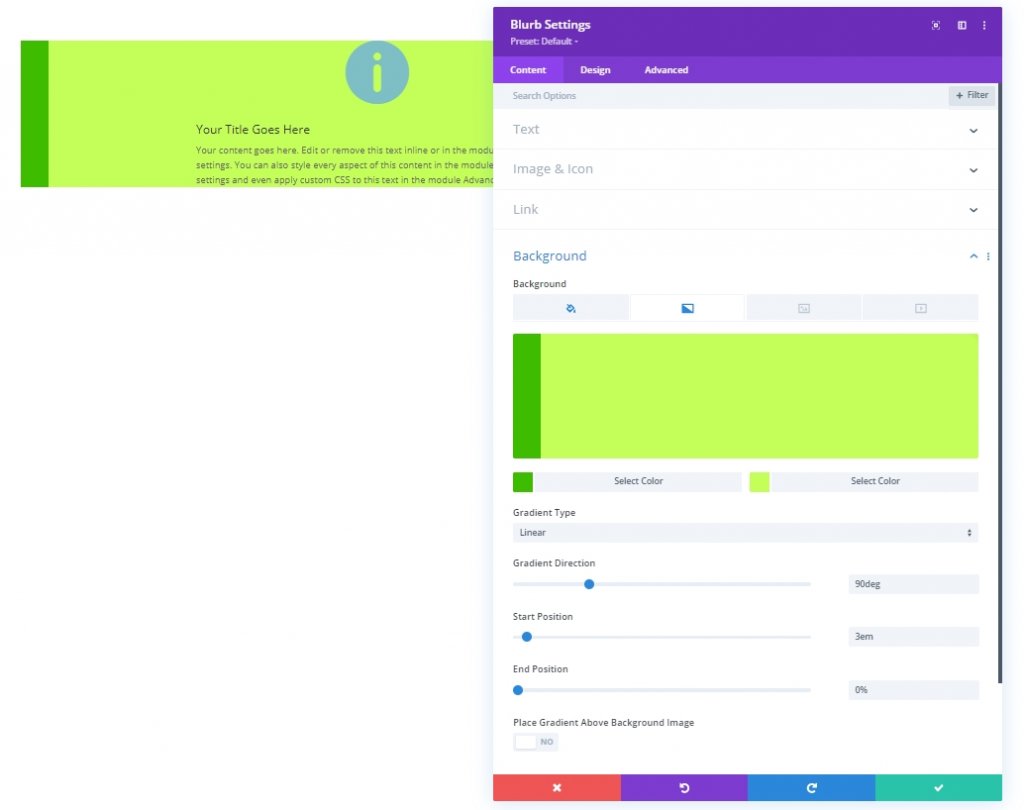
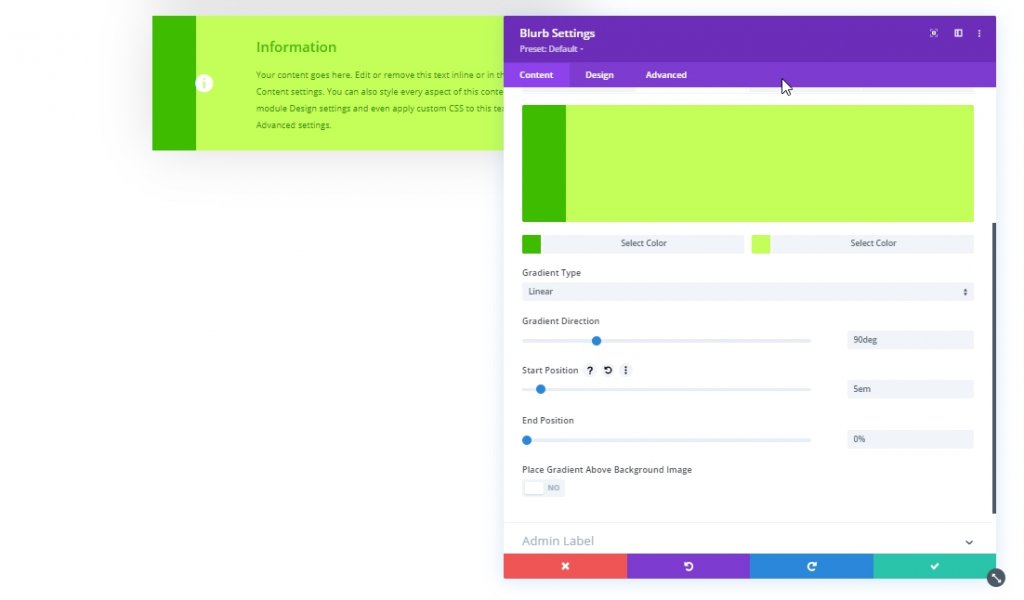
- Background Color: #ffffff
- Background Gradient Left Color: #3EBC00
- Background Gradient Right Color: #C4FF59
- Gradient Direction: 90deg
- Start Position: 3em
- End Position: 0%
From the design tab, update the icon style as follows:
- Icon Color: #ffffff
- Image/Icon Alignment: Left
- Use Icon Font Size: YES
- Icon Font Size: 2em
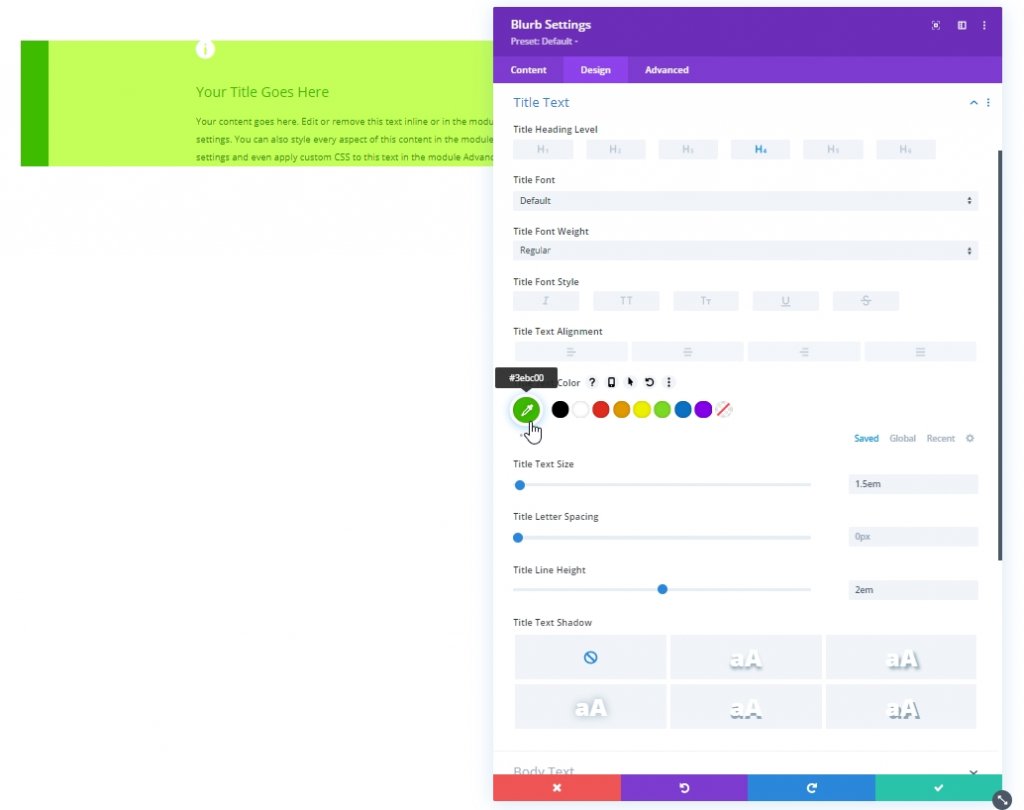
Adjust the text settings as follows:
- Title Text Color: #3EBC00
- Title Text Size: 1.5em
- Title Line Height: 2em
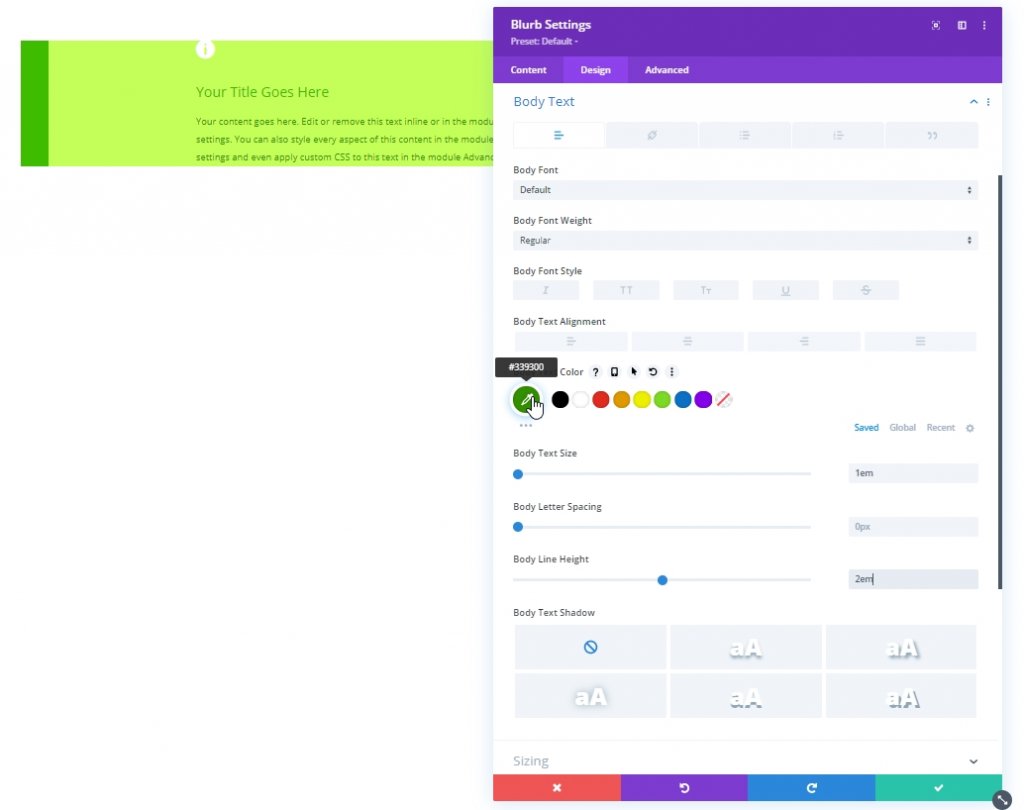
- Body Text Color: #339300
- Body Text Size: 1em
- Body Line Height: 2em
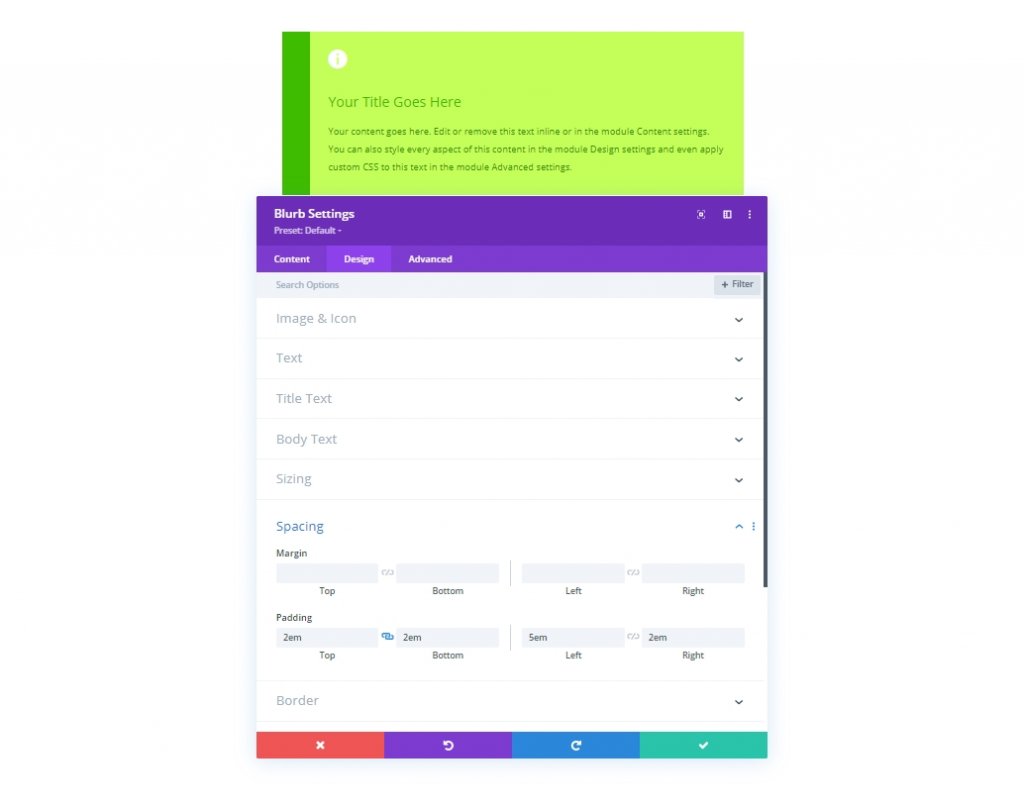
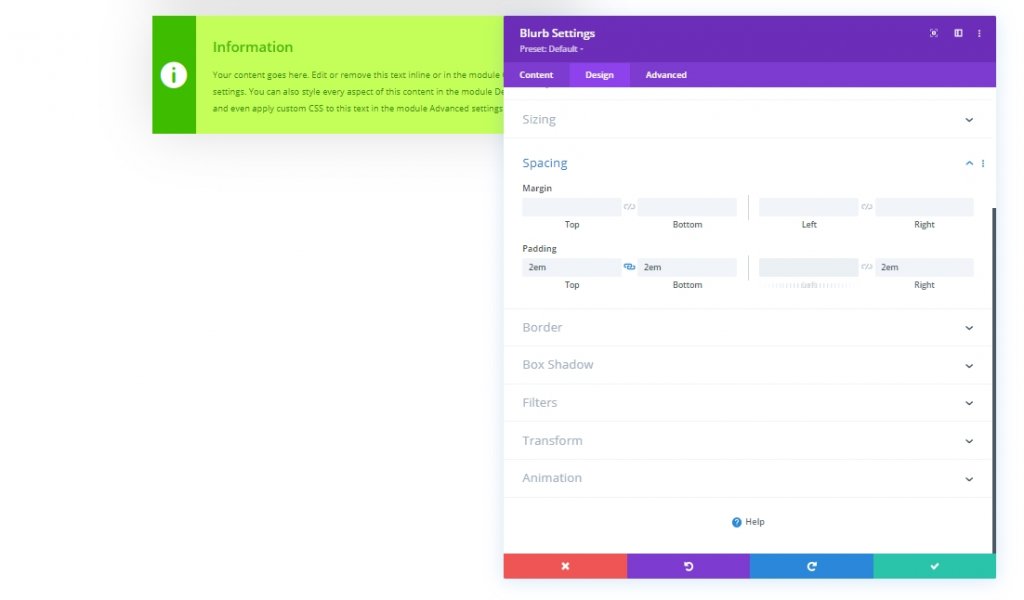
If you are done styling to texts, let's update the size and padding.
- Content Width: 100%
- Max Width: 700px
- Module Alignment: Center
- Padding: 2em top, 2em bottom, 5em left, 2em right
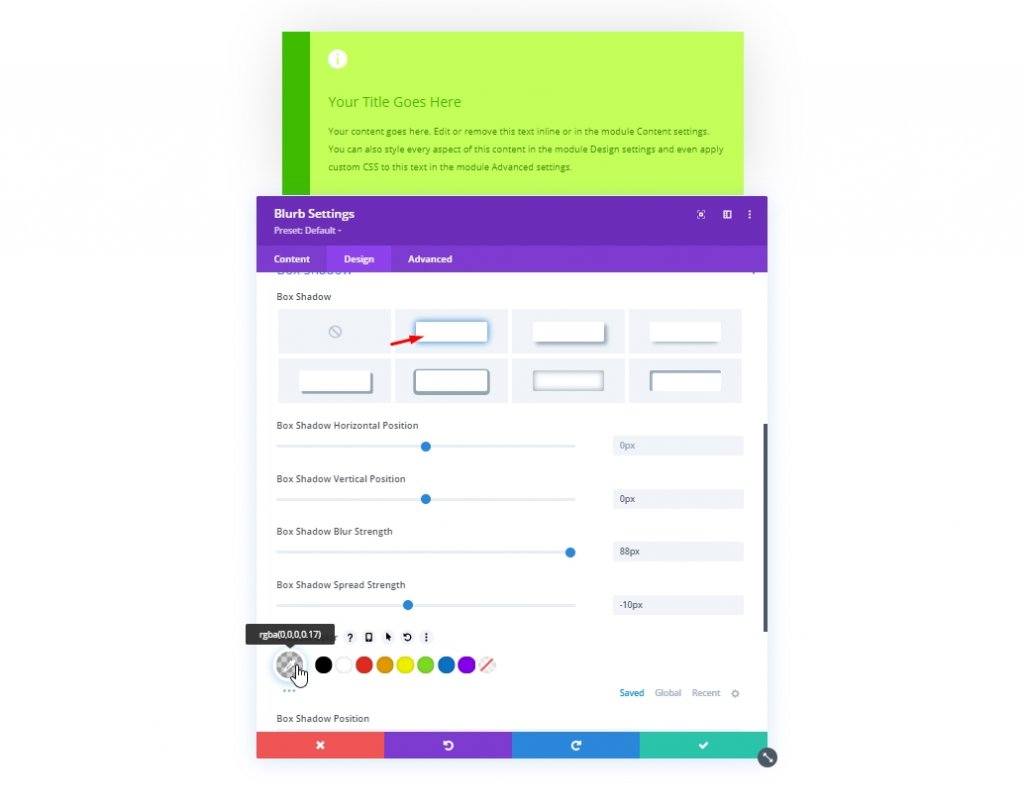
We will add a box-shadow to the blurb module as follows:
- Box Shadow: see screenshot
- Box Shadow Vertical Position: 0px
- Box Shadow Blur Strength: 88px
- Box Shadow Spread Strength: -10px
- Shadow Color: rgba(0,0,0,0.17)
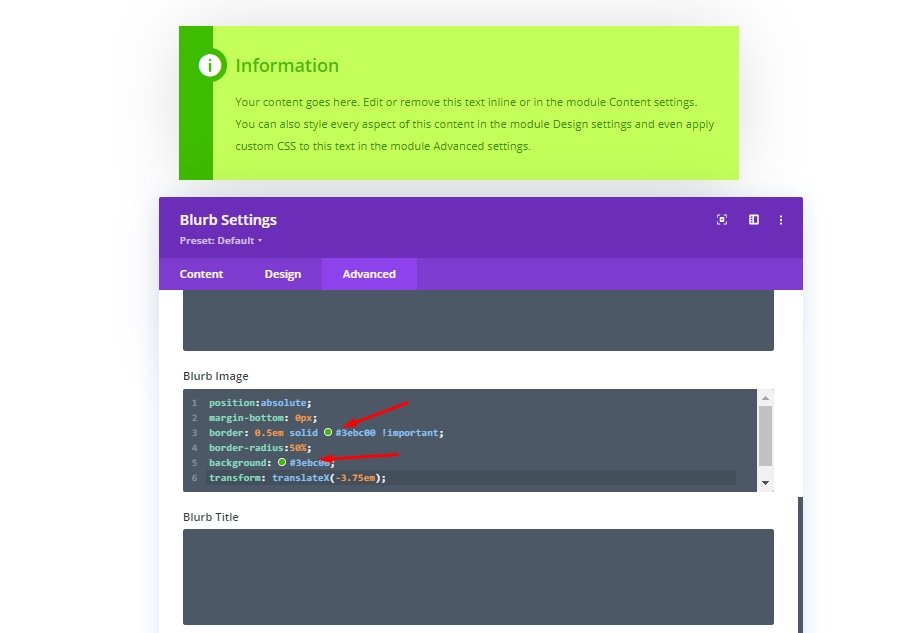
We will move to the advanced section to add some custom CSS that will give the icon a circular background with the same color as the left gradient part. Also, it will place the icon exactly where we want it, because we don't want the document to sacrifice any space for the icon. Put the code on the blurb image CSS section.
position:absolute;
margin-bottom: 0px;
border: 0.5em solid #3ebc00 !important;
border-radius:50%;
background: #3ebc00;
transform: translateX(-3.75em);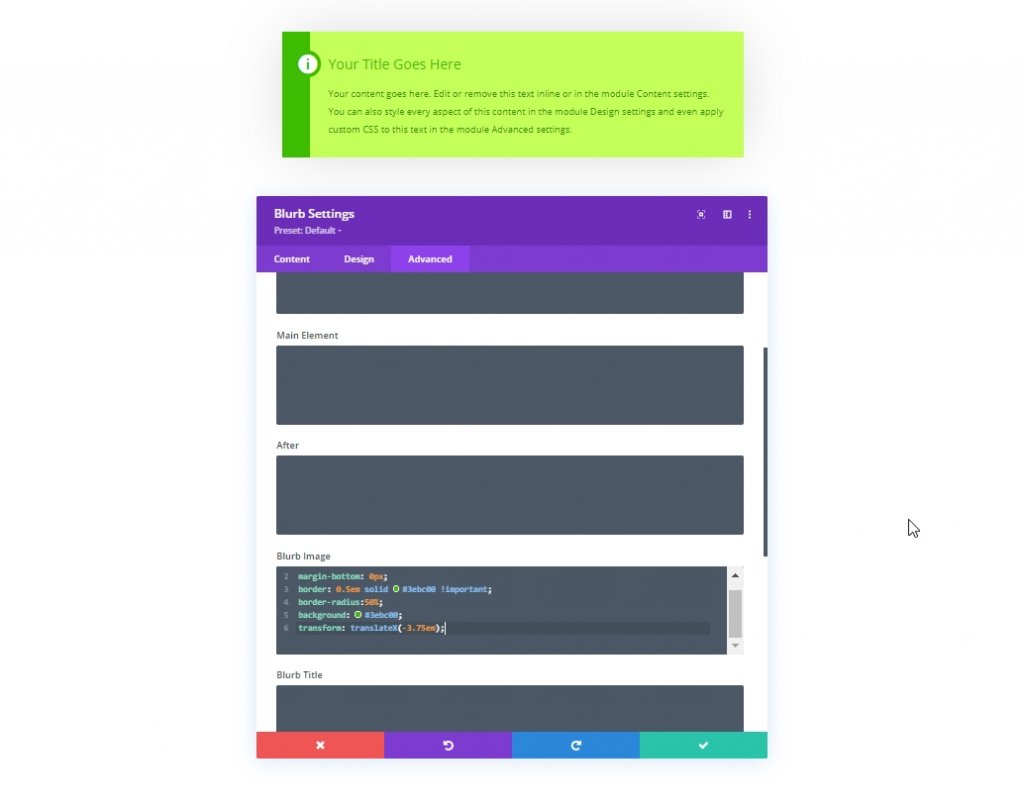
Make sure to change the color on the image CSS box while customizing further. Otherwise, it will remain the same. now let's see how our 1st content box looks like.
Design: 2nd Content Box
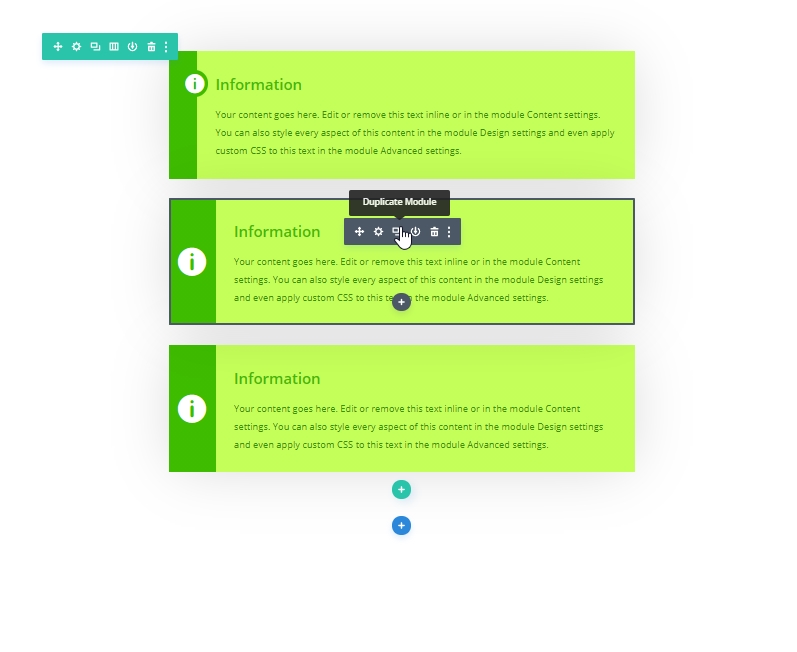
Simply clone the first content box design. It will save a lot of time and effort.
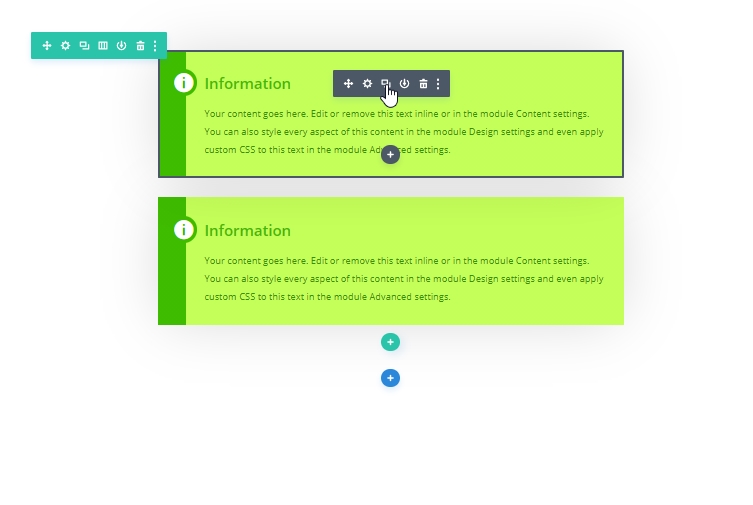
Now we will use the CSS grid property to vertically center the icon on the left side. In order to do that, let's change the blurb image CSS with the following code.
margin-bottom: 0px;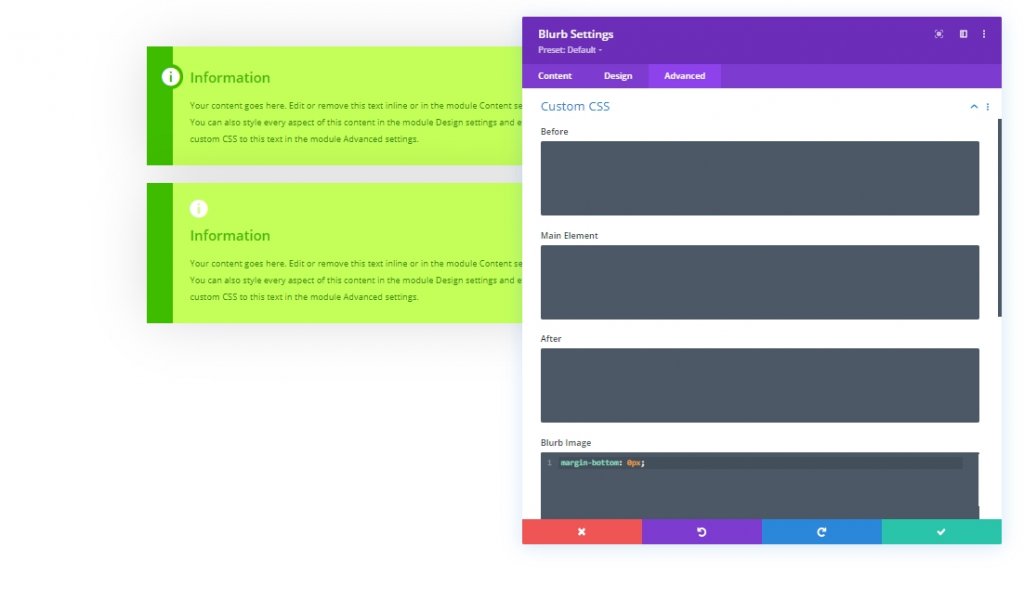
Also, add these CSS code on the content box.
display: grid;
align-items: center;
justify-content: center;
grid-template-columns: 5em auto;
grid-gap: 2em;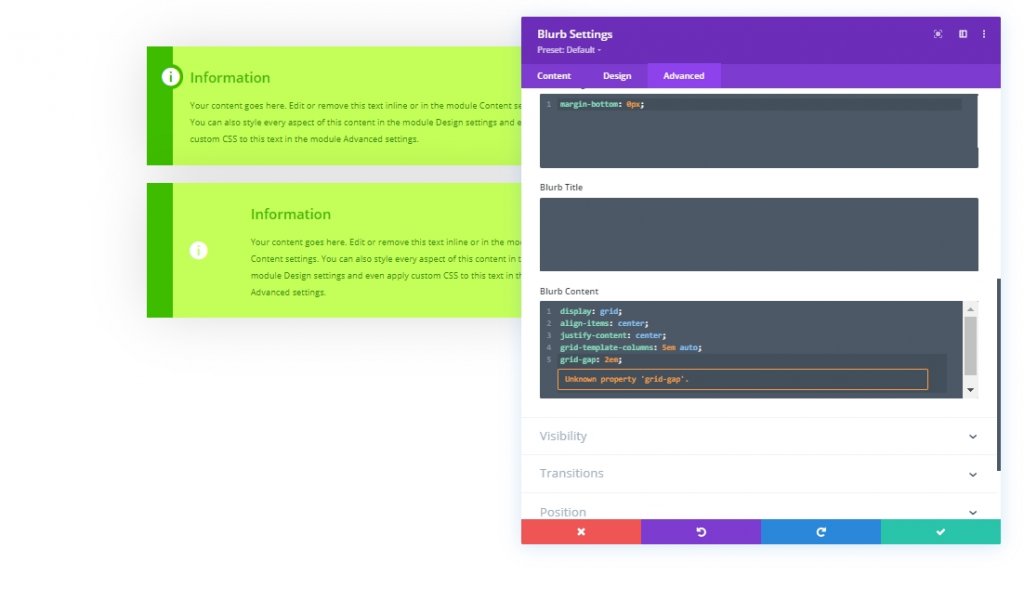
Here, the left column width that holds the icon is set to 5em and right column with texts inside is set to auto. So, we need to match the left gradient color to 5em width.
- Start Position: 5em
Make the following changes on design tab.
- Image/Icon Alignment: center
- Icon Font Size: 3em
Now we will take away the left padding because we dont need it anymore.
As everything is lined up, here is the final view.
Design: 3rd Content Box
Next, clone the 2nd content box design and start working on it right way.
Open the cloned blurb setting and move to design tab to change the icon color.
- Icon Color: rgba(255,255,255,0.5)
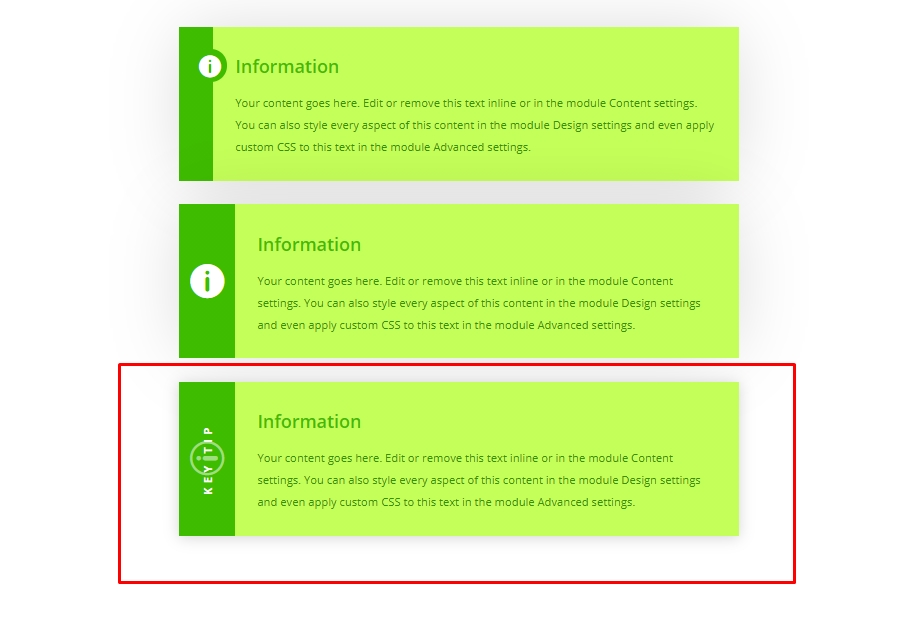
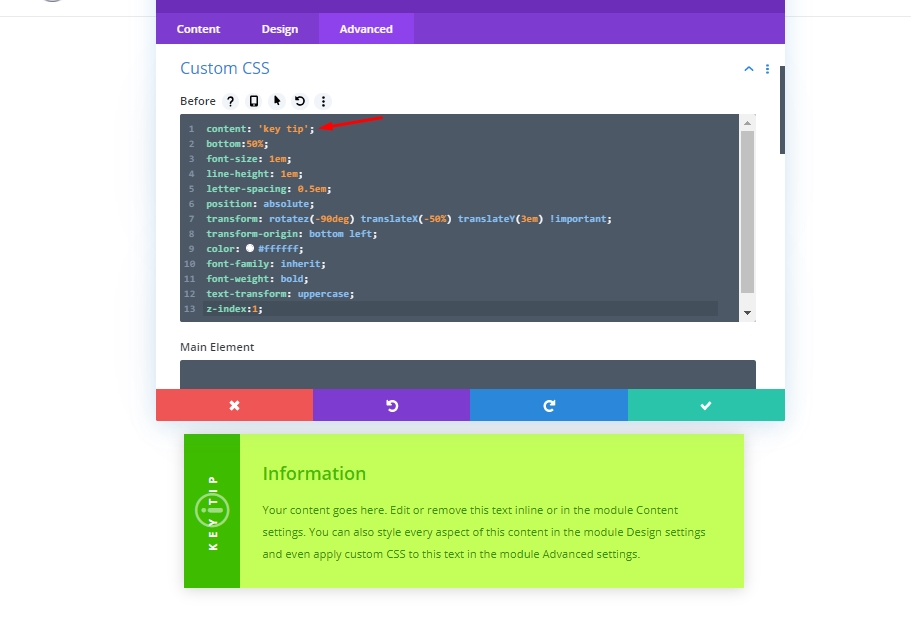
Now we will add a label text over icon vertically by adding some custom CSS. To do so, paste the following code to the Before CSS box.
content: 'key tip';
bottom:50%;
font-size: 1em;
line-height: 1em;
letter-spacing: 0.4em;
position:absolute;
transform: rotatez(-90deg) translateX(-50%) translateY(3em) !important;
transform-origin: bottom left;
color: #fff;
font-family: inherit;
font-weight: bold;
text-transform: uppercase;
z-index:1;
Also, add the code given below to blurb image CSS box to roted the icon.
margin-bottom: 0px;
transform: rotateZ(-90deg);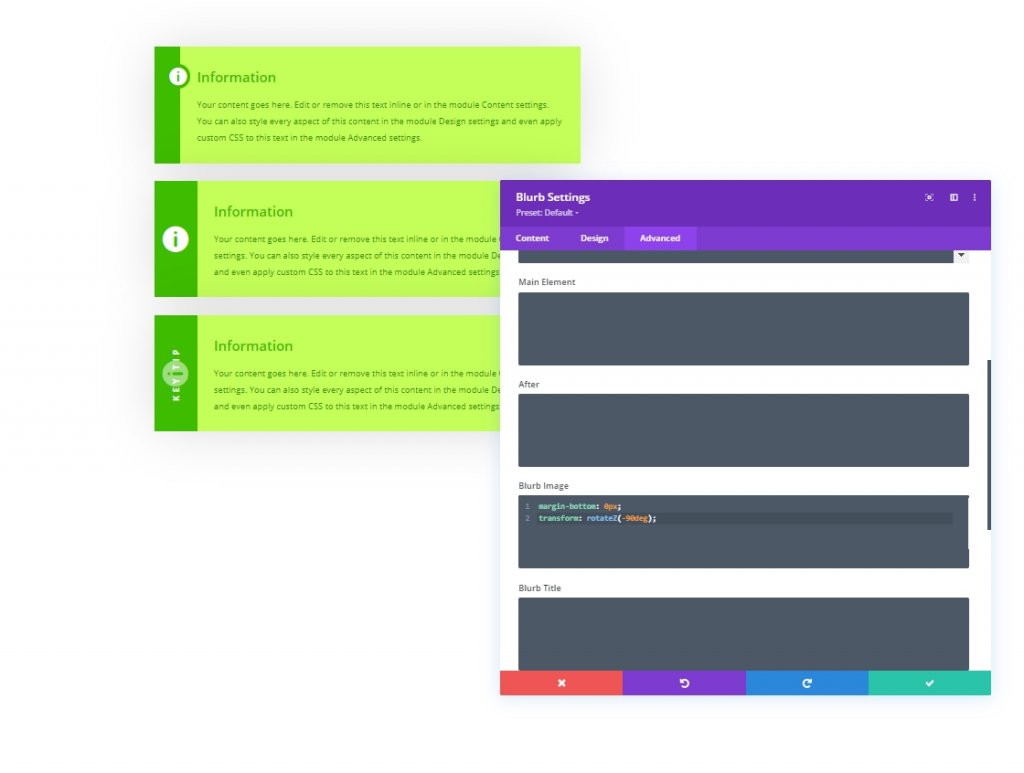
Lastly change the icon to according to the image. It looks more engaging.
The final output of our design goes like this.
Design Updating
Update Design Through Body Size Changing
Since we have done the entire design on em length unit which means elements root body font size, that's why we can change the size of the boxes by changing the body text value.
Change Colors
On 1st content box we added the color on icon as background from a CSS code. update that color to change overall ambience if you are thinking about choosing another color patterns.
Updating the Label Text
On the 3rd content box, we can change the label from the CSS code we have placed in the Before CSS box.
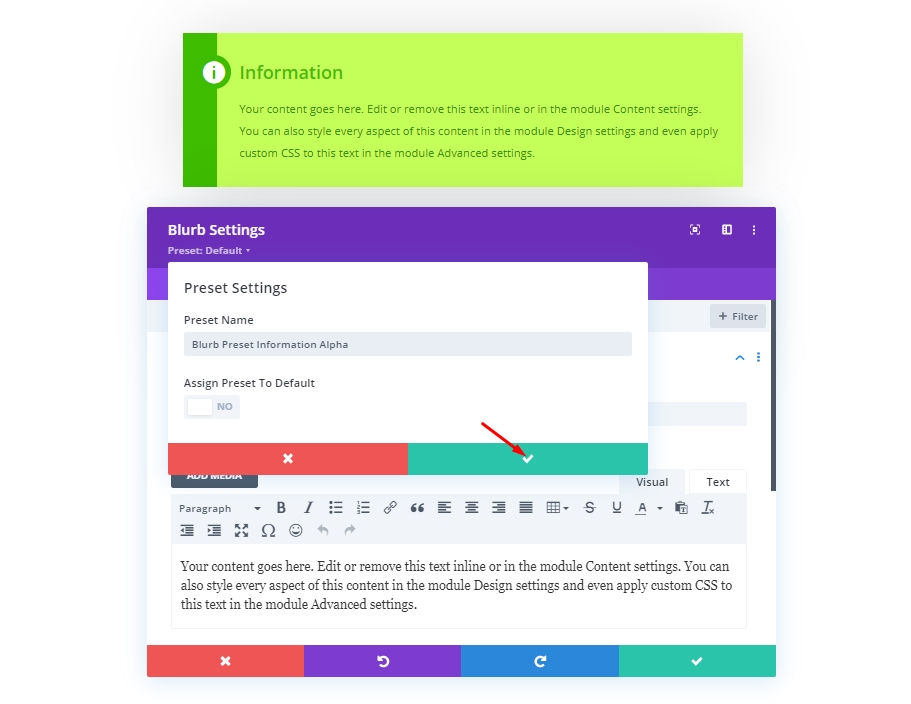
Make Reusable Content Box
You can easily save this design in two different ways. One is to save the module in the Divi library, where you can import it on any section of any page. Another way is to save it as a Global preset. Let's discuss on how to do it.
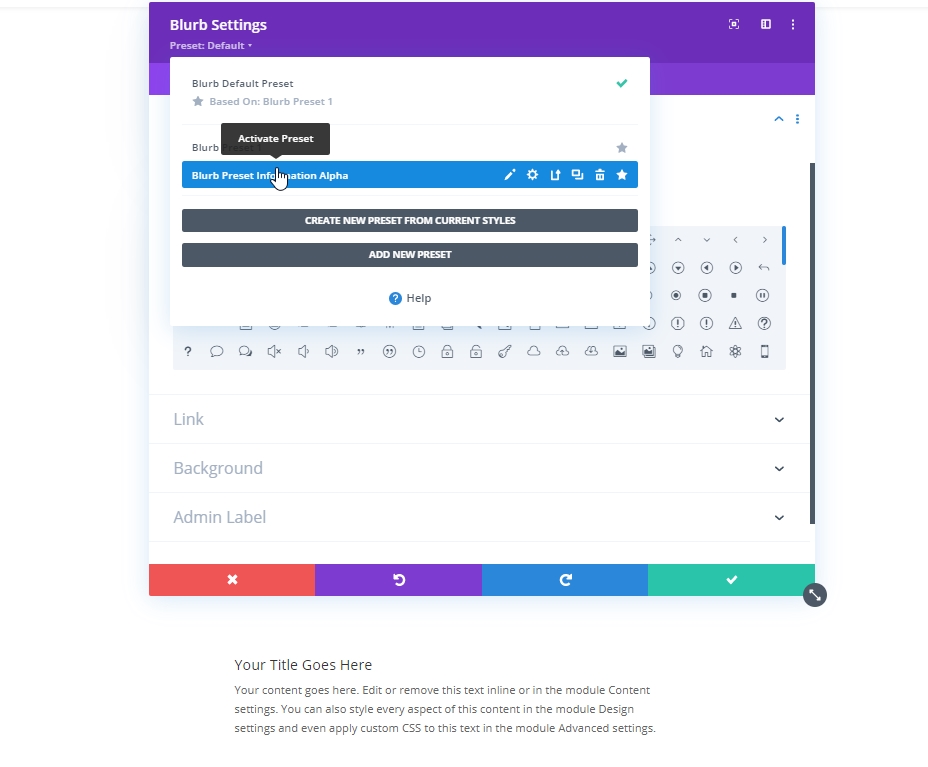
First, click on the subheading of the Blurb settings panel. You'll see a dropdown menu with two options.
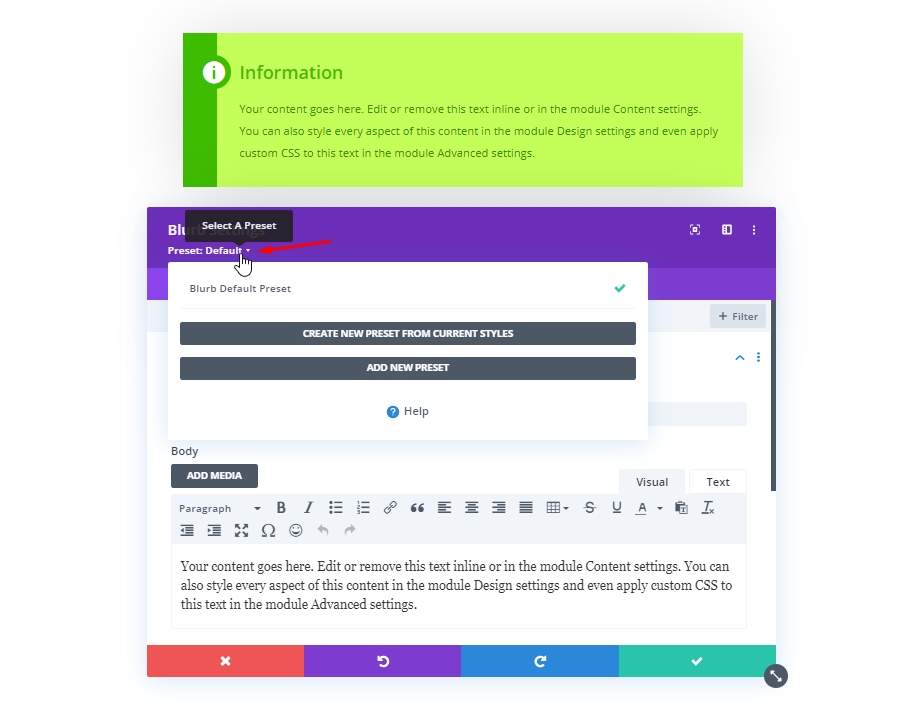
Then select the first option that says - Create new preset from current styles.
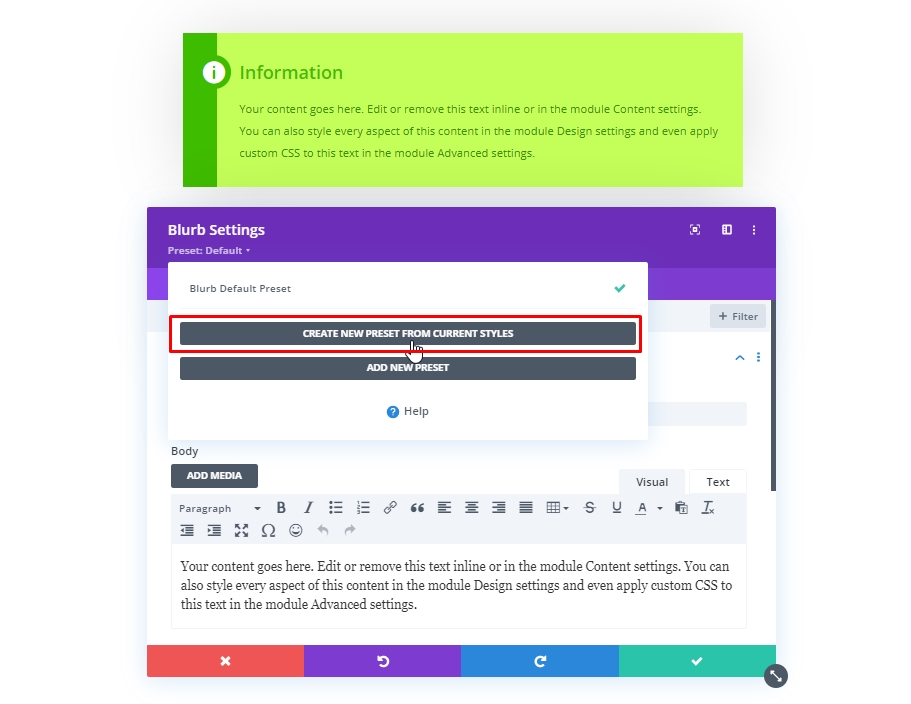
Now add a preset name according to your choice and save it.
Now, whenever you want these settings to be applied on a blurb module, just active this preset from the blurb settings subheading.
Final Result
So here is our final result of the design. Its very easy to design but important design material at the same time.
Final Words
We've said before that the customized content box enriches your website's user experience and carries the mark of your dedication to the website as these sections carry content that is very relevant to such a topic. This type of content box can be easily designed through Divi's Blurb module. So hopefully you will use it in blog posts or various descriptive sections in the next project.


