
Having trouble customizing WooCommerce emails? For more than ten operations, such as new orders, processed orders, and new accounts, WooCommerce already provides automated transactional emails. However, in order to make those emails uniquely yours, you should probably alter them. You will learn how to personalize WooCommerce emails using the built-in settings in this step-by-step tutorial.

Why Should You Customize WooCommerce Emails?
Once a customer leaves your website, you can still communicate with them via transactional or order-related emails. Emails with a professional appearance and a consistent theme showcase the distinctive brand identity you have developed for your business. By doing this, you can maintain a healthy level of customer trust. Additionally, it enhances your customers' experience.
Additionally, modifications are the ideal ways to give your customers pertinent information about your websites, such as links to related products and discount codes. This might even inspire further purchases.
Customize Your WooCommerce Emails
You can modify a number of elements in your WooCommerce emails using just the default settings, such as:
Create Amazing Websites
With the best free page builder Elementor
Start Now- Email sender options
- The general email theme
- Specific email content
Email Settings in WooCommerce
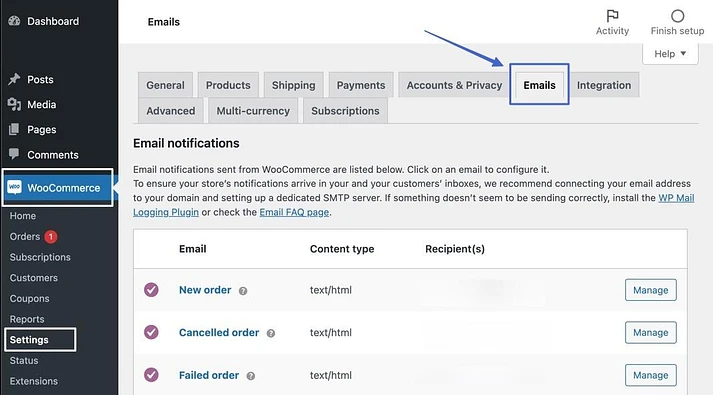
Go to WooCommerce > Settings > Emails in your WordPress dashboard. You can see the list of standard notification emails that WooCommerce has already set up for you here, along with the headline for Email Notifications.
Customize Options & Template
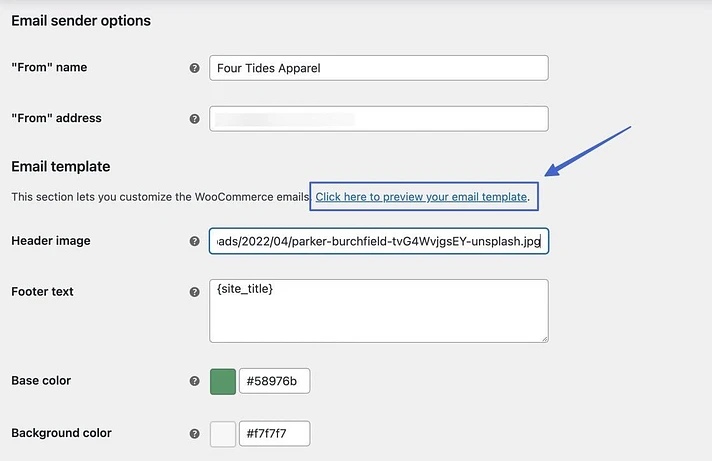
To access the area labeled "Email sender options," scroll past the list of email notifications.
There will be two fields:
- “From” name: Customers see the "from" name when they get an email; use your company name or, if it fits with your branding plan, a genuine person.
- “From” address: The email address that people can contact to reply to the automated email is the "from" address.
Change the options.

From the Email Template section, do customize the following option.
- Header image
- Footer text
- Base color
- Body background color
- Body text color
Paste the image's URL into the Header Image section if you wish to add a custom header to the email. The image URL can be obtained by hosting a picture in your WordPress Media Library.
Additionally, we advise eliminating the footer's "Built using WooCommerce" content. You are free to include whatever else you would like in the footer.

The color settings for the default WooCommerce email template are located further down in the Email Template section. As was previously noted, while operating an online store, WooCommerce automatically inserts its default purple as the foundation color, which is undesirable.
Select a color that goes with your brand as the Base Color, and if necessary, think about updating the other color fields as well.
When finished, click Save Changes.

Customize specific WooCommerce emails
WooCommerce has pre-set templates for emails that are automatically delivered to site administrators and customers to keep them updated on orders, from New Order emails through Completed Order emails. However, some of these emails should be customized with your unique content and without certain unused WooCommerce presets.
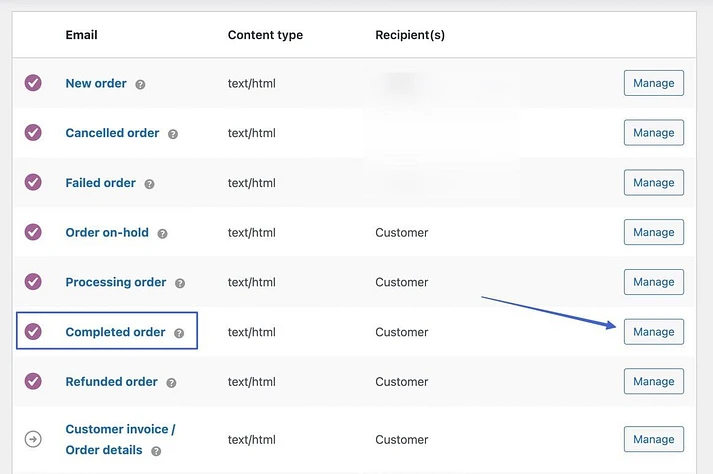
By selecting Manage next to the email you wish to alter, you can complete these specific email customizations. Since the "Processing Order" and "Completed Order" emails are the ones that the consumer views the most frequently, starting with them is not a bad idea.
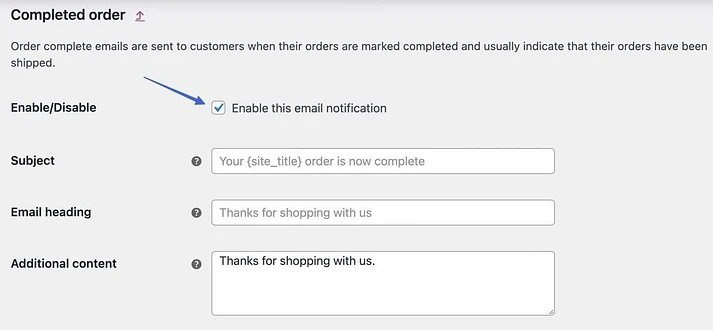
If necessary, proceed through the following fields:
- Enable/Disable
- Subject
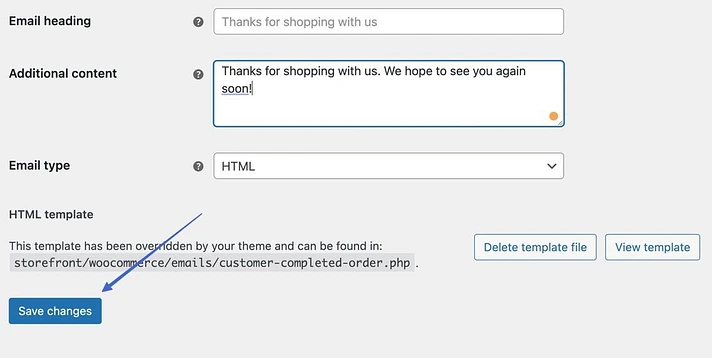
- Email heading
- Additional content
Unless you have a special situation where you don't need one of them or if you intend to use a different plugin for transactional emails, we advise leaving all WooCommerce emails enabled.
Your email's overall content is determined by fields like the Subject, Email Heading, and Additional Content; change them as necessary.
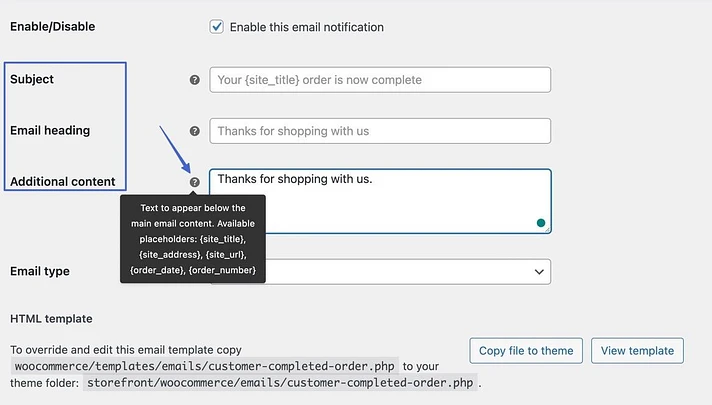
To view the list of dynamic placeholders that can be inserted into the content fields, click the "?" icons. In each email, for instance, you might use a placeholder to have WooCommerce fill in a link to your website.
Make an HTML or plain text Email
To view your selections, click the Email Type field. Decide between the following:
- Plain Text: Emails sent in plain text without any pictures or formatting
- HTML: Emails in HTML can contain rich media like images, tables, and formatting.
- Multipart: Because certain email clients do not handle HTML emails, this one dynamically converts between plain text and HTML as needed.
Editing the HTML Template
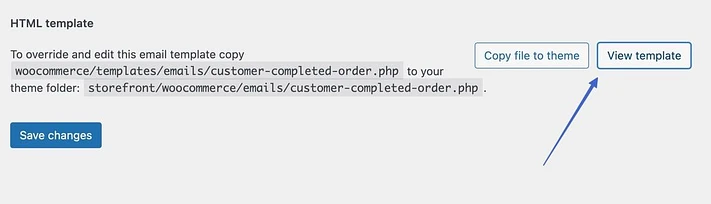
There is a section labeled "HTML template" at the very bottom of the page. WooCommerce's emails do not include a drag-and-drop editor, but you may alter the HTML code for each one.
To view the template's code, click the View Template button.
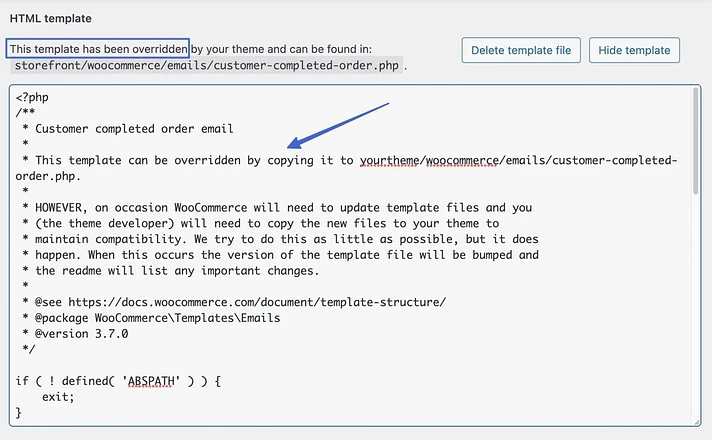
WooCommerce's default HTML template is locked, making it impossible to alter. To replace and edit the template, you must click the Copy File To Theme button.
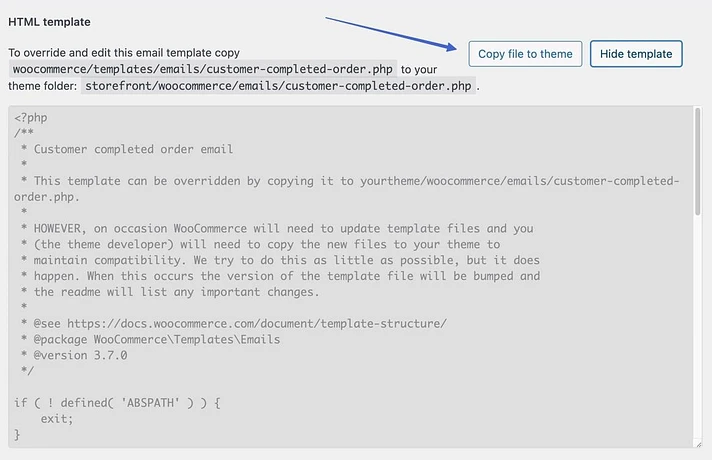
You can then insert your cursor in the text editor and make changes after that. This section should only be used if you are proficient in HTML.
And that's how WooCommerce emails can be customized! To conclude, use the Save Changes button.
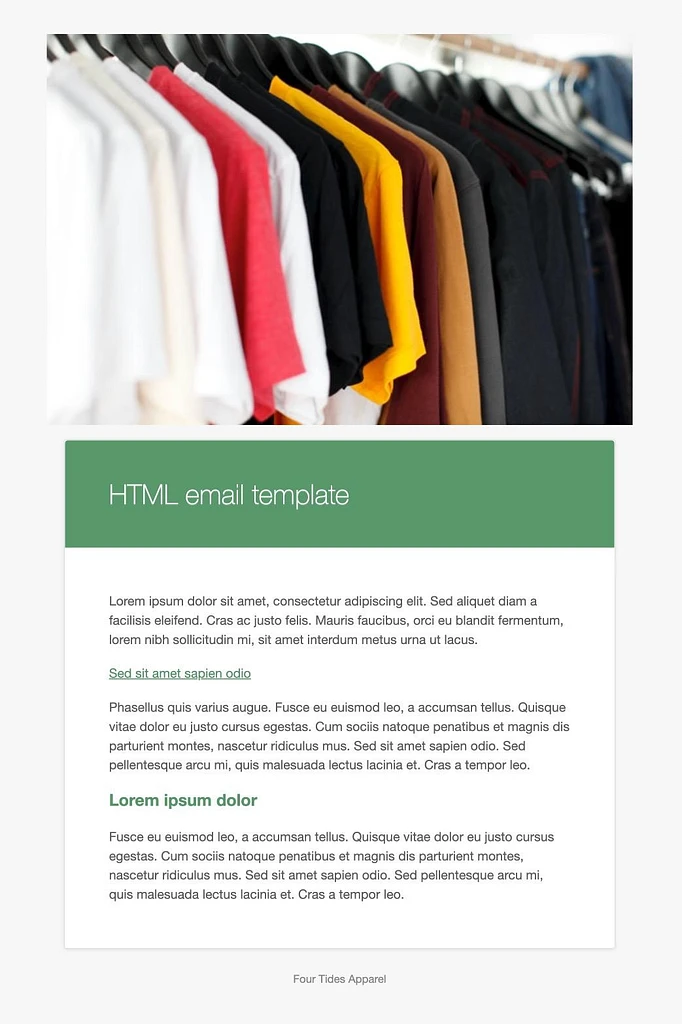
Before sending transactional emails to clients, you must preview them. By doing so, you can check for typos, outdated WooCommerce branding, and chances for promos or upsells. Find the Email Template area under WooCommerce > Settings > Emails and click the "Click here to preview your email template" link there.
This launches a new browser tab with the email displayed in your customized general email settings. If you modify everything, you should notice new colors, a header image, and an updated footer. Remember that the template preview's content is still generic.
Wrapping Up
Most fledgling eCommerce stores can get away with the basic WooCommerce email customizations, but we recommend eventually paying for a premium email editor like Ninja Forms or WP forms. Hope you like this tutorial, if so, then share it with your friends and follow CodeWatchers for more WordPress tutorials.


